This article explains how you can play a Wii video game by loading it directly from a USB memory drive, rather than using the original DVD. Remember that the procedure described below is only compatible with the classic Wii and not with the Wii U. To be able to start a game directly from a USB memory drive, the Homebrew channel must be installed on the console, which invalidates the manufacturer's warranty and that violates the terms and conditions of Nintendo's contract that govern the rules for using the product. After installing all the necessary tools, you will be able to copy the contents of an original Wii DVD to the USB drive you have configured and start the game directly from it without the need to use optical media.
Steps
Part 1 of 7: Preparations for Installation
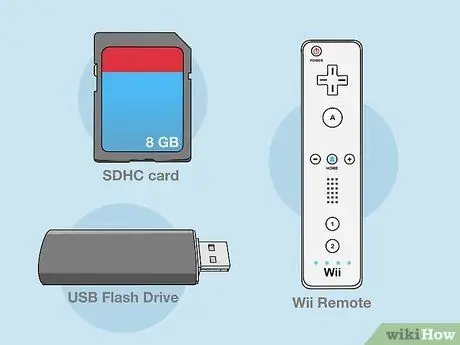
Step 1. Make sure you have all the necessary equipment available
To carry out the operations described in the guide you will need to obtain the following tools:
- SDHC card - get an SD card that has a capacity of at least 8 GB to be able to install the Homebrew channel on the Wii and be able to transfer other essential data;
- USB memory drive - this is the drive on which you are going to install all Wii games;
- Wiimote - This is the standard Wii controller. If you have the most up-to-date model of the Wii (the black one), you will need to use a regular Wiimote to be able to install.
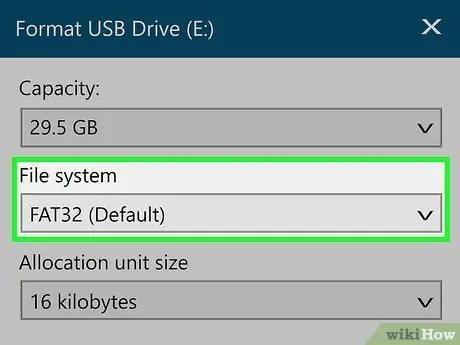
Step 2. Format the USB memory drive with the FAT32 file system format
To do this, select the option FAT32 from the "File System" drop-down menu in the format window (if you are using a Mac, choose the file system MS-DOS (FAT)).
Remember that when you format any memory drive all the data it contains will be permanently deleted. For this reason, first back up all files and documents that are important or that you want to keep. You can copy and transfer them to your computer
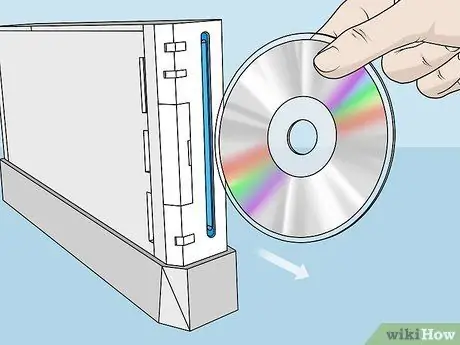
Step 3. Eject the disc currently in the Wii optical drive
If there is a DVD in the console player, you will need to remove it before you can continue.
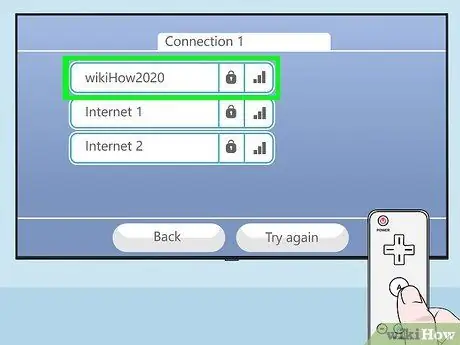
Step 4. Connect the Wii to the internet
In order to install all the tools necessary to perform the operations described in the article, the Wii must be able to access the web.
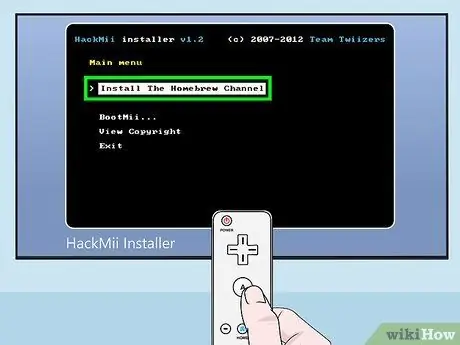
Step 5. Install the Homebrew Channel on the Wii
If you have not yet installed the Homebrew Channel on your Nintendo console, you will need to do so now before you can continue. The Homebrew channel allows you to install customized programs created by other users on the Wii and it is one of these programs that allows you to play video games directly from a USB drive connected to the console.
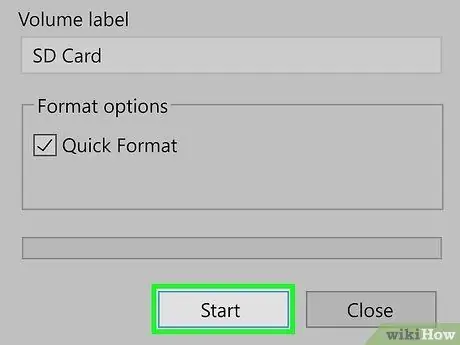
Step 6. Format the SD card
After installing the Homebrew channel using the SD card, you will need to delete its current content as you will need it to transfer other installation files to the console. The easiest way to empty an SD card is to format it.
Format your USB drive with the file system format FAT32 (if you are using a Mac, you will need to select the MS-DOS (FAT)).
Part 2 of 7: Configuring the USB Memory Drive for the Wii
Step 1. To perform the procedure described in this section, use a computer with a Windows operating system
Unfortunately it is not possible to properly format the USB memory drive so that it can be connected to the Wii using a Mac. If you do not have a PC, try using one of the computers provided by your local library or ask a friend for help..
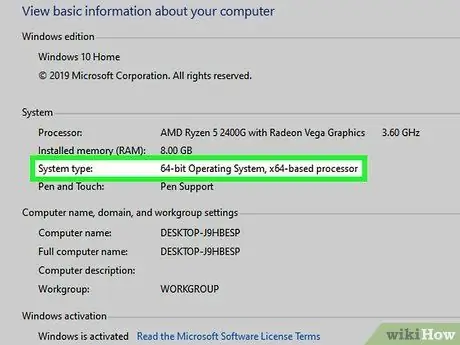
Step 2. Find the version of Windows you are using
In order to find out which version of the installation file you will need to download, you need to know the hardware architecture of the computer, i.e. whether it is 64-bit or 32-bit.
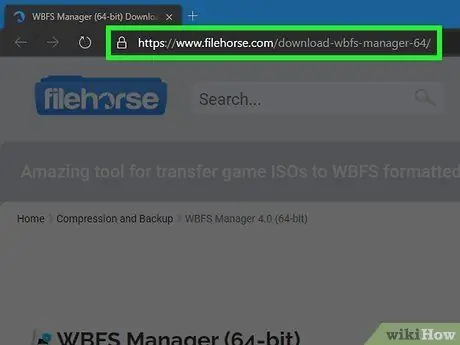
Step 3. Visit the web page where you can download the WBFS program
The links below refer to the 64-bit and 32-bit version of the WBFS Manager for Windows:
- WBFS Manager for 64-bit Windows;
- WBFS Manager for 32-bit Windows.
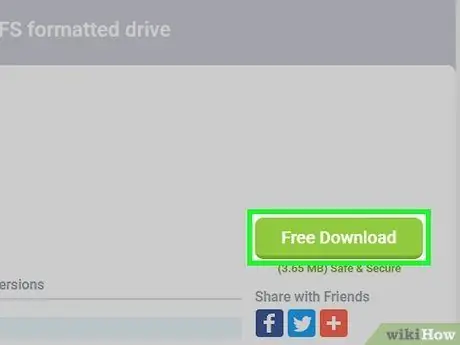
Step 4. Click on the green Free Download button
It is located in the upper right part of the page that appeared.
Beware of advertising and deceptive pop-up windows that may appear on the screen. Also, be careful not to click on the download link for software or programs that you don't need or need to install
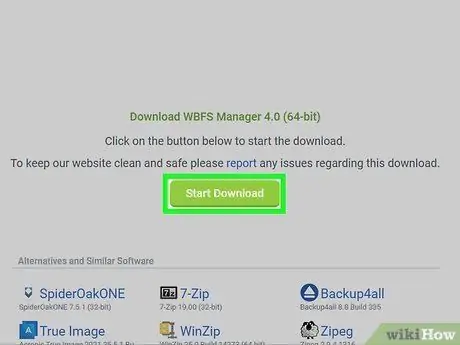
Step 5. Click on the green Start Download button
It is displayed in the center of the page. A ZIP file containing the WBFS Manager program installation file will be downloaded to your computer.
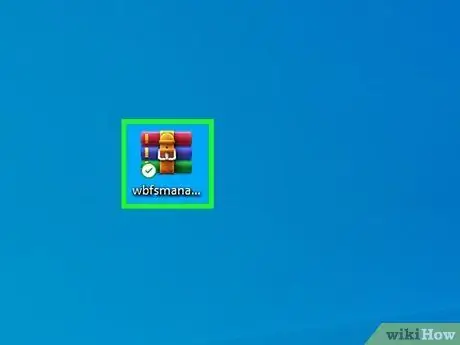
Step 6. Open the ZIP file you just downloaded
Double-click the corresponding icon to be able to view its contents.
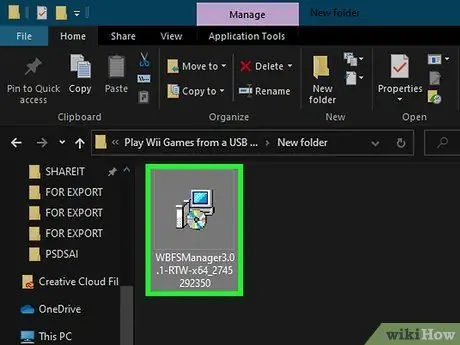
Step 7. Now double-click the setup.exe installation file
It's contents of the ZIP archive you just downloaded. The installation wizard window will appear.
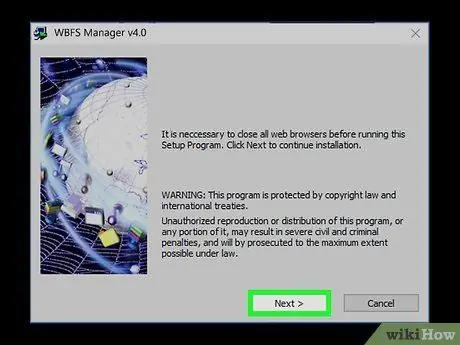
Step 8. Install the WBFS Manager program on your computer
Follow these instructions:
- Click on the button Next;
- Click on the button Browse to be able to select the installation folder (it is an optional step you can also use the default folder);
- Click on the button Next;
- Click on the button Next;
- Click on the button Yes;
- Click on the button Close.
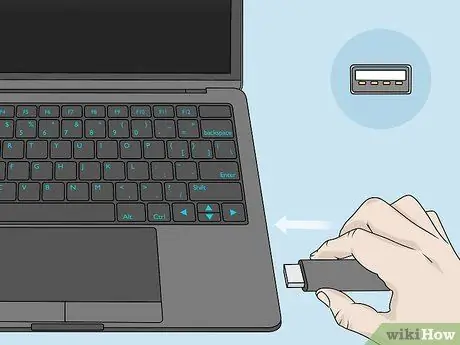
Step 9. Connect the USB memory drive to your computer
This is the memory unit to which you will copy Wii games. Insert the USB connector of the key or connecting cable into a free USB port on the PC.
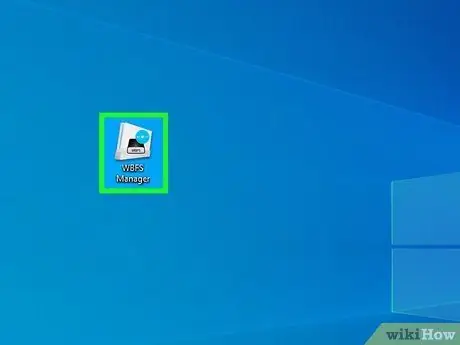
Step 10. Launch the WBFS Manager program
Double-click the app icon depicting a stylized Wii set against a blue background. You will find it in the Windows "Start" menu or directly on the desktop.
At the first start of the WBFS-Manager program, you will have to click on the button Yup located in the pop-up window that will appear to authorize him to access the computer resources.
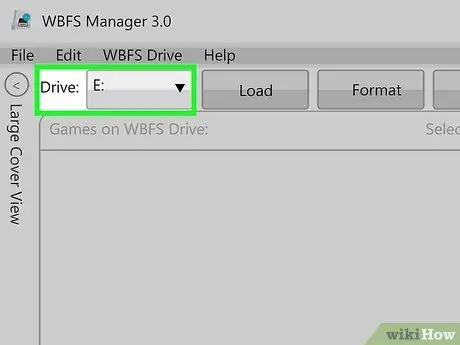
Step 11. Select the USB drive to configure
Click on the "Drive" drop-down menu, located in the upper left corner of the window, then click on the drive letter that corresponds to the USB device in question (normally this should be the letter F:).
If you don't know which drive letter corresponds to the USB stick, refer to the "Devices and Drives" section of the Windows "File Explorer" window by clicking on the "This PC" tab
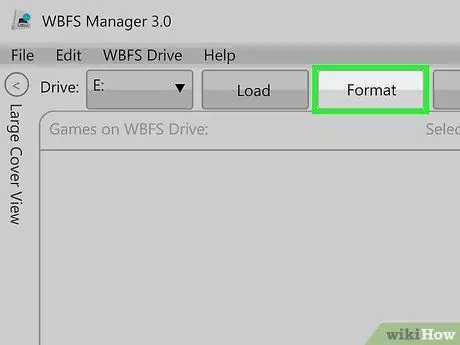
Step 12. Click the Format button
This way the indicated USB memory drive will be formatted and made compatible with your Nintendo Wii.
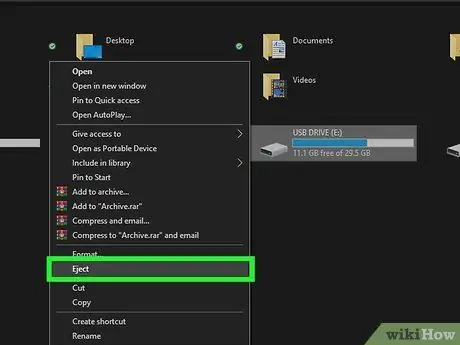
Step 13. Disconnect the USB drive from the computer
Click on the icon depicting a stylized USB flash drive displayed in the lower right corner of the desktop, then click on the option Eject listed in the menu that will appear. You can now disconnect the drive from your computer.
In order to locate the USB key icon, you may need to click on the icon first ^.
Part 3 of 7: Download the Installation Files
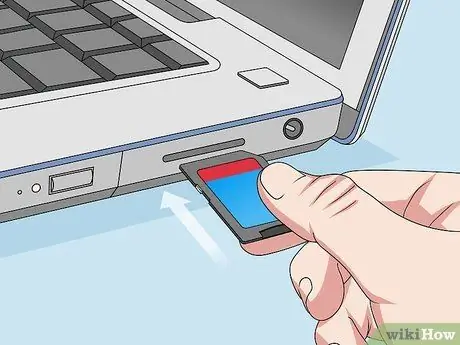
Step 1. Connect the SD card to the computer
If your computer has an SD card reader, insert it into the SD card reader with the labeled side facing up and the beveled corner facing the reader slot.
If the PC you are using does not have an SD card reader, you will need to purchase an external USB one
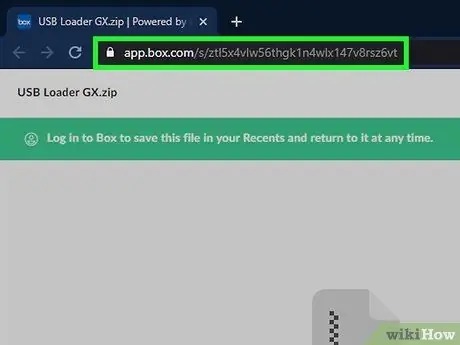
Step 2. Go to the website to download the installation files
Visit the following URL using your computer browser.
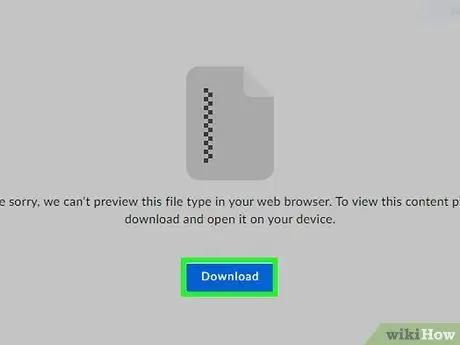
Step 3. Click the Download button
It is located in the upper right corner of the page. The USB Loader GX program installation file will be downloaded to your computer in ZIP format.
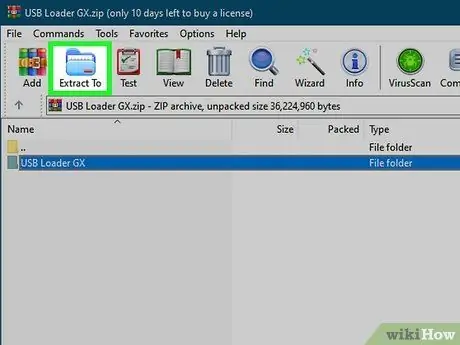
Step 4. Extract the files from the ZIP archive
If you are using a Windows computer, double click on the ZIP file icon, click on the tab Extract visible at the top of the window that appeared, click on the button Extract everything located on the toolbar and finally click on the button Extract when required. The files will be extracted from the ZIP file and placed in a normal folder which will have the same name as the compressed archive and which will be opened automatically at the end of the data extraction process.
If you are using a Mac, simply double-click on the ZIP file you want to open
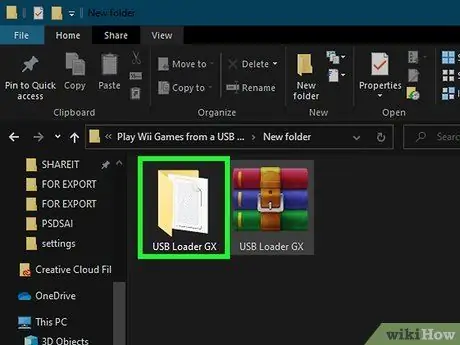
Step 5. Go to the "Files" folder
Double-click the directory icon USB Loader GX, then double-click the folder Files displayed at the top of the main window pane.
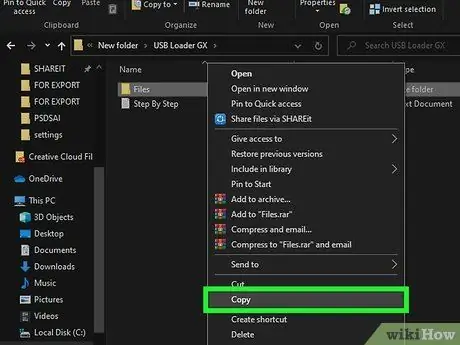
Step 6. Copy all the files in the "Files" folder
Click on one of the files in the folder in question, press the key combination Ctrl + A (on Windows) or Command + A (on a Mac) to select all the contents of the directory, then press the key combination Ctrl + C (in Windows) or Command + C (on Mac) to copy all selected data.
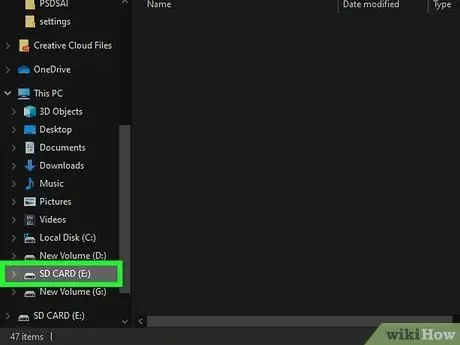
Step 7. Click on the name of the SD card you have connected to your computer
It is listed in the left panel of the Windows "File Explorer" or "Finder" window on the Mac.
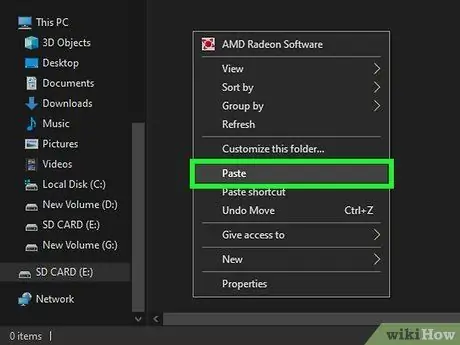
Step 8. Paste the files you copied in the previous step
Click on an empty spot in the main pane of the SD card window, then press the key combination Ctrl + V (on Windows) or Command + V (on Mac). All the files you copied will be transferred to the SD card.
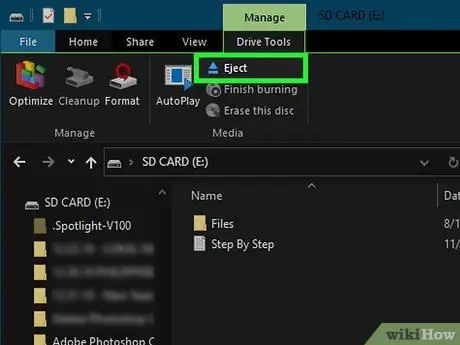
Step 9. Remove the SD card from the computer
Once the data copying process is complete, you will be able to remove the SD card from the PC reader. Follow these instructions:
- Windows - select the SD card icon displayed in the left panel of the "File Explorer" window with the right mouse button, then click on the item Eject of the context menu that will appear.
- Mac - click on the icon depicting an arrow pointing up on the right of the name of the SD card displayed in the left panel of the window.
Part 4 of 7: Install the IOS263 Program
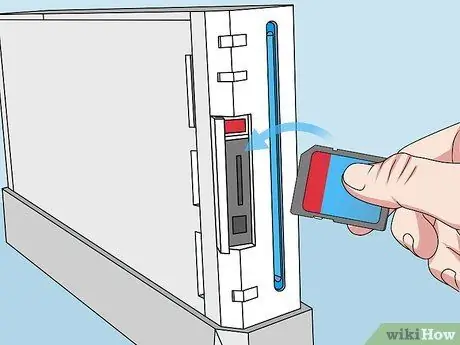
Step 1. Insert the SD card into the Wii reader
It is located along the front of the console.
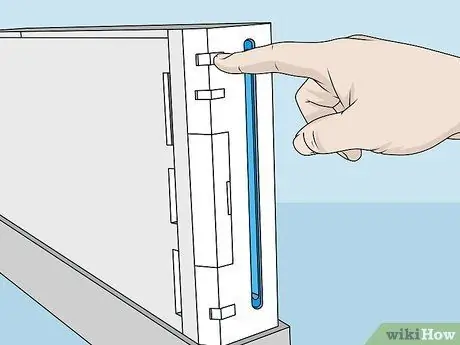
Step 2. Turn on the Wii
Press the power button on the console or press the appropriate button on the Wiimote.
If you have chosen to use the Wiimote, the Wiimote will need to be turned on and synchronized with the console
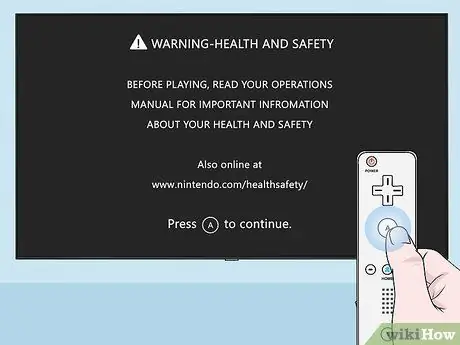
Step 3. Press the Wiimote A button when prompted
You will be redirected to the main console menu.
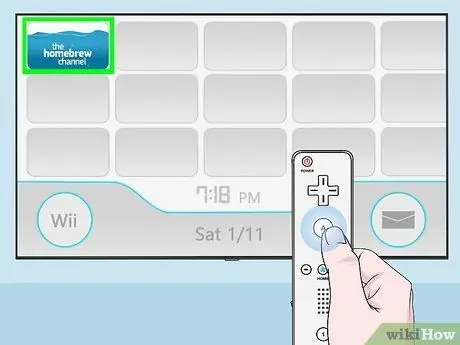
Step 4. Start the Homebrew channel
Select the icon the homebrew channel displayed in the Wii Main Menu, then select the option Start when required.
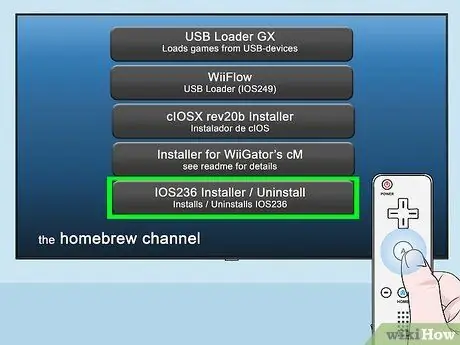
Step 5. Select the IOS263 Installer item
It is located in the center of the menu that appeared. A pop-up window will appear.
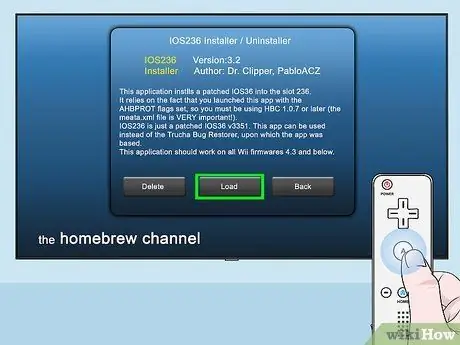
Step 6. Select the Load option when prompted
You will find the item indicated in the center of the bottom of the pop-up window that appeared.
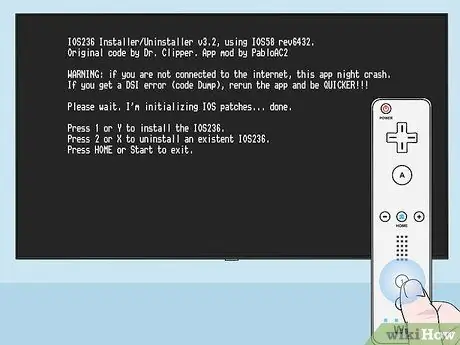
Step 7. Press the button
Step 1
This will select the option Install.
If you are using the GameCube controller, you will need to press the button Y instead of the one indicated.
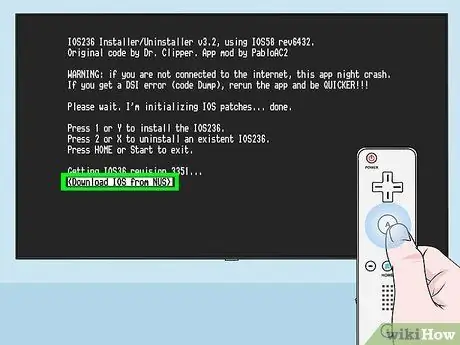
Step 8. Select the option
It is displayed at the bottom of the screen.
If the indicated entry is not listed, select the text enclosed in the angle brackets visible at the bottom of the screen, then press the right side of the D-pad on the controller until you see it appear
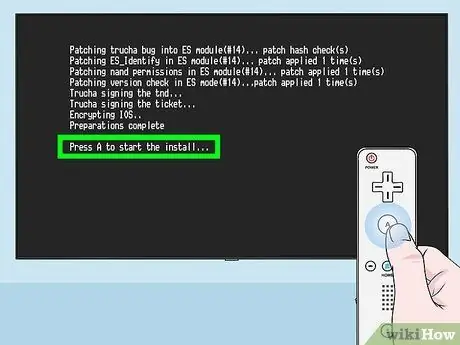
Step 9. Press the controller A button when prompted
In this way the IOS263 program will be installed on the Wii. This step will take approximately 20 minutes to complete, so please be patient.
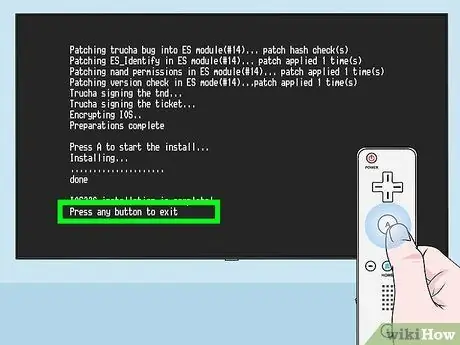
Step 10. Press any button on the controller when prompted
This will close the installation window and you will be redirected to the main Homebrew channel screen.
Part 5 of 7: Install the cIOSX Rev20b Program
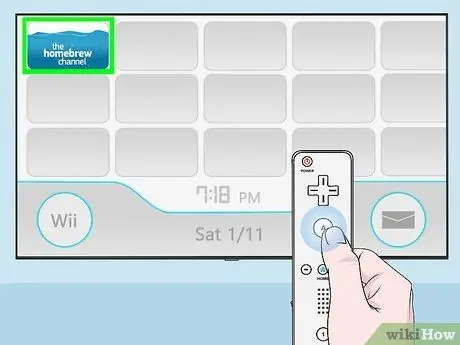
Step 1. Log in to the Homebrew channel
Select the icon the homebrew channel displayed in the Wii Main Menu, then select the option Start when required.
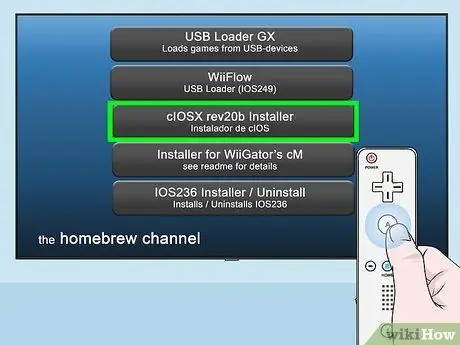
Step 2. Select the cIOSX rev20b Installer option
It is located in the center of the menu that appeared. A pop-up window will appear.
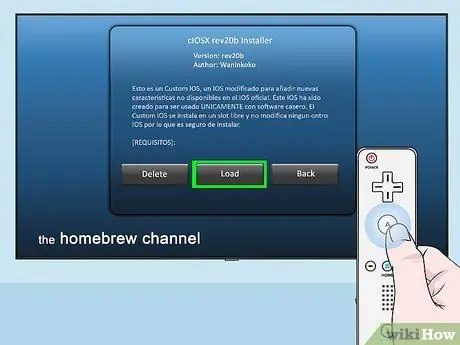
Step 3. Select the Load option when prompted
The installation window will appear.
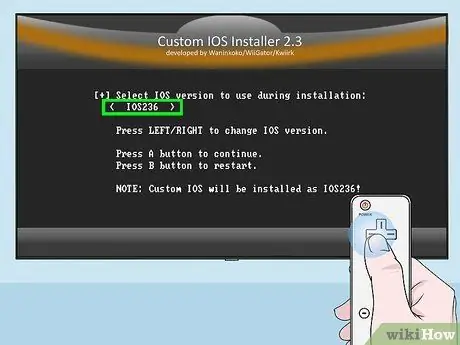
Step 4. Scroll the menu to the left to select the "IOS236" item
This is the IOS236 file you installed in the previous steps.
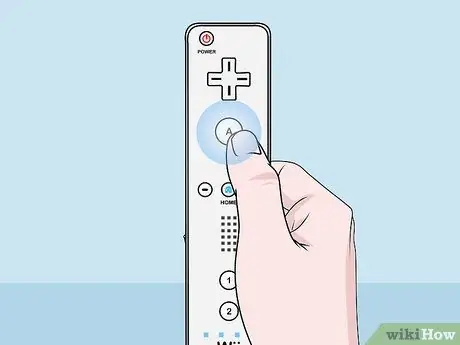
Step 5. Press the A button on the controller to confirm your choice
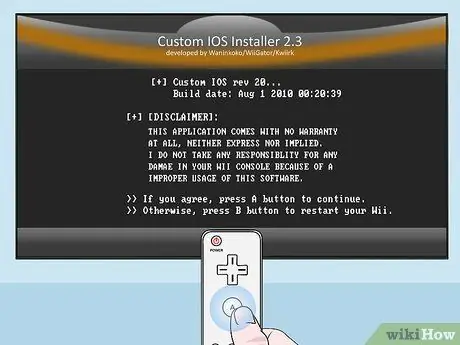
Step 6. Accept the terms and conditions for using the program
Press the button TO controller to perform this step and continue.
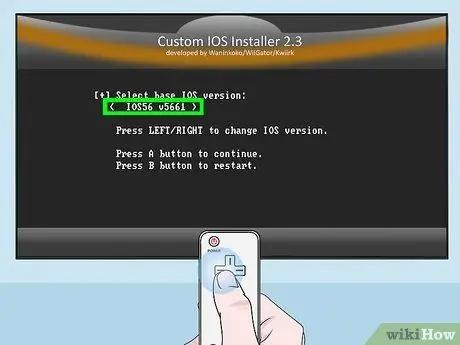
Step 7. Select the version of IOS to install
Press the directional pad to the left until "IOS56 v5661" is displayed between the angle brackets, then press the key TO controller to confirm.
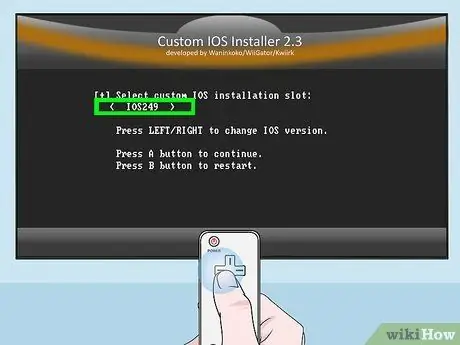
Step 8. Select a slot for IOS installation
Press the left directional pad of the controller until you see "IOS249" appear between the angle brackets, then press the key TO to confirm.
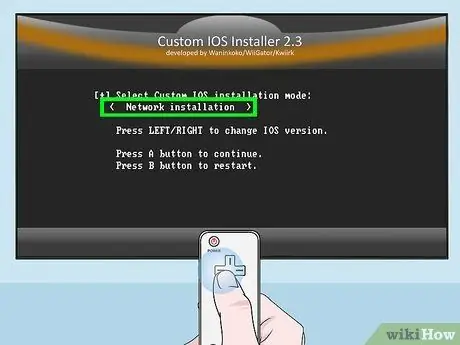
Step 9. Select the installation mode via network connection
Press the left d-pad on the controller until "Network installation" appears in the angle brackets.
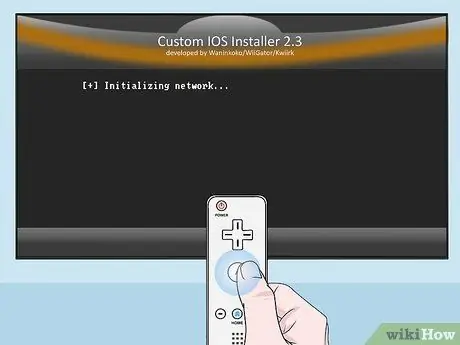
Step 10. Start the installation procedure
Press the button TO of the controller to start the installation of the IOS program.
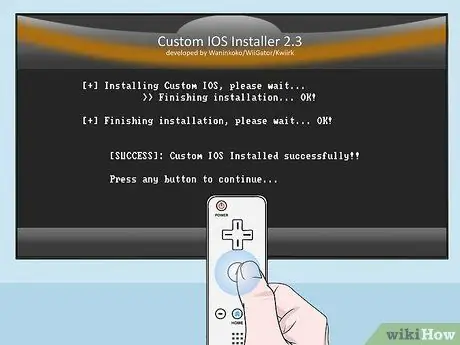
Step 11. Press any key on the controller to continue when prompted
This will take you to the next stage of the installation process.
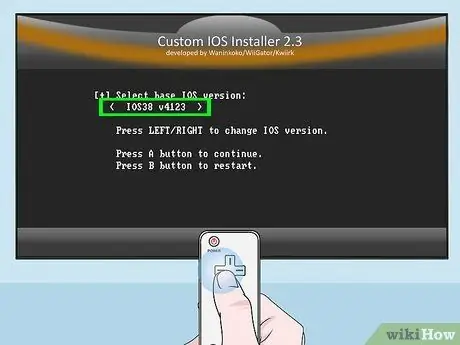
Step 12. Select the next version of the IOS program that you need to install
Press the left d-pad on the controller again until "IOS38 v4123" appears between the angle brackets, then press the key TO to continue.
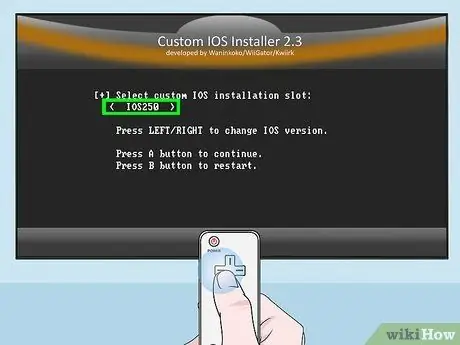
Step 13. Select a slot for installing the new version of IOS
Press the left directional pad of the controller until you see "IOS250" appear between the angle brackets, then press the key TO to confirm your choice.
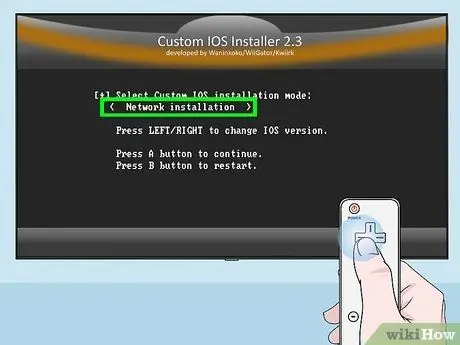
Step 14. Use the network connection setup mode
Select the "Network installation" option and press the button TO of the controller, as you did for the previous installation, then wait for this new installation to complete.
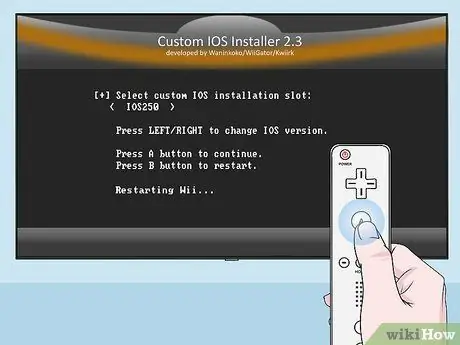
Step 15. When prompted, press any key on the controller to continue, then press the A button
At this point the Wii will restart. After the reboot is complete, you can continue.
Part 6 of 7: Install the USB Loader GX Program
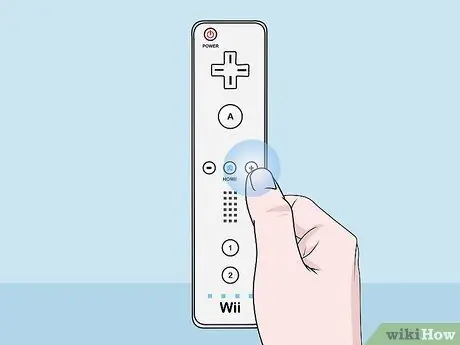
Step 1. Go to the next screen
Press the right d-pad on the Wiimote to perform this step.
Alternatively, you can press the button +.
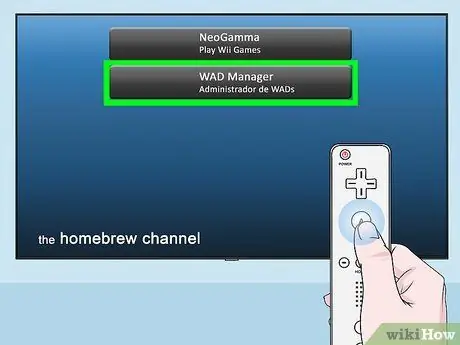
Step 2. Select the WAD Manager option
It is the second item listed in the menu that appeared.
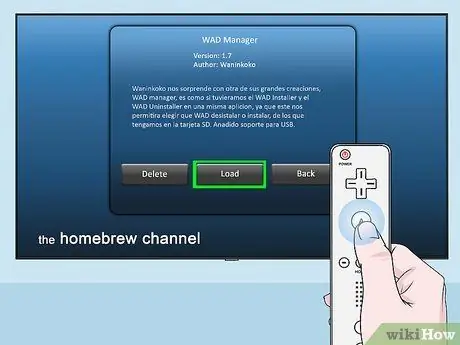
Step 3. Choose the Load item when prompted
This will start the installation of the WAD Manager program.
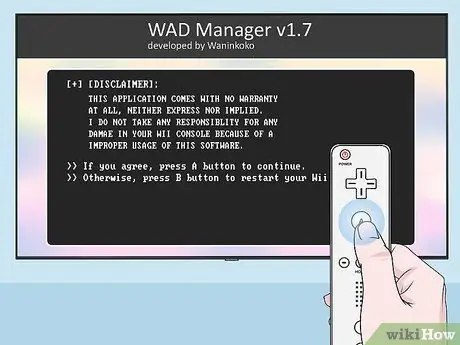
Step 4. Press the A button on the controller
You will accept the terms and conditions of use of the program.
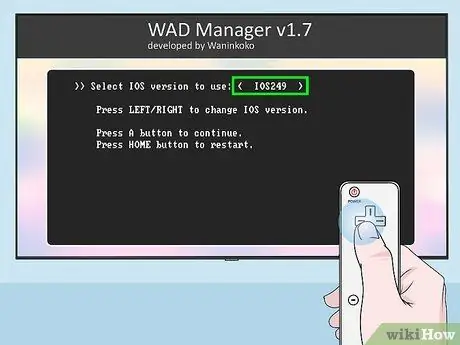
Step 5. Select the "IOS249" slot to upload the data
Press the left D-pad on the Wii controller until "IOS249" appears inside the angle brackets, then press the button TO to confirm.
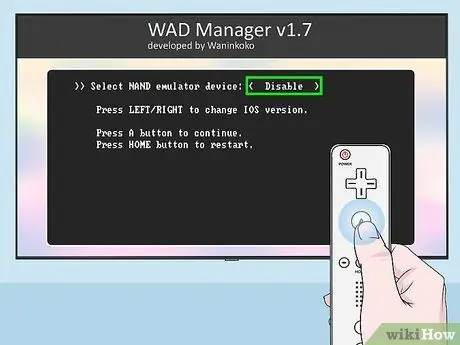
Step 6. Disable emulation
Select the "Disable" option by making it appear in angle brackets, then press the key TO to confirm.
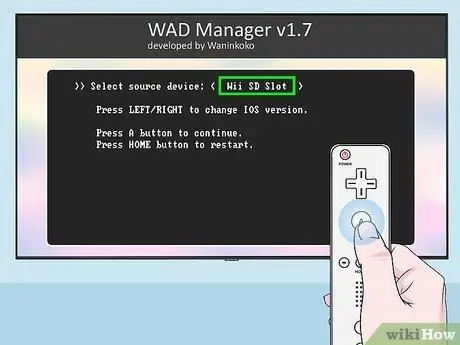
Step 7. Select the SD card
Use the directional pad on the Wiimote to make "Wii SD Slot" appear in the angle brackets, then press the button. TO. In this way you will have access to the contents of the SD card and the list of files present will be displayed on the screen. This is all the data you copied to the card in the previous steps.
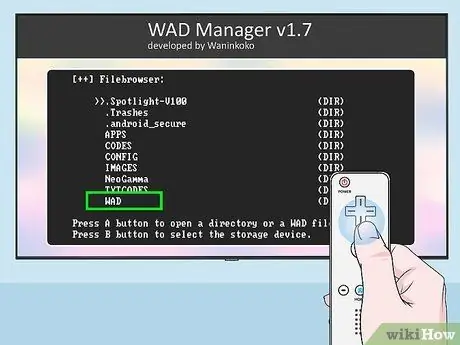
Step 8. Scroll down the list to be able to select the WAD entry
It is displayed at the bottom of the screen.
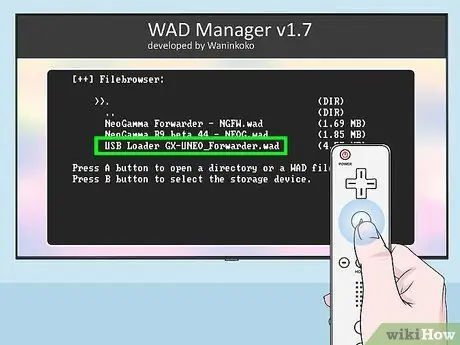
Step 9. Select the USB loader installation option
Scroll down the menu to be able to choose the item USB Loader GX-UNEO_Forwarder.wad, then press the key TO to confirm.
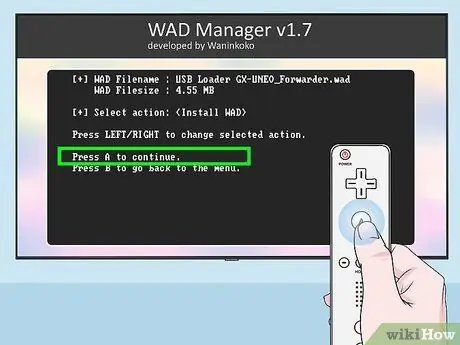
Step 10. Install the WAD Manager
Press the button TO when prompted to perform this step.
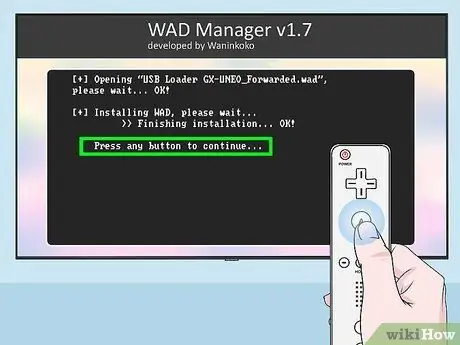
Step 11. When prompted, press any button on the Wiimote, then press the Home button ⌂
The Wii will restart automatically. At the end of this phase you will be redirected to the second screen of the Homebrew channel.
Part 7 of 7: Run Games from the USB Memory Drive
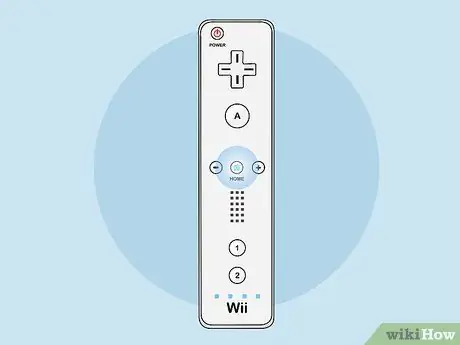
Step 1. Press the Home button ⌂ on the controller again
It is one of the buttons on the Wiimote. This will redirect you to the main menu of the Homebrew channel.
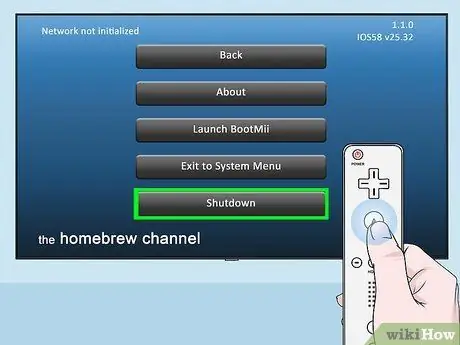
Step 2. Select the Shut Down option
It is displayed at the bottom of the menu. The Wii will be turned off.
Before continuing, it is best to wait until the console is completely off
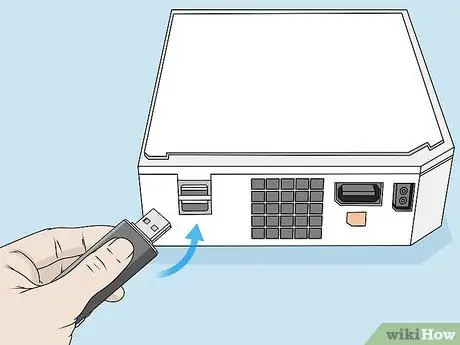
Step 3. Connect the USB memory drive to the Wii
If you used a USB stick, insert it into a free port on the console. You'll find it along the back of the Wii.
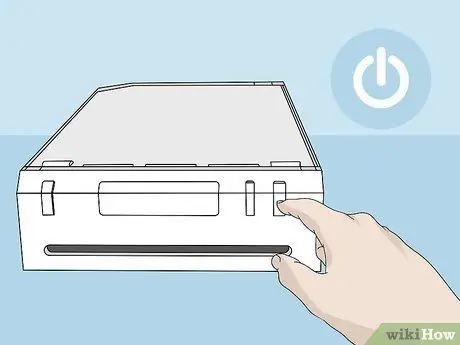
Step 4. Turn on the Wii
Press the console's power button or use the controller.
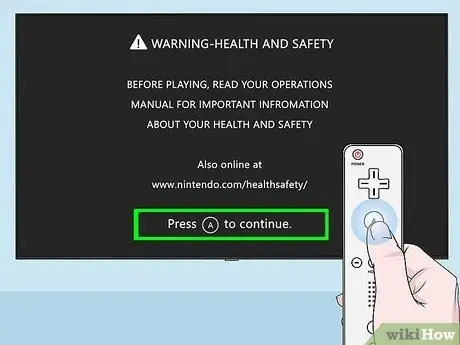
Step 5. Press the A button on the Wiimote when prompted
You will be redirected to the main console menu, where the option should be present USB Loader GX on the right of the Homebrew channel.
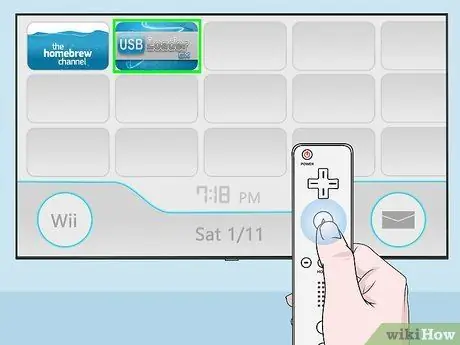
Step 6. Select the USB Loader GX item
It is listed along the right side of the current screen.
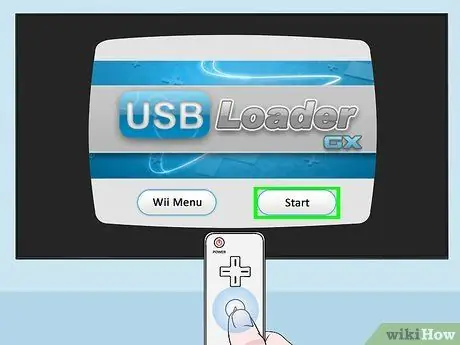
Step 7. Select the Start option
This will run the USB Loader GX program.
- This step may take several minutes to complete, especially if this is your first time running the program.
- If the message "Waiting for your slow USB" appears on the screen, try plugging the USB stick into a different port on the Wii.
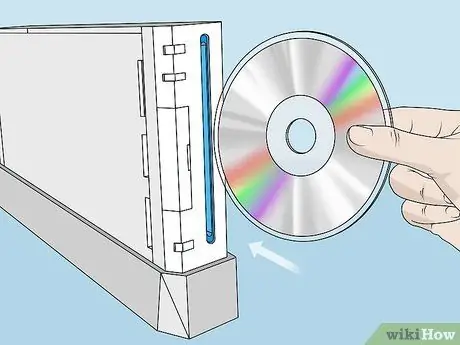
Step 8. Insert the DVD of the game you want to play into the Wii's optical drive so that it can be installed directly onto the USB stick
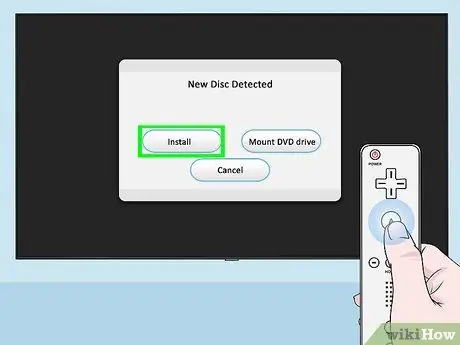
Step 9. Select the Install option when prompted
The program will automatically copy the contents of the disc in the Wii player.
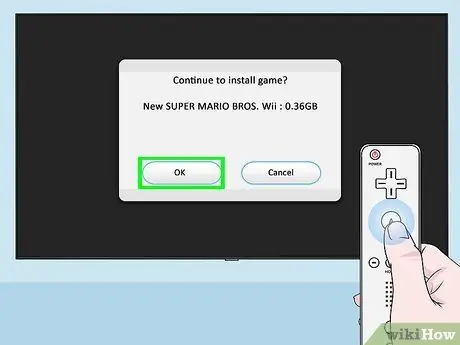
Step 10. Select the OK item when prompted
At this point all the data that has been copied from the DVD of the game you have chosen will be transferred to the USB stick.
This stage of the installation will take some time to complete. A progress bar will appear on the screen showing the progress of the installation, however it may appear to you that the bar has frozen at several points in the process. In this case, do not disconnect the USB stick from the Wii and do not restart the console for any reason
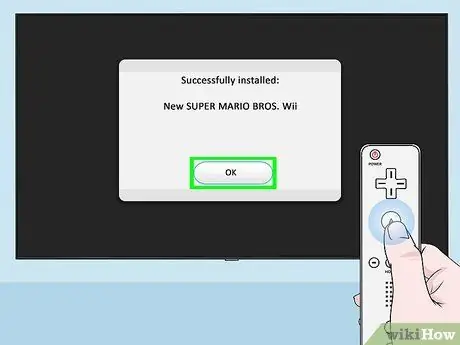
Step 11. Select the OK option when prompted
The game installation process on the USB memory drive connected to the Wii is now complete.
You can now remove the game DVD from the Wii player
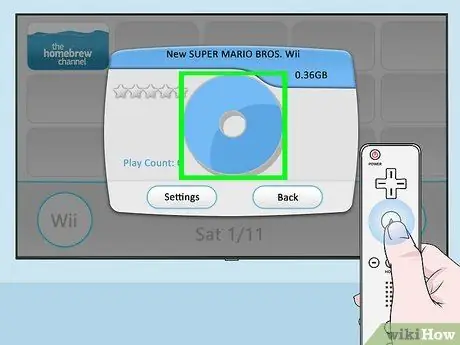
Step 12. Start the game of your choice
Click on the name of the video game in question, then click on the icon depicting a CD / DVD displayed in the center of the window that appeared. Doing so will start the game directly from the USB stick connected to the console.
Advice
- To have more space for your games, consider using a USB external hard drive.
- Wii video games, on average, take up around 2GB each, so consider the size of the USB stick you are going to buy accordingly.
-
When the main screen of the USB Loader GX program is displayed, you can press the button
Step 1. of the controller to customize the cover image of each game that you will install on the USB memory drive.
Warnings
- During the installation procedure of the programs indicated in the article, do not turn off the Wii.
- Remember that using content that you have not regularly purchased violates both the terms and conditions of the agreement you entered into with Nintendo and copyright laws.


