This article explains how to crop an area of an image using the Microsoft Paint program.
Steps
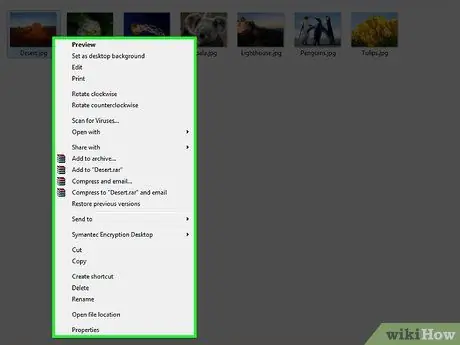
Step 1. Locate the image you want to edit, then right click on the corresponding icon
A drop-down menu will appear.
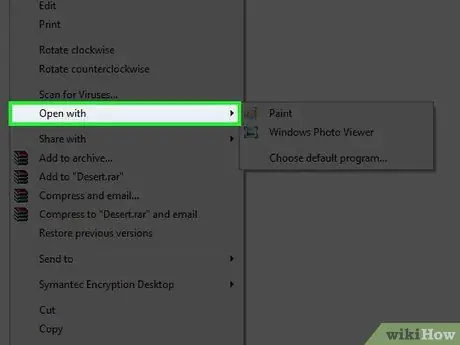
Step 2. Move your mouse over the Open With item
It is displayed in the middle of the context menu that appeared on the screen.
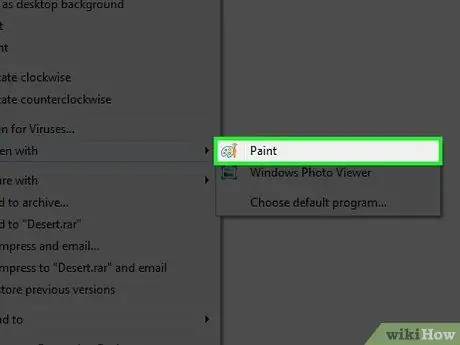
Step 3. Click on the Paint option
It features an icon depicting a color palette.
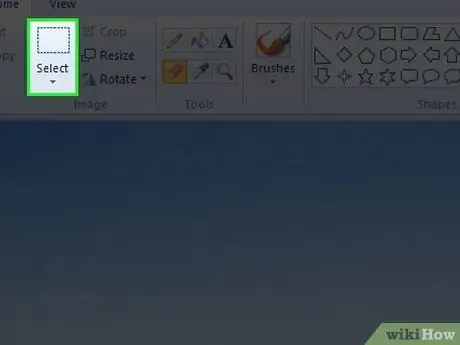
Step 4. Click on the ▼ icon visible under the Select item
The latter is located in the "Image" group of the Home tab of the Paint toolbar located at the top of the program window.
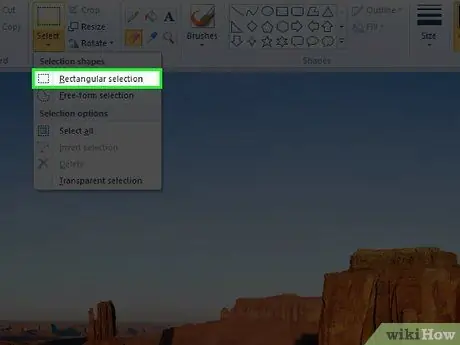
Step 5. Click on the Rectangular Selection option
It is the first item in the drop-down menu that appeared.
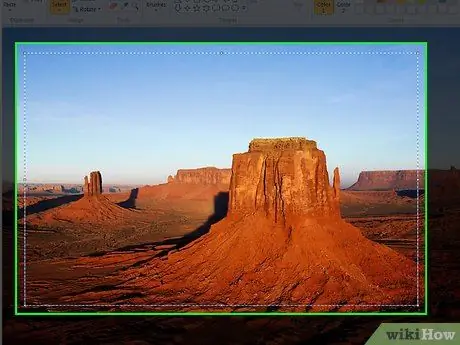
Step 6. Click on a point in the image, then drag the mouse cursor
This will create a rectangular selection area starting from where you clicked. The section of the image enclosed in the selection area will be preserved when you decide to use the "Crop" function.
- If you are trying to remove the outer edges of a photo, the best way to do this is to start by clicking on the upper left corner, then drag the mouse cursor to the lower right corner of the section of the image you want to keep.
- If you need to draw a new selection area, click anywhere outside the current one (indicated by a dotted line).
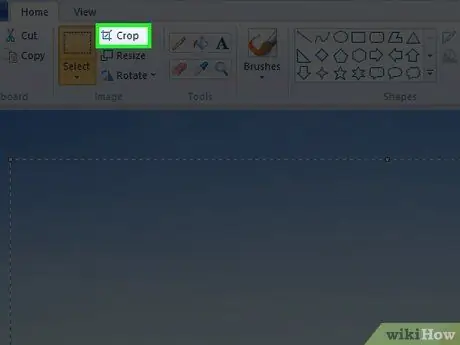
Step 7. Click on the Crop button
It is located in the upper right of the "Image" group of the Paint toolbar, to the right of the option Select. This will delete the part of the photo that is outside the selection area. The resulting new image will consist solely of the portion of the photo that was enclosed in the selection area you drew.


