Using the brush cutter regularly, the line gradually reduces until it is no longer effective. In this situation, the only thing you can do is "arm yourself" with the knowledge necessary to change the thread. Black & Decker manufactures a wide range of electric brushcutters, most of which follow the procedures described in this tutorial.
Steps
Step 1. Disconnect the tool from the power supply
Before tinkering with the line, you need to make sure that the brush cutter does not accidentally operate. Safety rules are essential every time you have to do maintenance work (even undemanding) on your gardening equipment.
If your model is powered by batteries, take them out of their housing before changing the wire
Step 2. Press the release tabs and pull out the cap covering the wire roll
You shouldn't have any difficulty in this step.
Step 3. Throw away any thread that is left on the roll or spool
You must take advantage of the opportunity to also remove all the dirt and debris that have accumulated on the tool.
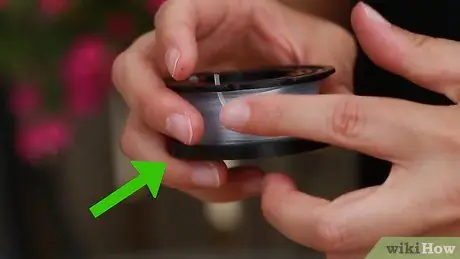
Step 4. Replace the wire
At this point you have two options: use a ready-made spare spool (you can find the nearest dealer thanks to the Black & Decker website) or buy only the line and manually wind it on the roll at your disposal.
- If you have decided to buy the replacement part, you can discard the used roll and read step number 8. Loose wire is available at hardware stores, garden stores and even online. Most of the brushcutters of this brand use wires with a diameter of 1.6 mm, but remember to check the specifications of the model you have.
- If you have decided to wind the thread by hand, keep the spool empty, as you will need it to make the new roll.
Step 5. Insert the wire into the anchor holes of the empty spool
These should be inside; insert the end of the thread and, if necessary, lock it in place with your thumb.
If you have trouble holding the thread in the hole, try bending the end of it so that it forms a kind of hook. A segment no longer than 2-3 cm will suffice to create this anchor
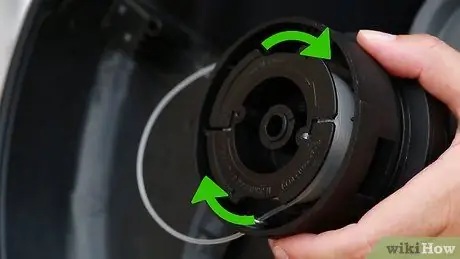
Step 6. Wind the thread respecting the direction of the arrows
These are printed directly on the spool and indicate the direction to follow when creating the roll. Start with the thread on the outside. Try to make the loops very tight and as uniform as possible, avoiding crossing the thread on itself.
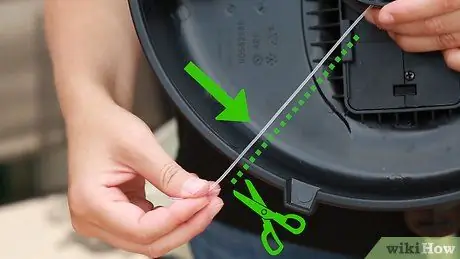
Step 7. Cut the thread when the spool is full
You don't have to create crossovers or a double layer of yarn. When all the space of the roll is occupied, you are finished: cut the line leaving a free end of about 15 cm, so that it can emerge from the head of the brushcutter.
If your model uses more than one wire, then you will need to wrap them separately, each in its own housing. They must not be connected to each other; Many Black & Decker brushcutter spools feature notches that lock the first line while winding the second
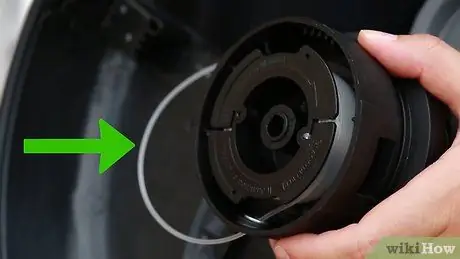
Step 8. Mount the spool back into its housing
You will need to rotate it on the hub for it to take the correct position.
After inserting the line through the eyelets, carefully check the operation just performed, in case you have the feeling that the spool has not been mounted correctly
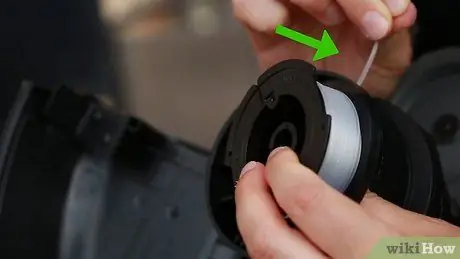
Step 9. Insert the ends of the thread into the eyelets
If you have decided to use a new replacement spool, you will need to detach the line and insert it into the appropriate holes. If you wound the roll by hand, take the end you pinned and put it through the eyelets.
The line should protrude from the head of the trimmer for 12-15 cm
Step 10. Refit the pressure cap
You should hear two distinct pops indicating that the cap has been put back in the right position. Once the brushcutter is connected to the power supply again, you should feel the line automatically assume the correct position. Congratulations, you did a good job!
Advice
- The Black & Decker brushcutter should be equipped with an instruction manual with pictures. If you don't have it, you should request it, to get more help.
- If you are having trouble with the line, never hit the trimmer on the ground in an attempt to get it out of the openings properly. Instead, you should disconnect the tool from the power supply and verify that the wire is arranged in an orderly manner without tangles and crossings, in a position that allows it to exit from the slots.


