In Windows 7, there is a very convenient feature that allows you to view hidden files and folders on your hard drive. You may need to view sensitive information contained in a hidden folder, or hide system files that you don't want to be deleted by mistake. In any case, after you have decided to hide a file or an entire folder, you will want to know how to view them again, continue reading the steps in this article to find out.
Steps
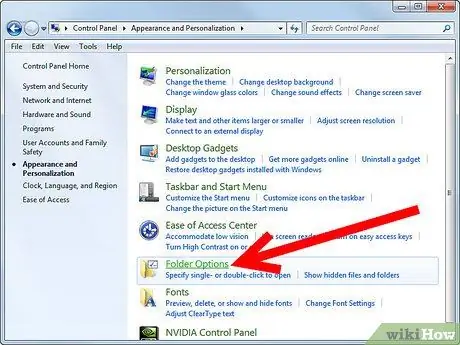
Step 1. Go to the 'Folder Options' panel
To do this, open the 'Start' menu and select the 'Control Panel' item. In the window that will appear, select the 'Folder Options' icon.
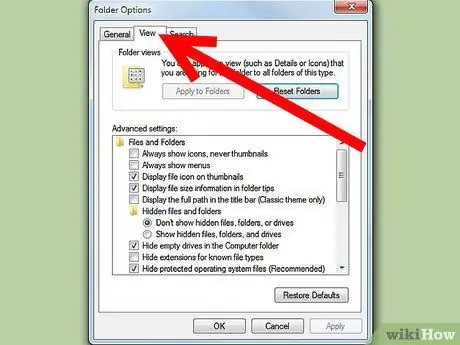
Step 2. From the 'Folder Options' panel, select the 'View' tab
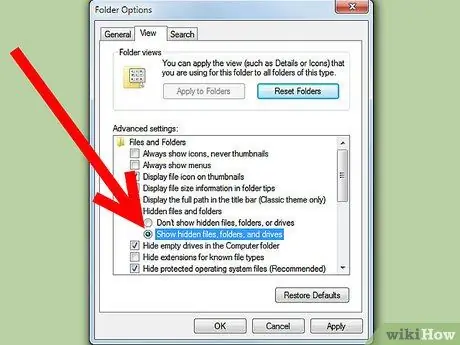
Step 3. Enable viewing of hidden files
Scroll through the list of the 'Advanced settings' section, until you see the 'Hidden files and folders' entry. Regarding this item in the list, you will find two radio buttons, select the one with the words 'Show hidden folders, files and drives'.
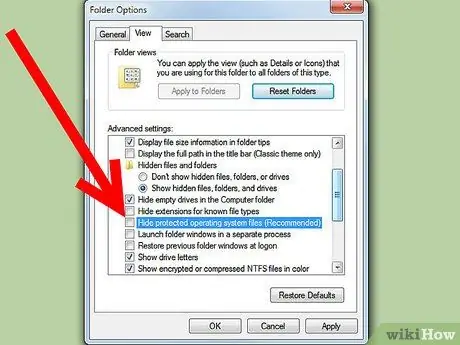
Step 4. Select the option that allows you to view the operating system files
In the 'Advanced settings' section, uncheck the 'Hide protected system files (recommended)' checkbox. This step is only needed if the file or folder you need are elements of the operating system.
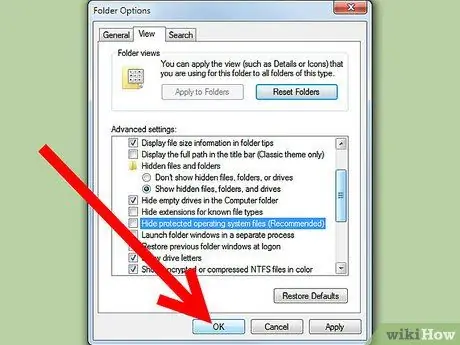
Step 5. Select the 'OK' button for the changes to take effect
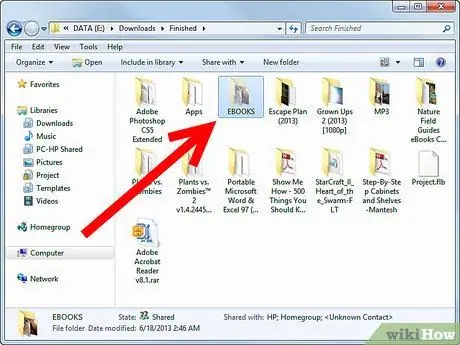
Step 6. Find the folder of your interest on the hard drive
If it was a hidden item, it will now have become visible. Browse through the folders looking for the information you need or, alternatively, use the Windows search function.
- To manually navigate through the folders, select the 'Start' menu and then select the 'Computer' item. In the 'Explorer' window that will appear, select the hard drive and then navigate from folder to folder until you reach the one you are interested in.
- To use the Windows search feature, open the 'Start' menu and, at the bottom of the menu, locate the field in which to enter the information to search. Type the full or partial name of the folder you are interested in and check the results that will appear dynamically. When you see the folder you need appear, select it directly from the list with a double click of the mouse.
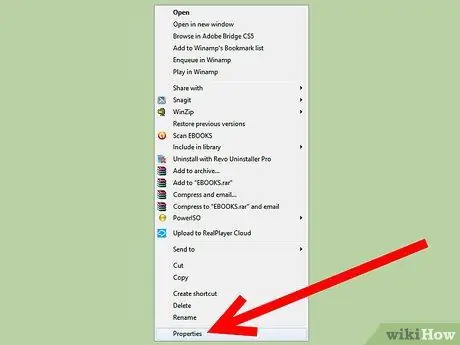
Step 7. Enter the folder's 'Properties' menu
To do this, select the folder of your interest with the right mouse button and, from the contextual menu that will appear, select the item 'Properties'. In the window that appears, select the 'General' tab.
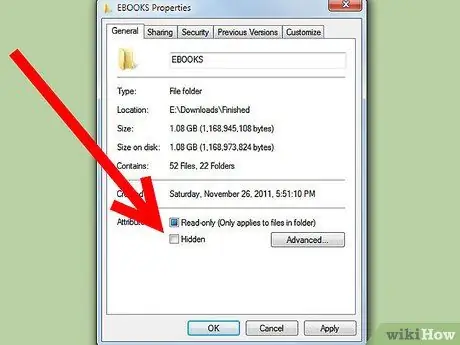
Step 8. Uncheck the check button for the 'Hidden' item at the bottom of the 'General' tab
From now on, the folder will always be visible. If you wish, you can access the 'Appearance and Personalization' category of the Control Panel and, via the 'Folder Options' feature, restore the invisibility of hidden files and folders. In this case, the folder to which you changed the properties will still be visible.


