The feature called "HomeGroup" allows computers running Windows to connect quickly and easily to share files and resources. Unfortunately it is not possible to connect a Mac to the Windows "HomeGroup", however you can allow file sharing to allow data transfer between the two computers. To proceed, you need to enable file sharing on both Windows and Mac.
Steps
Part 1 of 2: Sharing Files from a Windows Computer with a Mac
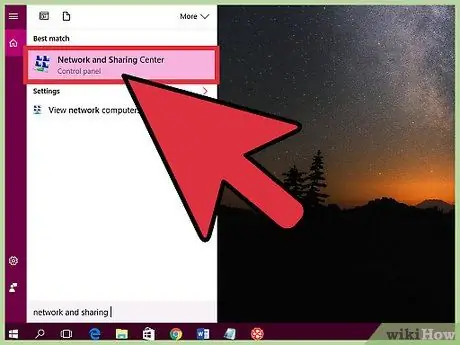
Step 1. Enable file sharing on your Windows computer
As mentioned, it is not possible to add a Mac Computer directly to the Windows "Home Group". However, you can share specific folders on a Windows computer with a Mac computer. To do this, you need to enable data sharing on your Windows computer:
- Go to the "Start" menu or screen, then type "Network and Sharing Center" to access the "Network and Sharing Center" window.
- Select the "Change advanced sharing settings" link.
- Make sure "Turn on file and printer sharing" is checked.
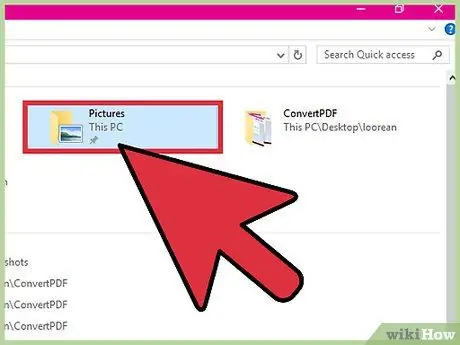
Step 2. Locate the folder you want to share on your Windows computer
Sharing is done by folders, so you will need to share the one that contains the data you want to make accessible to the Mac computer. Any folder or file inside the shared one will automatically be shared in turn.
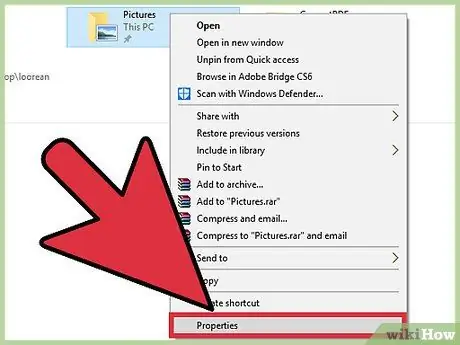
Step 3. Select the chosen folder with the right mouse button, then choose the "Properties" item
The "Properties" window of the selected folder will be displayed.
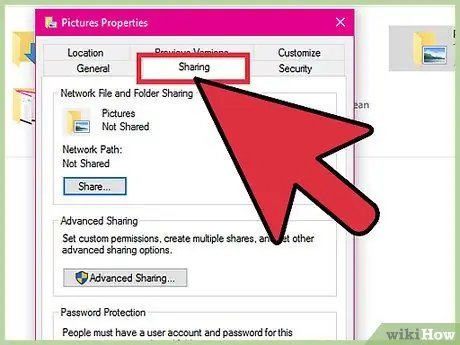
Step 4. Go to the "Sharing" tab
All sharing options of the chosen folder will be shown.
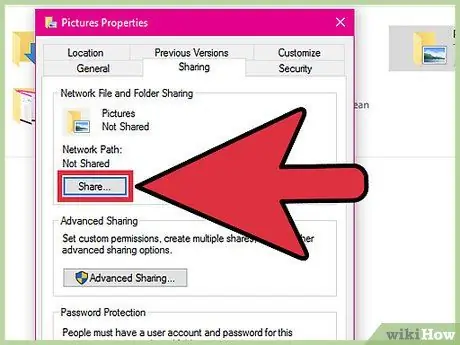
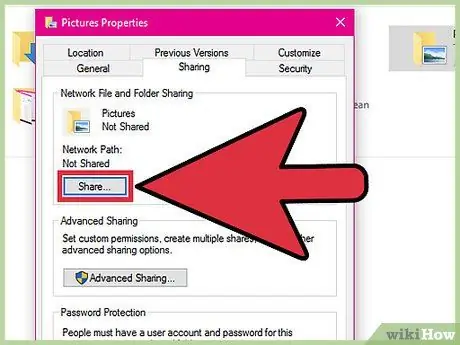
Step 5. Press the "Share" button
..".
A new dialog will be displayed with the list of users authorized to access the selected folder.

Step 6. Select "All" from the drop-down menu in the window, then press the "Add" button
This way anyone who connects to your network will have access to the shared folder.
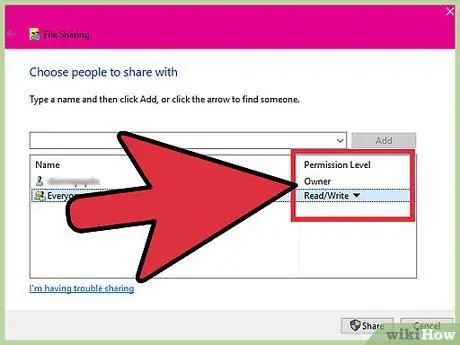
Step 7. Change the "Permission Level" for the new "Everyone" user
By default of the operating system, other computers will be able to access the shared folder for read only, that is, they will only be able to open and copy the contained items. If you need to add new files or modify existing ones, you need to select the "Read / Write" option from the "Permission Level" menu.
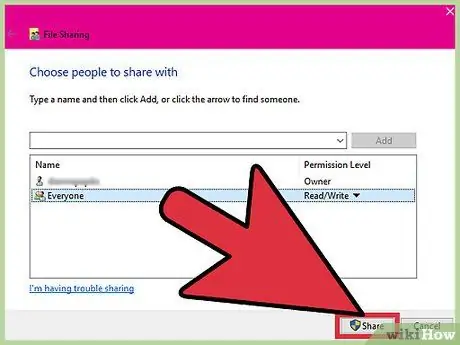
Step 8. Press the "Share" button to share the folder with the new settings
The new sharing settings will be applied to all subfolders in that chosen one. For large items, this may take some time to complete.
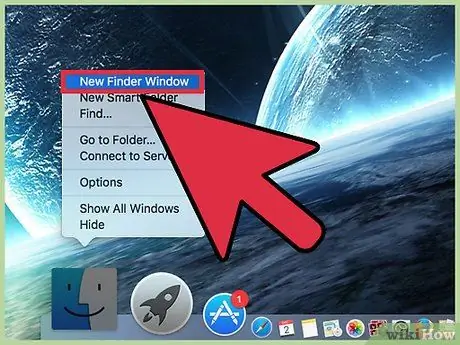
Step 9. Open a Finder window on the Mac
If the computer in question is connected to the same network as the Windows computer, you will see it appear in the "Shared" section of the sidebar.
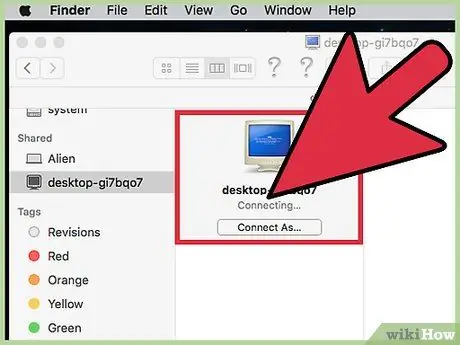
Step 10. Select the Windows computer, then log in with a valid account
As soon as you select the Windows computer icon in the Mac Finder window, you will be prompted to log in. At this point you can choose between two different options: "Guest" and "Registered user".
- Select the "Guest" option if you need read-only access (being able to open and copy the files and folders present).
- Select the "Registered user" item if you need write access (to be able to open, copy, create and edit files). In this case you will be asked to log in using a valid account on the Windows computer under test.

Step 11. Browse the contents of the shared folder
After logging in, you will be able to see the complete list of all files and folders in the shared directory. You can open, copy and edit existing files just like you do with anything else on your computer.
Step 12. Share other folders
If you need to share other directories on your Windows computer, you can do so by repeating the steps in this section. If, on the other hand, you want to share a folder on Mac with a Windows computer, continue reading the next method.
Part 2 of 2: Share Mac Files with a Windows Computer
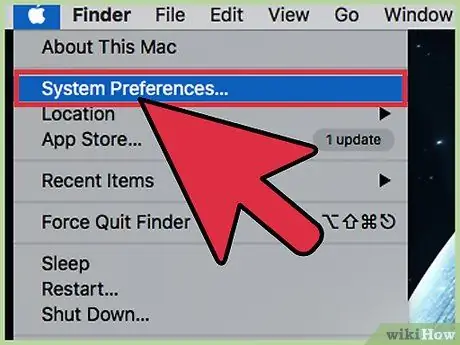
Step 1. Go to the "Apple" menu, then select the "System Preferences" option
Now that you are able to access shared folders on your Windows computer, you can configure your Mac's folders to be visible from Windows. The first step is to access your Mac's "System Preferences".
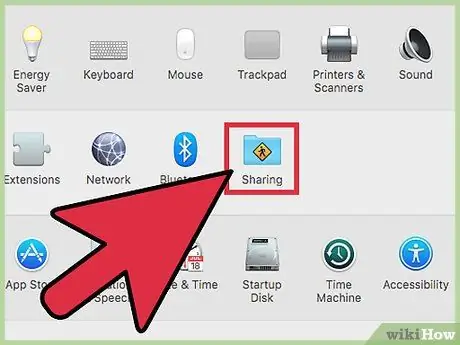
Step 2. Select the "Sharing" icon present in the "System Preferences" menu
A new window will appear containing the configuration settings for data sharing.
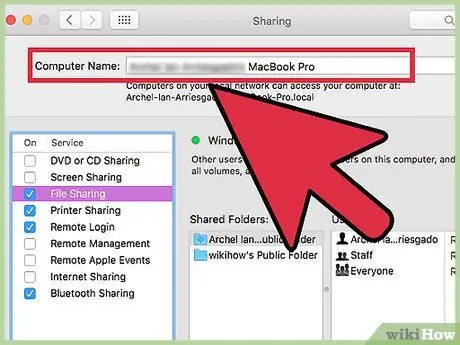
Step 3. Make a note of the string in the "Computer Name" field at the top of the window
You will need this information during the connection setup phase.
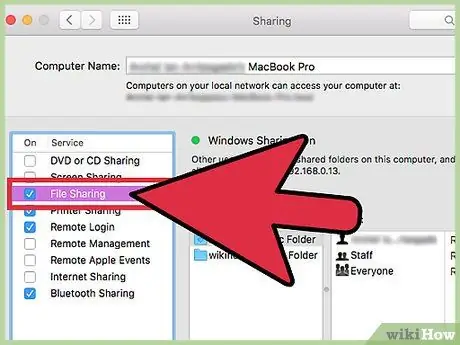
Step 4. Select the "File Sharing" checkbox to enable data sharing
After selecting the button, additional options will be displayed in the right part of the window.
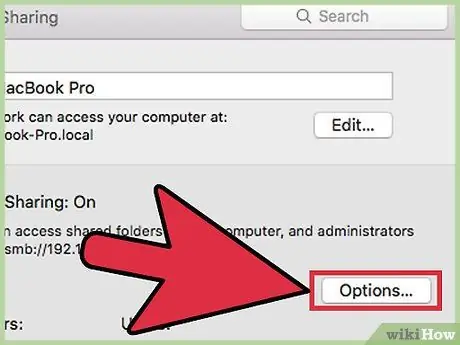
Step 5. After selecting "File Sharing", press the "Options" button
..".
File sharing options will be displayed.
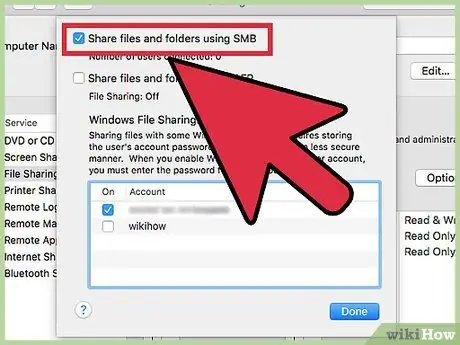
Step 6. Make sure "Share files and folders via SMB" is checked
This will enable the use of the sharing protocol, which allows you to connect to a computer with a Windows operating system.
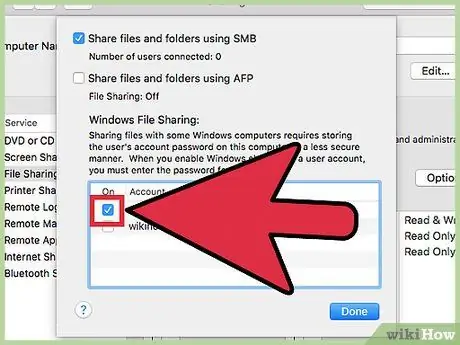
Step 7. Check the "Activate" selection button for your account in the "Windows File Sharing" section
This way you will be able to access all the files on your Mac using a Windows computer.
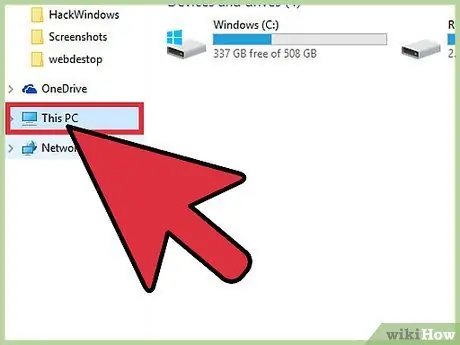
Step 8. Open the "Windows Explorer" or "File Manager" window on your Windows computer
You can use the hotkey combination ⊞ Win + E or select the "Computer" or "This PC" item.
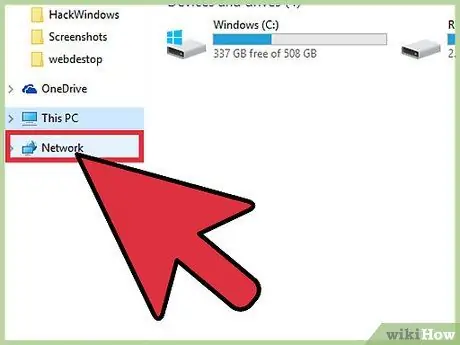
Step 9. Click on the "Network" icon located in the left sidebar of the window
It is possible that you will have to scroll through the menu a bit before you can locate it.
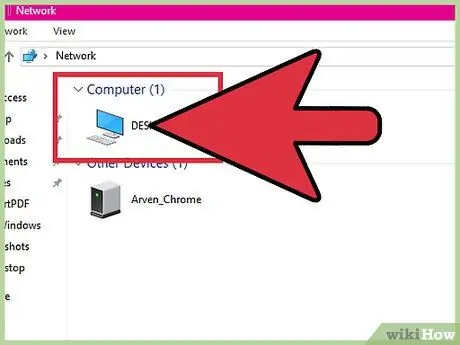
Step 10. Search for your Mac in the list of all computers connected to the network
It is characterized by the name you wrote down in step number 3 of this section.
If you don't find it, click the address bar at the top of the window, then type the command / Mac_name, where the Mac_name parameter represents the name you wrote down in step 3
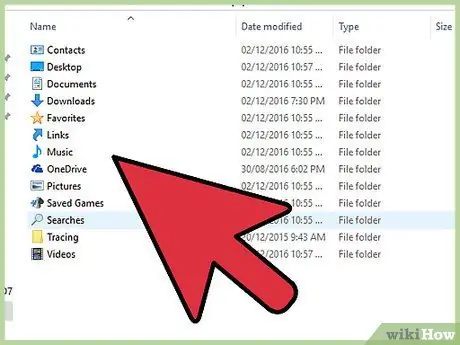
Step 11. Enter the username and password you use to log in to your Mac
After selecting the Mac computer icon, you will be prompted to log in by providing the username and password of a valid account. When done, you will be able to view the folders and files stored on the selected Mac.


