This article shows you how to thoroughly clean an optical mouse. These pointing devices use a laser optical sensor to track movement and detect movement. Cleaning your mouse at least once a month helps prevent (or reduce) problems with buttons and the motion detection system.
Steps

Step 1. Get all the tools you need for cleaning
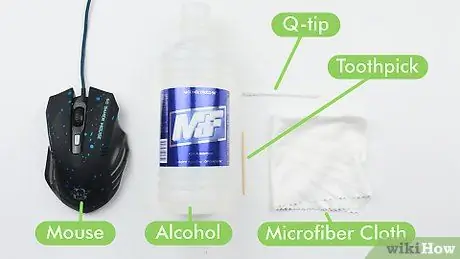
To clean an optical mouse you will need to procure the following items:
- Cotton swab or microfiber cloth - to remove dirt residue from the mouse. If possible, it is preferable to use a microfibre cloth as it does not leave fabric residues as it can happen using cotton swabs;
- Isopropyl alcohol - to thoroughly clean and sanitize surfaces. Do not use a different type of alcohol or cleaning product (for example Vetril). If you don't have isopropyl alcohol handy, use plain water;
- Clean and dry cloth - to remove dust and dry surfaces;
- Toothpick - to remove dirt and dust from the small cracks along the external structure of the mouse;
- Screwdriver - to remove the top cover of the mouse. Consult the user manual of your pointing device or search online using the make and model to get detailed instructions on how to disassemble the various parts that compose it;
- Tweezers - it is an optional tool, but it can be very useful to be able to easily remove any fragments or residues from very delicate parts of the device (for example the printed circuit of the mouse).
Step 2. Disconnect the mouse from the computer
This way you will avoid receiving an electric shock if you accidentally touch one of the electronic components of the mouse. Furthermore, you will avoid triggering a short circuit in the event that liquid should come into contact with the electronic parts inside the device.
If your mouse is powered by an internal battery, remove it from its bay before cleaning the device
Step 3. Clean the entire exterior of the mouse using a clean, dry cloth
This first step is to remove the most noticeable accumulations of dust and dirt from the outside of the device. If the mouse is exceptionally dirty, you can moisten the cloth with a little water.
Step 4. Slide the tip of a toothpick along all the slots on the mouse case
This will eliminate all residual dirt that could cause problems with the normal operation of the device.
For example, slide the tip of the toothpick into the gap underneath the buttons to get rid of any dirt that might prevent you from properly pressing them all the way down

Step 5. Flip the mouse upside down
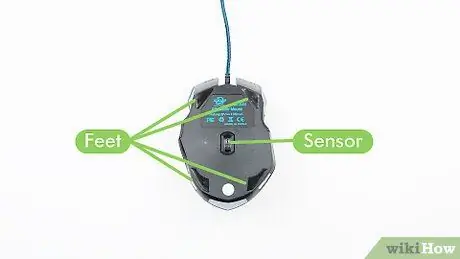
You should be able to see the following elements:
- Feet - they are thin rubber layers of a round (or more complex) shape placed at the four corners of the underside of the mouse;
- Sensor - it is characterized by a small hole protected by a glass or a transparent plastic layer from which a red or green light comes out when the mouse is in operation.
Step 6. Remove any residue present
Use a toothpick to remove any residue stuck to the feet or the rest of the frame from the underside of the mouse.
Step 7. Soak a cotton swab or a piece of cloth in some isopropyl alcohol
You will use it to clean and disinfect any still dirty parts of the mouse.
Step 8. Wipe any excess alcohol from the cotton swab or cloth
Your cleaning tool should be slightly damp, but not soggy.
Step 9. Clean any areas with debris or dirt
Here is the list of all the spots you will need to clean:
- The mouse pins;
- The sides of the device;
- All the crevices you have already cleaned with the toothpick.
Step 10. Dampen a cotton swab or the edge of a clean cloth with alcohol
It is extremely important to use a clean tool when you start cleaning a new area of the device.
Step 11. Gently clean the mouse sensor
Do not clean the sensor of the device by hitting it repeatedly with the tip of the cotton swab, just slide it on the glass or plastic protection. This will remove any residue of dirt that could interfere with the proper functioning of the mouse tracking system.

Step 12. Let the alcohol evaporate
Isopropyl alcohol shouldn't take more than a couple of minutes to evaporate and dry completely without leaving any residue. If this is not the case or if you are short on time, you can use a cotton swab or microfiber cloth to wipe off the excess.
Step 13. Remove the top cover of the mouse
The procedure to follow varies depending on the make and model of the device. In some cases you simply need to pull the top of the mouse housing to separate it from the rest of the device, in others you need to remove the mounting screws first. Consult your mouse's instruction manual or search online using make and model to find out how to disassemble it.
Step 14. Dip a cotton swab or clean cloth in some rubbing alcohol, then use it to clean the inside of the buttons
Inside the top cover of the device, residues of skin, food, dust and dirt can easily accumulate which could negatively interact with the proper functioning of the buttons. Thoroughly clean this area to remove as much dirt as possible.
Step 15. Remove any foreign bodies or debris from inside the mouse
You will most likely find small debris, hair and other dirt in the vicinity of the following components:
- The central mouse wheel;
- The top side of the printed circuit board (in this case it uses tweezers);
- The front of the mouse frame, next to the buttons.

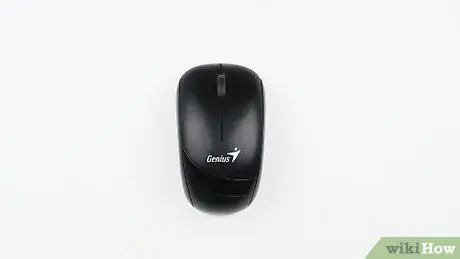
Step 16. As soon as all parts of the mouse you cleaned are perfectly dry, reassemble the device
When five or ten minutes have passed from the end of the internal cleaning phase of the device, you can reassemble it and carry out a final check. At this point it should be perfectly clean.
Step 17. Clean the mouse pad
It doesn't matter how meticulously you cleaned your mouse, if the pad you usually use is dirty. In this scenario the device will not be able to perform precise and quick movements. You can use a wet rag or sticky fabric brush to clean the mouse pad and remove any dirt that has built up.
If you have chosen to use an adhesive fabric brush, you will need to remove any sticky residue from the mat after cleaning to prevent more dirt from building up quickly
Advice
- If you have an inexpensive optical mouse with button or motion tracking problems, consider buying a new one.
- If you normally use a high-end optical mouse (for example a Razer), it might be better to take it to a specialized repair center rather than try to take it apart and repair it yourself. These mice are much more intricately designed and built than standard mice, so it's much more difficult to disassemble and reassemble them properly.


