This article explains how to fix a malfunctioning USB stick. If it's a software or device driver problem, you can fix it using tools built into your computer's operating system. If the cause of the problem is due to improper formatting of the device or corrupt files, you can fix the situation by formatting the drive. In this case, remember that when you format a memory device all the data inside is permanently deleted. If the problem was caused by physical damage, you should go to a specialized repair service or a company experienced in recovering data from digital storage devices. If this is not possible, you can try to fix the problem yourself by connecting a USB data cable to the PCB connectors on the stick using a soldering iron. It should be noted that trying to repair this type of device yourself is not recommended given the high risk of making the device unusable.
Steps
Method 1 of 3: Analyze and Repair the Device
Windows
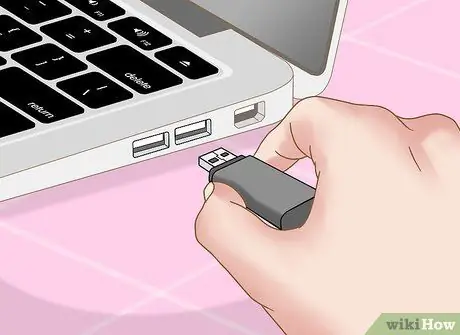
Step 1. Plug the USB stick into your computer
Plug it into one of the free USB ports on your PC. If errors have been found inside the device or if you are unable to view its contents, you can try to solve the problem by updating the USB drivers through the tools provided by the operating system.
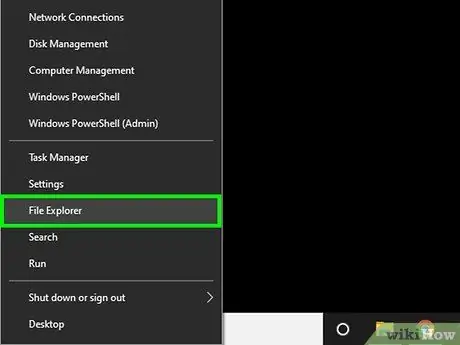
Step 2. Press the ⊞ Win + E button combination to open the "File Explorer" dialog
This is the Windows file manager. You can use this system window to access the contents of the stick and examine it.
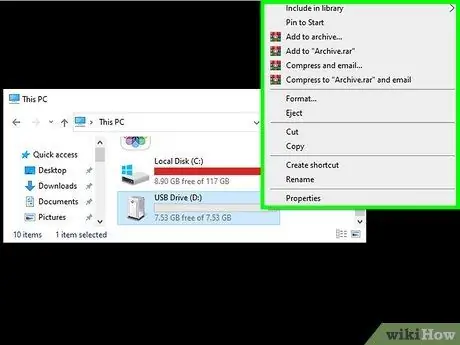
Step 3. Click the USB device icon with the right mouse button
A context menu will be displayed.
To locate the dongle icon, you may need to first click on the symbol > placed next to the item This PC.
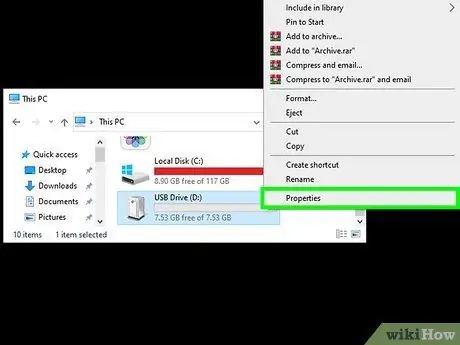
Step 4. Click on the Properties item
It is visible in the lower part of the menu that appeared after clicking on the key icon with the right mouse button.
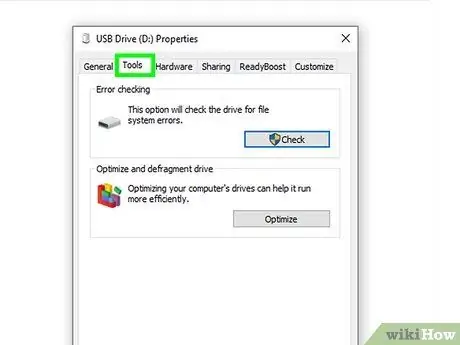
Step 5. Click on the Tools tab
It is located at the top of the "Properties" window.
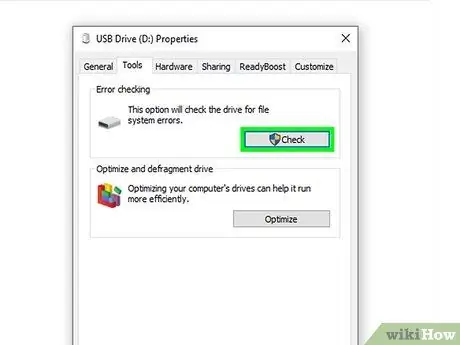
Step 6. Click the Check button
It is visible in the "Error Checking" section of the "Tools" tab.
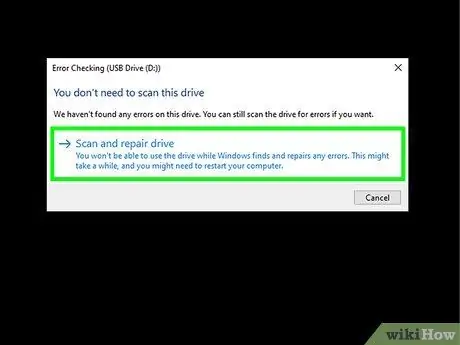
Step 7. Wait for the Windows operating system to scan and repair the contents of the drive
Your intervention may be required during the repair process. In this case, simply follow the instructions that will appear on the screen.
For example, you may need to confirm your willingness to repair the USB drive by clicking on the button Analyze and correct.
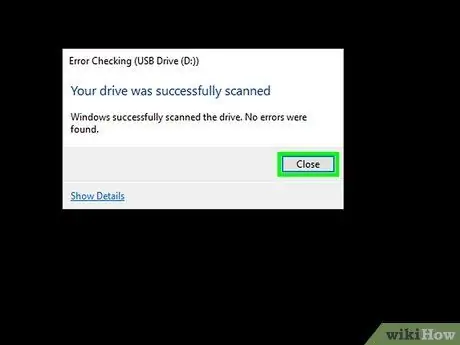
Step 8. Click the Close button when prompted
If it was a software or device driver problem, it should be fixed at this point.
Mac
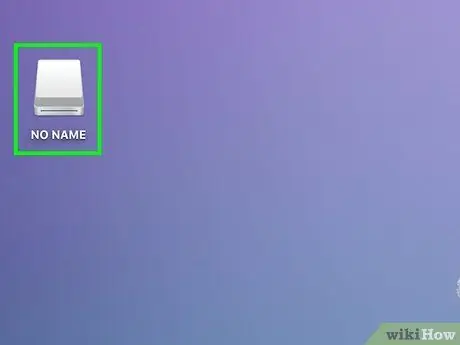
Step 1. Plug the USB stick into your computer
Insert it into one of the free USB ports on your Mac. If errors have been found inside the device or if you are unable to view the contents, you can try to solve the problem by updating the USB drivers using the tools provided by the operating system.
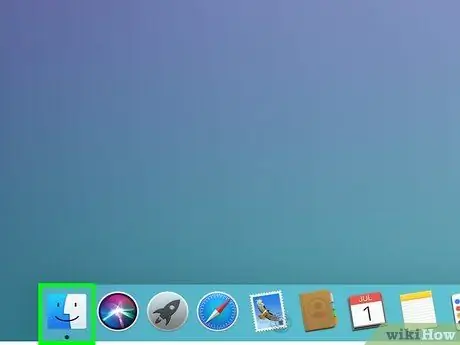
Step 2. Open a Finder window
It features a blue smiley icon. You can find it on the System Dock.
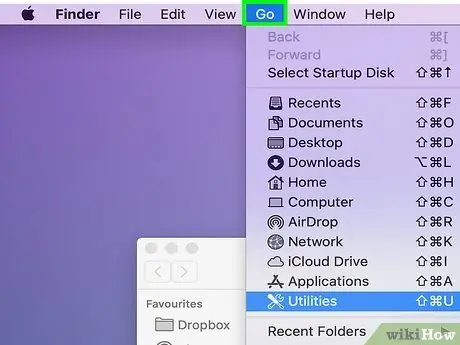
Step 3. Click on the Go menu
It is located in the upper left of the screen.
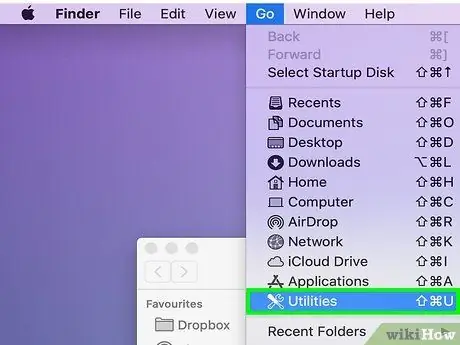
Step 4. Click on the Utility item
It is the folder visible at the bottom of the drop-down menu Go.
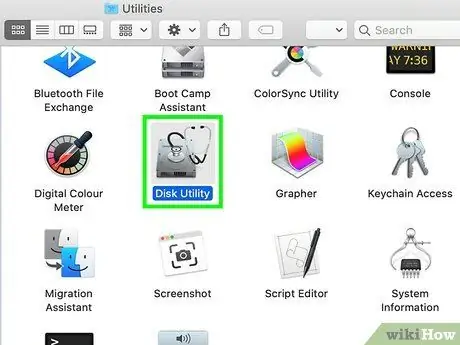
Step 5. Double-click the Disk Utility icon
It features a stethoscope and a stylized hard drive.
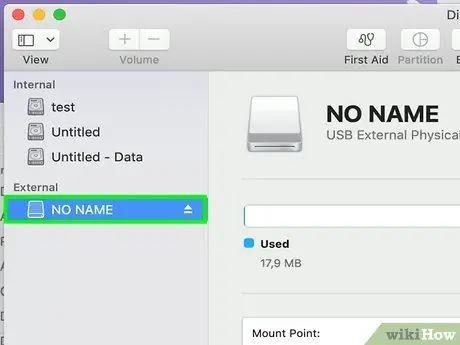
Step 6. Select the USB drive to repair
It is listed within the "External" section of the window.
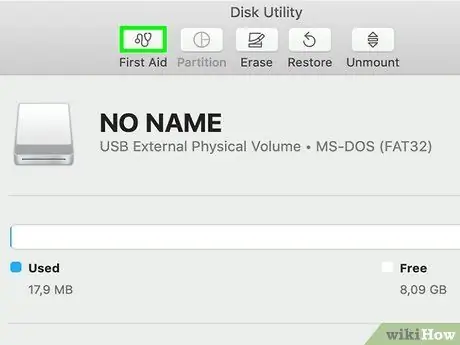
Step 7. Click on the S. O. S
It is displayed at the top of the "Disk Utility" window.
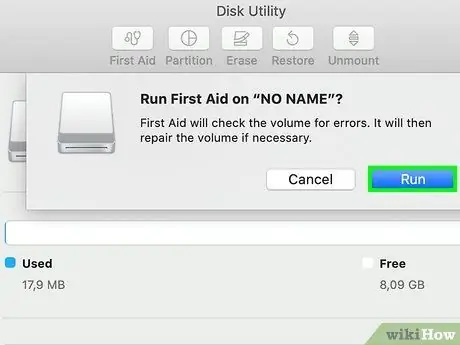
Step 8. Click the Run button when prompted
It is blue in color and is located in the lower right part of the pop-up that appears.
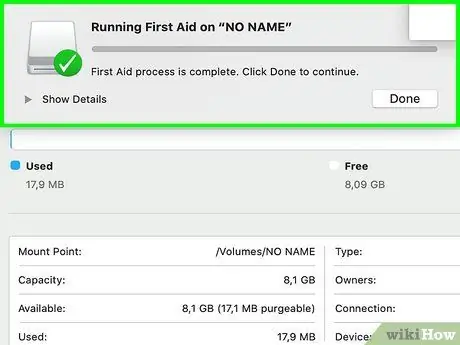
Step 9. Wait for the device analysis to complete
The "Disk Utility" program will correct any software problems found on the USB stick.
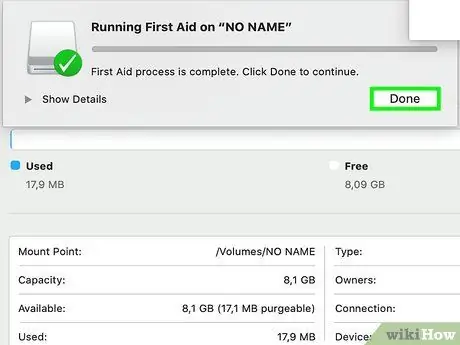
Step 10. Click the Finish button when prompted
If the cause of the problem was software or driver, the USB stick should now work fine.
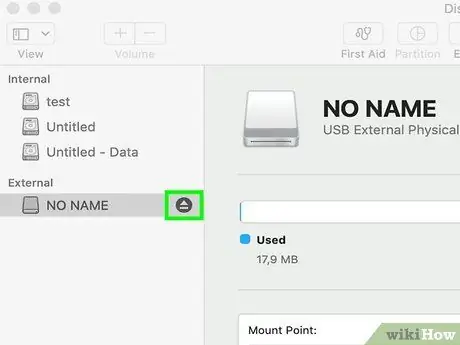
Step 11. Click on the icon
When you are done using the USB stick, always perform the eject procedure of the device before physically disconnecting it from your Mac. This will avoid damaging the device or the data it contains. To eject the USB stick, click on the "Eject" icon next to the device name listed in the Finder window. Alternatively, you can drag the icon of the USB stick, visible on the desktop, onto that of the system trash that you find on the Dock or on the desktop itself.
Method 2 of 3: Format a USB stick
Windows
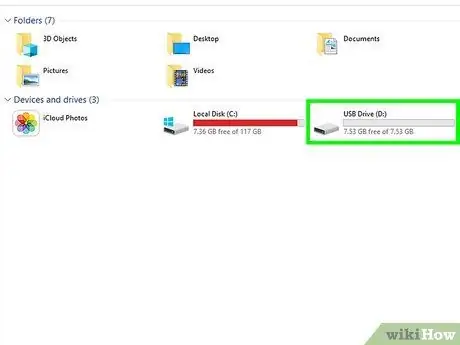
Step 1. Plug the USB stick into your computer
Plug it into one of the free USB ports on your PC.
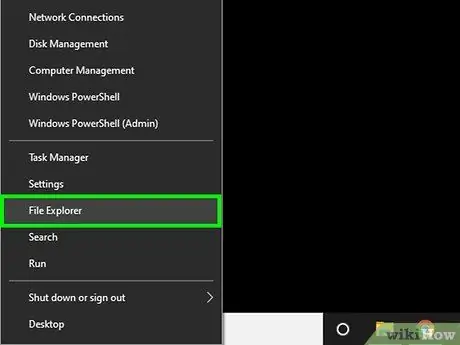
Step 2. Press the ⊞ Win + E button combination to open the "File Explorer" dialog
This is the Windows file manager. You can use this system window to access the contents of the stick and examine it.
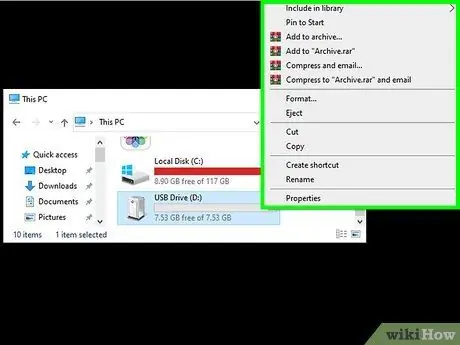
Step 3. Click the USB device icon with the right mouse button
A context menu will be displayed.
To locate the dongle icon, you may need to first click on the symbol > placed next to the item This PC.
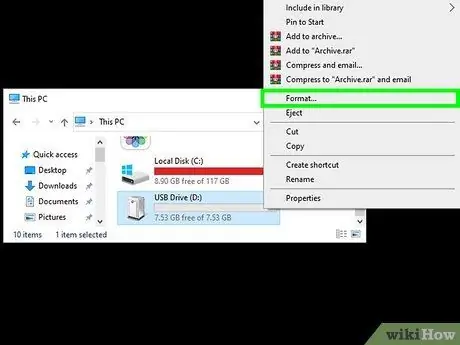
Step 4. Click on Format option
It is one of the items listed in the context menu that appeared. The "Format" system window will appear.
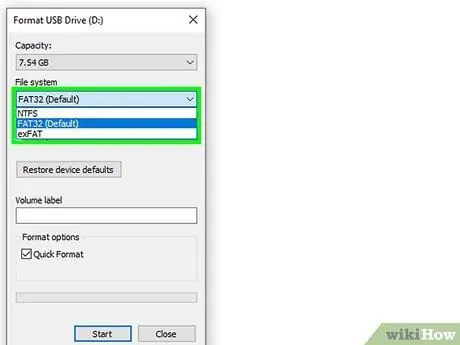
Step 5. Select the type of file system to use for formatting
Click on the "File System" drop-down menu, then select the type of file system to use to format the device. You will have the following options:
- NTFS - this is the default Windows file system and is a format that only works with computers using the Windows operating system;
- FAT32 - it is the file system that guarantees the highest level of compatibility and works on both Windows and Mac computers, but can only manage memory devices with a capacity of less than 32 GB;
- exFAT (recommended) - it is compatible with both Windows and Mac systems and has no limitations on the storage capacity of the device;
- If you have already formatted your device before and are sure it is fully functional, you can select the check button Quick format.
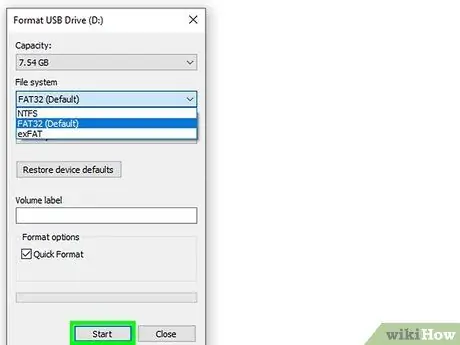
Step 6. Click on the Start button first and then on the button OK.
This will start formatting the USB stick according to the settings you indicated.
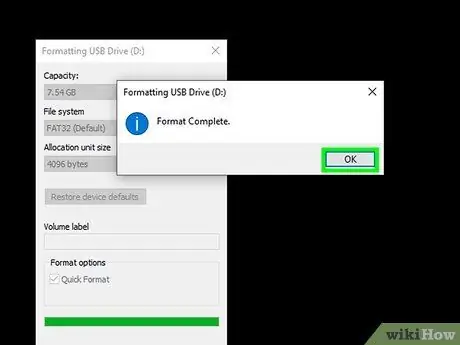
Step 7. Click the OK button when prompted
At this point, the USB stick has been successfully formatted.
Mac
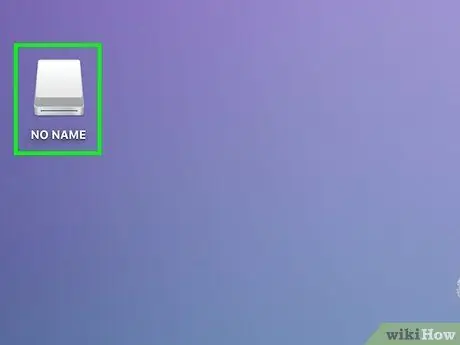
Step 1. Plug the USB stick into your computer
Plug it into one of the free USB ports on your Mac.
Some Macs don't have USB ports, so you'll need to buy an adapter in that case
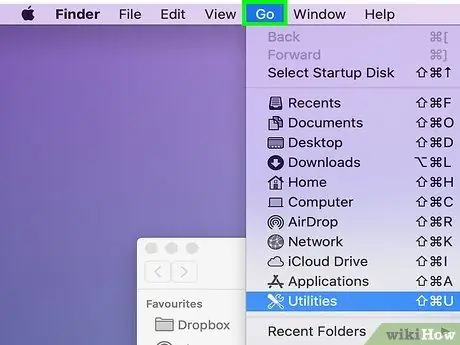
Step 2. Click on the Go menu
It is located in the upper left of the screen.
If the menu Go is not visible, first click on the Finder icon characterized by a blue smiley and visible on the Mac Dock.
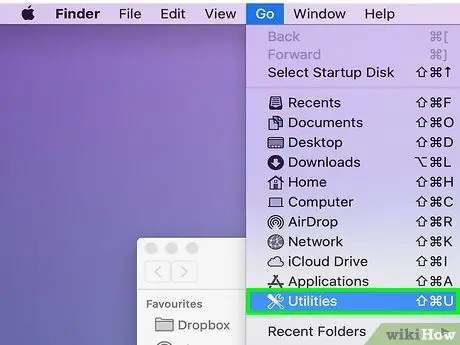
Step 3. Click on the Utility item
It is one of the options in the drop-down menu Go.
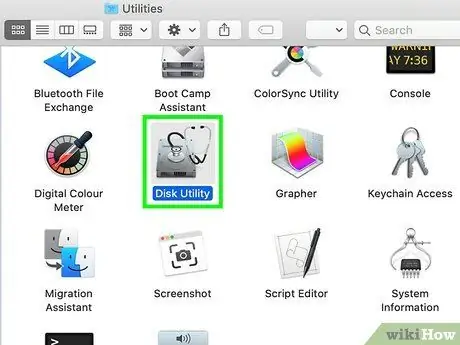
Step 4. Double-click the Disk Utility icon
It features a stethoscope and a stylized hard drive.
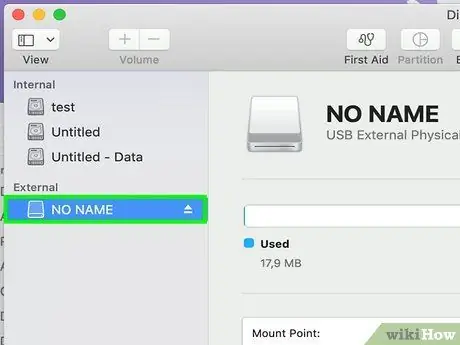
Step 5. Click on the name of the USB drive to be repaired
It is listed within the "External" section visible on the left side of the window.
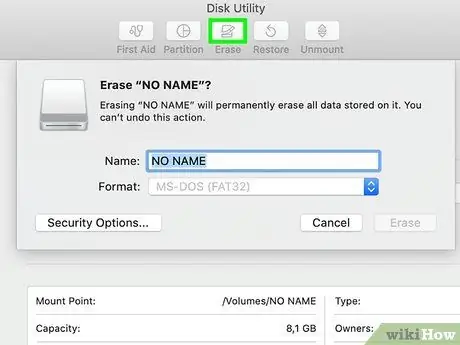
Step 6. Click on the Initialize tab
It is displayed at the top of the "Disk Utility" window.
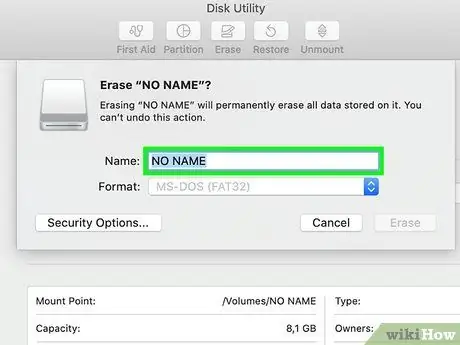
Step 7. Type in the name you want to assign to the device
Enter it in the "Name" text field. Once formatting is complete, the device will be labeled with the name you entered.
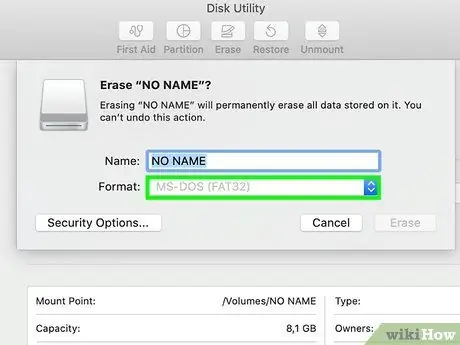
Step 8. Select the type of file system to use for formatting
Click on the "Format" drop-down menu, then select the type of file system to use to format the device. You will have the following options:
- Mac OS Extended (Journaled) - this is the default file system for all Macs and is only compatible with computers manufactured by Apple;
- Mac OS Extended (Journaled, Encoded) - is the encrypted version of the default Mac file system;
- Mac OS Extended (case sensitive, Journaled) - it is the version of the default file system of the Mac that differentiates files with the same name if written with upper or lower case letters (for example, in this case the files "test.txt" and "Test.txt" will be handled as two elements distinct);
- Mac OS Extended (case sensitive, Journaled, Encoded) - it is a file system that combines all the peculiarities of the three previous versions;
- MS-DOS (FAT) - it is compatible with both Windows and Mac systems, but can only manage devices with a memory capacity of less than 4 GB;
- exFAT (recommended) - it is compatible with both Windows and Mac systems and has no limitations on the storage capacity of the device.
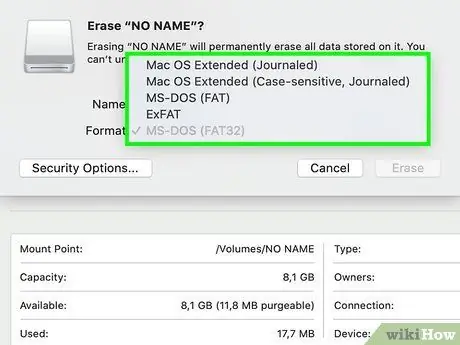
Step 9. Click on the type of file system you want to use to format the USB stick
Click on the item MS-DOS (FAT) or ExFat to ensure maximum compatibility.
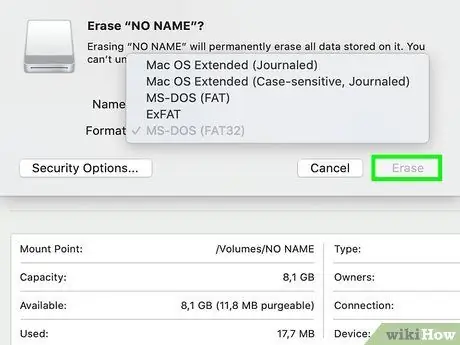
Step 10. Click on the Initialize buttons successively And Initialize when prompted.
This will start the formatting procedure. When the format process is complete, you will see the USB stick icon appear on the Mac desktop.
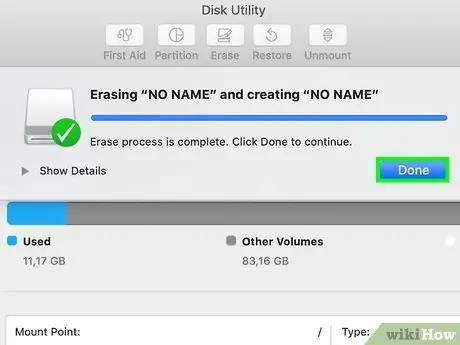
Step 11. Click the Finish button
When formatting the USB drive is complete, click the button end to continue.
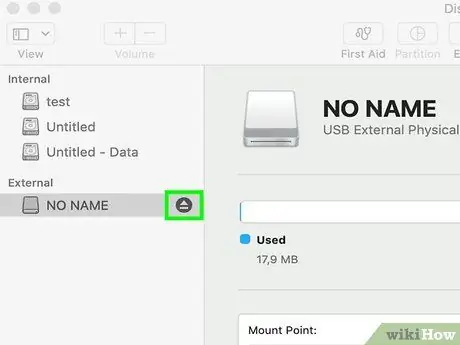
Step 12. Click on the icon
When you are finished using the USB stick, always perform the eject procedure of the device before physically disconnecting it from your Mac. This will avoid damaging the device or the data it contains. To eject the USB stick, click on the "Eject" icon next to the device name listed in the Finder window. Alternatively, you can drag the USB stick icon, visible on the desktop, onto the system recycle bin icon found on the Dock or on the desktop itself.
Method 3 of 3: Repair Physical Damage
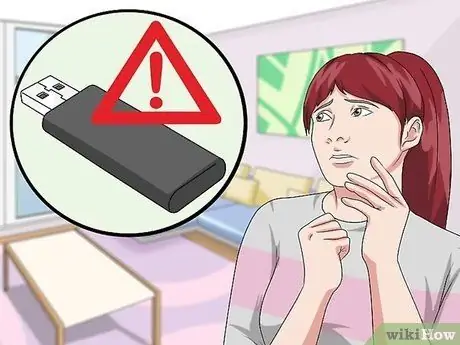
Step 1. Know that this type of repair will most likely not be successful
Unless you have experience in this type of technical intervention, you should not try to physically repair a USB stick by directly intervening on the hardware components of the device.
- If the problem is related to the internal memory of the device, the only option you have is to contact a specialized repair service
- The price to recover data from a damaged memory device ranges from € 20 to € 850, depending on the severity of the problem and the type of procedure to be taken.
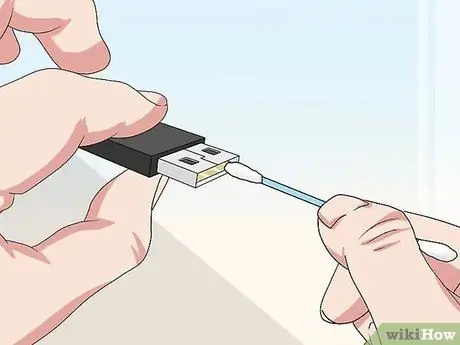
Step 2. Look at the USB flash drive connector for dirt or foreign objects
The device may not be able to communicate with the computer due to an obstruction that could be removed quickly and easily. If there is a foreign object or dirt inside the USB connector of the stick, remove it using a toothpick or a cotton swab.
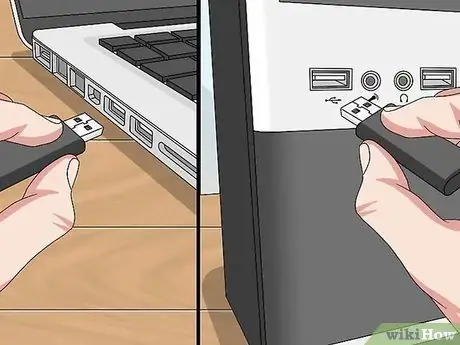
Step 3. Try connecting the USB stick to another computer or to another port
The cause of the problem could be the USB port on the computer not working properly, rather than the dongle itself.
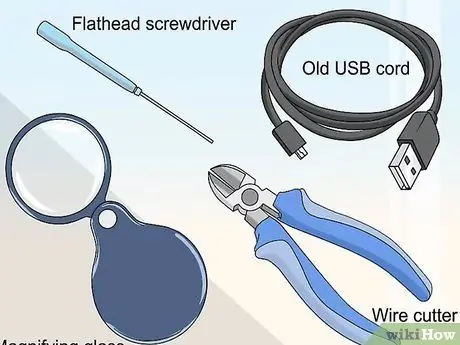
Step 4. Get the tools you need to repair a broken connector
If you've decided to take action and run the risk of losing data stored on your device, get the following tools:
- An electric soldering iron and tin wire;
- An old USB cable;
- A stripping pliers;
- A small flat screwdriver;
- A jeweler's loupe or magnifying glasses.
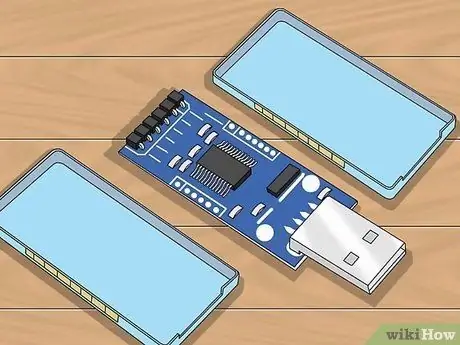
Step 5. Remove the outer cover of the USB stick
Use the flat head screwdriver.
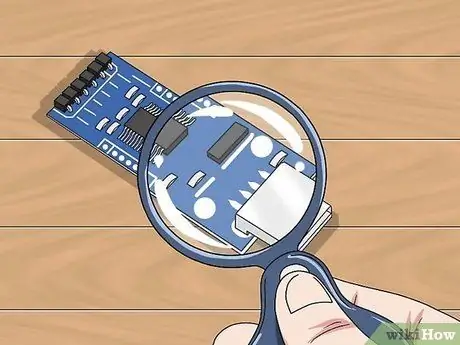
Step 6. Use the magnifying glass to examine the USB stick printed circuit board and solders
If the green PCB on the key is damaged or if you notice any broken or raised solder, it is very likely that you will need to go to a specialized repair service.
The solders that you need to carefully examine are those relating to the 4 terminals of the USB connector that are in direct contact with the copper tracks of the printed circuit. If the USB connector has any damage or breaks that did not affect the printed circuit board or soldering, continue reading
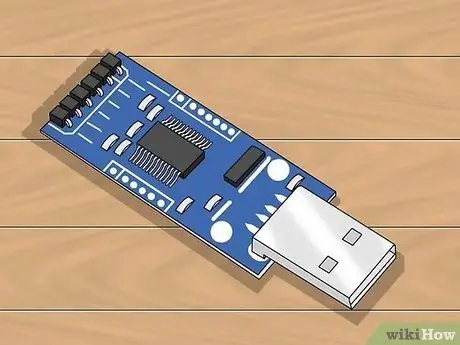
Step 7. Place the USB stick on a stable and compact work surface
Place the flash drive with the USB connector facing you and the side with the soldered terminals facing up.
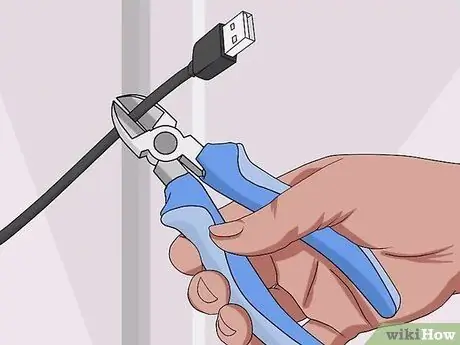
Step 8. Use scissors or wire stripping pliers to cut the connector of an old USB cable
If you have chosen to use a cable that acts as an adapter, be sure to cut the end where the standard USB connector is.
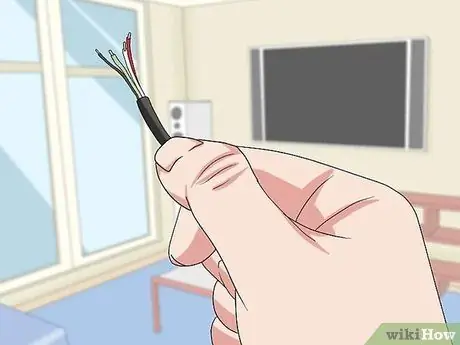
Step 9. Remove the protective sheath from the piece of cable connected to the USB connector to expose the internal wires
You need to expose about 1cm of each of the 4 electrical wires inside the USB cable.
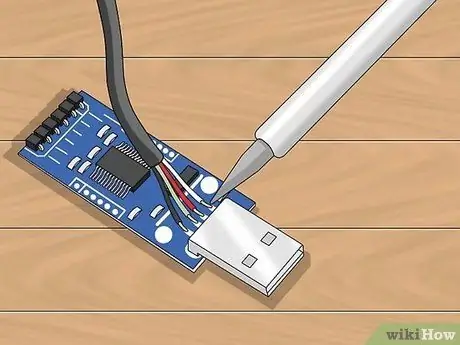
Step 10. Solder the four wires to the corresponding terminals on the printed circuit board of the USB stick
Take your time to perform this step, as if you fail to weld it is very likely that the device will no longer be usable.
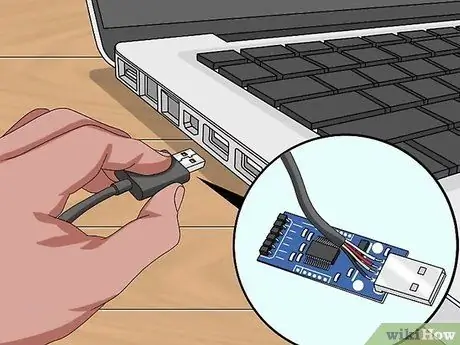
Step 11. Connect the USB cable you soldered to the stick to a free USB port on your computer
You can use any of the free ports on the computer case.
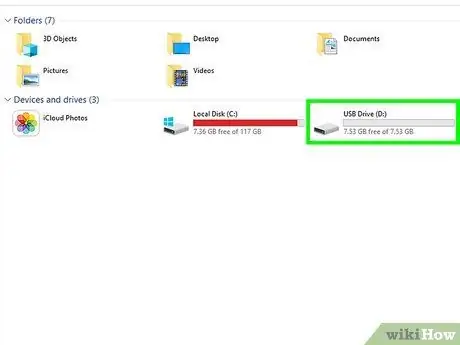
Step 12. Try to access the USB drive
If your device is successfully detected by your computer, you will be able to access the files it contains and move them to your computer's hard drive. Follow these instructions:
- Windows - access the menu Start, click on the icon File Explorer, then click the USB drive icon.
- Mac - open a window of Finder and click on the USB key icon.
- In case the USB drive is not detected by the computer, try to go to a specialized repair service to find out if the personnel can recover the data it contains.
Advice
- If you have chosen to rely on a company that offers a data recovery service from digital storage media, be sure to describe your problem to the staff clearly and in detail to make sure they have the tools and knowledge to do the job successfully..
- USB sticks are cheap nowadays and available in many models. If the data on the device is not important, consider simply buying a new key.
- If the USB stick you want to repair contains important data you want to recover, don't format the device.
Warnings
- Always back up any files and data that you consider important.
- Remember that formatting the memory drive deletes all the data it contains permanently.
- If the files on the USB stick are extremely important, don't let anyone who thinks they know how to use a soldering iron convince you that they can fix it. If you think the device is physically damaged, only rely on a professional and reliable repair service.
- Before physically disconnecting any USB drive from your computer, you must perform the Safely Remove Hardware procedure to avoid data loss or damage to the device.


