If you have a USB stick that is protected against data overwriting, you won't be able to edit or format the files on it. In this case, you can remove this type of protection from a USB stick in several ways. However, it is also possible that the USB device has malfunctioned or has been protected using third party software. This article explains how to remove the data overwrite protection of a USB stick using a Windows PC or Mac.
Steps
Method 1 of 6: Using Diskpart (Windows)
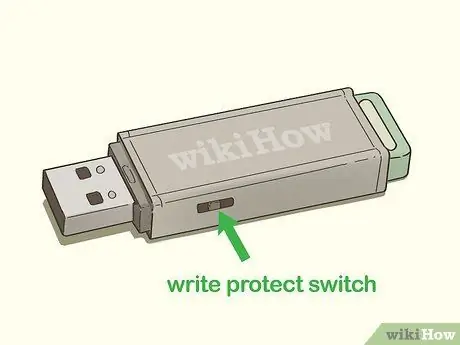
Step 1. Disable the appropriate physical switch on the USB stick
If your storage device has a switch for enabling and disabling the data overwrite protection, it may be in the wrong position (i.e. the position that prevents the data on the key from being changed). Before continuing to read this article, try to use this switch if present.
In some cases, the USB key may have been protected using special software to prevent the content from being modified without authorization. If this is the case for you, you may not be able to remove the write protection from your USB stick. To solve the problem, you will need to use the same program that was used to activate the protection

Step 2. Insert the key into a free USB port
You can use any free USB port on your PC.

Step 3. Click on the "Start" button
with the right mouse button.
By default it is located in the lower left corner of the screen. A context menu will be displayed.
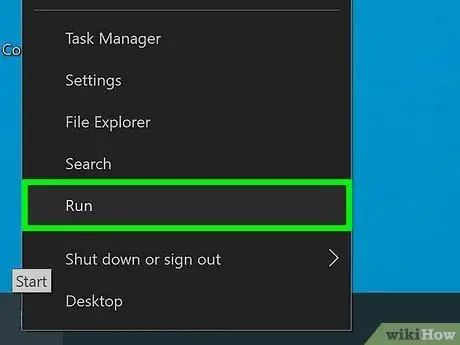
Step 4. Click on the Run item
It is listed at the bottom of the context menu of the Windows "Start" button. The "Run" dialog will be displayed.
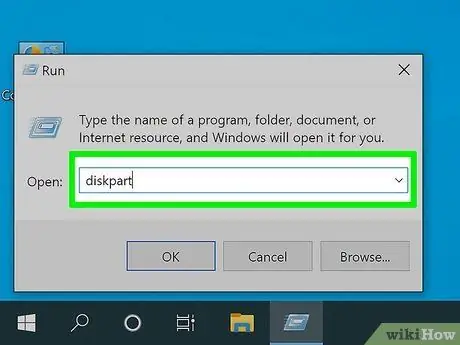
Step 5. Type the diskpart command in the "Open" field of the "Run" window, then press the Enter key
In this way the Diskpart program will be started within the "Command Prompt".
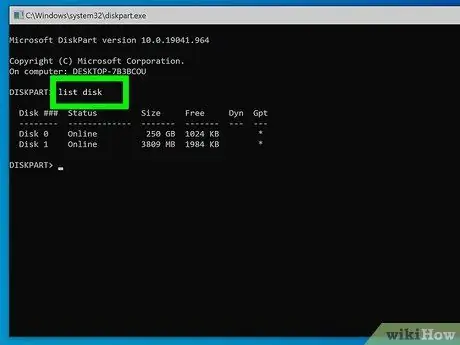
Step 6. Type the command list disk and press the Enter key
A list of all memory devices connected to the computer will be displayed, including the USB stick under consideration. Each device or volume will be labeled "Disk (number)". Each disc will be identified with a unique number.
You should be able to identify the USB stick under consideration by looking at the "Size" column which indicates the total storage capacity. For example, if the USB device has a capacity of 32 GB, the "Size" column should show "32 Gbytes" or a very similar number
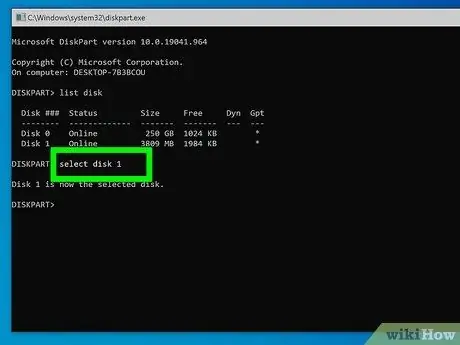
Step 7. Type the command select disk [number] and press the Enter key
Replace the parameter [number] with the identification number of the USB key (for example "select disk 3"). In this way the USB stick will be selected by the Diskpart program.
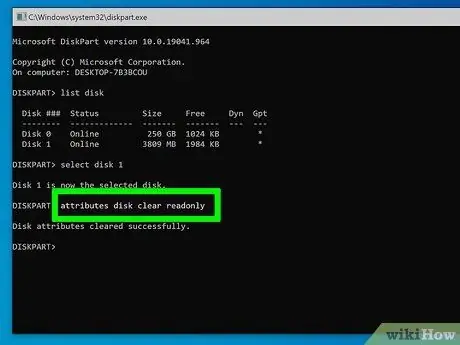
Step 8. Type the command attributes disk clear readonly and press the Enter key
This way the data overwrite protection should be removed from the USB stick.
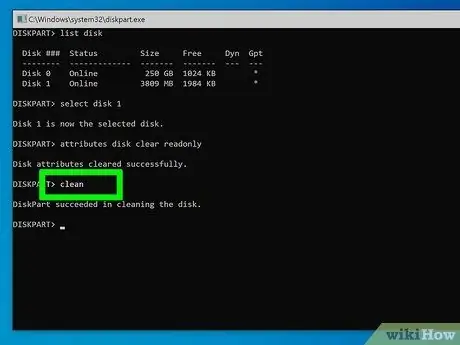
Step 9. Type the clean command and press the Enter key
In this way all the data on the USB stick should be deleted. Once this is done you should be able to set up the device for use.
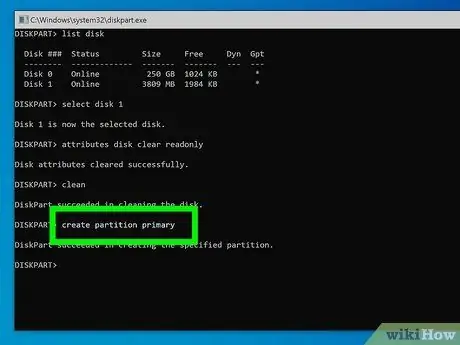
Step 10. Type the create partition primary command and press the Enter key
This will create a new primary partition on the USB stick.
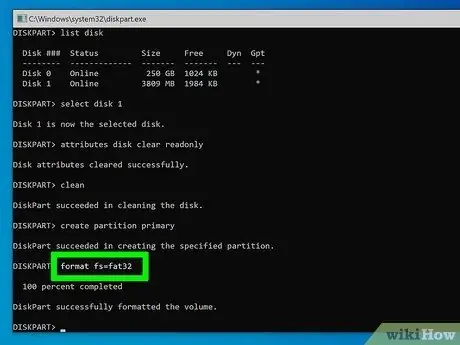
Step 11. Type the command format fs = ntfs, format fs = fat32 or format fs = exFAT and press the Enter key
This will specify the type of file system that will be used to format the storage device.
- Use the "format fs = ntfs" command if you want the USB key to be compatible only with Windows systems;
- Use the "format fs = fat32" command if the memory stick capacity is less than 32 GB and you want to make it compatible with most of the devices on the market;
- Run the command "format fs = exFAT" if the total capacity of the key is greater than 32 GB and you want to make it compatible with most of the devices on the market.
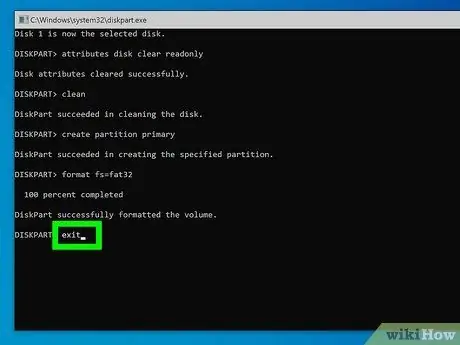
Step 12. Type the command exit and press the Enter key
This will redirect you to the standard "Command Prompt". The USB stick should now be ready for normal use.
Method 2 of 6: Using Third Party Software (Windows)
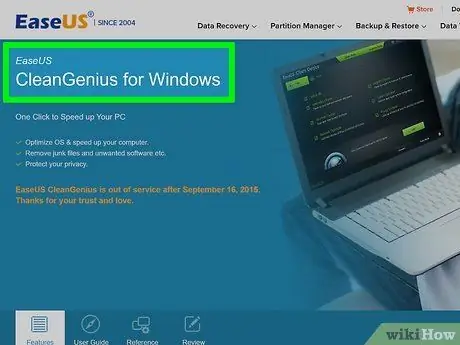
Step 1. Download the CleanGenius program
This is a free application available for Windows. It has a large number of useful tools to optimize your computer, but it also offers a feature that can remove write protection from USB memory devices. Click on the following link to download CleanGenius on your computer:
https://down.easeus.com/product/win_cleangenius_trial
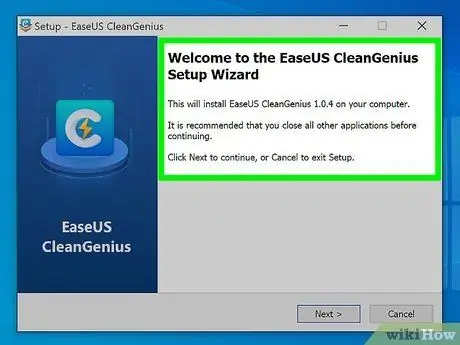
Step 2. Install CleanGenius
After clicking on the previous link, an EXE file will have been stored on your computer. By default, files downloaded from the web are stored in the "Downloads" folder and a reference is also displayed in the internet browser window. Click on the "win_cleangenius_trial.exe" file to open it. At this point, follow the instructions that will appear on the screen to complete the installation.

Step 3. Plug the USB stick into your computer
Plug it into a free USB port on your PC.
If your USB device has a physical switch to enable or disable data write protection, make sure it is disabled before continuing
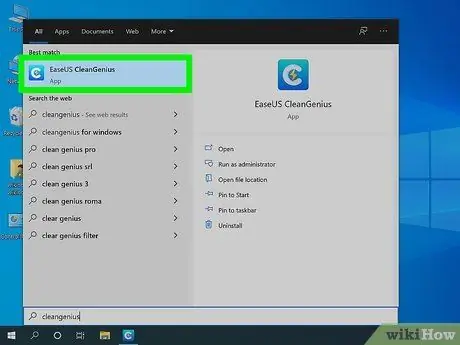
Step 4. Start the CleanGenius program
It features a blue icon containing the letter "C" and a stylized yellow flash. You can find it in the Windows "Start" menu. This will start CleanGenius.
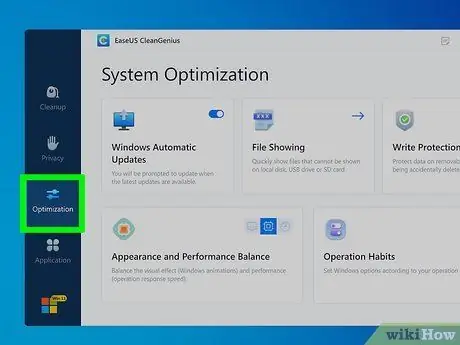
Step 5. Click on the Optimization tab
It is the third option of the menu bar located on the left side of the program window. It is characterized by an icon depicting some cursors.
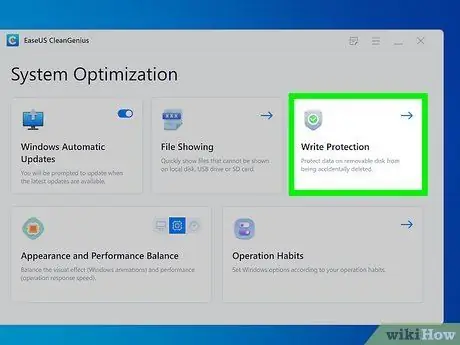
Step 6. Click on Write Protection option
It is the third item listed at the top of the window. It features a stylized shield icon and a green check mark.
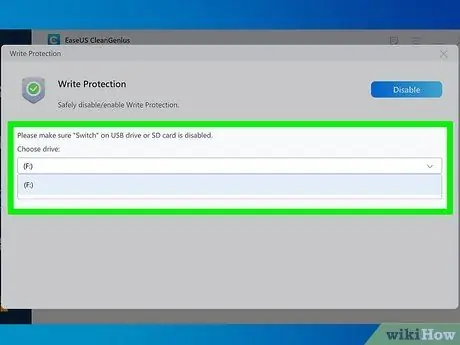
Step 7. Make sure the correct USB stick is selected
Use the drop-down menu in the "Choose drive" section to select the correct device by referring to the associated drive letter.
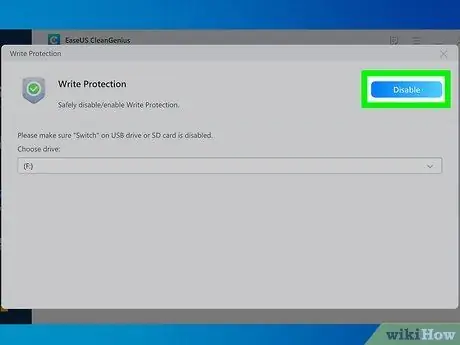
Step 8. Click the Disable button
It is blue in color and located in the upper right corner of the window. This will remove the data overwrite protection from the device.
If this data protection system has been activated using a specific third party program, you may need to use that software to remove the write protection. In this case it will not be possible to solve the problem by using a program other than the one used initially
Method 3 of 6: Use the Windows Registry Editor
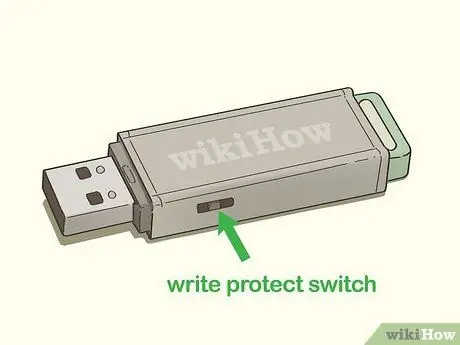
Step 1. Disable the appropriate physical switch on the USB stick
If your storage device has a switch for enabling and disabling the data overwrite protection, it may be in the wrong position (i.e. the position that prevents the data on the key from being changed). Before continuing to read this article, try to use this switch if present.
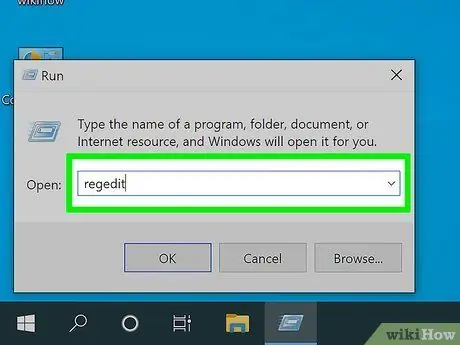
Step 2. Open Windows Registry Editor. Attention:
Making the wrong changes to the Windows registry can cause serious damage to the operating system. The use of this method is recommended for experienced users only. Do not change any registry keys unless you are fully aware of what you are doing. Follow these instructions to open the Windows Registry Editor:
- Press the key combination ⊞ Win + S to access the Windows search function;
- Type the regedit command in the search bar;
- Click on the icon Registry Editor appeared in the hit list;
- Click on the button Yup to start the program.
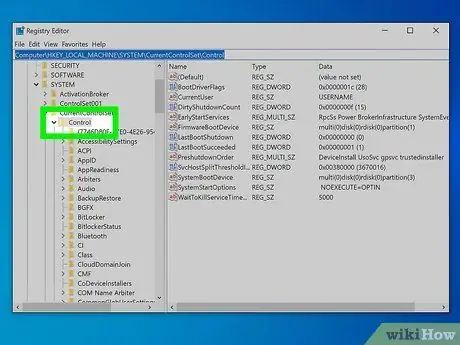
Step 3. Go to the "Control" folder of the registry
Follow these instructions to complete this step. Within the "Control" folder of the Windows registry are several subfolders.
- Click on the folder HKEY_LOCAL_MACHINE;
- Click on the folder SYSTEM;
- Click on the folder CurrentControlSet;
- Click on the folder Control.
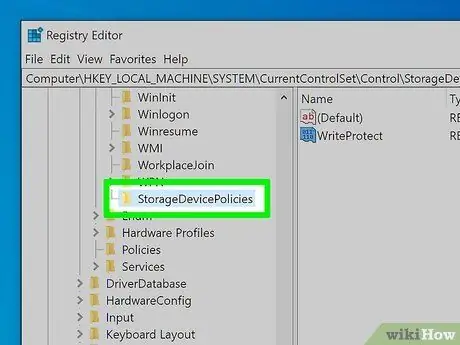
Step 4. Click on the StorageDevicePolicies folder (if it exists)
If the indicated subfolder is in the list of folders contained in the "Control" directory visible in the left pane of the Registry Editor, double-click the corresponding icon to view its contents in the right pane of the window. If the subfolder under consideration does not exist, follow these instructions to create it:
- Click on an empty spot in the right window pane with the right mouse button. A context menu will be displayed;
- Select the item New one, then choose the option Key from the secondary menu that will appear;
- Type the name StorageDevicePolicies, then click on an empty spot on the right panel to save the new key just created;
- Click on the folder StorageDevicePolicies appeared in the left panel of the window to select it;
- Click on an empty spot in the right pane of the window with the right mouse button, choose the item New one, then click the option DWORD value;
- Type the name WriteProtect and click on any empty point to complete the creation of the new DWORD value inside the "StorageDevicePolicies" folder.
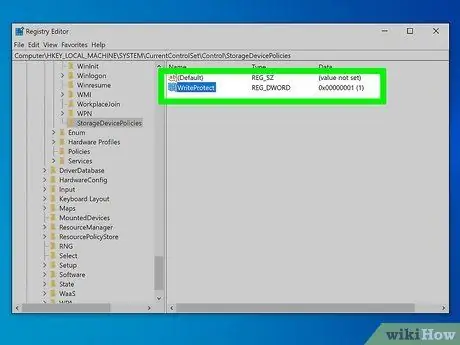
Step 5. Double click on the WriteProtect value visible in the right pane of the window
A new dialog will appear.
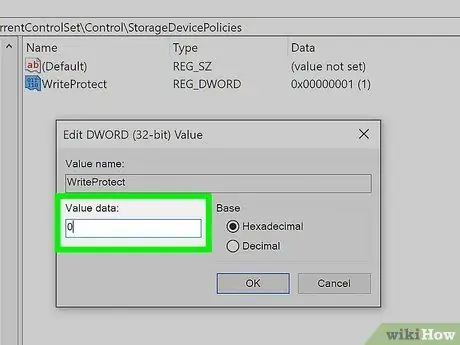
Step 6. Enter the value "0" into the "Value Data" field, then click the OK button
In this case you will have to enter the number zero by omitting the quotes.
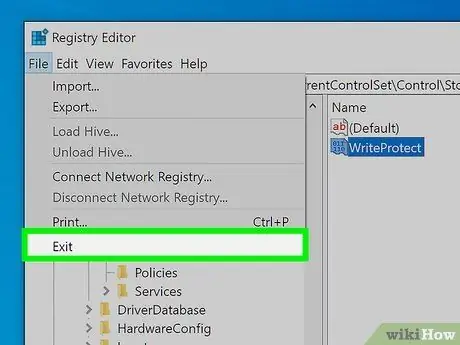
Step 7. You can now close Registry Editor and restart your PC
Changes made to the Windows registry always require a restart of the computer to take effect.
Method 4 of 6: Format a USB Memory Drive Using Third Party Software (Windows)
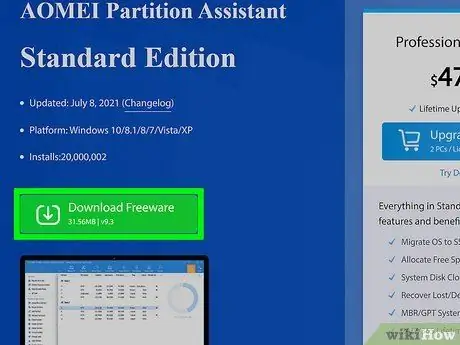
Step 1. Download and install AOMEI Partition Manager program
AOMEI Partition Manager Standard Edition is a free program available for Windows that allows you to format USB memory devices. In some cases it is also capable of formatting USB devices with data overwrite protection enabled. Follow these instructions to download and install AOMEI Partition Manager:
- Visit the URL https://www.diskpart.com/download-home.html using an internet browser;
- Click on the green button Freeware Download;
- Click on the file PAssist_Std.exe which you will find in the "Download" folder or directly in the browser window;
- Follow the instructions that will appear on the screen to complete the installation of the program.

Step 2. Plug the USB stick into your computer
Plug it into a free USB port on your computer.
If your USB device has a physical switch to enable or disable data write protection, make sure it is disabled before continuing
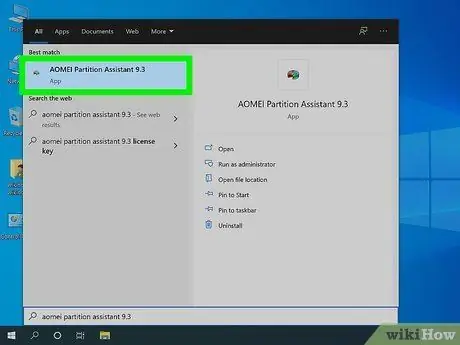
Step 3. Launch AOMEI Partition Manager program
It features a blue, red, and green pie chart icon with a green check mark in the center.
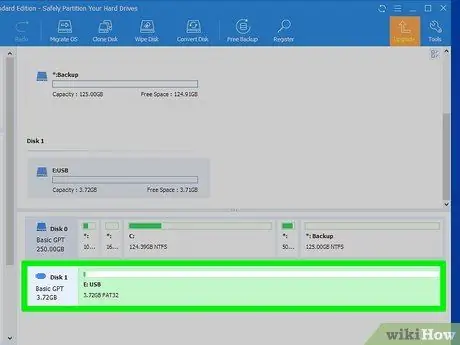
Step 4. Click on the section dedicated to the USB key with the right mouse button
It should be visible at the bottom of the list of all memory drives on your computer. The name of the USB device and the memory capacity are displayed in this section. A contextual menu will appear on the screen.
- Be careful not to select the wrong device. Check the name and overall memory capacity carefully to make sure you choose the USB stick you actually want to format.
- Also make sure that you have backed up any data on the device you want to keep.
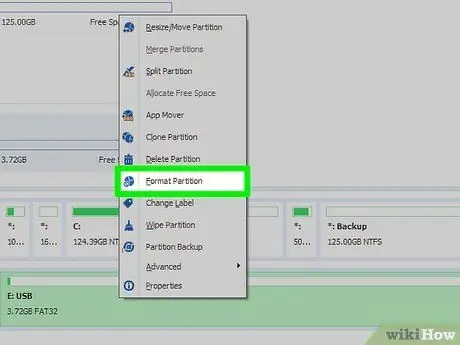
Step 5. Click on Format Partition option
A new dialog will appear that you can use to format the USB stick.
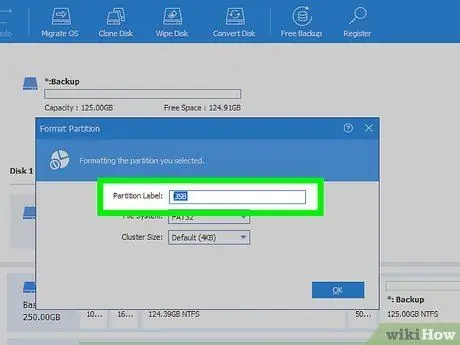
Step 6. Name the device
Type the name you want to assign to the USB stick in the "Partition Label" text field. It will be the name with which the device will be identified after formatting.
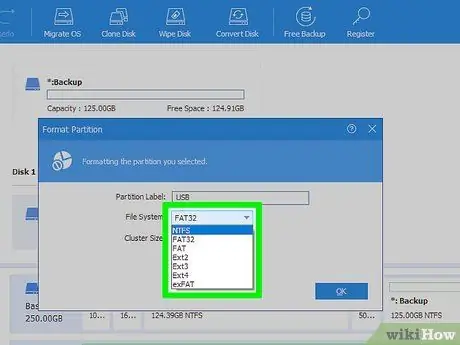
Step 7. Choose the file system
Use the "File system" drop-down menu to select the file system to use for formatting the USB stick. You can choose one of the following options:
- NTFS is the default Windows file system and is compatible only with relevant versions of the operating system. Memory drives formatted with the NTFS file system are not compatible with other devices.
- FAT32 it is one of the universal file systems and is compatible with most devices. However, it can only be used in case the maximum capacity of the memory unit is less than 32GB.
- exFAT it is the modern version of the "FAT32" file system and is compatible with many devices, except for older and obsolete ones. This file system can also handle memory units with a maximum capacity greater than 32GB.
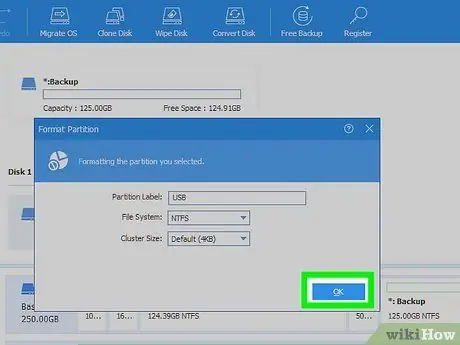
Step 8. Click the OK button
It is blue in color and is visible in the dialog box that appears. This way all changes will be stored.
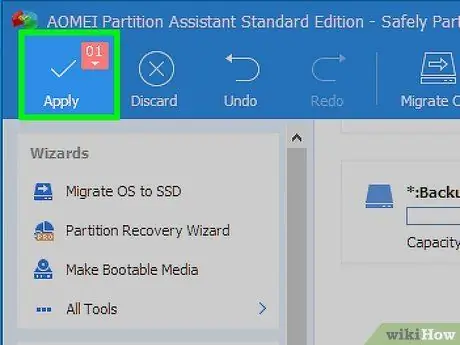
Step 9. Click the Apply button
It features a check mark icon and is located in the upper left corner of the window. This will bring up a preview dialog box listing all the changes that will be made to the USB memory drive.
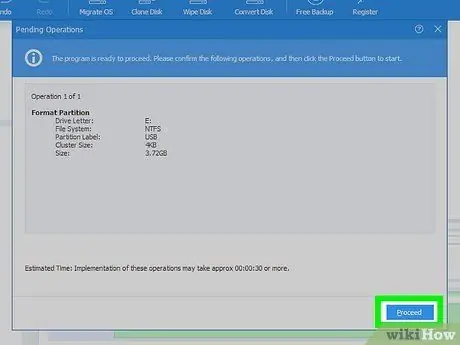
Step 10. Click the Proceed button, then click the option Yes.
The button is located in the lower left corner of the window. At this point click on the button Yes displayed in the dialog box that appeared. This way the USB stick will be formatted according to the settings you have chosen.
In some cases the AOMEI program will format the USB device without removing the write protection. If trying to use the key an error message appears stating that the device is write protected, you will need to try using one of the other methods in the article to try to solve the problem. If data overwrite protection has been applied using specific software, it is very likely that it can only be removed using that program
Method 5 of 6: Format a USB Memory Drive (Windows)

Step 1. Plug the USB stick into your computer
Plug it into a free USB port on your PC.
If your USB device has a physical switch to enable or disable data write protection, make sure it is disabled before continuing

Step 2. Click on the "Start" button
Windows.
It features the Windows logo and is located in the lower right corner of the desktop. This will display a context menu different from the classic "Start" menu.
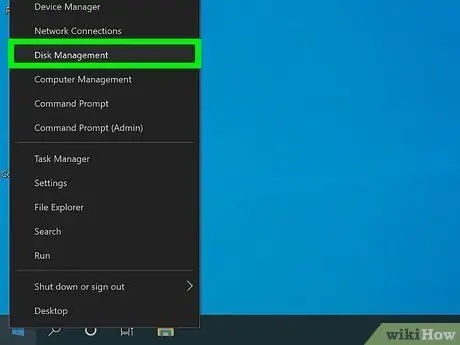
Step 3. Click on the Disk Management option
The "Disk Management" dialog box of the same name will be displayed, listing all the memory units connected to the PC.
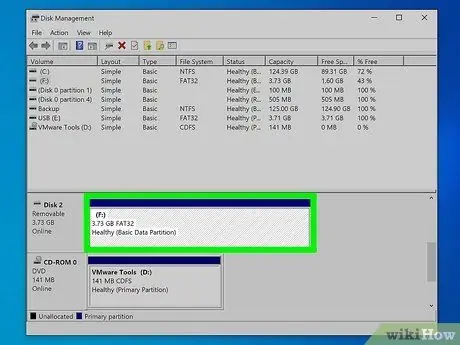
Step 4. Click on the USB stick with the right mouse button
It should be listed in the "Volume:" column of the schema. To make sure you have selected the correct memory drive, refer to the drive letter and total capacity.
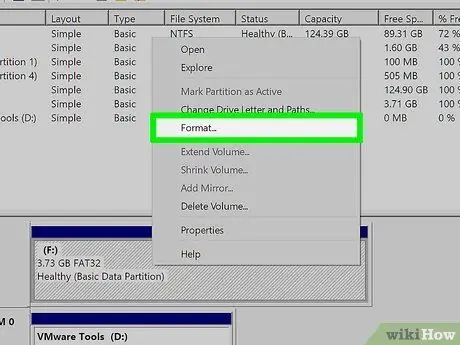
Step 5. Click on the Format option, then click the button Yup.
It is one of the items of the context menu that appeared. You will be asked to confirm your action by clicking on the button Yup visible in a pop-up window that will remind you that formatting any storage device deletes all the data inside it.
Before proceeding with formatting, make sure you have backed up any data you want to keep
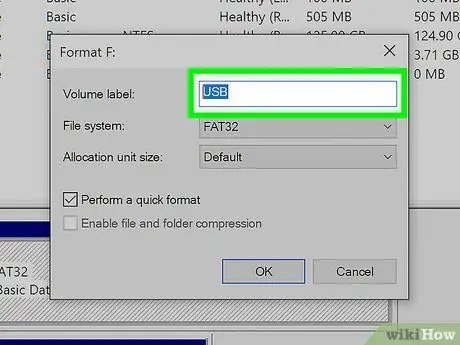
Step 6. Rename the memory drive
This is the name the device will be labeled with when formatting is complete. Type it in the "Volume Label:" text field.
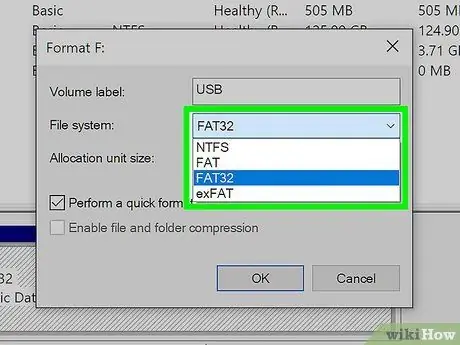
Step 7. Select the file system
Use the "File System" drop-down menu to select the file system you want to use to format the USB stick. You can choose between "exFAT", "FAT32" or "NTFS".
- NTFS is the default Windows file system and is compatible only with relevant versions of the operating system. Memory drives formatted with the NTFS file system are not compatible with other devices.
- FAT32 it is one of the universal file systems and is compatible with most devices. However, it can only be used if the maximum capacity of the memory unit is less than 32GB.
- exFAT it is the modern version of the "FAT32" file system and is compatible with many devices, except for older and obsolete ones. This file system can also handle memory units with a maximum capacity greater than 32GB.
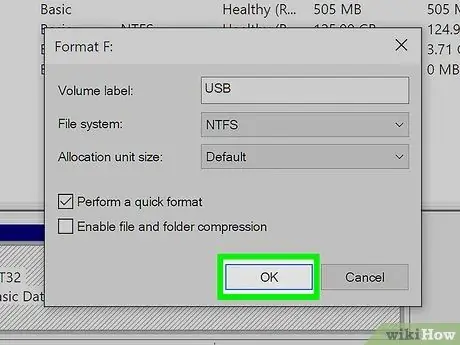
Step 8. Double click the OK button
Clicking on the "OK" button visible in the formatting window will display a warning message concerning the fact that all the data on the USB key will be lost. Clicking the "OK" button again will start the formatting process.
Method 6 of 6: Format a USB Memory Drive (Mac)
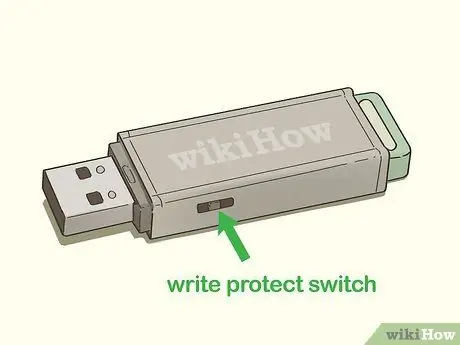
Step 1. Disable the appropriate physical switch on the USB stick
If your storage device has a switch for enabling and disabling the data overwrite protection, it may be in the wrong position (i.e. the position that prevents the data on the key from being changed). Before continuing to read this article, try to use this switch, if present.

Step 2. Insert the USB key to be formatted into a free USB port on the Mac
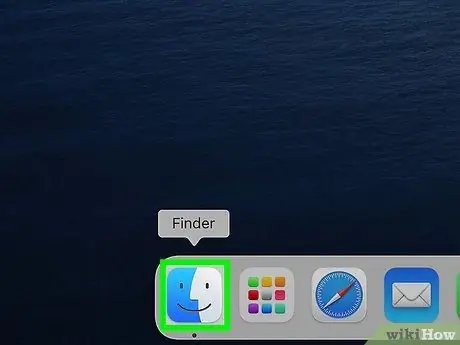
Step 3. Open a Finder window by clicking on the icon
It is the first visible icon on the system dock. The latter is normally docked at the bottom of the screen.
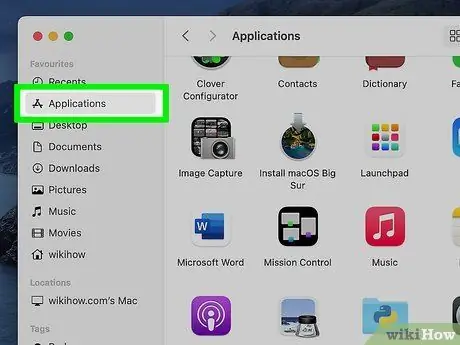
Step 4. Click on the Applications folder
It should be listed in the left pane of the "Finder" window. A series of icons will appear in the right pane of the window.
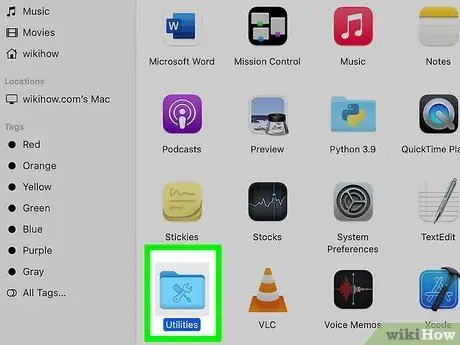
Step 5. Double-click the Utility icon
It is one of the options displayed in the right pane of the "Finder" window.
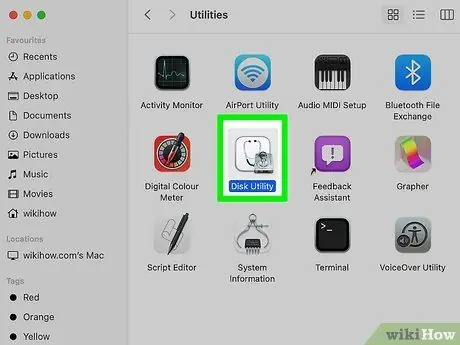
Step 6. Double-click the Disk Utility icon
It features a stylized hard drive and stethoscope. A new dialog will appear that you can use to format the memory drives.
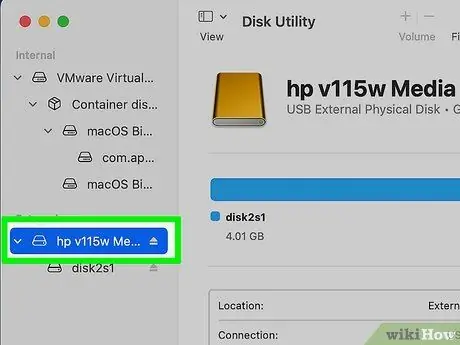
Step 7. Select the USB stick in question from the left panel of the window
Some information about the device will be displayed in the right pane of the window.
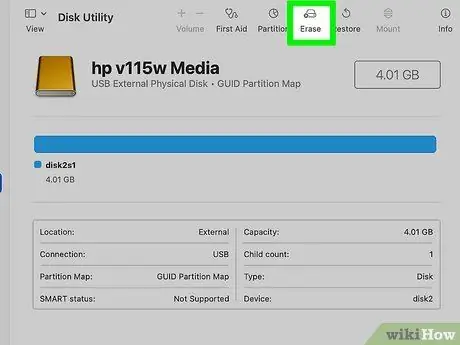
Step 8. Click on the Initialize tab
It is visible at the top of the right pane of the "Disk Utility" window.
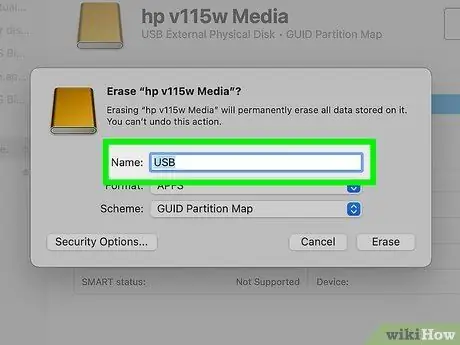
Step 9. Name the memory drive (optional)
If you wish, you can also use the default name.
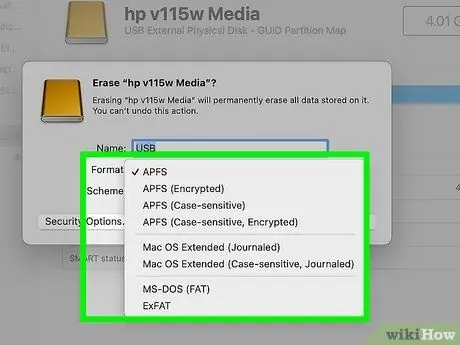
Step 10. Select a file system from the "Format" menu
If you want your device to be compatible with both Windows and macOS, choose the option MS-DOS (FAT) (in the case of a memory unit with a total capacity of less than 32GB) or ExFAT (in the case of a memory unit with a total capacity greater than 32GB). Alternatively, choose one of the Mac-specific file systems.
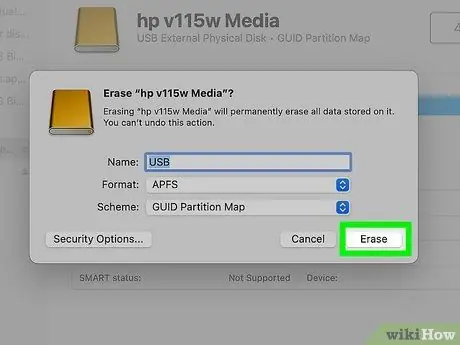
Step 11. Click the Initialize button
It is located in the lower right corner of the active window. The Mac operating system will format the USB key and change the access level to the device to "read and write".


