This article explains how to enable restrictions on the use of specific apps and programs on a computer. On Windows systems it is possible to activate these types of restrictions using the registry, while on Mac it is necessary to install a third-party application.
Steps
Method 1 of 2: Windows
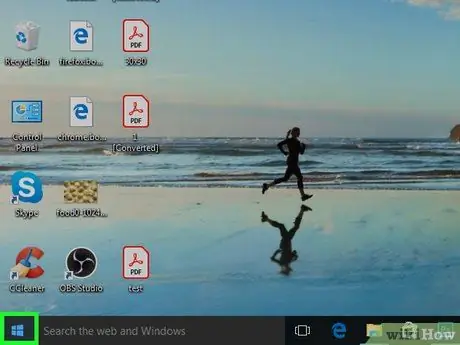
Step 1. Access the "Start" menu
Click on the icon visible in the lower left corner of the desktop to access the "Start" menu.
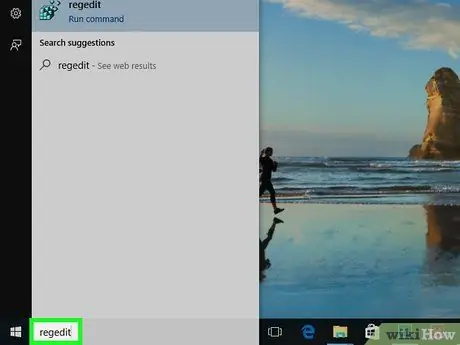
Step 2. Type the keyword regedit into the "Start" menu
The "Registry Editor" app should appear in the search results list.
-
Alternatively, click on the icon
located to the right of the "Start" button and search using the specified keyword.
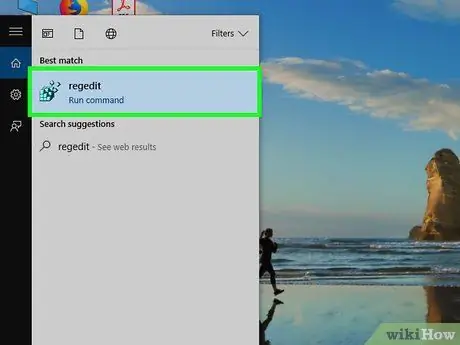
Step 3. Click on the Registry Editor app
It is characterized by an icon depicting a blue cube made up of many small blocks. The Windows Registry Editor window will appear.
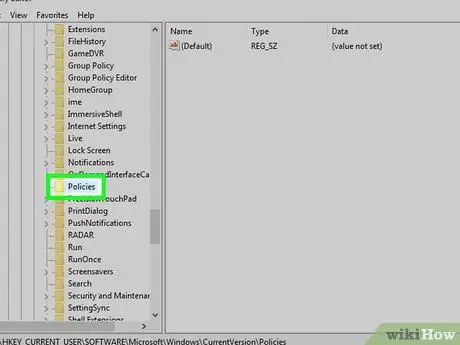
Step 4. Access the "Policies" folder using the left pane of the window
Locate the root folder named "Computer" listed in the left pane of the window, then follow the instructions below to access the "Policies" registry key.
- To access the "Policies" folder you will need to click in sequence on the following items: HKEY_CURRENT_USER, Software, Microsoft, Windows And CurrentVersion.
- Alternatively, click on the address bar located at the top of the window and paste or enter the following path: Computer / HKEY_CURRENT_USER / Software / Microsoft / Windows / CurrentVersion / Policies.
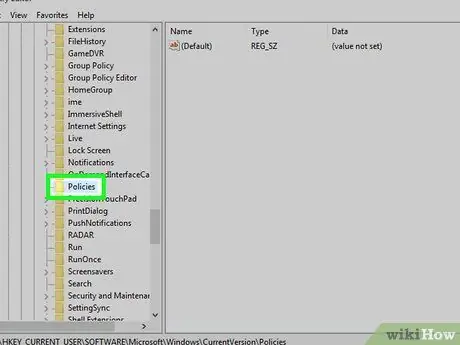
Step 5. Click on the Policies folder with the right mouse button
A list of items will be displayed within a context menu.
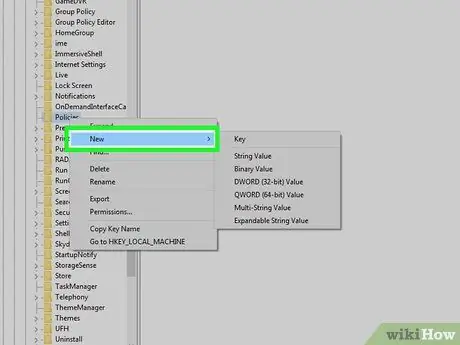
Step 6. Move your mouse to the New option
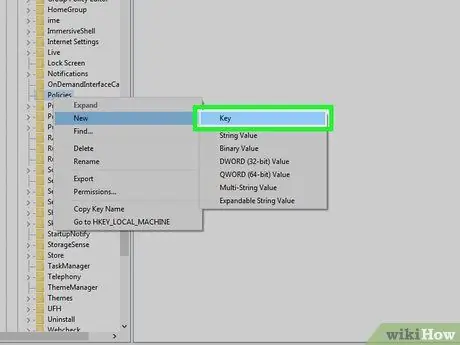
Step 7. Select the Key item from the "New" menu
This will create a new registry key inside the "Policies" folder. At this point you will be asked to give the new key a name.
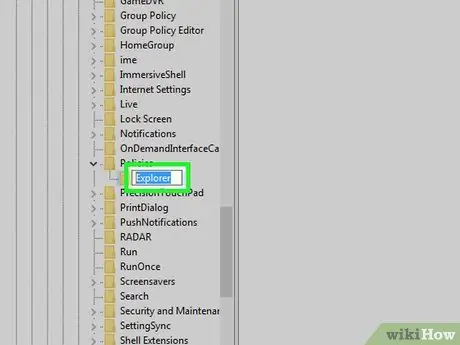
Step 8. Name the new key Explorer
Type it in and hit the Enter key on your keyboard to store it.
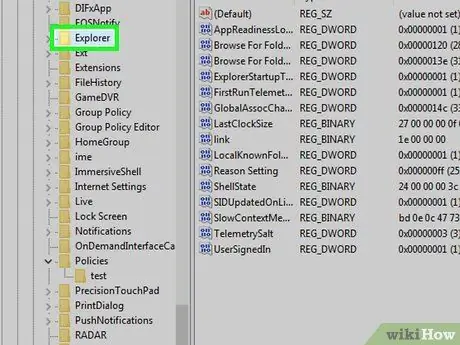
Step 9. Click on the Explorer key with the right mouse button
It is listed in the left pane of the window. A context menu will be displayed.
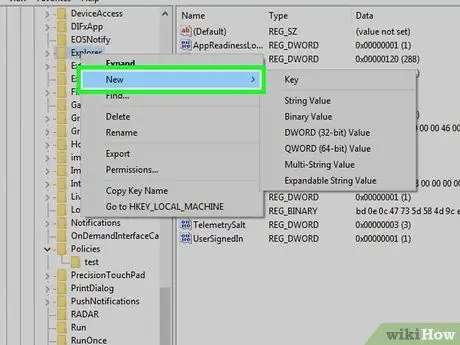
Step 10. Place the mouse cursor on the New item in the menu that appears
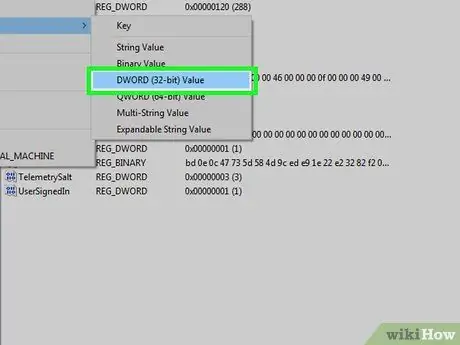
Step 11. Select the DWORD (32-bit) Value option
Inside the "Explorer" key a new "DWORD" value will be created and you will be asked to give it a name.
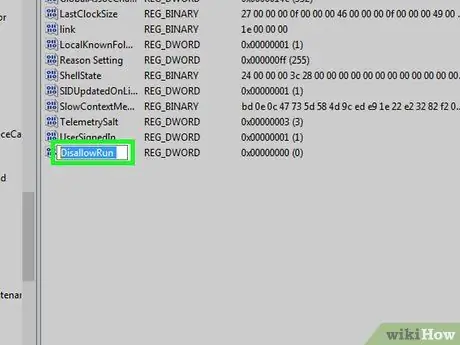
Step 12. Type the name DisallowRun and press the Enter key on your keyboard to store it
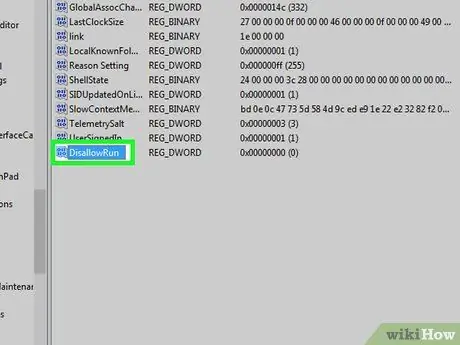
Step 13. Double-click the new DisallowRun value
A new pop-up window will appear allowing you to assign a value to the new "DWORD" key.
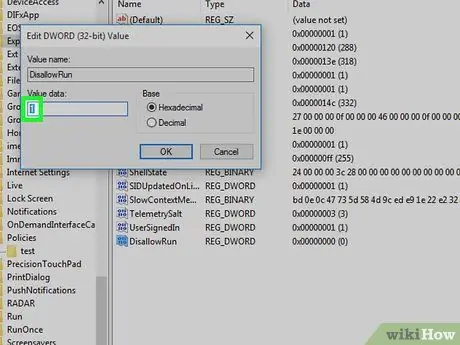
Step 14. Change the value in the "Value" text field from "0" to "1"
Replace the value "0" in the "Value" field with the number "1" and click on the button OK.
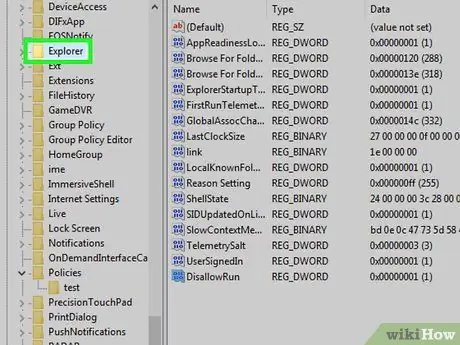
Step 15. Click on the Explorer key with the right mouse button
A context menu will be displayed.
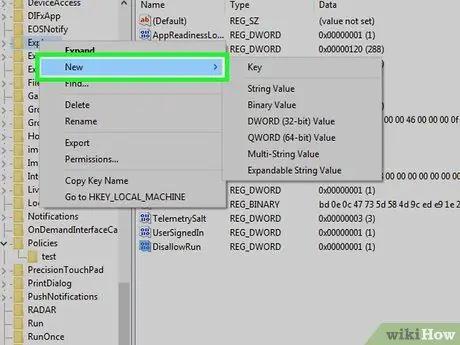
Step 16. Place the mouse cursor on the New item in the menu that appears
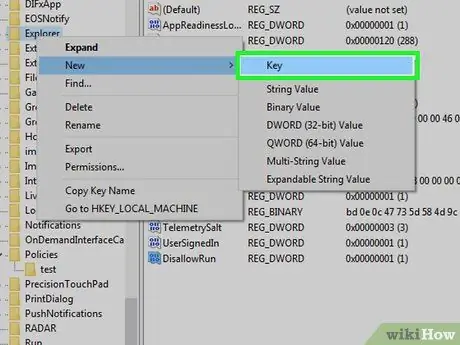
Step 17. Select the Key item from the "New" menu
This will create a new registry key inside the "Explorer" folder. At this point you will be asked to name the new key.
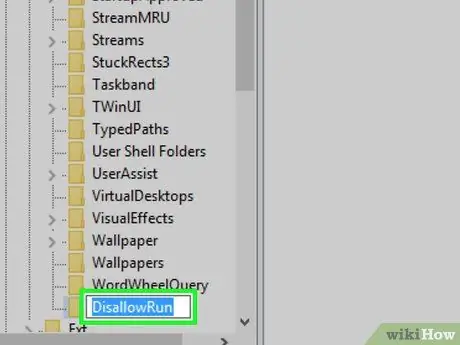
Step 18. Name the new key DisallowRun
The latter should appear inside the "Explorer" folder listed in the left pane of the window.
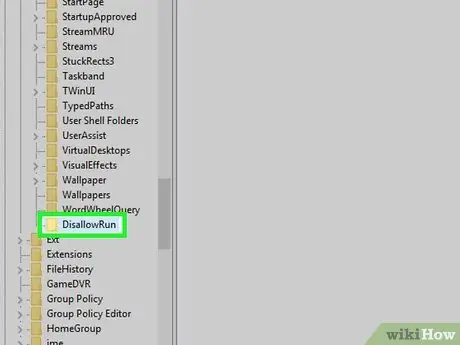
Step 19. Click on the DisallowRun key with the right mouse button
At this point, to block the execution of the apps you want you will have to create a series of "string" values inside the "DisallowRun" key.
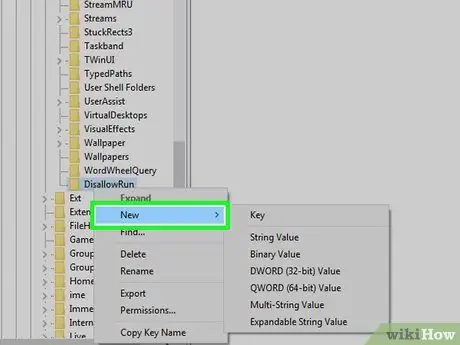
Step 20. Position the mouse cursor on the New item in the menu that appears
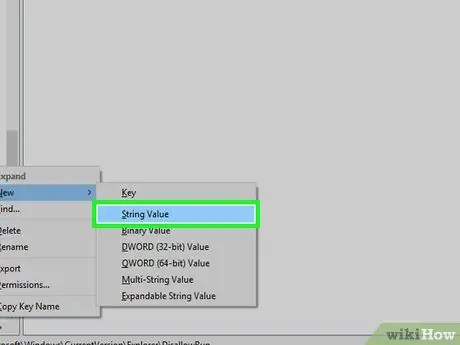
Step 21. Select the String Value option from the "New" menu
A new "string" value will be created inside the "DisallowRun" key.
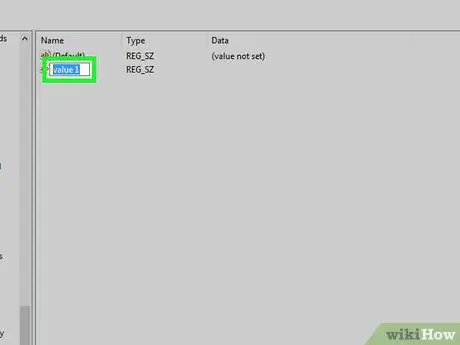
Step 22. Assign the value 1 to the new string and press the Enter key to store it
If in the future you need to block another application, you will need to add another "string" value in the same place. In this scenario, the second string value must have the name 2, the third 3, the fourth 4, and so on
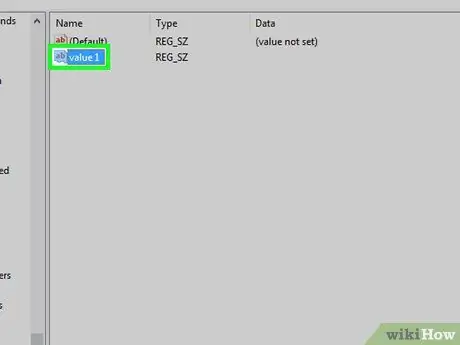
Step 23. Double-click the new string value "1" you just created
This will bring up a pop-up window that will allow you to change the string value in question.
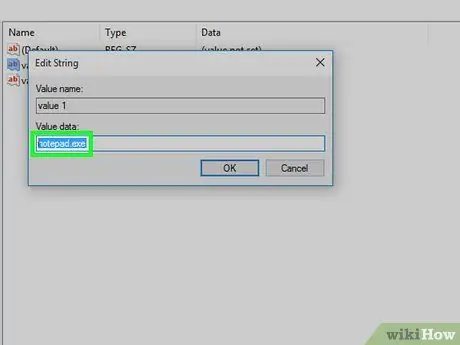
Step 24. Enter the name of the app you want to block in the "Value" text field
Click on the "Value" text field and type the name of the application to be blocked.
Make sure to enter the full name of the executable file of the app you want to block including the extension as well. For example, if you want to block the "Notepad" program from running, you will need to enter the name notepad.exe in the indicated field
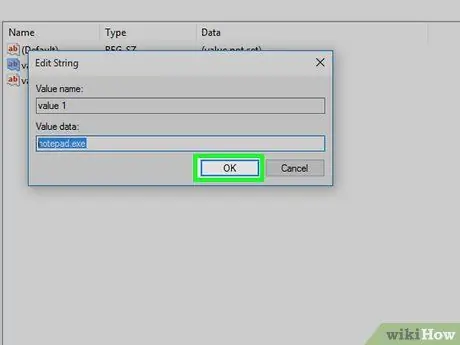
Step 25. Click the OK button
The value of the new string "1" will be stored in the registry and the specified app will no longer be able to run on the computer.
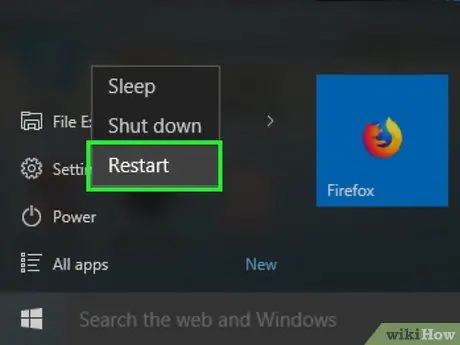
Step 26. Restart your computer
Some changes made to the Windows registry take effect only after the system is restarted.
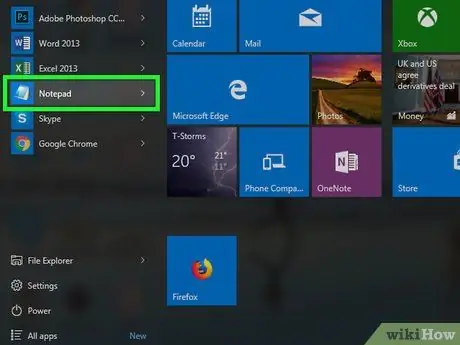
Step 27. When the restart is complete, try to run the app you just blocked
You will see a message appear on the screen indicating that the app in question cannot be run.
Method 2 of 2: Mac
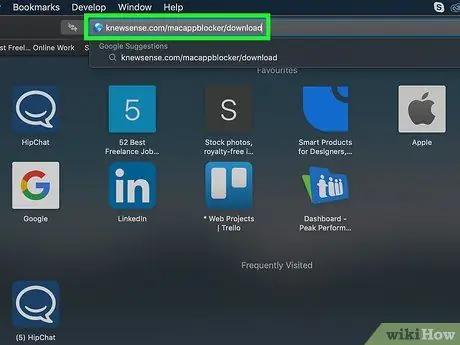
Step 1. Visit the URL "knewsense.com/macappblocker/download" using your computer's browser
Type the link indicated in the browser address bar or copy and paste it, then press the Enter key on your keyboard.
- If the file download does not start automatically, click on the button click here placed next to a shield icon displayed at the top of the page.
- The Mac App Blocker program can be used for free for a 15-day trial period. After 15 days you can choose to buy the product or try another one.
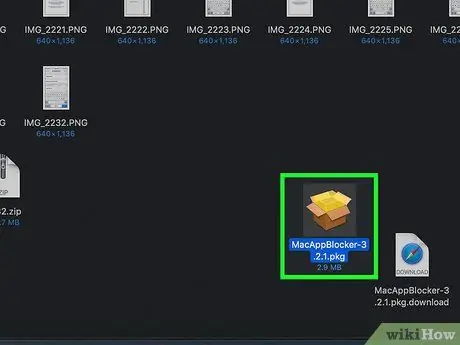
Step 2. Run the Mac App Blocker installation file
You can find it in your Mac's "Download" folder. Double-click the corresponding icon to start the installation.
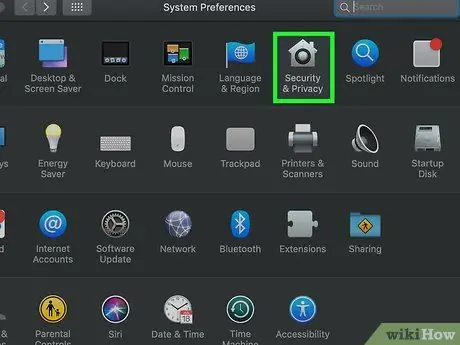
Step 3. Authorize the installation
In some cases, you may need to authorize the file to run in order for the installation to begin. Follow these instructions:
- Click on the "Apple" menu icon located in the upper left part of the screen;
- Click on the item System Preferences;
- Click on the icon Security and Privacy;
- Click on the icon depicting a padlock located in the lower left part of the window, then enter your account password;
- Click on the button Allow located next to the MacAppBlocker app.
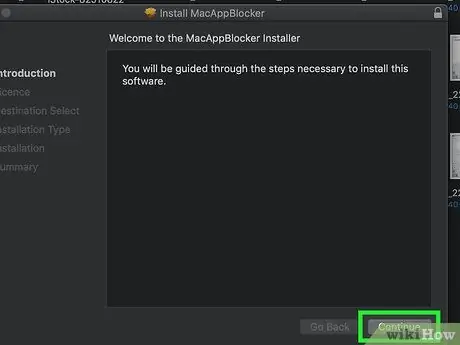
Step 4. Click the Continue button displayed in the installation procedure window
You will be redirected to the next screen where you will have to accept the terms and conditions of use of the licensed product.
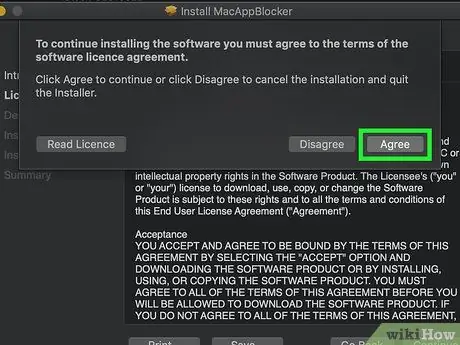
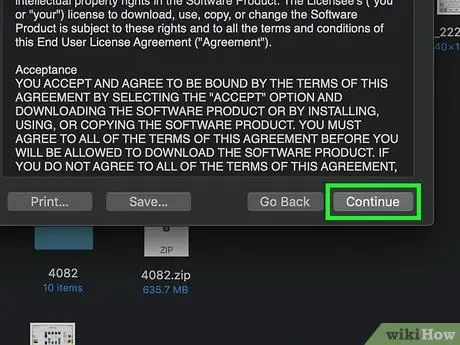
Step 5. Accept the terms and conditions of the license
Click on the button Continue, then click the button Agree when required.
Mac App Blocker is a third-party application, so be sure to read the license terms and conditions carefully before accepting them
Step 6. Select your computer's primary hard drive
Click on the memory unit on which you want to install the program, then click on the button Continue.
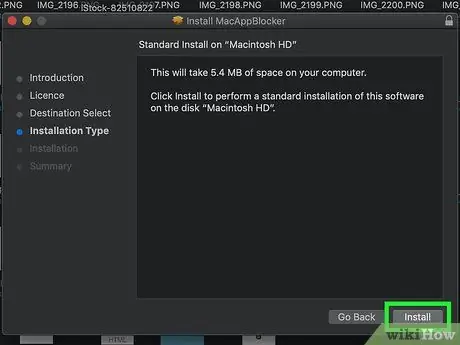
Step 7. Click the Install button
Mac App Blocker app will be installed on your computer.
If prompted, enter your account password to confirm the installation
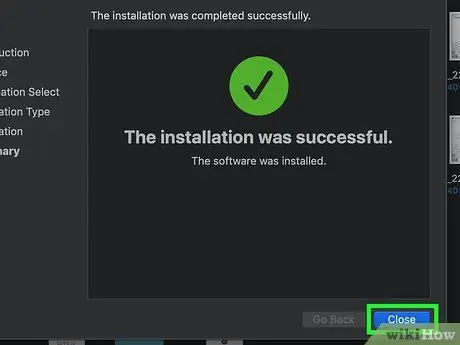
Step 8. Click the Close button
The installation window will close.
At this you can choose whether to keep the installation file or move it directly to the trash
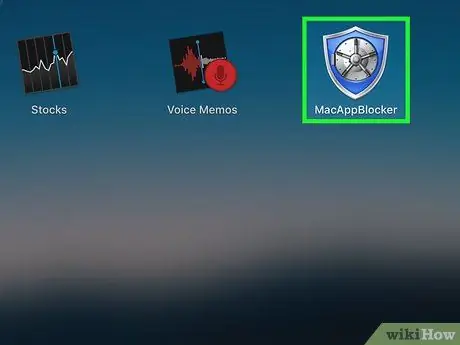
Step 9. Launch the Mac App Blocker app
It features a blue shield icon. You can find it in the "Applications" folder.
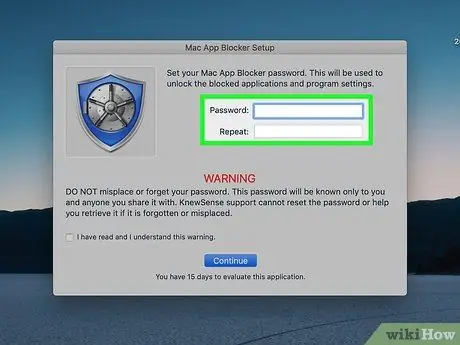
Step 10. Set a security password for the Mac App Blocker app
Choose a strong password and type in the "Password" field, type a second time in the "Repeat" field and click on the button Continue.
Make sure the "I have read and I understand this warning" checkbox is checked
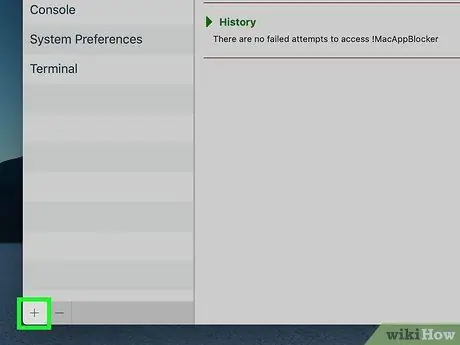
Step 11. Click the + button located at the bottom left of the Mac App Blocker app window
A list of all apps installed on the Mac will be displayed.
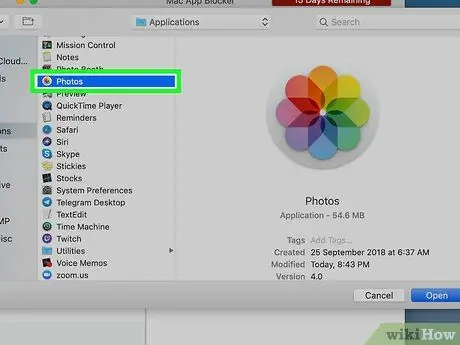
Step 12. Select the application you want to block
Look for it in the "Applications" folder, then click on the corresponding name to select it.
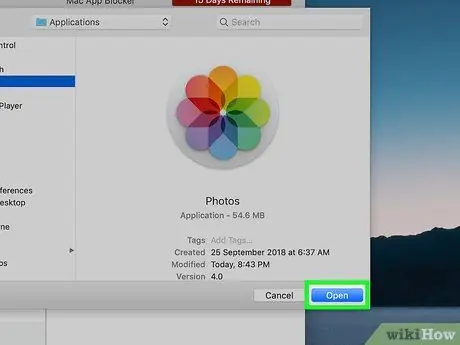
Step 13. Click on the Open button
The app you have chosen will be added to the blocked list.


