Blocking access to certain websites can be useful to increase your productivity at work or to reduce the chances that your children will encounter material reserved for an adult audience. On a Mac, you can "blacklist" websites in several ways. While the easiest option to use is to take advantage of the "Parental Controls" feature built into the OS X operating system, you can also decide to use the "hosts" file if you need to block access to certain websites by account with administrator privileges.
Steps
Method 1 of 3: Enable Parental Controls
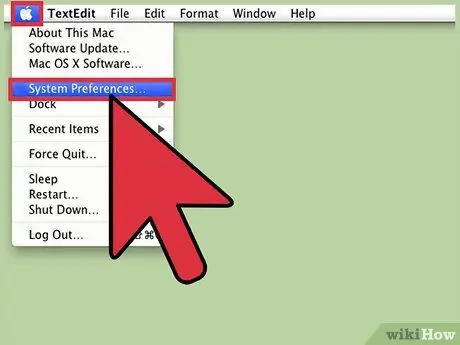
Step 1. Go to "System Preferences"
Select the Apple icon on the menu bar visible at the top of the screen, then choose "System Preferences". You can also access this option from the "Applications" folder and usually from the Dock as well.
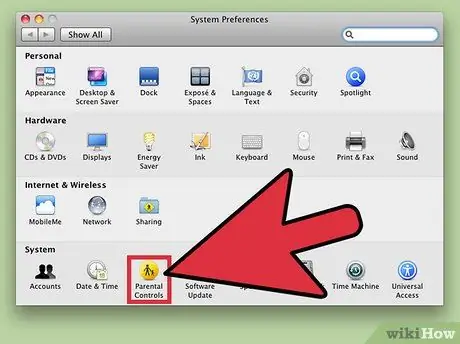
Step 2. Choose the "Parental Controls" icon
In most versions of OS X this option is characterized by a yellow icon, the meaning of which is very intuitive. If you can't find it, type "Parental Controls" into the search bar in the upper right corner of the "System Preferences" window. This will highlight the correct icon (highlight it).
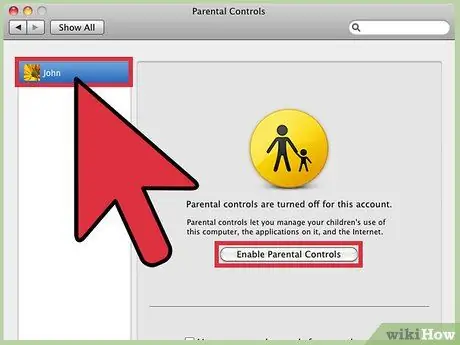
Step 3. Choose your child's account
From the left panel select the user account you want to allow (or not) access to certain websites, then click on "Enable parental controls". Remember this function cannot be activated for a system administrator account.
- If your child does not have an account, choose "Create a new user account with parental controls", then follow the instructions that appear on the screen.
- If you cannot select the desired user, click on the padlock icon in the lower left corner of the window, then enter the system administrator account password.
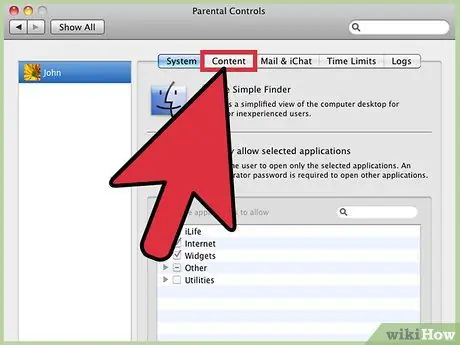
Step 4. Go to the "Web" tab
You can find it at the top of the "Parental Controls" window. In older versions of OS X you will find the "Content" tab instead.
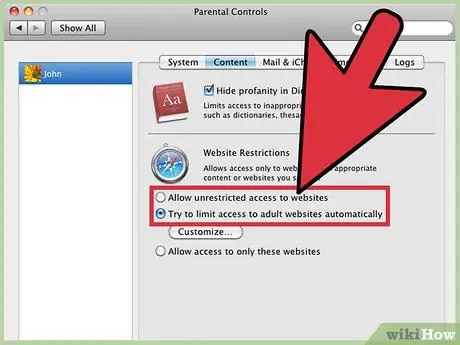
Step 5. Scroll through the options available to manage access to websites
You can choose between two distinct methods with which to manage your children's internet access:
- Selecting the "Try to automatically restrict access to adult websites" option will prevent access to adult websites surveyed by Apple. You can change the contents of the default list used as a filter by pressing the Customize button.
- The option "Allow access only to these websites" blocks access to all websites that are not listed in the appropriate list located below the item in question. To add or delete items from this list, you can use the + and - buttons respectively.
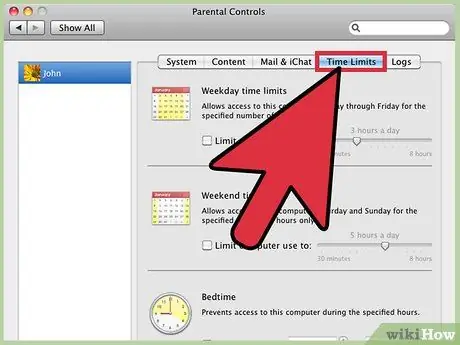
Step 6. Consider using additional restrictions
To block access to adult content through applications, go to the "Apps" tab of the "Parental Controls" window, then change the options according to your needs. To restrict access to your computer only at set times, use the options on the "Time Limits" tab.
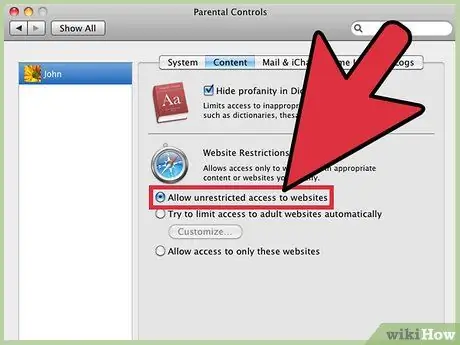
Step 7. Enable access to blocked sites
To re-enable access to all previously blocked sites, choose "Allow free access to websites". This step does not disable the restrictions on the options on the other tabs (for example "Apps" or "People") of the "Parental Controls" tool.
Method 2 of 3: Block Access to Web Sites Through the Hosts File
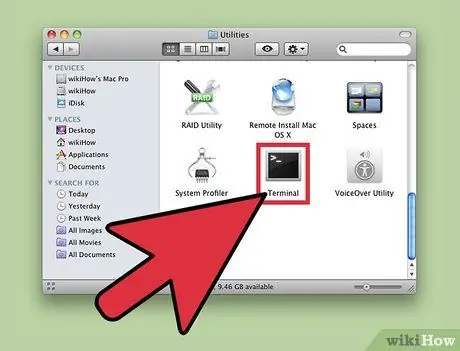
Step 1. Launch the "Terminal" application
To do this, go to the "Applications" folder, choose the "Utilities" directory, then select the "Terminal" item. This application allows you to edit the hosts file from which the operating system derives the IP address of specific URLs. By associating a bogus IP address with a particular URL, you can prevent access to that website via your normal internet browser.
This access control mechanism does not have a 100% success rate and, moreover, it is not very complex to bypass. However, this is a quick and easy way to block access to a particular website from your computer, for example to reduce possible distractions from work commitments. Although not recommended as the only tool to control web access for users who use the computer, if combined with other options this procedure can produce an excellent overall result
Step 2. Back up the current hosts file
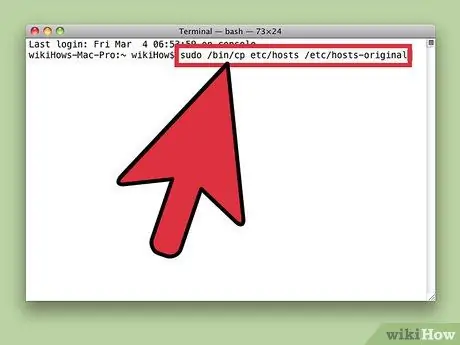
If you make a mistake while editing the contents of the file, you may completely block internet access. Having a backup copy of the file available you will be able to restore the original configuration without causing any problems. Doing this is very simple and you need to use a single command:
- Inside the "Terminal" window type the command sudo / bin / cp / etc / hosts / etc / hosts-original exactly as it appears.
- When done, press the Enter key on your keyboard to execute the command.
Step 3. Provide the computer administrator account password
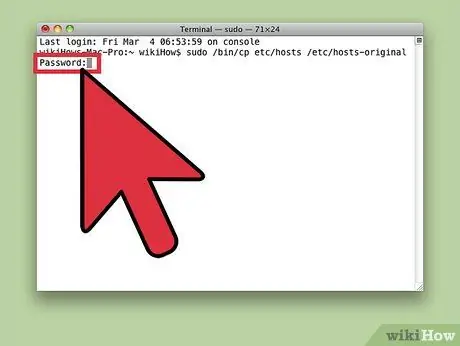
The "Terminal" application should prompt you to enter your password. If so, type it and press the Enter key. Remember that when you enter a password in the "Terminal" window, the cursor does not move from its original position.
Step 4. Open the hosts file
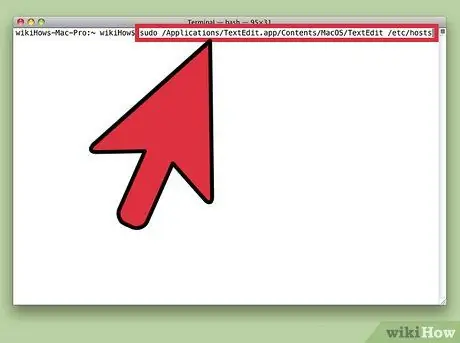
Type the following command, then press the Enter key: sudo /Applications/TextEdit.app/Contents/MacOS/TextEdit / etc / hosts. This command gives you access to the contents of your Mac's hosts file through the "TextEdit" app launched via the "Terminal" window.
Alternatively, you can edit the hosts file directly within the "Terminal" window using the sudo nano -e / etc / hosts command
Step 5. Leave the existing text unchanged
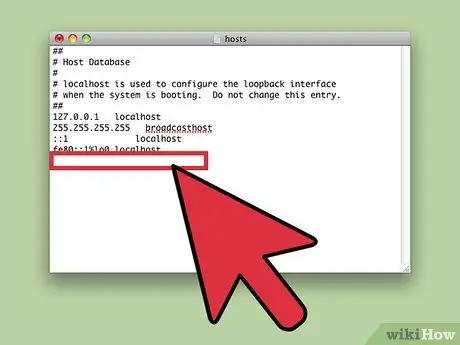
Within your Mac's hosts file there should already be several IP addresses associated with the "localhost" entry. That text must never be changed or deleted, for any reason. Otherwise the internet browsers installed on the system may no longer have access to the web. Place the cursor on a new line of text at the end of the document.
- If you are using the "Terminal" window, use the arrow keys on your keyboard to move to the end of existing text.
- Some users have reported the presence of a bug that allows the insertion of new lines of text within the hosts file only if done at the beginning of the already existing text.
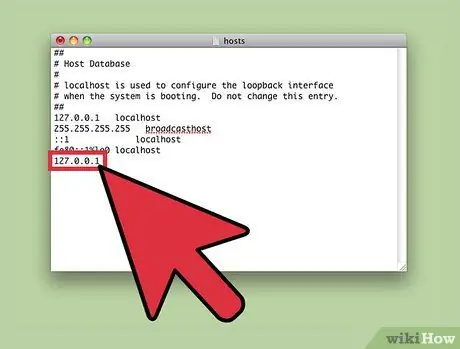
Step 6. Enter the IP address 127.0.0.1
This is the local IP address that identifies your Mac. If requests for access to certain web pages sent by any internet browser installed on your computer are redirected to that IP address, no content will be displayed.
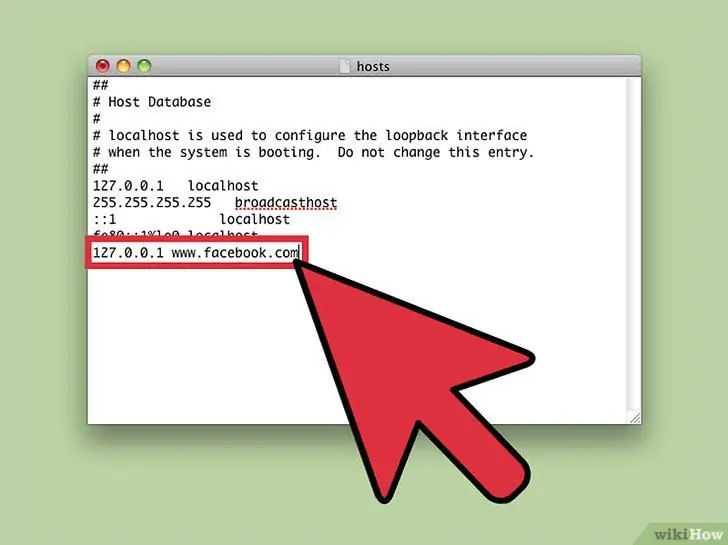
Step 7. Press the spacebar, then type the URL of the website you want to block. Remember not to include the "http:" prefix in the URL. For example, assuming you want to block access to the Facebook website, the line of text to add to the hosts file would be "127.0.0.1 www.facebook.com".
- The hosts file only checks for occurrences that exactly match the URLs entered. For example, the line "127.0.0.1 www.google.com" blocks access only to the main page of the Google website. Anyone using your Mac will still be able to access all of Google's other secondary domains, such as "google.com/maps", "google.com/mail" and so on.
- Do not copy and paste text from another document. This would also insert text characters, invisible to the user, used by editors to perform specific checks that would prevent the hosts file from functioning correctly.
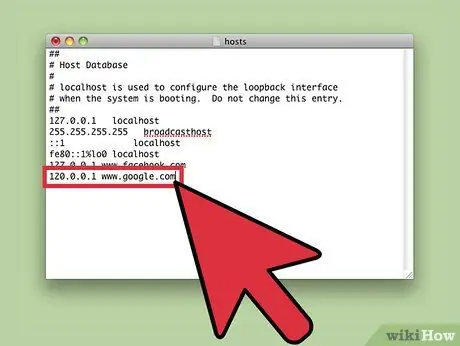
Step 8. Add new URLs (one per line)
To do this, press the Enter key to go to a new line and enter the IP address 127.0.0.1 first. At this point you can add the URL of the web page you want to block access to. This way you can block access to all the websites you want; however, remember that each line must necessarily begin with the IP address "127.0.0.1".
In theory, it is possible to include multiple URLs on a single line of text (which can have a single IP address associated with it) up to a maximum length of 255 characters. However, this syntax may not work in all versions of OS X
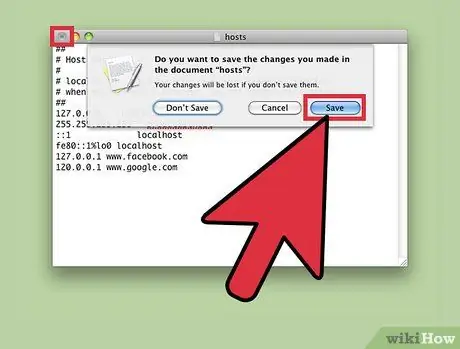
Step 9. Save your changes, then close the hosts file
When finished, close the "TextEdit" application window, then, when prompted by the program, confirm that you want to save the changes made to the file (in some cases the file may be saved automatically).
If you are editing the hosts file directly from the "Terminal" window, press the key combination ctrl + O to save it, then press the key combination ctrl + X to close the file
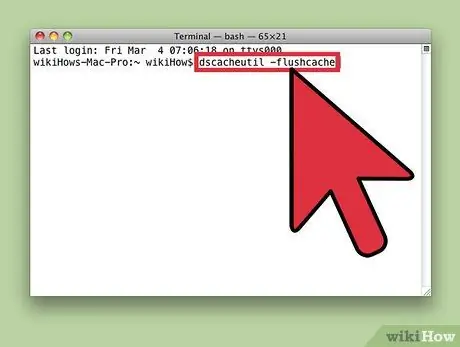
Step 10. Flush the cache
Type the command dscacheutil -flushcache inside the "Terminal" window, then press the Enter key. This step clears the cache by ensuring that the browser immediately references the updated information contained in the hosts file. The added websites should not be reachable through any of the internet browsers installed on your Mac.
Instead of using the command in question, you can restart your computer to achieve the same effect. In many cases, the websites listed will be blocked even without performing this step
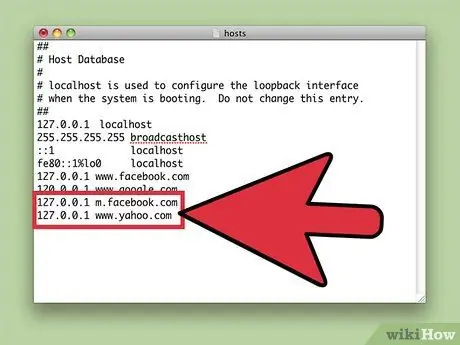
Step 11. Troubleshooting
If you continue to be able to access one of the websites entered in the hosts file, the cause could be that the internet browser uses a different subdomain, an IPv6 address instead of an IPv4 address, or does not consult the hosts file for the requested URL. The solution to the first two problems is to add the necessary lines of text inside the hosts file:
- 127.0.0.1 (URL) without the "www" prefix.
- 127.0.0.1 m. (URL) normally blocks the mobile device version of the site indicated.
- 127.0.0.1 login. (URL) or apps. (URL) are some of the most used variants to indicate the address of the main pages of websites. To find the correct URL, go to the desired web page, then check the contents of your browser's address bar.
- fe80:: 1% lo0 (URL) blocks access to a website that uses Ipv6 addresses. Most websites are not automatically reachable via the IPv6 protocol, but Facebook is one of the most notable exceptions.
- If none of these changes work, there is most likely a system that bypasses the access control system via the hosts file. In this case, try using one of the other methods listed in the article.
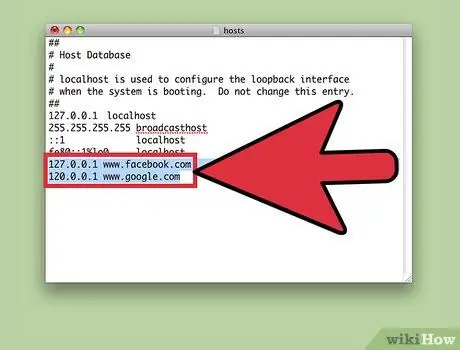
Step 12. Delete one of the hosts file entries to allow access to its website
Open the hosts file again and delete the line of text for the URL of the web page you want to allow access to. Save the changes, close the file and "flush" the cache, as described in the previous steps, to make the new changes immediately active.
To undo all the changes made and restore the backup copy of the hosts file you can use the command sudo nano / etc / hosts-original, typing it in the "Terminal" window. Press the key combination ctrl + O, delete the "-original" suffix from the file name, then confirm that you want to proceed with the save
Method 3 of 3: Use Other Methods
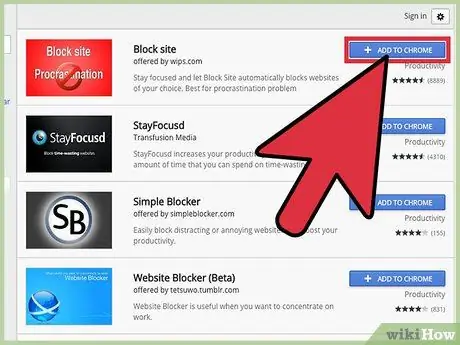
Step 1. Install an internet browser extension
Chrome, Firefox and most of the newer internet browsers allow you to install extensions (also called "add-ons") created by other users to change the way the browser works. Within the store of the internet browser in use, search for new extensions using the keywords "block site", "block sites", "web filter" or "access control" to identify applications that can prevent access to a particular web page. Install the chosen extension, restart your browser, then proceed to configure the extension settings by entering the URLs of the sites or web pages you want to block.
- Be cautious in choosing the extension to use, avoid those that are not appreciated by other users or that have too few reviews to be able to provide an accurate and reliable judgment. Applications or extensions that come from insecure sources could install malware or a virus on your computer.
- This method blocks access to a particular site only from the internet browser on which the extension is installed.
Step 2. Change the configuration settings of your network router
Blocking access to a particular website directly from the network router ensures that no device connected to the network is able to access it. Here's how to proceed with the configuration:
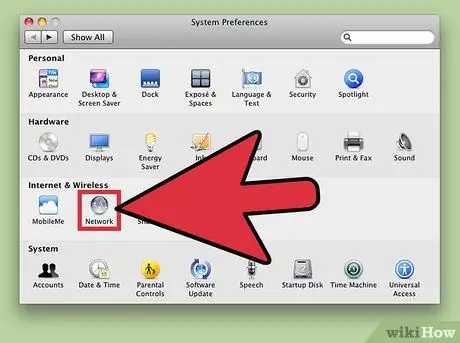
- Access the "System Preferences" of your Mac, choose the "Network" icon, select the "Wi-Fi" adapter, press the "Advanced" button and finally access the "TCP / IP" tab.
- Copy the IP address listed in the "Router" field, then paste it into the address bar of your browser. Your network router's configuration page should appear.
- Log in to the router by providing your username and password. If you do not know this information, please refer to the default login credentials of your router model (usually the username is "admin" and the password is "password").
- Go to the router settings section related to access control. Each brand of router offers different configuration options, but you should normally find them in the "Access", "Access", "Content" or "Contents" sections.


