Have you ever needed a folder for your documents and can't find it? Or are you just fed up with the boring colors of your old folders? Whether you want to create your own or just decorate the ones you already have, here are some ways to make your folders more personalized and original.
Steps
Part 1 of 2: Create a Homemade Folder

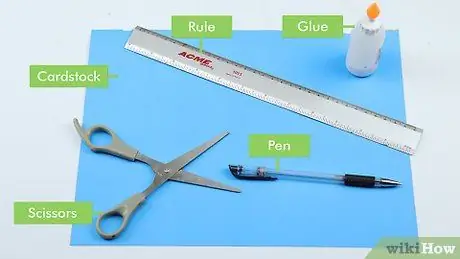
Step 1. Purchase the necessary materials
You can use many different raw materials to make your folders, such as plain paper, letter paper, cardstock or cardboard. In DIY stores you can find these materials with many different designs and motifs. Most of the documents stored in the folders are the size of an A4 sheet (210 x 297 mm), so be sure to buy larger sheets of at least five centimeters on all sides.
- If you can find materials larger than 420 x 300 mm, just buy one sheet per folder, which you can fold in half. If, on the other hand, the paper you find is smaller, you will need to use two sheets per folder.
- Paper is not very strong, so if you use folders often, you can choose less fragile materials, such as cardstock or cardboard.
- If you are creating folders for your work, think about which style is best suited for the office. If, on the other hand, they will simply remain in the desk at home, the style and the designs do not matter.
- Creating a folder yourself is a great way to save, have fun, and show off your creative side, so don't be afraid to indulge yourself.
Step 2. Measure and cut the materials
Once you have purchased the materials you want to use, measure them. Cut a 250 x 300 mm rectangle and a 225 x 300 mm rectangle. If you are using a single sheet, cut it to 475 x 300 mm.
- If you want to make slightly stronger edges, increase the size of each rectangle to 300 x 325mm. The larger margin will allow you to fold in the edges on all sides of the folder.
- If you want your project to have a traditional size and shape, trace a folder outline under the material you are using, aligning the short side of the folder with the short side of the rectangle and doing the same for the long side. Cut out the rectangles you drew to create the two parts.
Step 3. Fold and glue the pieces
Measure and mark a 12.5mm stripe at the bottom of the long side of the smaller rectangle. Fold the paper along the line you just drew. Using glue stick, double-sided tape or vinyl glue, place the adhesive along the outside of the fold by 12.5mm. Take the larger rectangle and line up the bottom side with the crease, making the glue adhere. The sides of the two rectangles should be the same size.
- If you are using a stronger material than paper, you can mark the crease at the line 12.5mm from the edge so that no cracks appear on the sheet when you fold it. To mark the material, place the ruler along the line you just drew. Press gently on the line using a hard object, such as a letter opener, to leave a notch in the paper. This will make it easier to bend the material, which will not deform.
- To make stronger edges, you need to glue the sides before the bottom. Make a mark 12.5mm from the edge on all short sides of the rectangles you want to cut out, folding them along the lines. Put glue on the inside of each fold and close them. This will create stronger edges for your folders.
Step 4. Finish the folder
Once the glue has dried, you can fold the folder to close it. About 2.5 cm of the larger rectangle should remain visible under the smaller rectangle. You can leave the longer edge as it is, even along the entire length, or cut out the back side to leave a small protruding space for the label, like in a traditional folder. To do this, choose where to place the protruding part and outline it. Cut out the long side of the folder, smoothing the edge of the two rectangles, except where that space will be. At that point you can add a label to the folder, insert documents and finish the project.
- In traditional folders, spaces for labels can be on the right, left or center. If you are going to create more than one folder, you can use all kinds of formats, so that you have the spaces in different positions.
- If you've chosen sturdy cardstock that doesn't have a style you like, you can always glue some patterned paper to the front of the folder to make it look more beautiful. To do this, cut the paper into a rectangle about 1.5 cm smaller on all sides than the folder. Glue the paper to the outside of the cardstock, making sure it is centered. The color of the cardboard will be visible on the edges, while the designs will make your folder unique.
Part 2 of 2: Decorating a Traditional Folder

Step 1. Choose the materials
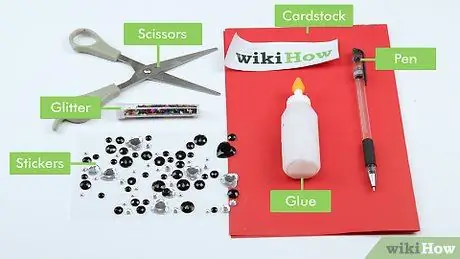
You need to get some folders to decorate as well as materials to do it. You need something to cover one or both sides of the paper, such as wrapping paper, wrapping paper, fabric, or sticky paper. You can also purchase small cutouts, stickers, colored ribbons or other decorations that you can add to the outside of the folder.

Step 2. Choose your style
There are many ways to decorate a folder, starting with the position of the decorative elements. You can decorate the inside, in order to give color to the larger side of the folder with the space for the label, decorate the front, with a large design visible from the outside, or customize all the surfaces, in order to obtain a folder completely different from the original one.
If you are decorating the folders you will use at work, you may be wondering what kind of designs and styles are best suited to the office. If, on the other hand, you will only use them at home, the important thing is that you like the folders
Step 3. Cut out the materials
Regardless of the material you choose, you will need to cut it to fit the folder. Spread it out on a table, then place the folder on it and trace the outline. Once you have drawn the whole area to decorate, cut it out along the lines you drew.
- If you don't feel good at cutting, try the next step, first gluing the material to the folder and then cutting out the edges. This will give you a stiffer surface to cut around and be more precise.
- If you want to decorate the inside of the folder, you don't need to cut out a sheet of the full size of the folder if you prefer not to waste material. Simply cut along the visible edge and trim the bottom when it is no longer visible from the outside.
Step 4. Glue the materials
You need to use a glue stick, super glue or other thin adhesive, so that the material is not too embossed in relation to the folder. Apply a thin but generous coat of glue to the surface of the folder where you want to cover it. Before it dries, adhere the material to the paper, making sure to line up the edges. Press gently on the material, checking that the entire surface remains attached to the folder.
- You can pass a ruler over the surface of the material to eliminate any air bubbles that formed when you glued it.
- If you use fabric to decorate your folders, be sure to use a type of adhesive that does not pierce the fabric and that is able to stick it to the paper, such as spray adhesive, instead of glue.
- If you have decided to use sticky paper, you need to remove the film covering the sticky side after cutting out the paper, then attach it to the folder. Paper of this type is ideal for lining the entire folder, so use that material if your intention is to cover it all. This way you will not only give your folder a new look, but you will also make it more resistant and waterproof.
Step 5. Add decorative elements
Once the glue on the folder has dried, add the decorations. The possibilities are endless, so have fun and make them as colorful as possible, compatibly with their use.
- You can add colored stickers or ribbons to the front of the folder. Try criss-crossing ribbons to create designs, or use them as a background for labels.
- You can paste cutouts on the folder to add designs. You can also use items like buttons or bows to make it even more beautiful.
- You can also use colored stamps and inks to decorate the folder and personalize it even more. This way you can add decorative elements that will never come off and do not increase the size of the material.


