If you've lost or forgotten the password to log into your Windows 7-based computer, you can use the password reset disk you created earlier and regain access to your Windows account in minutes. If you don't have the password reset disk available, don't panic, you can use the Windows installation DVD or a system repair disc. Alternatively, you can create a startup disk using the NTPassword program and a second computer.
Steps
Method 1 of 4: Use a Windows System Repair Disk
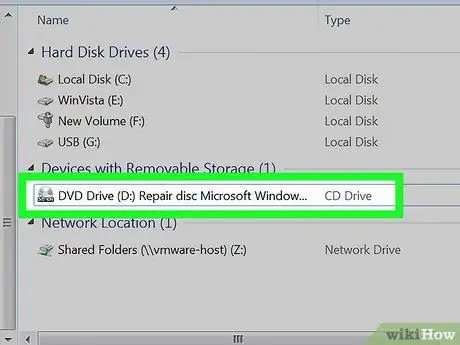
Step 1. Insert the System Repair Disc into your computer's optical drive
Booting the system from the Windows 7 recovery disk allows you to create a temporary login to the command prompt, allowing you to reset your account password.
If you don't have a Windows 7 system repair disc available, you can create one using a second computer
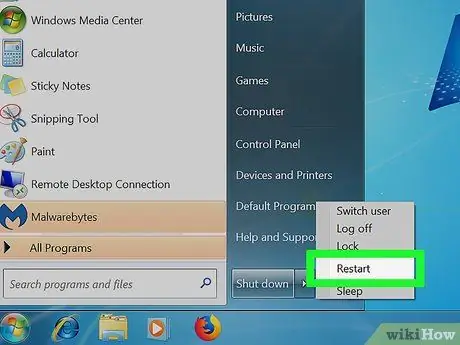
Step 2. Restart your computer
When prompted, press any key on the keyboard to complete the startup phase.
If your computer returns to the Windows logon screen after rebooting, it simply means that you need to change your machine's BIOS boot sequence
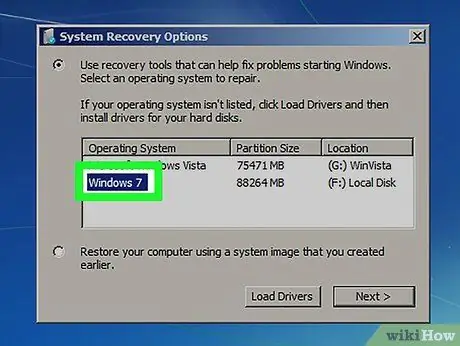
Step 3. Choose the "Windows 7" option from the "Operating System" drop-down menu
After completing your selection, the text will turn blue.
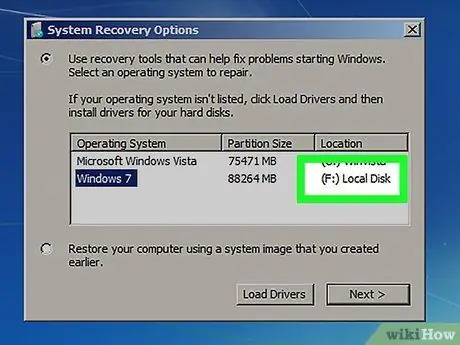
Step 4. Make a note of the drive letter shown in the "Path" field
For example, if you see Local Disk (D:), it means the drive letter associated with the volume is "D:", so make a note of this information
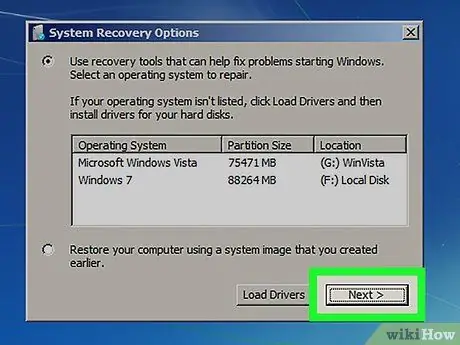
Step 5. Press the Next button
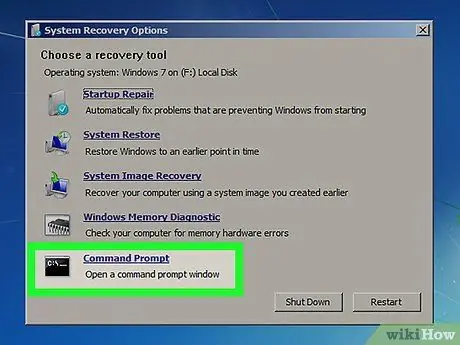
Step 6. Select the "Command Prompt" link
A small command line window will appear with a black background and white text.
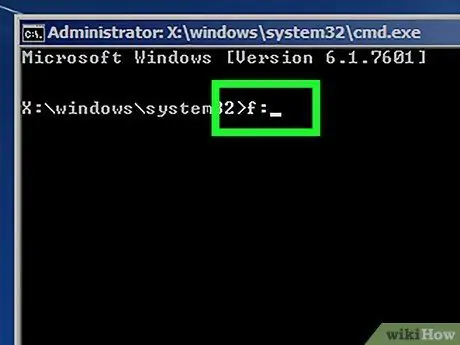
Step 7. Type the drive letter you previously stored in the command prompt window that appears
In our example we assumed the drive letter was D:, so at this point you will have to type D: into the command prompt window
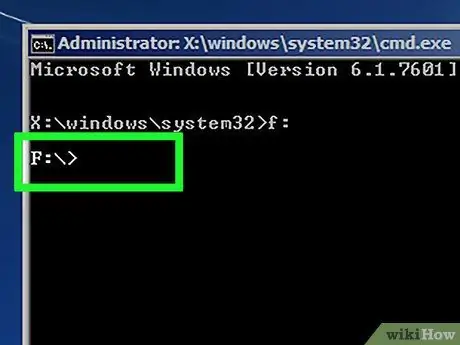
Step 8. When done, hit the Enter key
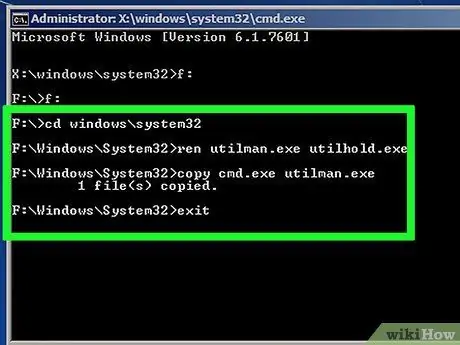
Step 9. Create a "backdoor" to access a higher permission level of the command prompt
To do this, type the following sequence of commands respecting the order in which they are listed:
- Type the command cd windows / system32, then press the Enter key.
- Type the command ren utilman.exe utilhold.exe, then press the Enter key.
- Type the command copy cmd.exe utilman.exe, then press the Enter key.
- Type the command exit, then press the Enter key.
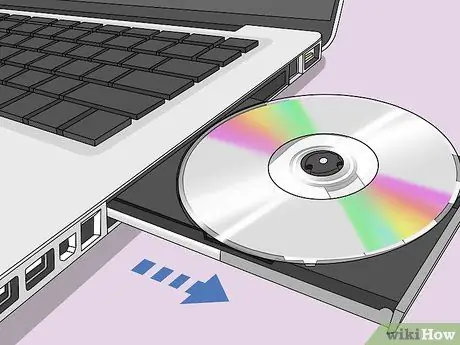
Step 10. Eject the System Repair Disc from your computer's optical drive
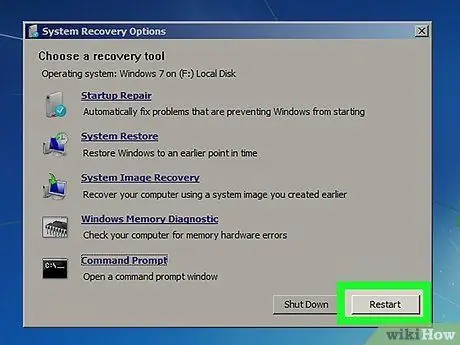
Step 11. Restart your computer
At this point, the machine will proceed to load the instance of Windows 7 installed on the hard drive and, at the end, it will show the classic login screen that allows you to log in to your user account.
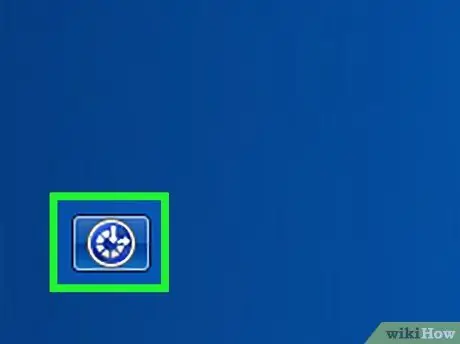
Step 12. Click the icon that allows you to use the "Accessibility" feature
It is located in the lower left corner of the login screen and is characterized by a blue circle, inside which there are two white arrows at right angles. At this point, instead of the "Ease of Access Center", a Command Prompt window will appear. Don't be alarmed, this is an expected result due to the changes made in the previous steps.
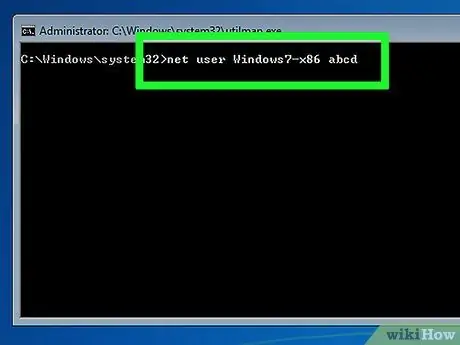
Step 13. Type the command net user [username] [new_pwd] into the command prompt
Remember to replace the "username" parameter with the name of the account whose access password you want to change and "new_pwd" with the new password chosen.
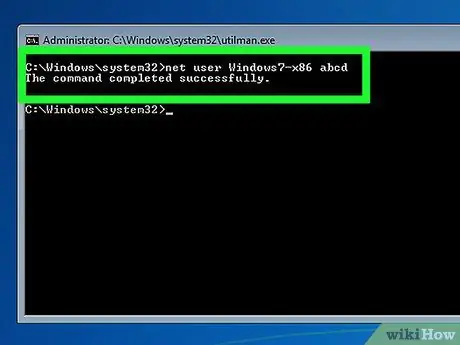
Step 14. Press the Enter key
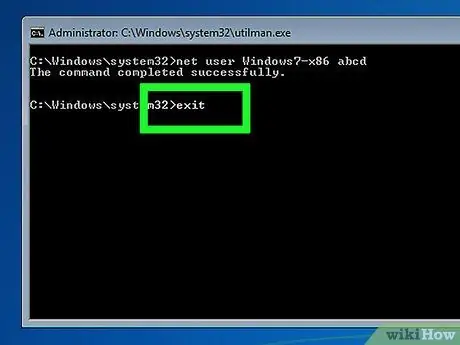
Step 15. At this point, close the Command Prompt window
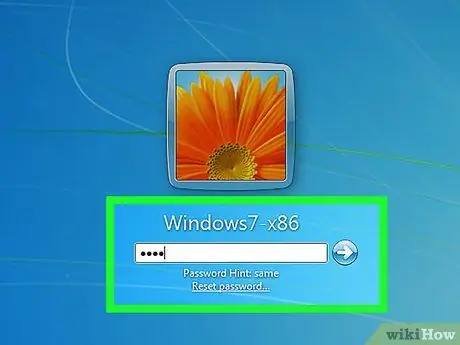
Step 16. Log into Windows using your user account
You should have regained access to the system with the Windows account you normally use.
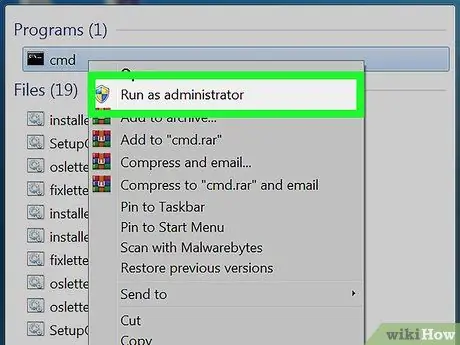
Step 17. Open a Command Prompt window as a system administrator
Here's how to do it:
- Access the "Start" menu.
- Type the keyword cmd into the search field.
- Right-click the "Command Prompt" icon that appears in the search results, then choose "Run as administrator".
- If prompted, confirm your willingness to run the program as a computer administrator.
- A new Command Prompt window will appear.
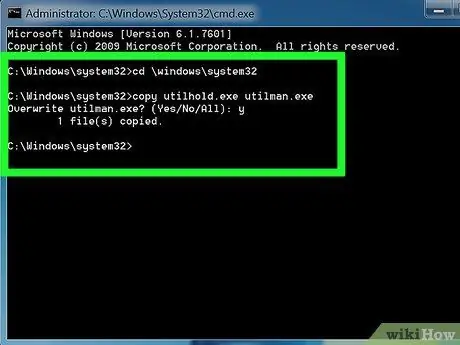
Step 18. Remove the "backdoor" created in the previous steps
To do this, type the following sequence of commands in the window that appears, respecting the order. In this way, you will restore the normal system configuration by removing the "backdoor" created earlier.
- Type the drive letter you noted in the first few steps of this section. In our example it was D:.
- Press the Enter key.
- Type the command cd / windows / system32 \, then press the Enter key.
- Type the command copy utilhold.exe utilman.exe, then press the Enter key.
Method 2 of 4: Use the Windows Installation DVD
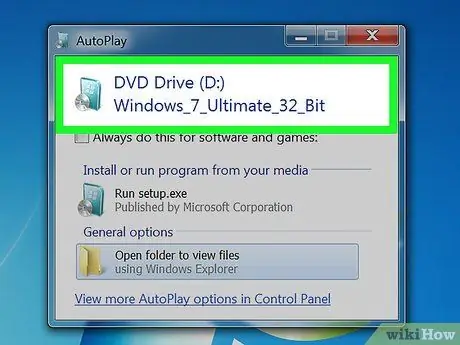
Step 1. Insert the Windows 7 installation disc into your computer's optical drive
The purpose is to log into a system administrator account to be able to make some changes to the computer's registry.
It is not important to use the same DVD with which you installed Windows 7 on your computer; if necessary, you can borrow one from a friend or colleague
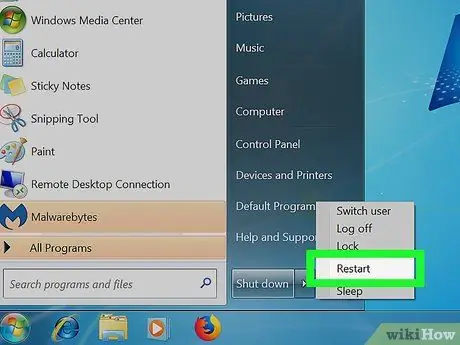
Step 2. Restart your computer
It should boot when loading the operating system from the disc inserted into the optical drive. At this point, a screen should appear asking you to choose the language in which to install the operating system.
If after rebooting your computer returns to the classic Windows logon screen, it simply means that you need to change the boot sequence of your machine's BIOS
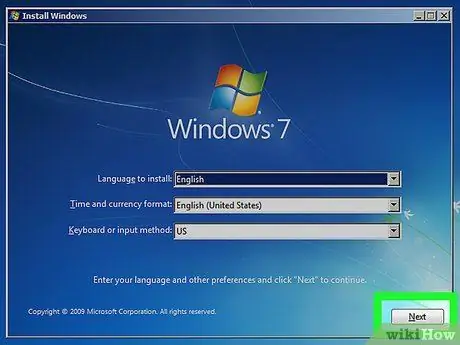
Step 3. Choose your language, then press the Next button
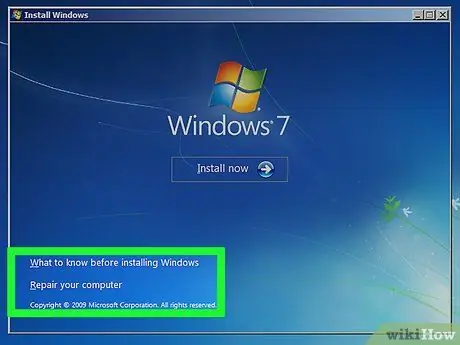
Step 4. Choose the Repair your computer option
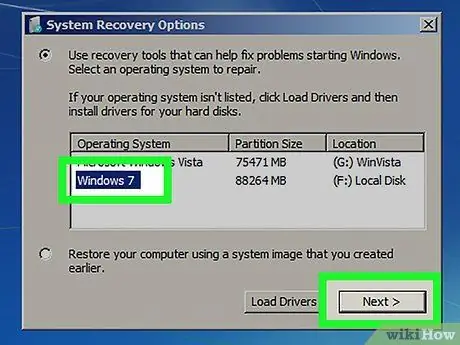
Step 5. Select the current Windows installation
- Choose the current Windows 7 installation from the list that appears. Unless you have installed a second operating system on a hard drive partition, this should be the only option available.
- Press the Next button.
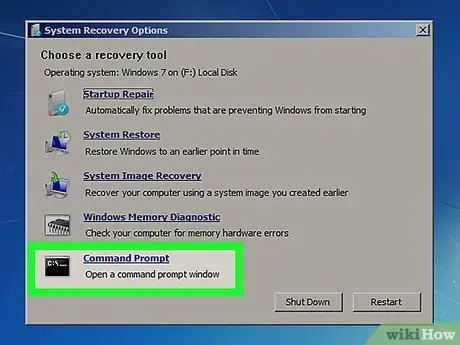
Step 6. Select the "Command Prompt" link
It is the last option at the bottom that appears in the "System Recovery Options" window. At this point, a command prompt window will appear. It is a small command line window with a black background and white text.
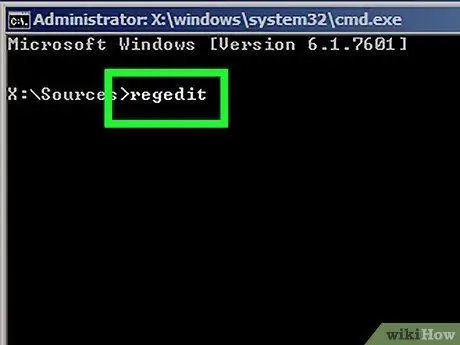
Step 7. Type the regedit command, then press the Enter key
The registry editor window will appear.
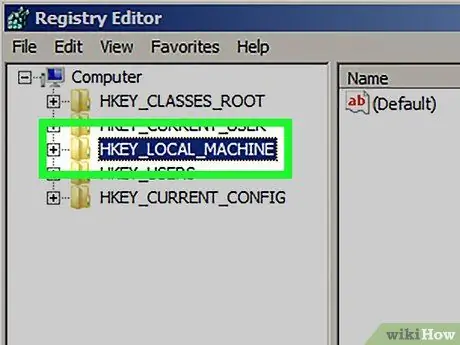
Step 8. Click the HKEY_LOCAL_MACHINE icon
It is located in the tree menu on the left side of the window.
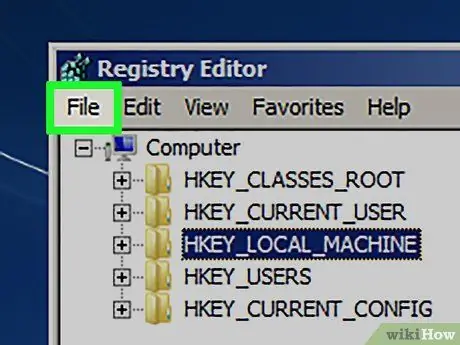
Step 9. At this point, access the "File" menu
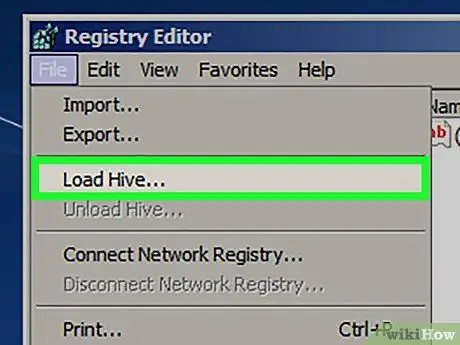
Step 10. Choose the "Load Hive" item
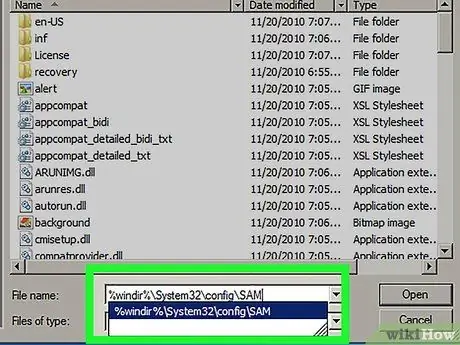
Step 11. Type the string% windir% / system32 / config / sam in the "File name" field of the window that appears
Make sure you type it exactly as it appears in the article.
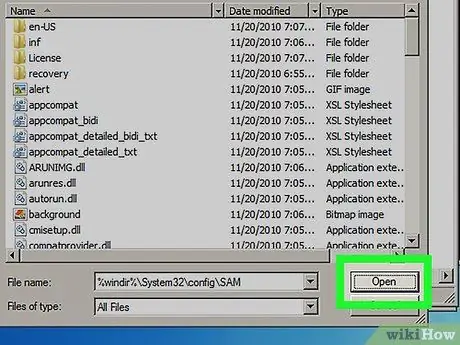
Step 12. Press the Open button
A screen will appear asking you to enter the name of the "New hive".
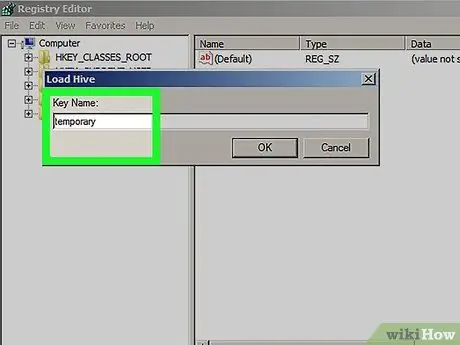
Step 13. Name the new hive Temporary
Actually, you can choose whatever name you like, but the one indicated is perfect for our purpose.
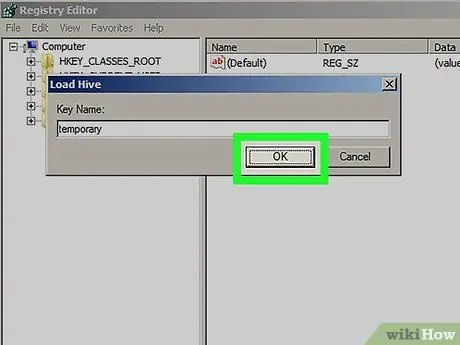
Step 14. Press the OK button
At this point, you will be redirected to the main registry editor screen.
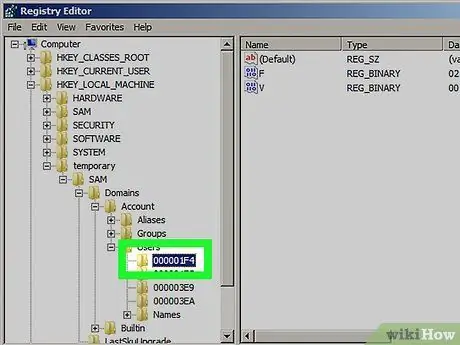
Step 15. Access the registry key for the user account whose password you want to change
Below, you will find all the steps to take to access the following registry key "HKEY_LOCAL_MACHINE / Temporary / SAM / Domains / Account / Users / 000001F4":
- Click the "+" icon related to the HKEY_LOCAL_MACHINE node in the tree menu on the left of the registry editor window.
- Click the "+" icon relating to the Temporary node of the tree menu.
- Click the "+" icon relating to the SAM node in the tree menu.
- Click the "+" icon related to the Domains node of the tree menu.
- Click the "+" icon related to the Account node of the tree menu.
- Click the "+" icon related to the Users node of the tree menu.
- Click the "+" icon relating to node 000001F4. In the main window pane, the one on the right, you should find the entry F.
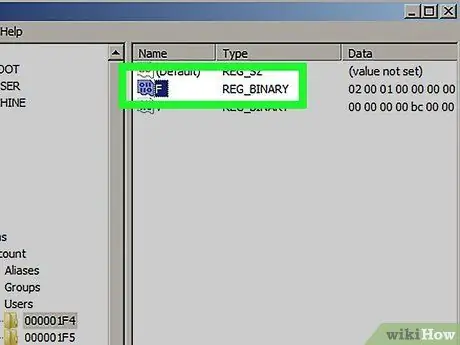
Step 16. Double click on item F
A small pop-up window will appear containing several hexadecimal values.
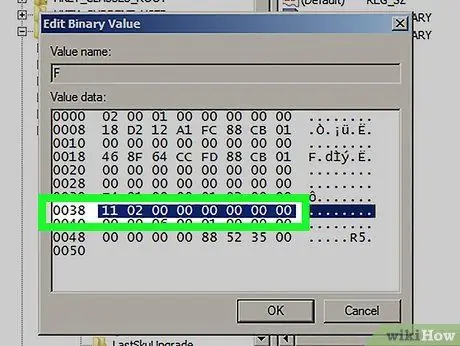
Step 17. Find the line of text starting with the code 0038
On the right of the code 0038, the number 11 should be present.
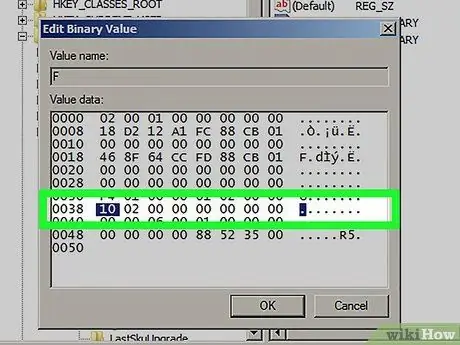
Step 18. Change the value 11 to 10
- Use the mouse cursor to highlight only the value 11. Check that no empty spaces are selected either to the right or to the left of the indicated value.
- At this point, type the number 10.
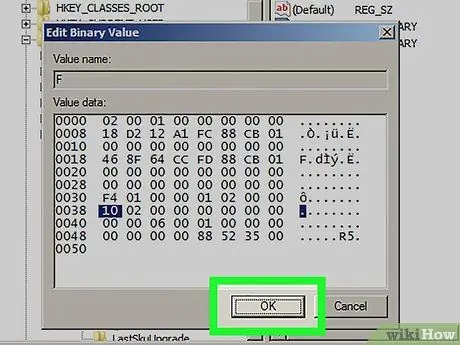
Step 19. When finished editing, press the OK button
Congratulations, the hardest and most complicated part of the job is done.
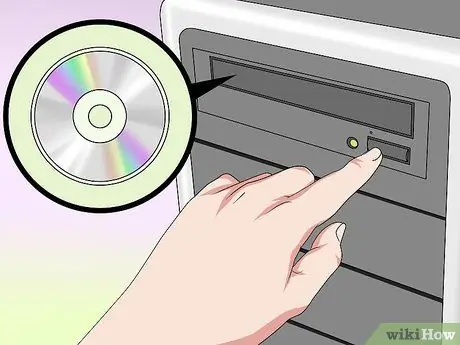
Step 20. Eject the Windows 7 DVD from your computer's optical drive
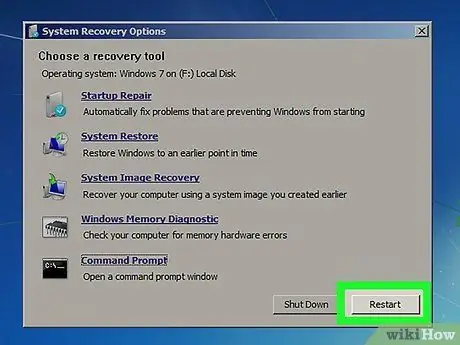
Step 21. Reboot the system
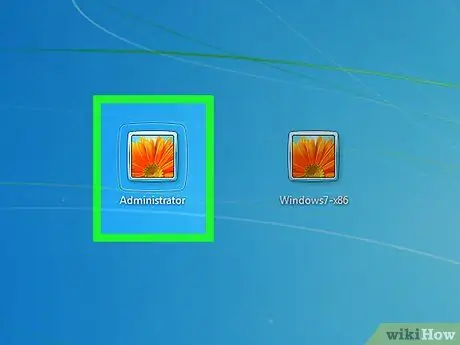
Step 22. Select the computer administrator account
In this way, you will have access to the system with full control of all the features being able to make the changes you want.
Now use the instructions in this article to reset the password of the user account you normally use when you log in to the instance of Windows 7 installed on your computer
Method 3 of 4: Using NTPassword
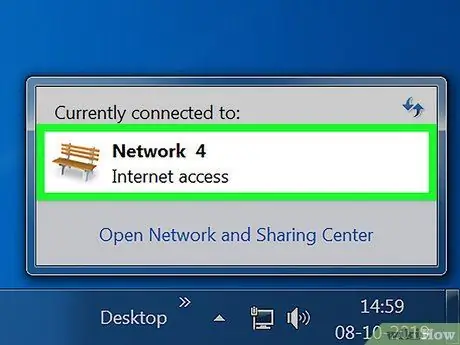
Step 1. Log in to a second computer
If you can access the web from another computer, you can download a small program called NTPassword (also known as "chntpw"), which allows you to reset the login password of a computer running Windows 7. To use it, you will need to create a boot disk or USB drive to copy the program to.
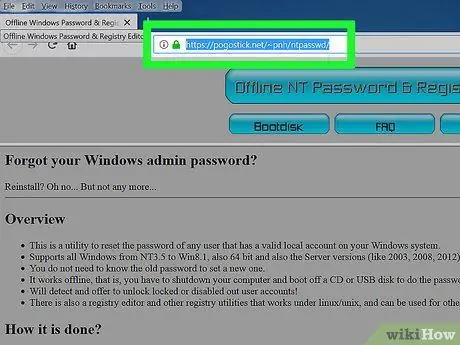
Step 2. To download NTPassword, go to this URL
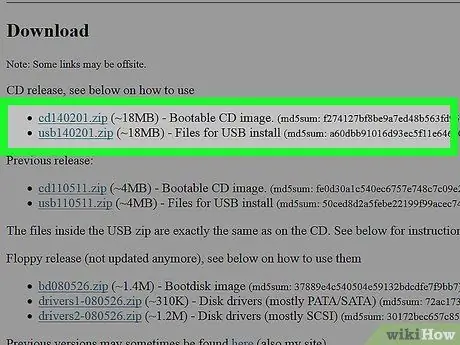
Step 3. Select the version of the program you want to use
To do this, choose one of the following links:
- Click the usb140201.zip entry to create a bootable USB drive. The USB key you are going to use must not contain anything other than the indicated file.
- Select the cd140201.zip option to download the ISO image (cd140201.iso) of the disc to be burned to your computer. Once the download is complete, you can use it to create a bootable CD or DVD.
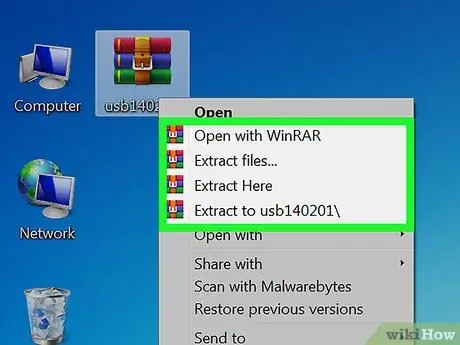
Step 4. Create a bootable USB drive
If you have chosen to use the usb140201.zip version of the program, follow these instructions:
- Extract the data contained in the compressed archive (usb140201.zip) you just downloaded onto the USB key you have chosen to use. Remember that the files must be located in the root directory of the USB drive and not within a subfolder.
- Go to the "Start" menu, then type the keyword cmd into the search field.
- Right-click the "Command Prompt" icon that appears in the search results, then choose "Run as administrator".
- Type the command cd [x:] in the command prompt window, being careful to replace the "x:" parameter with the drive letter currently assigned to the USB stick in use, then press the Enter key.
- Now run the command [x:] syslinux.exe -ma [x:]. Again, remember to replace the "x:" parameter with the drive letter currently assigned to the USB stick you are using, then hit the Enter key.
- At this point, remove the USB drive from your computer.
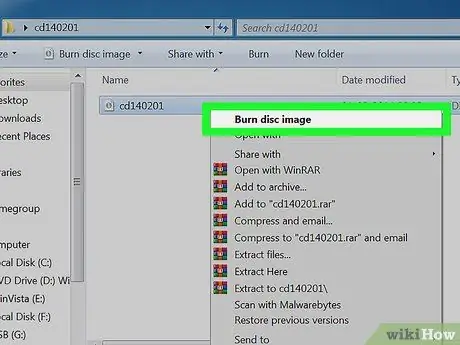
Step 5. Create a bootable CD or DVD
If you have chosen the cd140201.zip option, follow these instructions to create a boot disk:
- Insert a blank, recordable disc (CD-R or DVD-R) into your computer's optical drive.
- Select the "cd140201.iso" file you just downloaded with the right mouse button, then choose the "Burn image to disc" option from the context menu that appeared.
- Follow the on-screen instructions to finish burning the ISO image to disc.
- When the burning process is complete, take the disc out of the second computer.
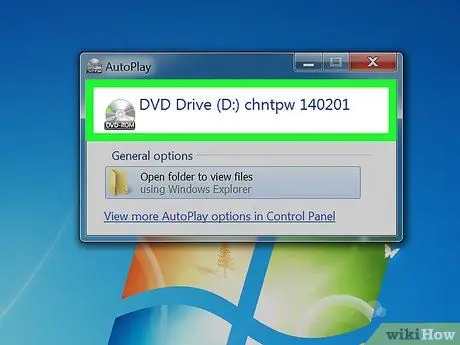
Step 6. Insert the USB stick or CD / DVD respectively into a free USB port or into the optical drive of your computer which you can no longer access
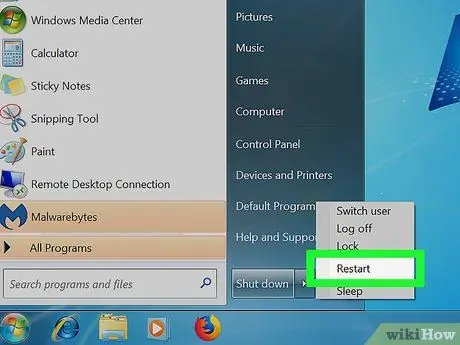
Step 7. Reboot the system
The computer should restart by loading the data on the USB drive or bootable CD / DVD. When finished, a Command Prompt window should appear stating "Windows Reset Password".
If after rebooting your computer returns to the classic Windows logon screen, it simply means that you need to change the boot sequence of your machine's BIOS
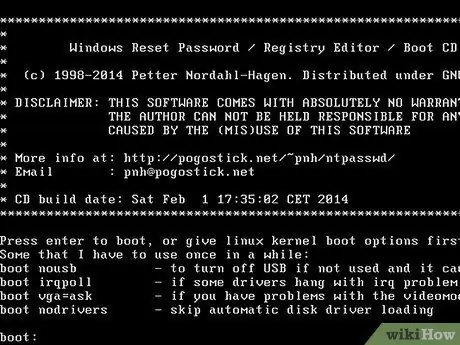
Step 8. Press the Enter key
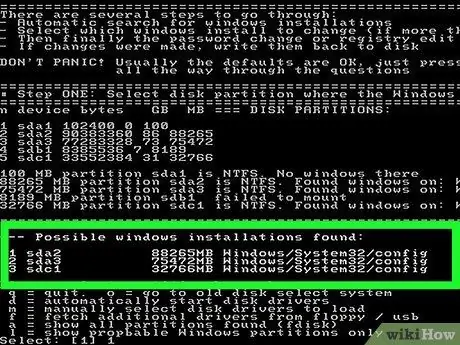
Step 9. Select the disk or partition that contains the Windows 7 installation
At the bottom of the screen you will find "STEP ONE: Select disk where the Windows partition is".
- Look at the partition listed under "Candidate Windows partitions found".
- Press the keyboard key that corresponds to the identification number next to the largest partition without the words "Boot".
- Press the Enter key.
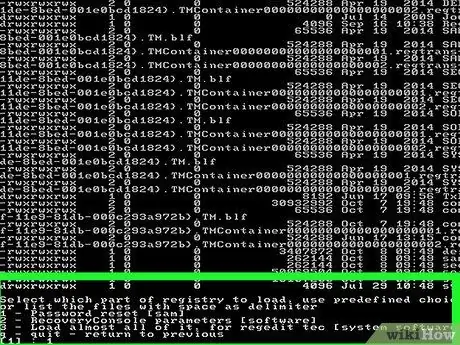
Step 10. Press the Enter key again to confirm the path to the system log file
At this point, you should see the message "Select which part of registry to load, use predefined choices or list the files with space delimiter".
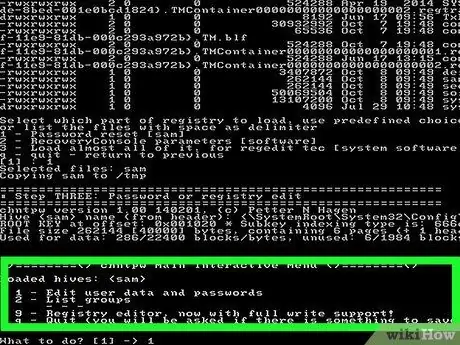
Step 11. Press the Enter key
This will select the default option, which is "Edit user data and passwords".
Step 12. Press the Enter key again to proceed further using the default option again
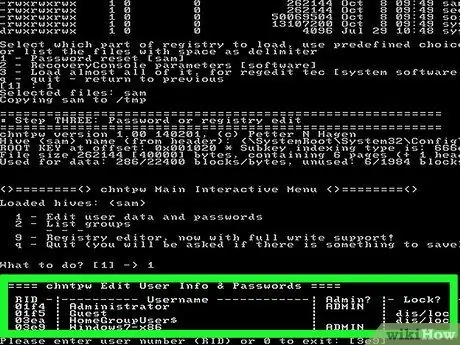
Step 13. Choose the Windows user account whose login password you want to change
- Find your user account in the "Username" column at the bottom of the screen.
- Now locate the corresponding "RID" code, shown in the column located to the left of the one called "Username".
- Type the "RID" code of your user account, then press the Enter key.
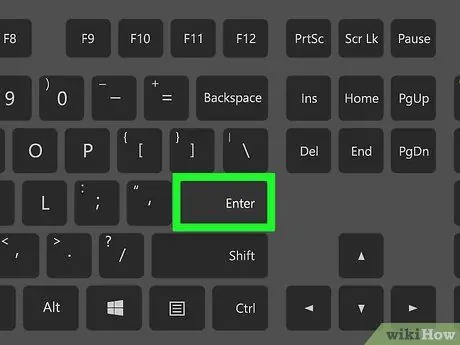
Step 14. Press the Enter key
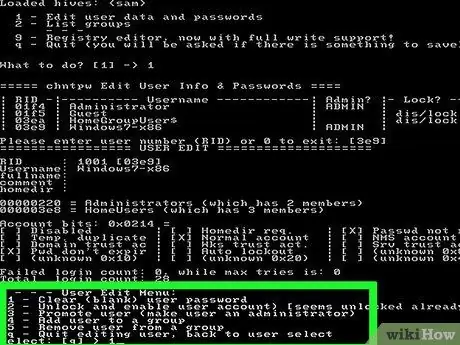
Step 15. Press the keys in succession
Step 1. And Enter the keyboard.
This will clear the current password of the specified user.
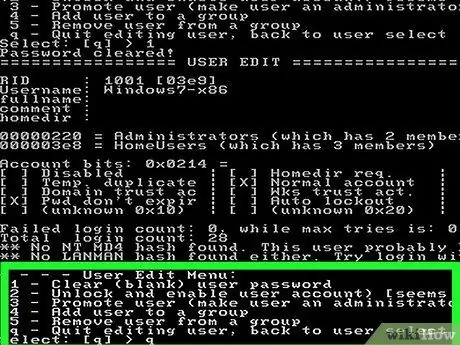
Step 16. Press the q keys in succession And Enter.
At this point, you will be asked to save the changes made to the system configuration.
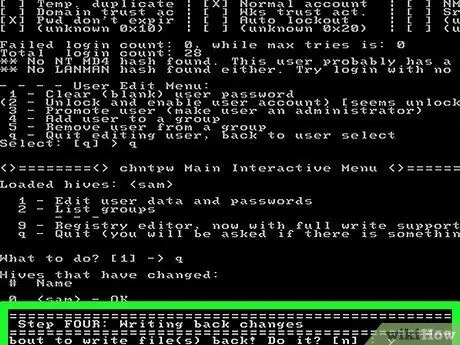
Step 17. To complete the procedure, press the y keys in succession And Enter.
This way, any changes you've made will be saved.
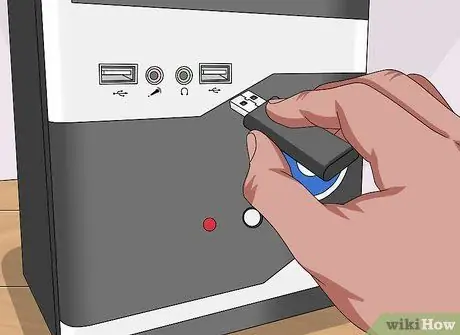
Step 18. Remove the USB stick or take the CD / DVD out of the computer's optical drive
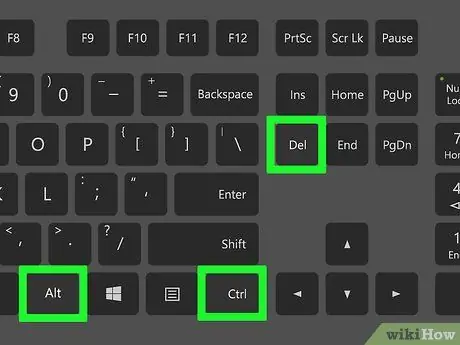
Step 19. Press the hotkey combination Ctrl + Alt + Del
Your computer will automatically restart and you will be redirected to the Windows 7 login screen. At this point, just select your user account and set a new login password.
Method 4 of 4: Use a Password Reset Disk
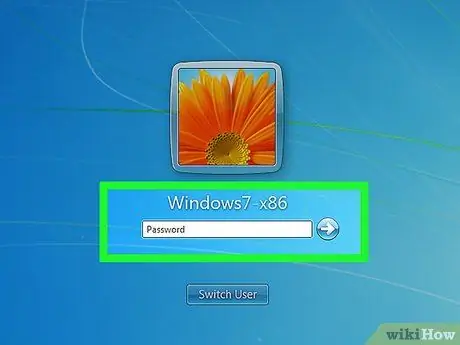
Step 1. Try logging into Windows using your account
If you have previously created a password reset disk, you can use it now to regain access to your computer.
If you've never created a password reset disk for your Windows user account and your computer, you'll need to use one of the other methods described in this article
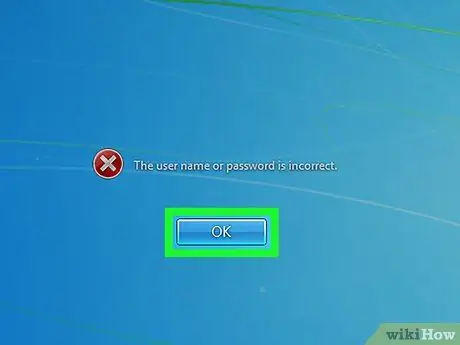
Step 2. Press the "OK" button located inside the window indicating that the entered password is incorrect
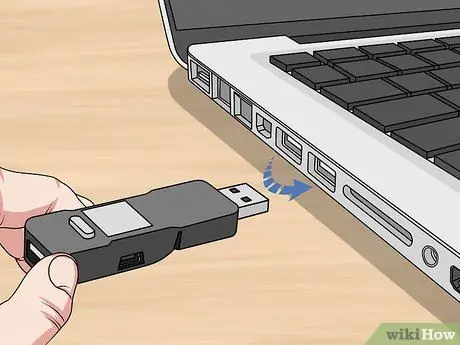
Step 3. Insert the USB key to reset the password into a free USB port on your computer
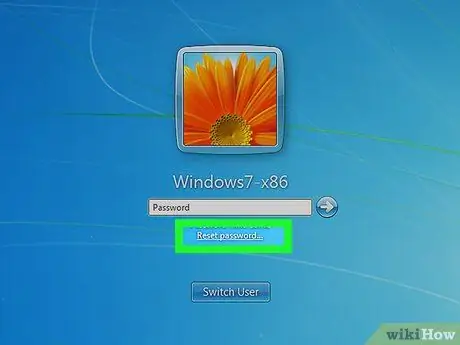
Step 4. Choose the item "Reset password…"
It should be positioned exactly below the field for entering the login password. This will start the Windows Password Reset Wizard.
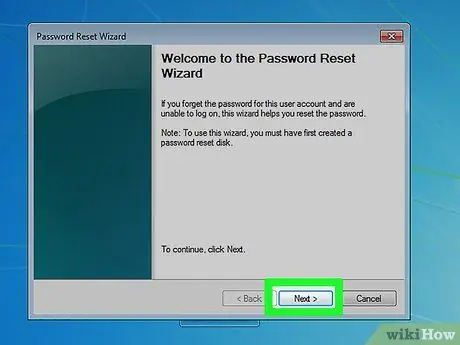
Step 5. Press the Next button
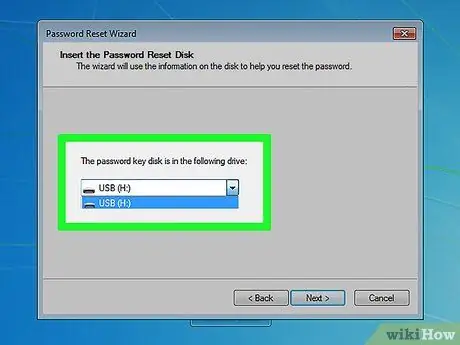
Step 6. Select the USB stick from the drop-down menu that appeared
Normally the USB drive is labeled "Removable Disk" or "Removable Storage".
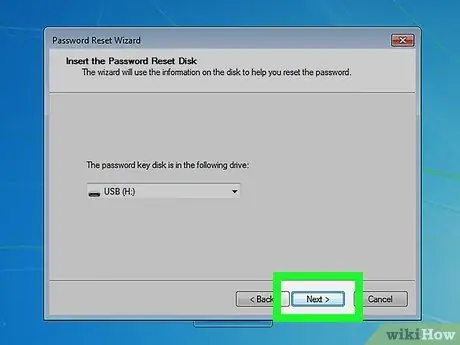
Step 7. Press the Next button
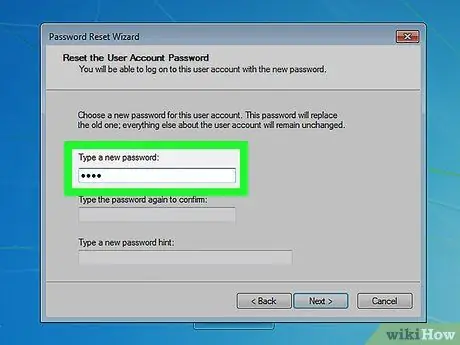
Step 8. Type the new login password
Do this using the first blank text field located under "Enter new password".
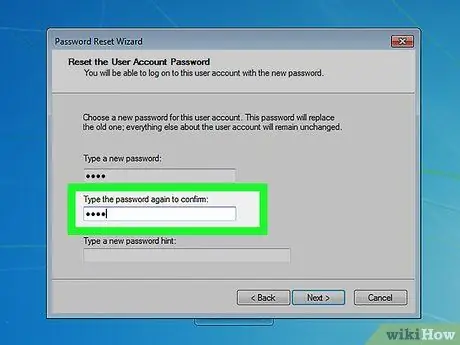
Step 9. Retype your chosen password to confirm it is correct
In this case you will have to use the second empty text field located under the heading "Retype the password to confirm".
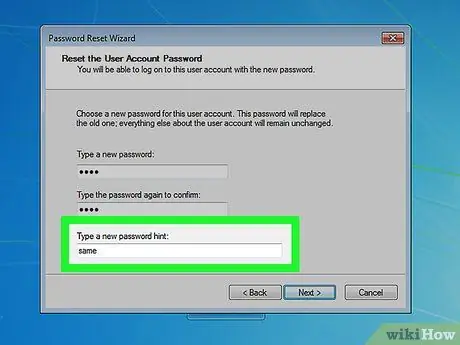
Step 10. Enter a word or phrase that will allow you to trace the password you have chosen
In this case you will have to use the third text field placed under the previous two. You should use information that is easy to remember to help you quickly trace the password you just created in case you forget it.
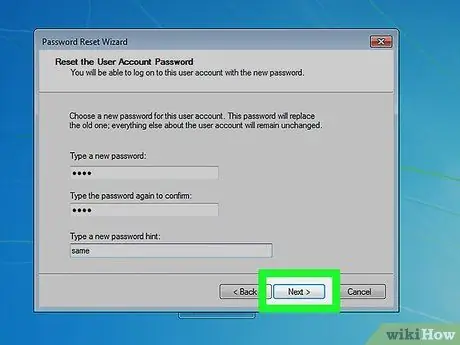
Step 11. Once you have finished making your selection, press the Next button
If an error message similar to the following "An error occurred while the wizard was trying to set the password" appears, it means that you have used the wrong password reset disk
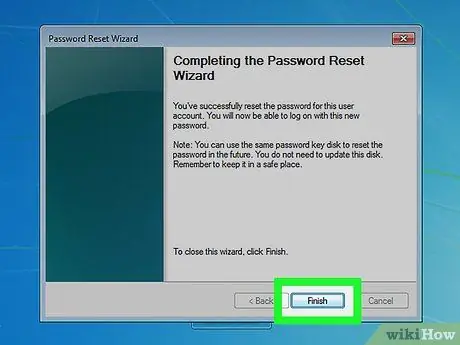
Step 12. At this point, press the Finish button
This will close the Reset Password Wizard window.
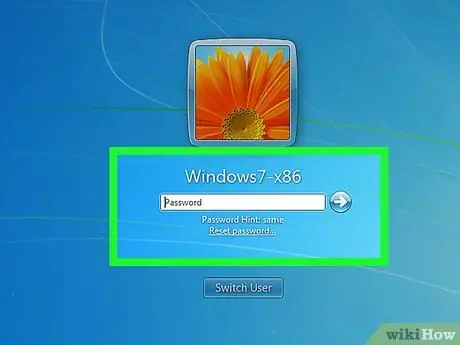
Step 13. Log in to Windows
You should now be able to log back into the computer using your user account and the new password you just created.


