If you intend to sell your computer, you should delete the partitions on the hard drive to restore the factory configuration that existed at the time of purchase. When you delete partitions on a hard drive, the hard drive returns to its original state making all the storage space available to a single memory unit. It should be noted that the indications in this article are compatible with Windows 7 systems and later versions. If you are using a computer with an older version of Windows, you will need to get third-party software to manage the partitions on the disk. On the contrary, all Macs on the market allow you to partition the hard disk and delete the partitions present in total autonomy.
Steps
Method 1 of 2: Windows
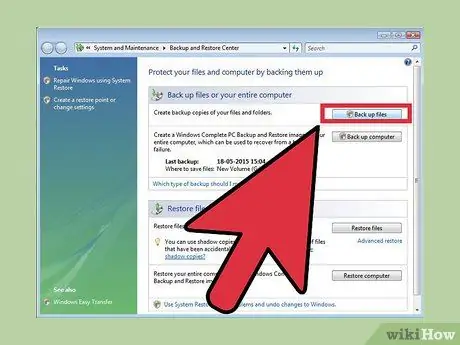
Step 1. Back up all data on the partition you want to delete, but you want to keep
By deleting a volume, all the data it contains will be lost forever. Please refer to this article for more details on how to back up your data.
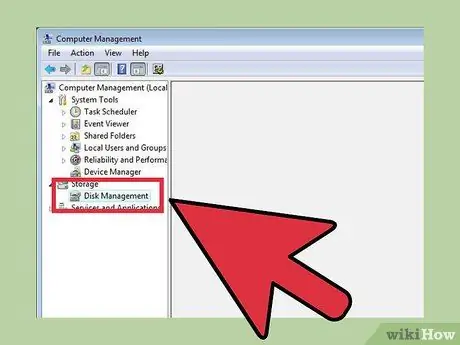
Step 2. Start the Windows "Computer Management" program and choose the "Disk Management" tool
Windows computers already have this software which is an integral part of the operating system. This program provides the complete list of all hard drives present in the system and all partitions into which they are divided. You can access this tool in two ways:
- Press the "Start" button and type the keyword "compmgmt.msc" into the menu that will appear. The "Computer Management" system window will appear. At this point select "Disk Management" from the left sidebar of the latter.
- Access the "Disk Management" tool directly by typing the keyword "disk" in the "Start" menu and selecting the "Create and format hard disk partitions" icon.
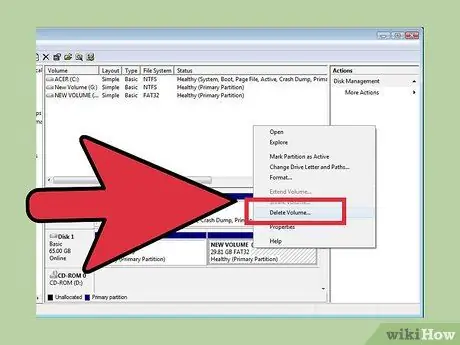
Step 3. Delete all data on the partition to be deleted
Inside the lower pane of the "Disk Management" window is shown the list of all disks identified by the entries "Disk 0", "Disk 1", etc. Next to each disk you can see its partitions grouped within a horizontal bar.
-
Select the partition to be deleted with the right mouse button, then choose the "Delete volume" option from the context menu that appeared. Search for the volume to delete based on the name you gave it when you created it. All data stored in this partition will be permanently deleted. Unfortunately this is the only way to remove a partition.
Users of Windows 7 and Windows Vista systems they will have to select the partition to be deleted with the right mouse button and choose the item "Delete partition" from the context menu that will appear.
- At this point the partition will disappear and will be replaced by unallocated disk space. Unallocated memory space should be identified by a black bar, while space reserved for still active partitions is identified by a blue bar.
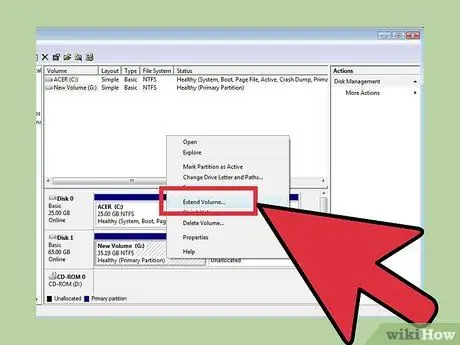
Step 4. Assign the unallocated free space to the primary partition (or whatever you want) of the original hard drive
In this way the space that was previously reserved for the partition that has been deleted will be allocated entirely to the main one of the disk. In other words, the partition will return to be an integral part of the free space available on the hard disk in question. For example, if your memory drive is the "C:" drive, right-click it and choose the "Extend Volume" option from the drop-down menu that will appear.
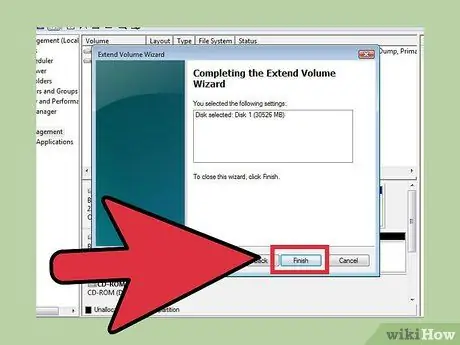
Step 5. Use the "Extend Volume" wizard to allocate the space left free by the partition to the selected hard drive
The wizard window will appear automatically as soon as you choose "Extend Volume".
Press the "Next" button at the bottom of each screen of the "Extend Volume" window to complete the wizard. When finished, press the "Finish" button
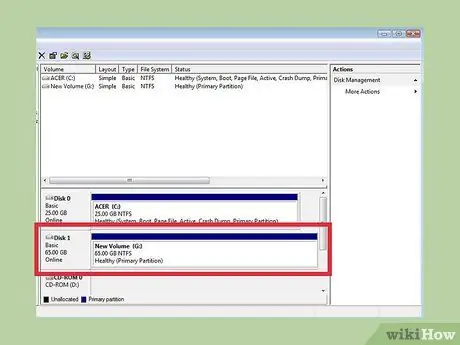
Step 6. At this point the partition under consideration will no longer be listed in the "Disk Management" window
The hard drive to which the removed partition belonged should be returned to its original state and all free space that was previously occupied by the partition should be made available again.
Method 2 of 2: Mac
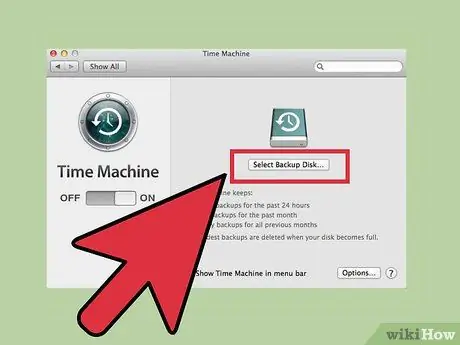
Step 1. Back up all data on the partition you want to delete, but you want to keep
By deleting a volume, all the data it contains will be lost forever. Please refer to this article for more details on how to back up your data.
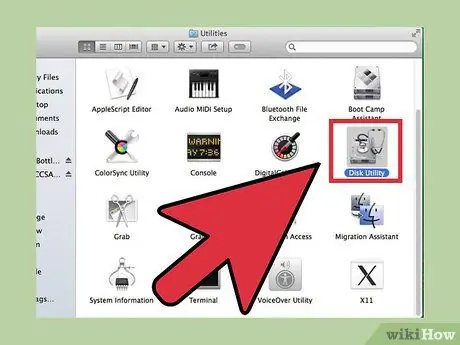
Step 2. Launch the "Disk Utility" program
Open a Finder window and use its search bar and the keywords "disk utility" to search your Mac.
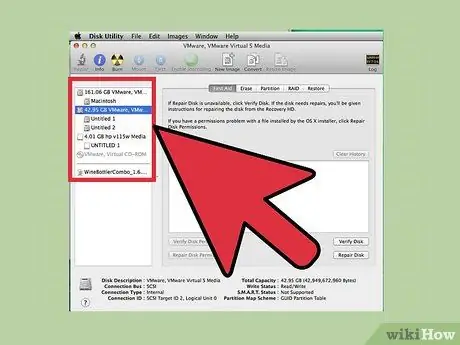
Step 3. Locate and select the correct hard drive icon
All hard drives installed in your Mac are listed within the left sidebar of the "Disk Utility" window. Make sure you select the drive that contains the partition to delete. If you haven't installed any additional storage drives on your Mac, you should only see one SSD. The various partitions are listed under the name of the disk they refer to, so select the one that contains the volume to be erased.
Select the name of the hard disk that contains the partition to be deleted, leaving out the volumes it contains for now
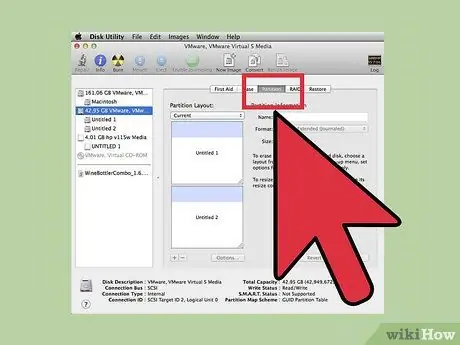
Step 4. Go to the "Partition" tab
At the top of the main pane of the "Disk Utility" window there should be five tabs, select the one labeled "Partition". It should be located between the "Initialize" and "RAID" tabs.
After selecting the indicated item, the "Partition Information" section should appear in the main frame of the window
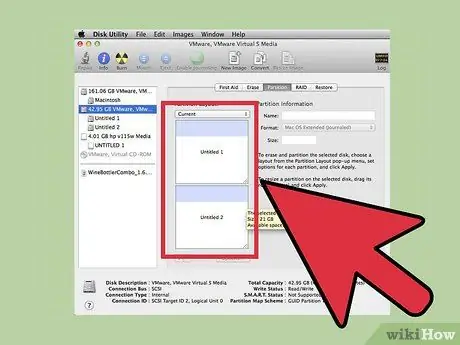
Step 5. Select the partition to delete
Within the section "Partition scheme:" you should see the graphic scheme of the partitions present in the chosen hard disk. Each white box represents a partition.
After selecting the pane of the partition to delete, make sure it is outlined in blue
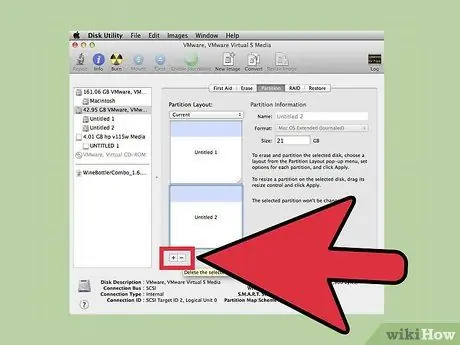
Step 6. Press the "-" button below the partition diagram
A drop-down menu will appear. Select the "Remove" item.
Make sure you have backed up any important data on the partition you need to keep. Once the partition is deleted, you will no longer be able to trace the data it contained, unless you have a backup copy of it
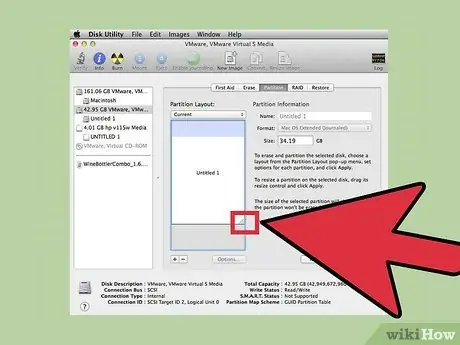
Step 7. Resize the remaining primary partition
After the deletion of the partition in question, within the graphic scheme of the hard disk in question, there should be an empty space of gray color just where the volume that was removed was. Select the lower left corner of the remaining main partition, characterized by three lines, and drag it down until it reaches the bottom edge of the pane. As you perform this step, the visible value inside the "Size" field will progressively increase.
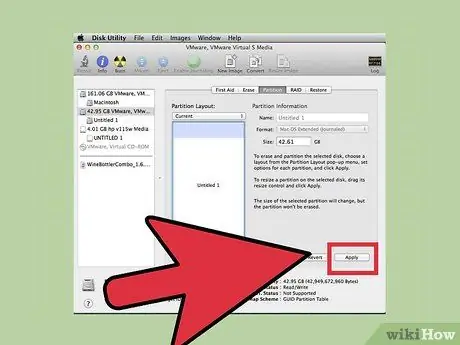
Step 8. Press the "Apply" button located in the lower right corner of the window
When prompted, select "Partition" from the drop-down menu that appeared.
This step may take some time to complete, depending on the size of the primary partition being resized, so please be patient
Advice
- If necessary, be sure to back up all data on the drive.
- If you are using a Mac and the partition was created using "Boot Camp", deleting it may run into problems. Search online and download software that can manage Mac partitions to your computer.


