This article explains how to repair bad or corrupt sectors of a hard drive. This can be done on both a Windows and a Mac computer. It should be noted that if the hard drive has suffered physical damage, the problem cannot be fixed simply by using a diagnostic program. In this scenario you will need to go to a specialized data recovery center as soon as possible, to try to recover all the essential and important information it contains.
Steps
Method 1 of 2: Windows
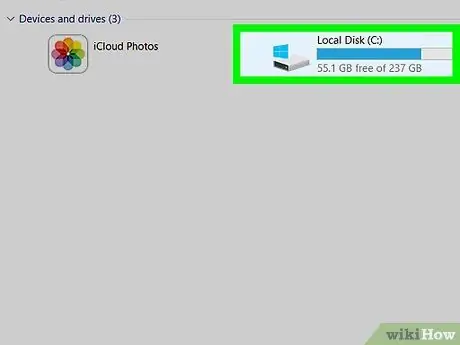
Step 1. Connect the hard drive to the computer if it is an external memory drive
If you need to repair bad sectors on an external hard drive or USB stick, plug the device into one of the free USB ports on your computer.
If you want to repair bad sectors on your computer's hard drive, skip this step

Step 2. Access the "Start" menu
Click on the button featuring the Windows logo located in the lower left corner of the desktop. Alternatively, press the ⊞ Win key on your keyboard.
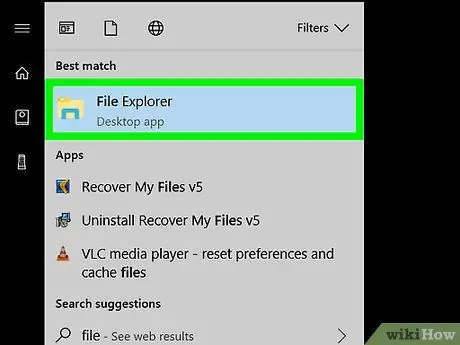
Step 3. Open the "File Explorer" window by clicking on the icon
It features a stylized folder and is located on the left side of the "Start" menu. The "File Explorer" system window will appear.
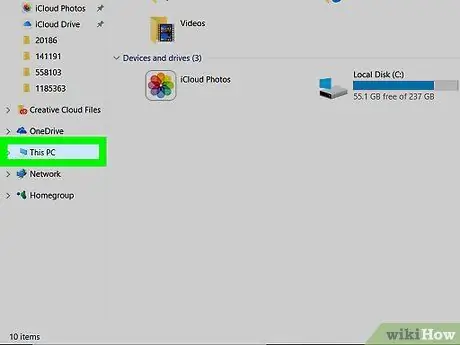
Step 4. Click on the entry This PC
It is listed in the left pane of the window. This will display the contents of the "This PC" section.
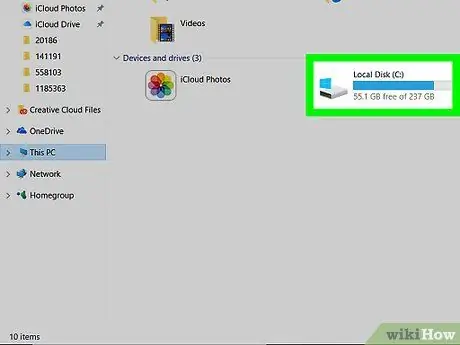
Step 5. Select the hard drive to repair
The corresponding icon is listed in the "Devices and Drives" section. Click on the disk icon you want to scan and repair.
The primary hard drive of your computer is usually indicated by the following wording OS (C:).
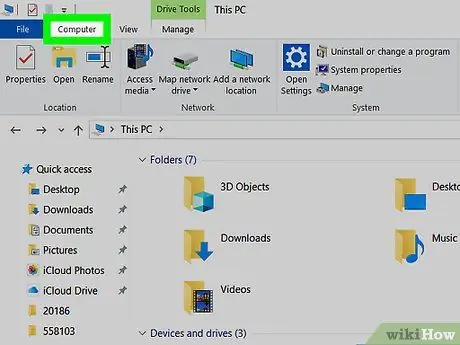
Step 6. Click on the Computer tab
It is located in the upper left corner of the window. A toolbar will appear.
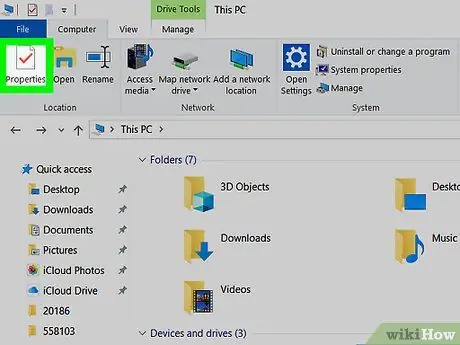
Step 7. Click on the Properties option
It is characterized by an icon depicting a white sheet with a red check mark inside. The "Properties" window of the selected hard drive will be displayed.
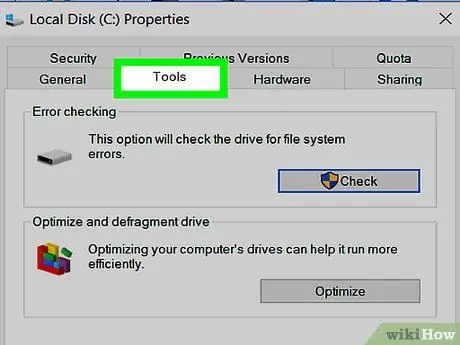
Step 8. Click on the Tools tab
It is visible at the top of the window.
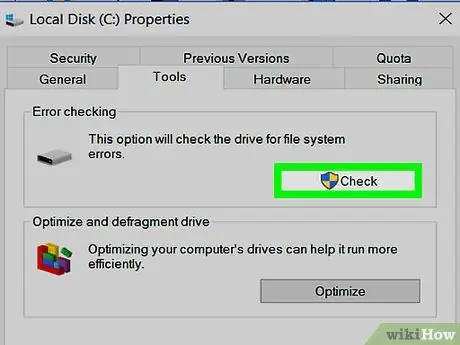
Step 9. Click the Check button
It is located in the right part of the "Error Checking" section of the "Properties" window.
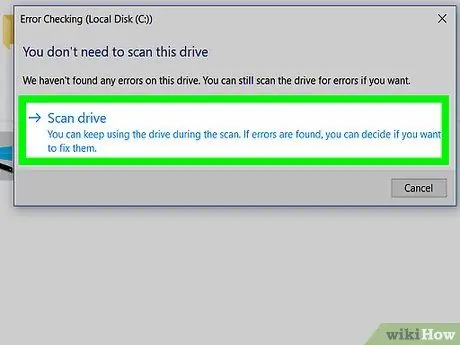
Step 10. Click the Scan Drive button when prompted
The operating system will scan the hard drive for any bad sectors.
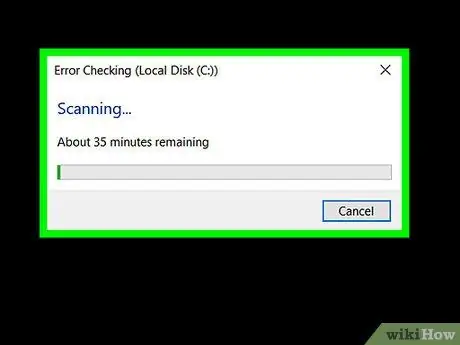
Step 11. Wait for the scan to complete
At the end of the analysis phase a pop-up window will be displayed with the list of results.
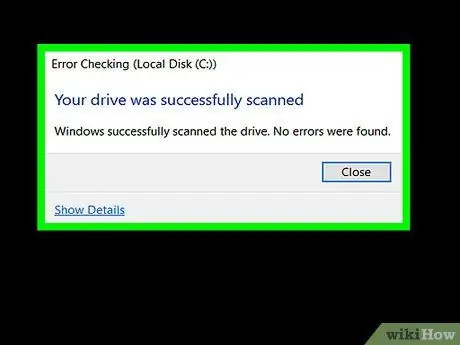
Step 12. Click on the Scan and Fix option when prompted
It is located at the bottom of the pop-up window that appeared. Windows will try to fix any errors found on the disk. The solution that will be adopted is to move the data present in the bad sectors to new sectors and to format the bad sectors in an attempt to restore their operation.
To fix all errors that were found during the disk scan, you may need to click the button several times Analyze and correct.
Method 2 of 2: Mac
Step 1. Connect the hard drive to the computer if it is an external memory drive
If you need to repair bad sectors on an external hard drive or USB stick, plug the device into one of the free USB ports on your computer.
- If you want to repair bad sectors on your computer's hard drive, skip this step.
- If your Mac doesn't have a USB port, you may need to purchase a USB 3 to USB-C adapter.
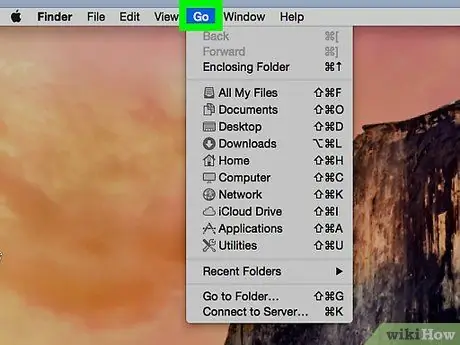
Step 2. Click on the Go menu
It is visible on the menu bar located at the top of the Mac screen. A number of options will be displayed.
If the menu Go is not visible at the top of the screen, click on the Finder app icon on the Mac Dock. Alternatively, click on an empty spot on the desktop.
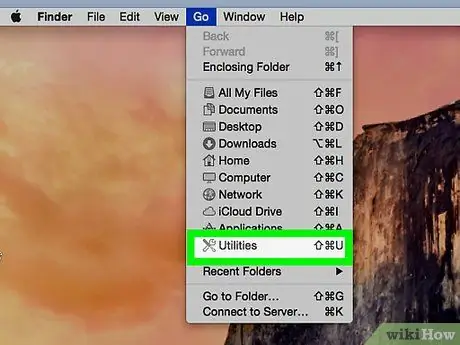
Step 3. Click on the Utility option
It is displayed at the bottom of the drop-down menu that appeared.
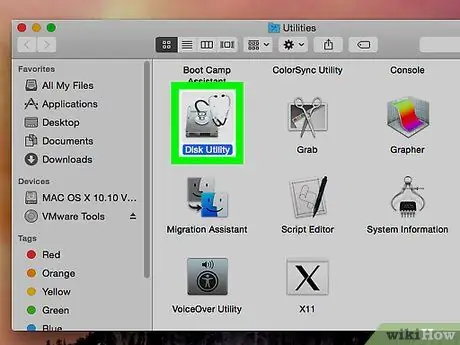
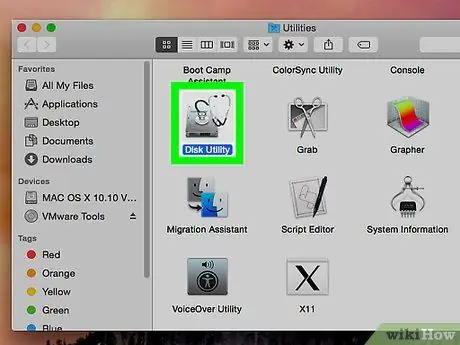
Step 4. Launch the Disk Utility app
Double-click the indicated application icon with a gray hard drive and stethoscope.
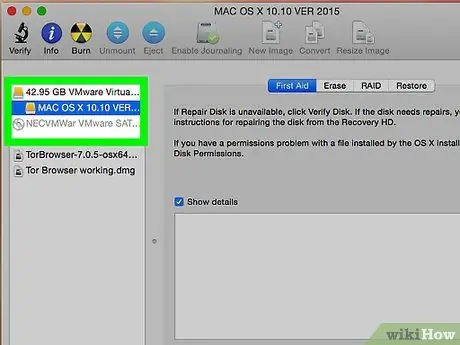
Step 5. Select the hard drive or drive to repair
Click on the corresponding name listed in the upper left corner of the window.
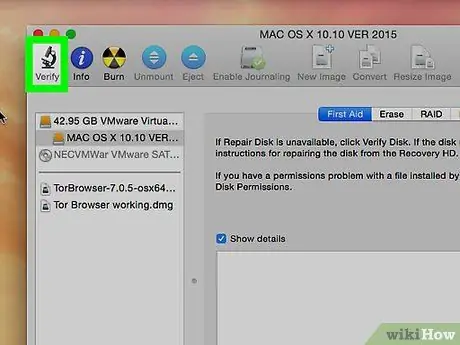
Step 6. Click on the S. O. S
It is displayed at the top of the "Disk Utility" window.
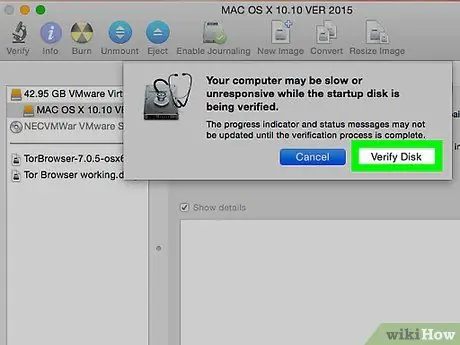
Step 7. Click the Run button when prompted
The program will analyze the selected drive for errors that will be repaired automatically.
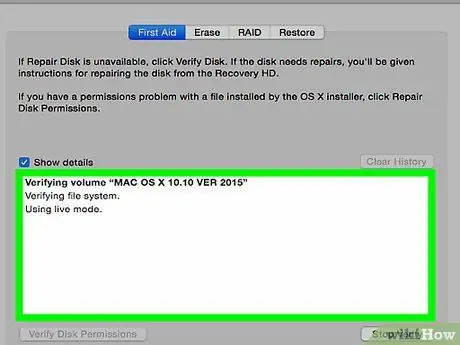
Step 8. Wait for the repair process to complete
When the "Disk Utility" program has finished analyzing the drive, a pop-up window should appear showing the results list.
If no repairs appear in the list of results, it means that no bad sectors were found on the hard drive
Step 9. Run the "S. O. S" function of the "Disk Utility" app again
Whenever bad sectors or errors have been found and repaired, re-scan with the "Disk Utility" app to make sure there are no more problems. When the program no longer detects any errors in the drive, it means that the Mac hard drive is in perfect condition.


