One of the most important settings for any non-automatic camera is the adjustment of the size of the hole (known as the "aperture") by which light passes from the subject, passes through the lens and ends on the film. The adjustment of this hole, which is defined in "f / stop" in reference to a standard measurement or simply as "diaphragm", influences the depth of field, allows you to control certain lens defects and can be of help to achieve certain special effects such as star reflections around particularly bright light sources. Knowing the mechanisms and effects of the diaphragm allows you to make conscious choices when choosing the aperture to use.
Steps
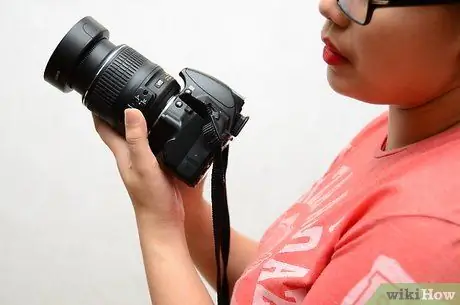
Step 1. First of all you need to familiarize yourself with the basic concepts and terminology
Without such knowledge the rest of the article may seem pointless.
-
Diaphragm or stop. This is the adjustable hole through which light passes from the subject, passes through the lens and ends on the film (or digital sensor). Like the pinhole in a pinhole camera, this mechanism prevents the passage of light rays except those which, even without passing through a lens, would tend to form an inverted image on the film. Combined with a lens, the diaphragm also blocks those rays of light that would pass away from the center of the lens, where the crystalline elements of the lens can barely focus and approximate the correct proportions of the image (and which usually produce some spherical or cylindrical distortions), especially when the subject is composed of aspherical shapes, causing the so-called aberrations.
Since each camera has an aperture that is usually adjustable or at least has the edge of the lens as its aperture, adjusting the aperture is what is also called "aperture"
- F-stop or simply opening. This is the ratio of the focal length of the lens to the size of the aperture. This measurement is used since the same amount of light is obtained for a given focal ratio and therefore the same shutter speed will be required for a given ISO sensitivity value (the sensitivity of the film or equivalent the light amplification of the digital sensor.) regardless of the focal length.
-
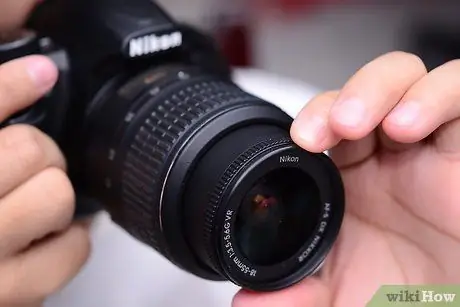
Iris diaphragm or simply iris. This is the device that most cameras have for adjusting the aperture. It consists of a series of thin metal plates that overlap each other and that rotate around the center sliding inside a metal ring. A central hole is formed which at full opening (when the slats are completely open towards the outside) is perfectly circular. As the slats are pushed inwards, this hole narrows forming a polygon of increasingly smaller dimensions and which in some cases may have rounded edges.
In most SLR cameras, the aperture that closes is visible from the front of the lens, either during an exposure or by activating the depth-of-field preview mechanism
- Close the diaphragm it means to use a smaller aperture (a higher f / stop number).
- Open the diaphragm it means to use a larger aperture (a lower f / stop number).
- Wide open it means using the widest aperture possible (the smallest f / stop number).
-
There shallow depth of field is the specific area of the image or (depending on the context) the width of the area that is perfectly in focus. A narrower aperture increases the depth of field and reduces the intensity at which objects that are out of scope are blurred. The concept of depth of field is to some extent a subjective matter as the sharpness gradually degrades as you move away from the precise point where the focus was made and whether the blur is more or less noticeable depends on factors such as the type of subject being shot, other causes of sharpness degradation, and the conditions in which the image is displayed.
An image taken with a wide depth of field is called "all in focus"
-
The Aberrations are imperfections found in the ability of a lens to focus on a subject perfectly. In general, cheaper and less common lenses (such as those with super-apertures) suffer from more pronounced aberrations.
Aperture has no effect on linear distortion (straight lines that appear curved in an image), which usually tends to disappear when using intermediate focal lengths in the focal range of a zoom. Furthermore, the images should be composed in such a way as to avoid dropping the attention on these lines, for example not leaving straight lines like a building or the horizon near the edges of the image. However, these are distortions that can be corrected with post-production software or in some cases automatically by native digital camera software
- There diffraction it is a fundamental aspect of the behavior of a wave passing through small apertures, which limits the maximum sharpness attainable by any lens to the smallest apertures. This is a phenomenon that becomes progressively visible more or less starting from images taken with f / 11 or higher apertures and which can make even a camera with excellent quality optics similar to a mediocre one (although sometimes it is useful to have a camera specially designed for specific uses that require, for example, a wide depth of field or long exposure times, even if it is not possible to have low sensitivity or neutral filters).
Step 2. Understand the depth of field
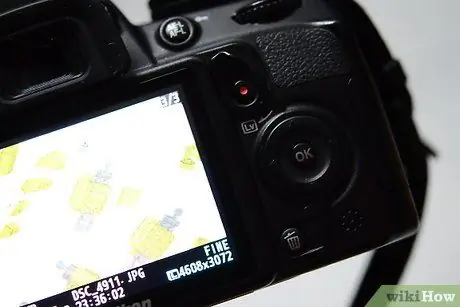
Formally, depth of field is defined as the area where objects appear focused in the image with an acceptable degree of sharpness. For each image there is a single plane on which the objects will be perfectly in focus and the sharpness gradually degrades in front of and behind this plane. Objects positioned in front of and behind this plane but at relatively negligible distances, should be so little blurred that the film or the sensor cannot register this blur; in the final image even objects slightly further away from this plane of focus will appear "fairly" in focus. On lenses usually the depth of field near the focus (or distance) scale is indicated, so that the focus distance can be estimated quite satisfactorily.
- Approximately one third of the depth of field is between the subject and the camera, while two thirds is behind the subject (unless it extends to infinity, since this is a phenomenon related to how far they need to be. "bent" the rays of light coming from the subject to converge on the focal point and the rays coming from afar tend to be parallel).
-
Depth of field gradually degrades. If they are not in perfect focus, backgrounds and foregrounds will appear slightly soft with a small aperture, but with a wide aperture they will be particularly blurry if not outright unrecognizable. So it is important to consider whether it is important that these subjects are in focus, if they are relevant to the context to the point of making them a little soft or if they are disturbing elements and therefore go completely out of focus.
If you're trying to get a particular background blur but don't have enough depth of field available for the subject to be captured, you'll need to focus on the spot that needs the most attention, usually the subject's eyes
- At times it seems that the depth of field may depend, in addition to the aperture of the diaphragm, on the focal length (the greater the focal length should correspond to a smaller depth of field), the format (smaller films or sensors should be characterized by a greater depth of field, for a given angle, i.e. with the same focal length), and from the distance to the subject (greater depth at a short distance). So if you want to get a shallow depth of field, you should use a super-fast (expensive) lens, or zoom (free) and set a cheap lens wide open.
- The artistic purpose of depth of field is to deliberately choose whether to have a fully defined image or to "cut depth" by dissolving foreground or background subjects that distract the viewer.
- A more practical purpose of depth of field with a manual focus camera is to set a narrow aperture and to focus the lens in advance on its "hyperfocal distance" (i.e. the minimum distance at which the depth of focus is). field extends to infinity starting from a certain distance from the lens; for any given aperture just check the tables or the depth-of-field markings marked on the lens), or to focus at a predetermined distance, in order to be able to shoot immediately a photo of a subject that moves too fast or unpredictably and therefore the autofocus would not be able to capture clearly (in these cases a high shutter speed will also be required).
-
Be careful, because usually while composing the image you will not be able to see any of this through the viewfinder or on the camera screen.
The exposure meter of modern cameras measures light with the lens at its maximum aperture and the diaphragm is closed at the aperture needed only at the moment of shooting. The depth-of-field preview function usually only allows for a dark and inaccurate pre-view. (The strange markings on the focusing screen should not be taken into consideration; they will not be impressed with the final image.) What's more, the viewfinders in current [Understanding your SLR Camera | DSLRs] and other non-autofocus cameras can show true depth of field wide open with a lens that has a maximum aperture of f / 2, 8 or faster such limitations). In current [Buy a Digital Camera | digital cameras] it is easier to take the picture, then view it on the LCD screen and zoom in to see if the background is sharp enough (or blurry).
Step 3. Interactions between aperture and flash
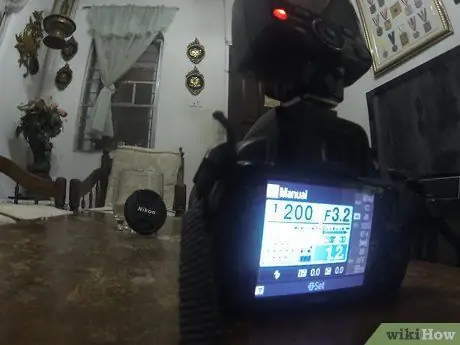
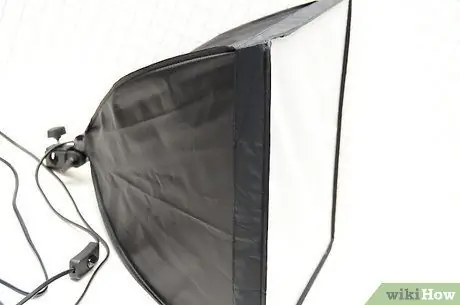
The flash of a flash is usually so short that the shutter is basically affected only by the aperture. (Most film and digital SLRs have a maximum "flash-sync" shutter speed compatible with the flash speed; beyond that speed only a portion of the image will be recorded based on how the shutter moves on the "focal plane." Special high-speed flash sync programs use a series of rapid, low-intensity flashes of the flash, each of which exposes a portion of the image; these flashes greatly reduce the range of the flash, so they rarely prove to be useful.) A large aperture increases the range of the flash. It also increases the effective range of the fill flash as it increases the proportional exposure of the flash and decreases the time the exposure records only ambient light. A small aperture could be useful for avoiding over-exposures of close-ups, due to the fact that there is a limit below which the intensity of the flash cannot be reduced (an indirect flash, although in itself would be less efficient, in these cases it could be useful). Many cameras manage the balance between flash and ambient light through "flash exposure compensation". For complex flash settings a DSLR is preferable, as the result of instant flashes of light is not naturally intuitive, although some studio flashes have preview features called "modeling light" and some fantastic handheld flashes have similar functions too..
Step 4. Verify the optimal sharpness of the lenses
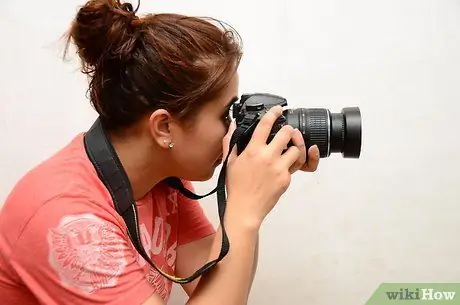
All lenses are different from each other and demonstrate their best qualities with different aperture apertures. The only way to verify this is to take pictures with different apertures of a subject with lots of details and a beautiful texture, and then compare the different shots and determine the behavior of the optics at the various apertures. To avoid confusing blur with aberrations, the subject should be positioned almost "infinitely" (at least ten meters for wide angles, over thirty meters for telephoto lenses; a row of distant trees are usually fine). Here are some ideas to pay attention to:
-
Almost all lenses at maximum aperture have low contrast and are less punchy, especially towards the corners of the image.
This is especially true with inexpensive lenses and point-and-shoot cameras. Consequently, if you want to get an image full of sharp details even at the corners, you will need to use a smaller aperture. For flat subjects the sharpest aperture is usually at f / 8. For subjects placed at different distances, a smaller aperture should be preferable for greater depth of field.
-
Most lenses suffer from noticeable light loss wide open.
Light loss occurs when the edges in the image are slightly darker than the center. This is an effect, called vingetting, sought after by many photographers, in particular by portraitists; focuses attention towards the center of the photo, which is why this effect is often added in post-production. The important thing is to be aware of what you are doing. Light loss usually becomes invisible at f / 8 and higher apertures.
- Zoom lenses behave differently depending on the focal length they are used with. The above tests should be performed at different zoom factors.
- Diffraction in almost all lenses results in a certain softness on images shot at f / 16 or narrower apertures, and conspicuous softness starting at f / 22.
- All these aspects are only a part of what must be considered to get the best possible sharpness in a photo that already enjoys good composition - including depth of field - as long as it is not overly spoiled by a slow shutter speed that it may cause camera shake and subject blur or excessive electronic noise due to high "sensitivity" (amplification).
- There is no need to waste too much film to test these characteristics - just test the lens with a digital camera, read reviews and, if you really can't do otherwise, trust that expensive and fixed (non-zoom) lenses give the better than if at f / 8, the cheap and simple ones like the ones that come in kit with the camera work best at f / 11, and the exotic cheap lenses like the super wide-angle ones or the optics with add-ons, adapters and multipliers work well only from f / 16. (With a point-and-shoot camera and a lens adapter, you'll probably need to shut down as much as possible using the aperture-priority program - you'll need to check the camera menu.)
Step 5. Learn about the special effects related to aperture
-
Bokeh, is a Japanese term that is usually used to refer to the appearance of out-of-focus areas, particularly highlights that will appear as bright bubbles. Much has been written about the details of these out-of-focus bubbles, which are sometimes brighter in the center and sometimes brighter at the edges, like donuts, while at other times they have a combination of these two effects, but usually authors rarely notice this in the articles that do not specifically deal with bokeh. What matters is the fact that the out of focus blur can be:
- Wider and more widespread with wider apertures.
- With soft edges at maximum aperture, due to the perfectly circular hole (the edge of the lens, instead of the aperture blades).
- Same shape as the hole created by the diaphragm. This effect is most visible when working with large openings as the hole is large. This effect could be considered unpleasant with those lenses whose diaphragm does not form circular apertures, such as inexpensive optics in which it is formed with five or six blades.
- Sometimes in the shape of half-moons rather than circular, near the sides of the image taken with very wide apertures, probably due to one of the lens elements, which is not large enough as it should be to illuminate all areas of the lens. image at that given opening or strangely extended due to a "coma" with particularly high apertures (an almost obligatory effect when taking night photos with light sources).
- Evidently donut-shaped with telephoto reflex lenses, due to the central elements that obstruct the path of the light rays.
- Point diffraction which creates the little stars. Particularly bright lights, such as light bulbs at night or small specular reflections of sunlight, are surrounded by "pointed diffractions" that create "stars" if immortalized with narrow apertures (they are created with the increase in diffraction that occurs on vertices of the polygon formed by the diaphragm blades). These stars will have as many points as there are vertices of the polygon formed by the blades of the diaphragm (if they are of an even number), due to the overlapping of the opposite points, or equal to double (if the blades are odd). The stars will be more evanescent and less visible with lenses with a lot of blades (usually the more particular lenses, like the old Leica models).

Step 6. Exit taking pictures
The most important thing (at least as far as the aperture is concerned), is to control the depth of field. It is so simple that it can be summarized as follows: a smaller aperture implies a greater depth of field, a larger aperture implies a smaller depth. A wide aperture also results in a more blurry background. Here are some examples:
- Use a narrower aperture for greater depth of field.
-
Remember that the closer you get to the subject, the narrower the depth of field.
If you are doing macro photography, for example, you will have to close the aperture much more than a panoramic photo. Insect photographers usually use f / 16 or smaller apertures and have to bombard their subjects with lots of artificial light.
-
Use a large aperture to get a shallow depth of field.
This technique is perfect for portraits, for example (much better than the automatic portrait program); use the maximum aperture possible, lock the focus on the subject's eyes, recompose the image and you will see how the background will be completely blurred and consequently will not distract attention from the subject. Remember that opening the aperture a lot means choosing faster shutter speeds. In daylight you have to make sure not to exceed the maximum shutter speed (in DSLRs it is usually equal to 1/4000). To avoid this risk, just decrease the ISO sensitivity.

Step 7. Shoot with special effects
If you photograph lights at night, you will need to have a suitable support for the camera and if you want to get the stars you will have to use small apertures. If, on the other hand, you want to get a bokeh with large and perfectly round bubbles (although some will not be completely circular), you will have to use large apertures.
Step 8. Fill flash shots
To mix the flash light with the ambient light, a relatively large aperture and a rather fast shutter speed are used, so as not to overwhelm the flash.

Step 9. Shoot with maximum clarity
If depth of field is not particularly important (when virtually all subjects in the photo are far enough away from the lens to come into focus anyway), you should set a shutter speed fast enough to avoid camera shake and a sensitivity ISO low enough to avoid noise or other quality losses as much as possible (things that can be done in daylight), without the need for aperture-based tricks, using any flash that is sufficiently powerful that balances properly with ambient light and setting the aperture to get as much detail as possible with the lens you are using.
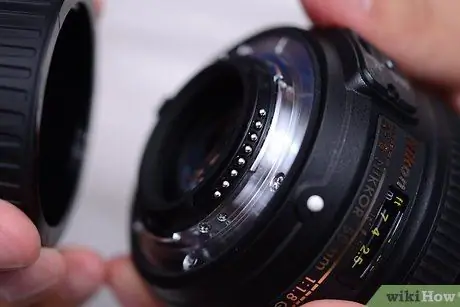
Step 10. Once you have chosen the aperture, you can try to get the most out of the camera by using the aperture priority program
Advice
- There is all the wisdom in the old American saying: f / 8 and don't be late (f / 8 and seize the day). An f / 8 aperture typically allows enough depth of field to shoot still subjects and is the aperture at which lenses provide the most detail on both film and digital sensors. Don't be afraid to use an aperture of f / 8 - you can leave the camera programmed at this aperture (it's a good way to capture anything that suddenly pops up) - with interesting subjects that don't necessarily stay still and give us time to set up the camera.
- Sometimes it is necessary to compromise between the right aperture and an adequate shutter speed, or setting the film speed or the "sensitivity" (amplification) of the sensor. You can also leave the choice of some of these parameters to the camera automatisms. Why not.
- The softness that comes from diffraction and, to a lesser extent, from blur (which can create strange effects rather than soft halos), can sometimes be diminished by using the GIMP or PhotoShop "unsharp mask" in post-production. This mask reinforces the soft edges, even though it cannot invent the sharp details that were not captured during the shot, and if overused it can generate jarring detail artifacts.
- If the choice of aperture is very important for the photos you intend to take and you have an automatic camera, you can use the convenient aperture-priority or Program programs (scrolling through the various combinations of aperture and time proposed by the camera and determined in automatic mode to obtain the correct exposure).
Warnings
-
The "stars" should be made with point sources of clear light, but not as bright as the sun.
- It is not advisable to aim a telephoto lens, especially if it is a very bright or long lens, towards the sun trying to get the effect of the star or for any other reason. You could damage your eyesight and / or the camera.
- It is not advisable to point a mirrorless camera with a curtain shutter, such as the old Leica, at the sun, except perhaps to quickly take a picture, even with the aperture very closed. You could burn the shutter creating a hole that would cost you a lot of money to repair.


