This article shows you how to prevent the websites you visit or your internet connection manager (ISP) or anyone else from gaining the IP address of the computer or mobile device you are using. To achieve this, it is possible to use a proxy service that allows you to use a temporary fake IP address or to subscribe to a VPN service (from the English "Virtual Private Network"), which basically offers the possibility of accessing the web with a fake address permanently both from computer and smartphone.
Steps
Method 1 of 5: Use a Proxy Server
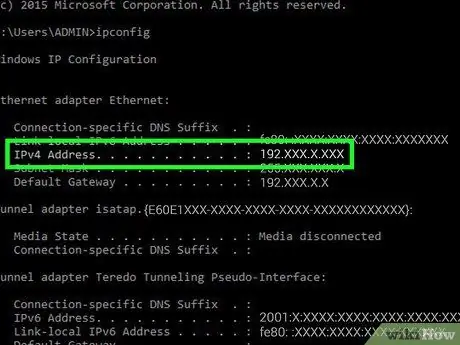
Step 1. Understand how this type of service works
Websites that offer access to a proxy server obscure the real IP address with which you are logged into the public internet network by using a series of different addresses, often one for each state, for the purpose of hide your real IP address from the websites you visit and from the various ISPs. This is a practical and simple solution if, for example, you need to take advantage of audio or video content that is not currently distributed in the geographical area in which you reside or to access your home banking from a public Wi-Fi network..
- It is important to obscure your IP address whenever you use a public internet connection (for example in a library, in a public place or in a commercial venue).
- Since proxy services normally route the connection using different servers located in multiple states, the browsing speed is visibly slower than normal.
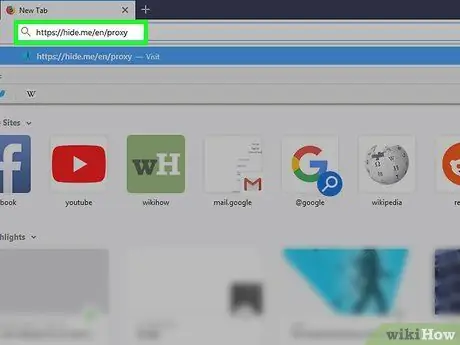
Step 2. Log in to the Hide Me website
Launch the internet browser of your choice and use it to access the following URL: https://hide.me/en/proxy. Hide Me is a simple search engine based on a proxy service that allows you to browse the web anonymously.
Remember that the IP address of your connection will only be obscured as long as you use the Hide Me website to browse the internet. If you use another internet browser or another card to access the web, the IP address will be exposed
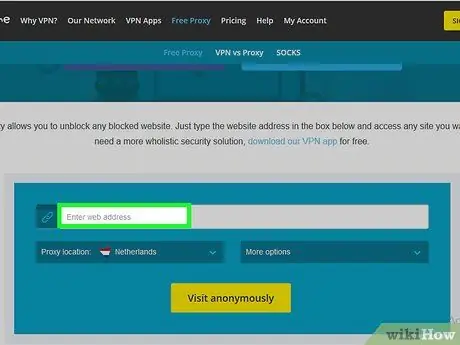
Step 3. Select the text field to enter the URL
This is the white bar called "Enter web address" displayed in the center of the main page of the Hide Me website.
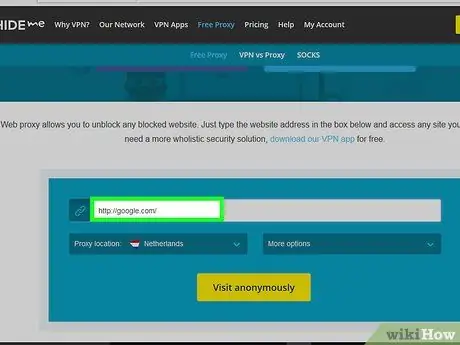
Step 4. Enter the website to reach
Type the URL of the page you want to view (for example "facebook.com" or "google.it"). Using the Hide Me website it is not possible to perform a normal keyword search, so if this is your goal you will first need to access the website of a real search engine, such as Google or Bing.
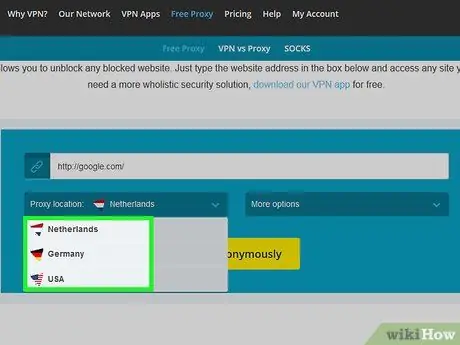
Step 5. Select the proxy server to use
Access the "Proxy location" drop-down menu to choose which server to use for browsing (for example Germany or USA).
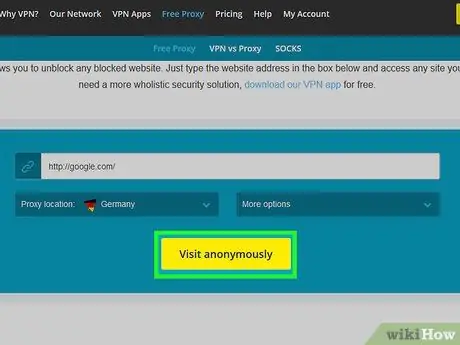
Step 6. Press the Visit anonymously button
It is yellow in color and is located at the bottom of the page. This way you will be redirected to the requested website from where you can browse as you normally would.
Simply remember not to leave the browser tab you used to access the Hide Me website, otherwise your browsing will no longer be anonymous and your real IP address will be public again
Method 2 of 5: Using a VPN Service on a Windows System
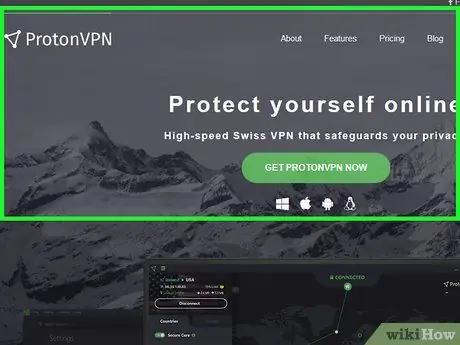
Step 1. Subscribe to a VPN service
After you sign up for a VPN service, you will normally receive the username, password and address of the VPN server that you need to use in order to use the service. This type of subscription is not free and usually you have to pay a monthly fee.
- ExpressVPN is considered by many to be one of the best VPN services for Windows, Mac, iOS, Android, and Linux systems.
- Using a VPN service is a different procedure from the one you follow to use a proxy service, since you need to download a special program that will obscure the IP address of any internet connection generated by the system in use. However, the VPN client must be active to ensure anonymous web browsing.
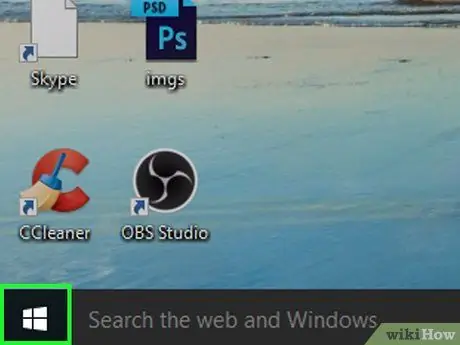
Step 2. Access the "Start" menu by clicking the icon
It features the Windows logo and is located in the lower left corner of the desktop.
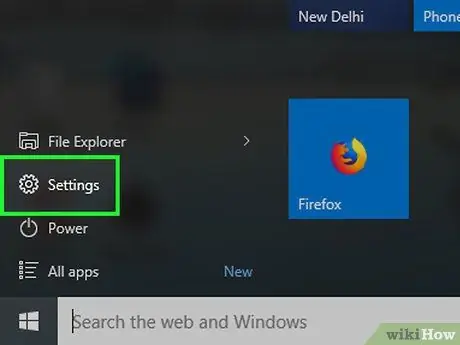
Step 3. Choose the "Settings" option by clicking the icon
It features a gear and is located at the bottom left of the "Start" menu.
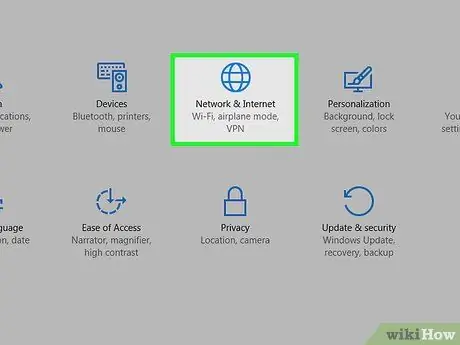
Step 4. Click the "Network and Internet" icon
It is characterized by a globe and is visible in the "Settings" window that has appeared.
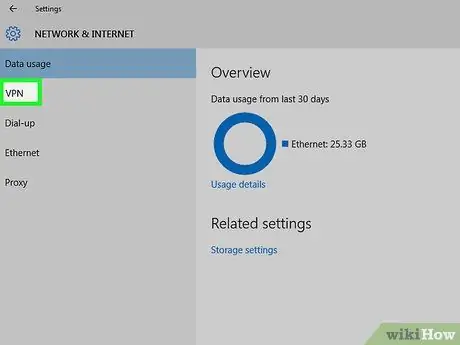
Step 5. Choose the VPN tab
It is one of the options displayed on the left side of the window.
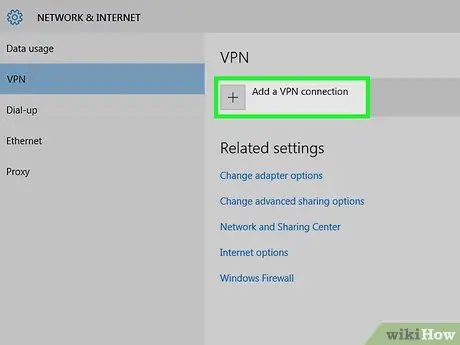
Step 6. Select the item + Add VPN connection
It is located at the top of the page. A new dialog will appear.
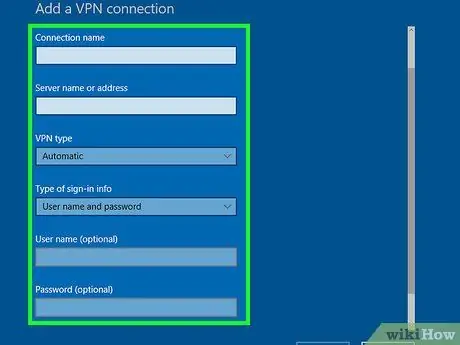
Step 7. Enter the information to access the VPN service
Open the "VPN provider" drop-down menu at the top of the page, then choose the option Windows (default). At this point, enter the URL of the VPN server, which was provided to you after subscribing to the service, in the "Server name or address" text field. If you wish, you can also name the VPN connection using the "Connection Name" field.
- If you need to use a username and password to access your chosen VPN network, enter the required credentials in the "Username" and "Password" text fields.
- You can change the authentication method used by the VPN client by using the "Login info type" drop-down menu and choosing one of the options provided.
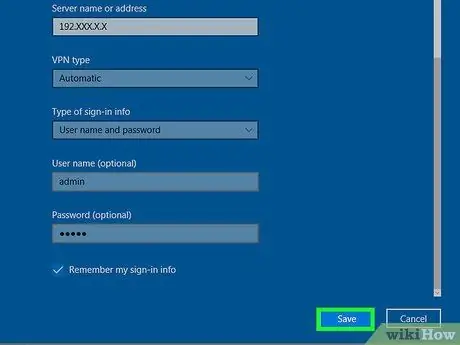
Step 8. Press the Save button
It's at the bottom right of the page.
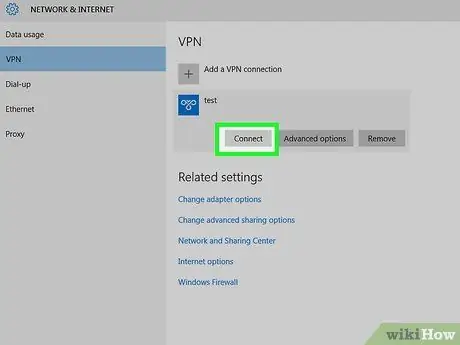
Step 9. Connect to the VPN network
Select the name of the VPN connection you just created and visible at the top of the page, then press the button Connect. In this way the computer will be connected to the selected VPN service and from now on any activity carried out online will be completely anonymous, regardless of the internet browser or network connection in use.
Before the connection is established, you may need to provide the security username and password that were provided to you by the VPN service provider
Method 3 of 5: Use a VPN Service on Mac
Step 1. Subscribe to a VPN service
After you subscribe to a VPN service, you will normally receive the username, password and address of the VPN server that you need to use in order to use the service. This type of subscription is not free and usually you have to pay a monthly fee.
- ExpressVPN is considered by many to be one of the best VPN services for Windows, Mac, iOS, Android, and Linux systems.
- Using a VPN service is a different procedure from the one you follow to use a proxy service, since you need to download a special program that will obscure the IP address of any internet connection generated by the system in use. However, the VPN client must be active to ensure anonymous web browsing.
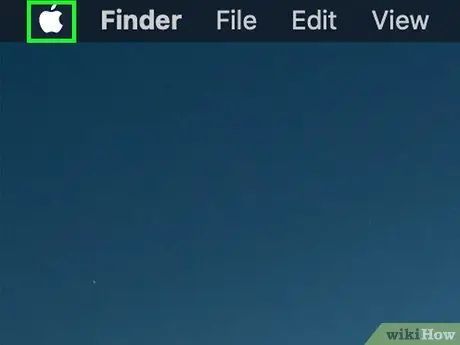
Step 2. Enter the "Apple" menu by clicking the icon
It features the Apple logo and is located in the upper left corner of the screen. A drop-down menu will appear.
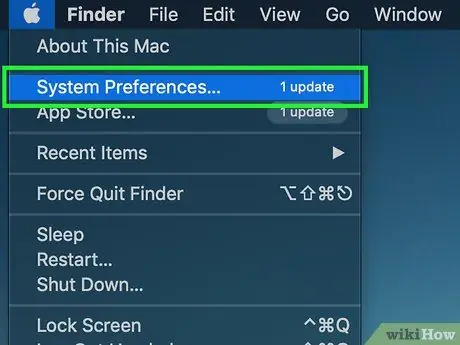
Step 3. Choose the System Preferences… item
It's located at the top of the drop-down menu.
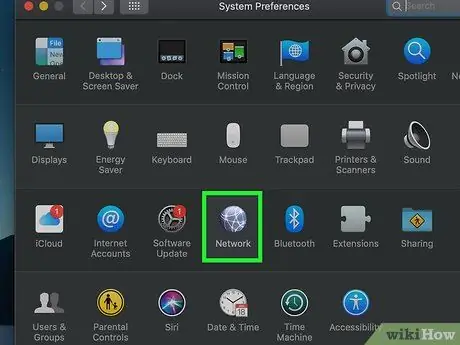
Step 4. Click the Network icon
It has a globe and is displayed in the "System Preferences" window.
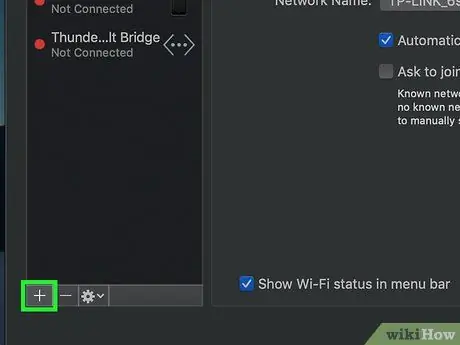
Step 5. Press the + button
It is located in the lower left part of the newly appeared window. A new dialog will appear.
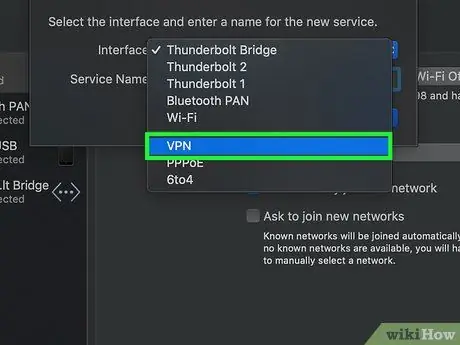
Step 6. Enter the VPN service configuration settings
Access the "Interface" drop-down menu, then choose the option VPN among those available.
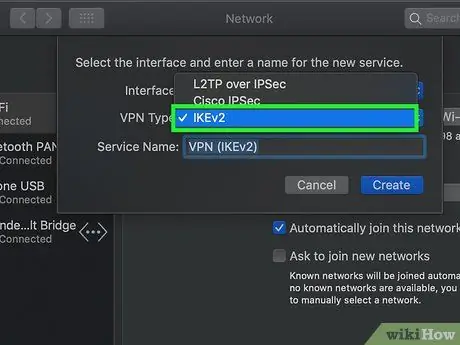
Step 7. Choose the type of VPN connection to use
Open the "VPN Type" drop-down menu, then select one of the available options from the list that appears.
Most VPN services use the protocol L2TP.
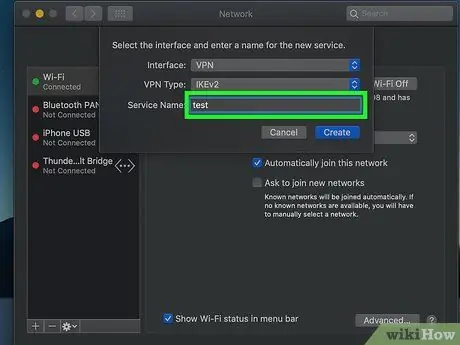
Step 8. Name the connection
Type the information into the "Service Name" text field.
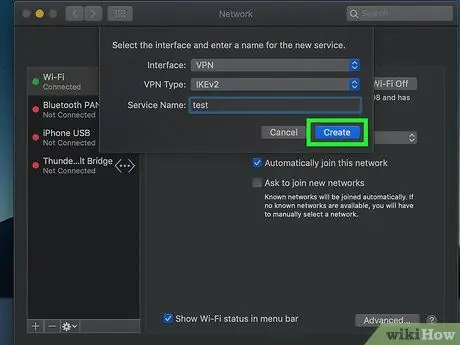
Step 9. Press the Create button
It is blue in color and is positioned at the bottom of the window.
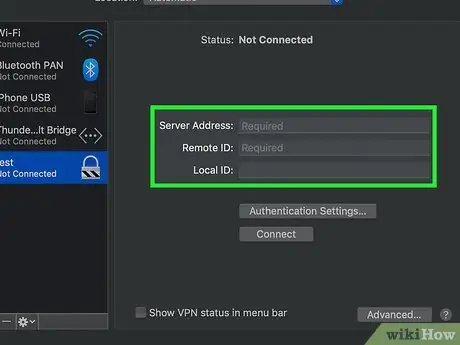
Step 10. Enter the information for the VPN server to connect to
This is the URL or IP address of the server and the username to use to access the service.
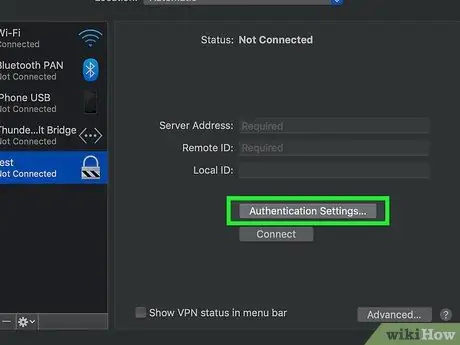
Step 11. Press the Authentication Settings… button
It is gray in color and placed in the center of the page. A new window will appear.
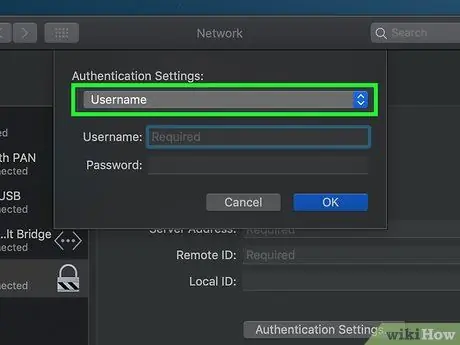
Step 12. Enter the authentication information that was provided to you when you signed up for the service
Check the authentication method used to connect and displayed in the "User Authentication" section (for example Password), then enter the requested information. At this point, do the same check for the "Machine Authentication" section.
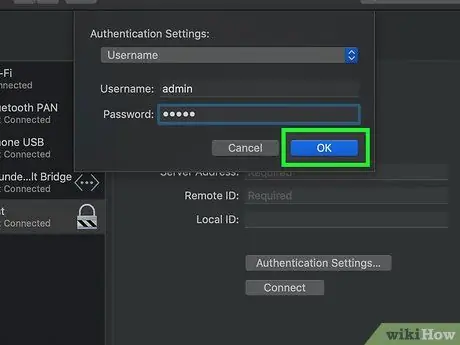
Step 13. Press the OK button
It is blue in color and is located at the bottom of the window. All entered configuration settings will be saved and the "Authentication Settings" window will close.
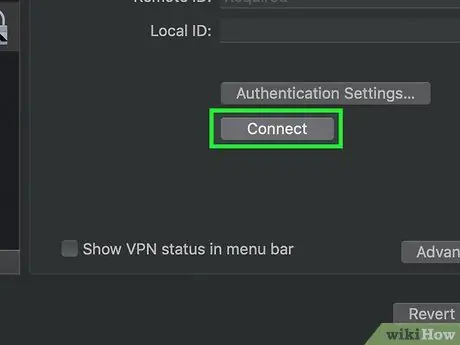
Step 14. Press the Connect button
It is placed in the center of the page. This will establish the connection between the Mac and the indicated VPN server, which means that the IP address of the computer will be obscured until the VPN connection is disconnected.
Before the connection to the indicated VPN network is complete, you may need to enter the security password or a confirmation code
Method 4 of 5: Using a VPN Connection on iPhone
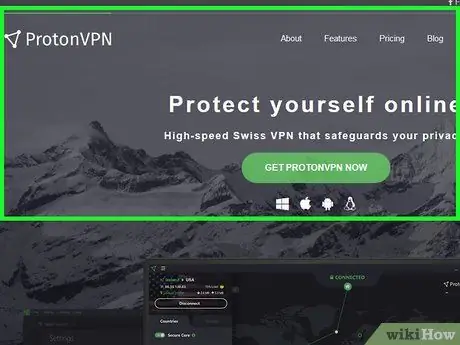
Step 1. Subscribe to a VPN service
After you sign up for a VPN service, you will normally receive the username, password and address of the VPN server that you need to use in order to use the service. This type of subscription is not free and usually you have to pay a monthly fee.
- ExpressVPN is considered by many to be one of the best VPN services for Windows, Mac, iOS, Android, and Linux systems.
- Using a VPN service is a different procedure from the one you follow to use a proxy service, since you need to download a special program that will obscure the IP address of any internet connection generated by the system in use. However, the VPN client must be active to ensure anonymous web browsing.
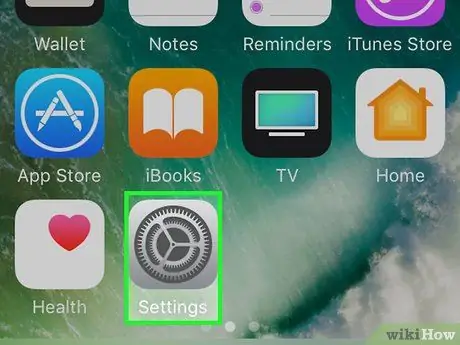
Step 2. Launch the iPhone Settings app by clicking the icon
It is characterized by a gray colored gear.
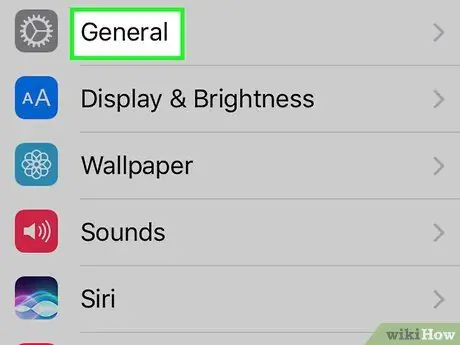
Step 3. Scroll down the appeared menu to locate and select the item
It is located at the top of the "Settings" menu.
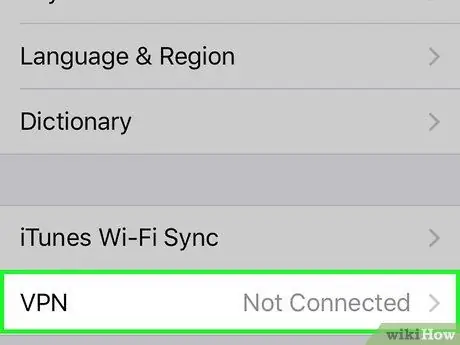
Step 4. Scroll down the list and choose the VPN option
It is located at the bottom of the page.
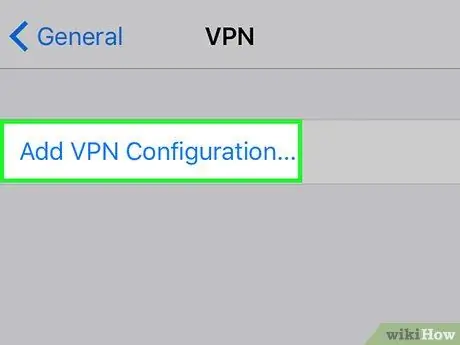
Step 5. Tap Add VPN configuration…
It is located at the top of the screen.
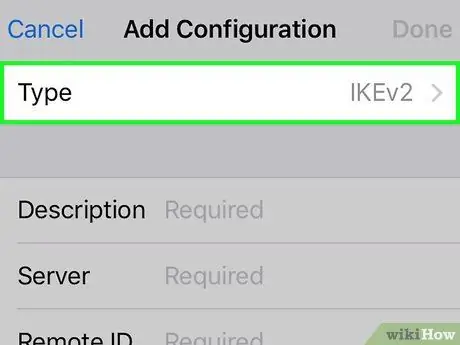
Step 6. Choose the type of VPN protocol to use
Tap the text field Guy, then choose the type of VPN connection from those available.
If you don't see any VPN protocols, your iPhone model can't use a VPN connection
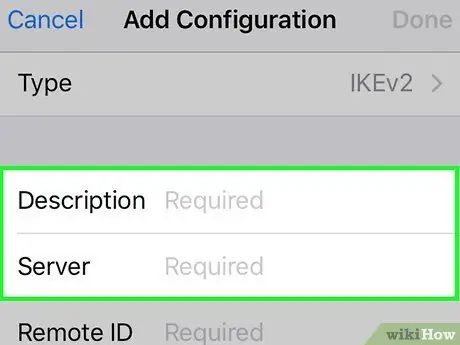
Step 7. Enter the service configuration information
Fill in all the mandatory fields that display the word "Required" in them.
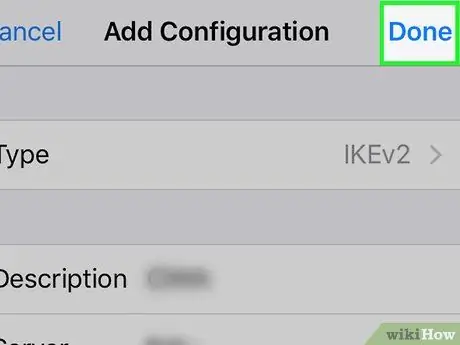
Step 8. Press the Finish button
It is located in the upper right corner of the screen. This will redirect you back to the "VPN" screen, where the newly created connection will be marked with a small blue check mark.
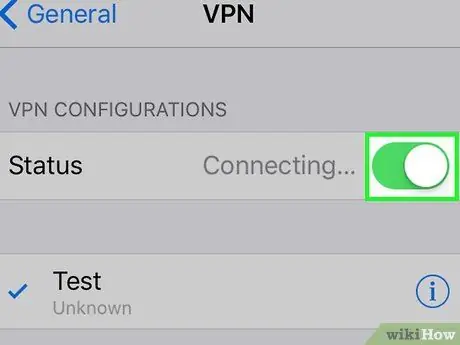
Step 9. Activate the white "Status" slider
moving it to the right.
It is located at the top of the page. Once active it will take on a green color
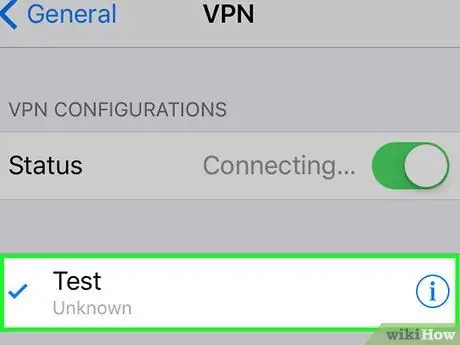
Step 10. Enter your login information when prompted
Type the password (or the type of authentication required) in the menu that appears, then press the button OK. In this way the iPhone will be connected to the indicated VPN service, which will allow you to browse the web completely anonymously.
Method 5 of 5: Using a VPN Connection on Android
Step 1. Subscribe to a VPN service
After you sign up for a VPN service, you will normally receive the username, password and address of the VPN server that you need to use in order to use the service. This type of subscription is not free and usually you have to pay a monthly fee.
- ExpressVPN is considered by many to be one of the best VPN services for Windows, Mac, iOS, Android, and Linux systems.
- Using a VPN service is a different procedure from the one you follow to use a proxy service, since you need to download a special program that will obscure the IP address of any internet connection generated by the system in use. However, the VPN client must be active to ensure anonymous web browsing.
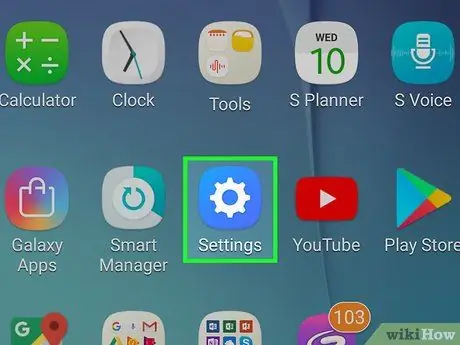
Step 2. Launch the Android Settings app by clicking its icon
It features a white gear icon on a colored background. It is normally visible within the "Applications" panel.
Alternatively, you can slide your finger on the screen from top to bottom to access the notification bar where there is the quick link to the Settings (also in this case it is characterized by a small gear icon)
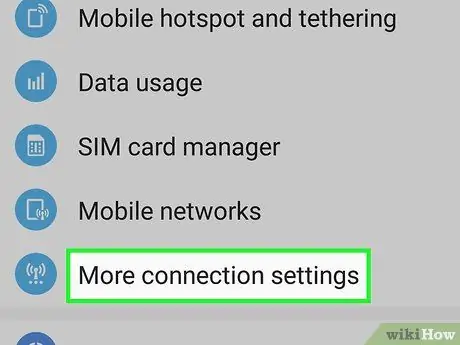
Step 3. Choose the VPN item
It is usually located at the top of the "Settings" menu, but in some cases you may need to scroll down the list.
- On some models of Android devices, you must first choose the voice Other located in the "Wireless and networks" section.
- If you are using a Samsung Galaxy, you will need to choose the option first Connections, select the item Other network settings and finally access the menu VPN.
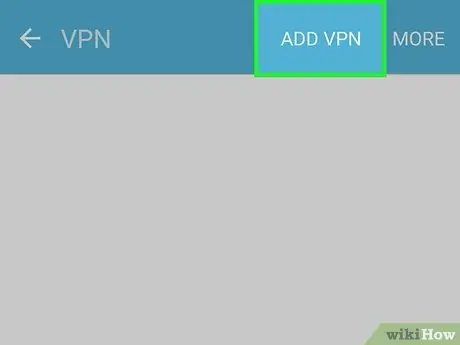
Step 4. Press the + button or tap the item Add VPN.
Both items are located in the upper right corner of the screen.
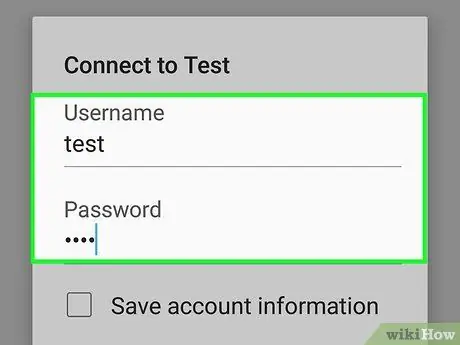
Step 5. Enter the VPN service configuration settings
Enter the required information in the appropriate fields: name of the VPN connection, type of protocol to use, server address, username and password.
Depending on the VPN protocol you have chosen, you may need to provide additional information
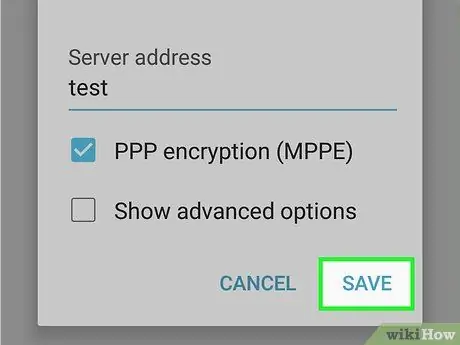
Step 6. Press the Save button
It is located in the upper right corner of the screen. This will save all the settings you entered and the new VPN connection will be added to the list.
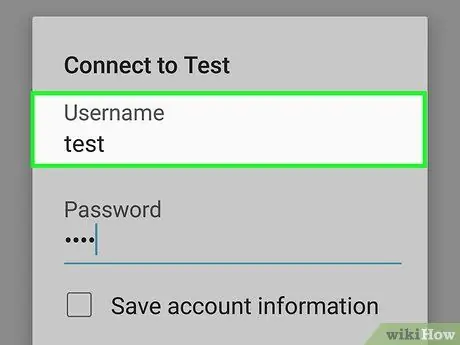
Step 7. Select the VPN connection you just created
A new dialog will appear.
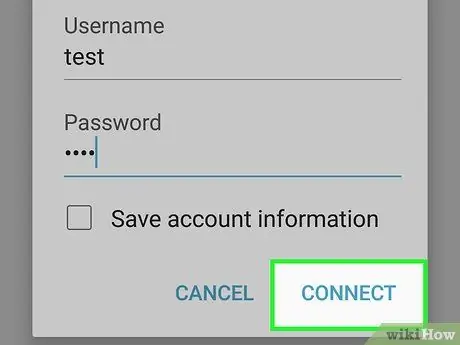
Step 8. Connect your device to the indicated VPN network
Provide the username, password and other login credentials needed to establish the connection, then press the button Connect. This will connect your device to the chosen VPN server, which will make web browsing completely anonymous.
Advice
- Hotspot Shield is a simple free VPN service available for both Windows and Mac systems.
- Proxy services usually only obscure the client's IP address when using a specific internet browser. On the contrary, a VPN service is able to obscure the IP address in all circumstances in which the system needs to access the internet.
- Before deciding to use a VPN service or proxy server, always do a thorough research to see if it is the right choice.
Warnings
- Even if using these solutions the IP address from which you connect is obscured, a hacker with the right preparation and the adequate amount of time available would still be able to trace this information. Don't make the mistake of thinking that by using a VPN service or proxy server your web browsing is completely anonymous or immune to scrutiny. Always use the same caution both when browsing normally and when using a proxy or VPN service.
- If your chosen VPN service goes offline or loses connection, your real IP address will be automatically detected. To avoid this, many VPN clients for desktop systems have a feature called "kill switch" which disconnects the system from the internet as soon as the VPN service is no longer reachable. This way your IP address will remain safe and the activities you were doing cannot be tracked.


