The offer of commercially available USB storage drives (flash drives, external hard drives, etc.) is very wide, and with the advancement of technological progress, their memory capacities are constantly increasing. This trend could make partitioning into multiple separate volumes very useful to increase efficiency; such a measure simplifies the problems related to the organization of your information in files and folders; for example, allowing you to create a boot partition and a secondary partition in which to store all the essential tools for your needs. To create multiple partitions in a USB drive on Windows systems, you need to use special tools, also subject to some restrictions regarding use. On Linux and Mac systems, on the other hand, it is possible to create a USB drive with multiple partitions using the tools built into the operating system.
Steps
Method 1 of 3: Windows
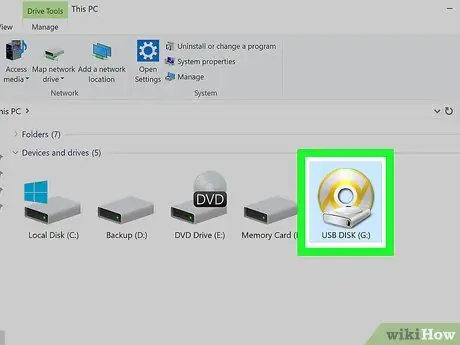
Step 1. Understand the usage restrictions imposed by the Windows operating system
While you can use third-party tools to create multiple partitions on a USB memory drive, Windows can detect and allow access only to the primary partition. The same tool used for partitioning can also be used to modify the visible partition, it being understood that the access limit is still fixed to only one volume at a time. Unfortunately on Windows systems there is no way around this limit.
- To create multiple partitions on USB memory drives, the Windows "Disk Management" tool cannot be used. It is therefore mandatory to resort to the use of third-party programs.
- On the contrary, by connecting your partitioned USB drive on Linux or Mac systems, all the volumes inside it will be visible and accessible.
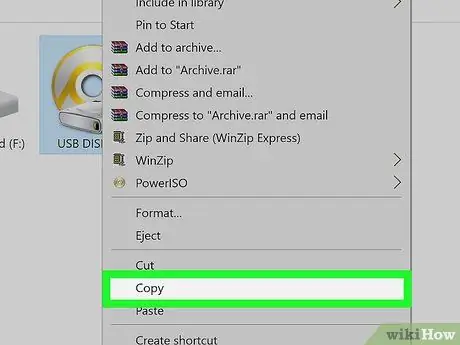
Step 2. Back up all data on the USB drive
When you partition any USB storage device, all the data on it is deleted, so it is essential to make a full backup of it before you begin. You can simply copy all the files inside the USB drive to your computer hard drive.
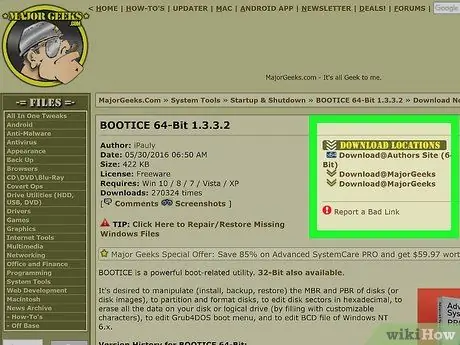
Step 3. Download Bootice
It is a software that allows you to create multiple partitions on USB memory drives, as well as allowing you to change the active (i.e. visible and accessible) volume on Windows systems.
You can download Bootice from the majorgeeks.com/files/details/bootice.html website
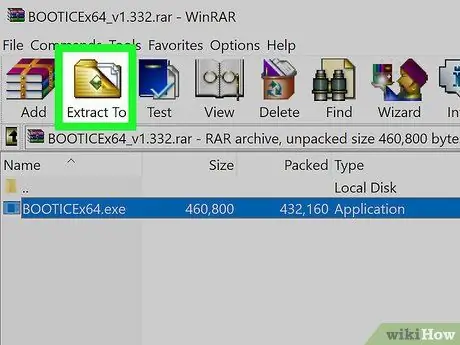
Step 4. Extract the Bootice executable file
To do this, you need to use a program that can handle RAR compressed archives.
- 7-Zip is a free software that can decompress compressed archives in RAR format. You can download it from the 7-zip.org website. After installing 7-Zip on your computer, select the Bootice RAR file with the right mouse button, choose the "7-Zip" option from the context menu that appeared, then click "Extract here".
- The free version of WinRAR (downloadable from the rarlabs.com website) is capable of managing RAR archives, but is only available for a limited trial period.
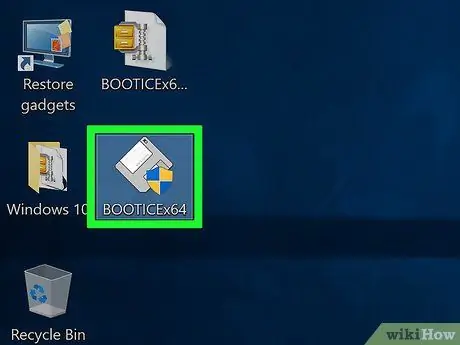
Step 5. Launch Bootice
It is placed in the folder that was created by the compressed archive extraction process. Most likely, Windows will send you a message asking you to confirm your willingness to run Bootice.
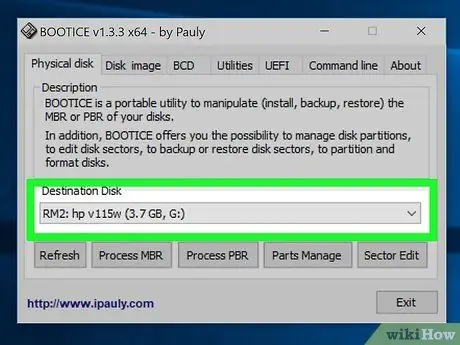
Step 6. Make sure you have selected the correct USB drive
Select the "Destination Disk" drop-down menu, then choose the USB drive you want to partition. Be careful not to select your computer hard drive, otherwise you may lose all the data it contains! Identify the correct volume with the help of its drive letter and size.
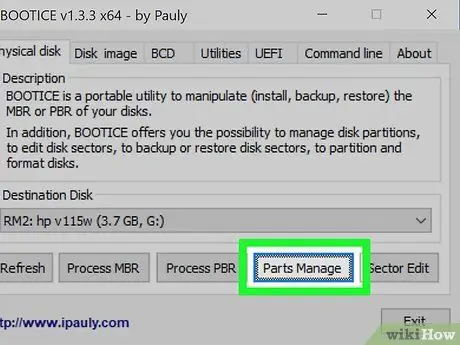
Step 7. Press the Bootice "Parts Manage" button
The "Partition Management" window for managing partitions will be displayed.
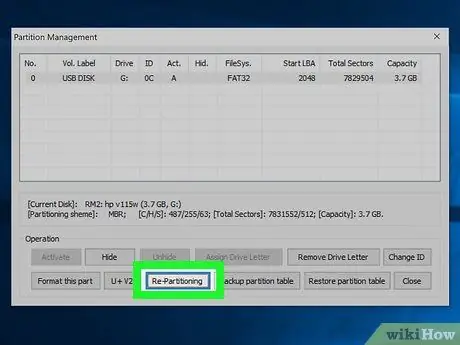
Step 8. Press the "Re-Partitioning" button
This will bring up the new "Removable disk repartitioning" window.
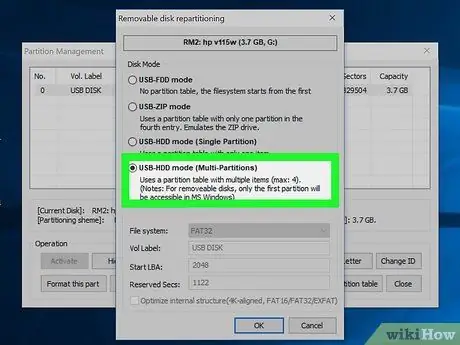
Step 9. Choose the "USB-HDD Mode (Multi-Partitions)" option, then press the "OK" button
At this point the "Partition Settings" window will be displayed.
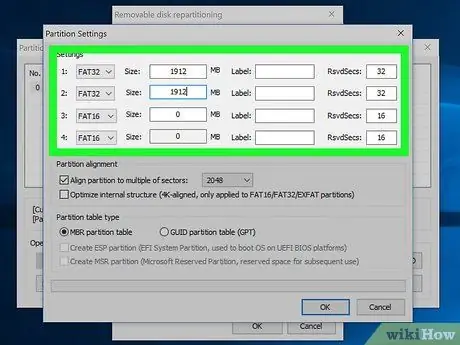
Step 10. Set the size of each partition
By default, all available space on the drive will be divided equally into 4 partitions. You can modify this configuration as you wish, according to your needs. If you want the number of partitions to be less than 4, just set the value of the "Size" field of those to be deleted to 0.
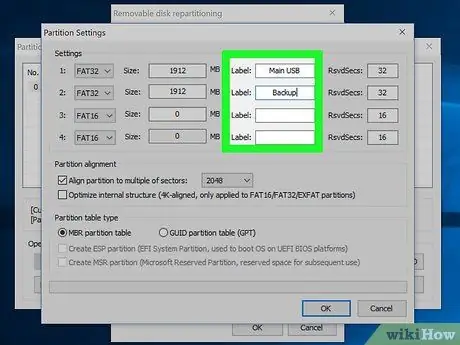
Step 11. Label each partition
This step allows you to easily identify the different partitions. Remember that Windows can only show and allow access to one partition at a time, so it can be very useful to have labels identifying them.
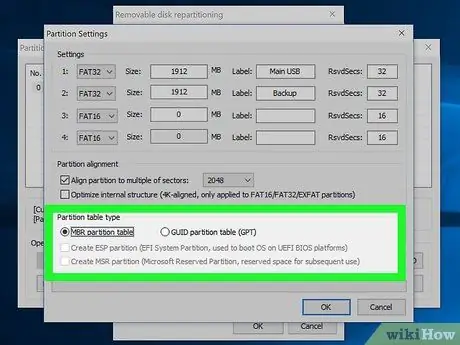
Step 12. Set the partition table type
At the bottom of the window is the "Partition Table" section, where you can choose the type of table to use for storing partition information. You can choose to use a table of type "MBR" or "GPT". Choose an "MBR" table if you plan to use partitions for data storage or for installing older operating systems. Instead, choose a "GPT" table if you intend to use the USB drive to boot computers with a UEFI interface or if you simply want to take advantage of more modern systems.
If you want to boot a UEFI interface computer via the USB drive, after choosing the partition table type "GPT" also select the "Create ESP partition" check button
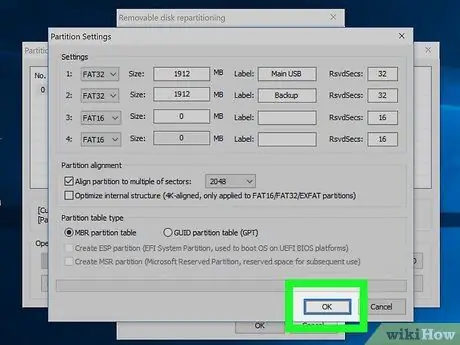
Step 13. To start formatting the media, press the "OK" button
You will be informed that all data on the USB drive will be erased. The formatting procedure should only take a few seconds to complete.
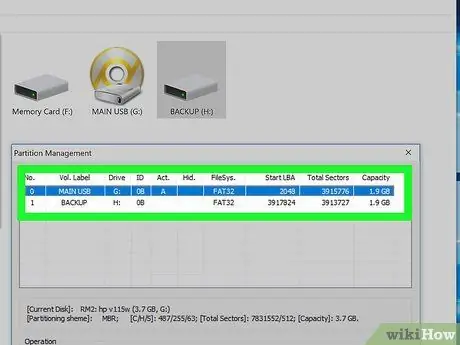
Step 14. Start using the active partition
After formatting is complete, the first partition will be detected by Windows as a removable storage medium. At this point you will be able to use this partition exactly as you would in the case of any USB memory medium.
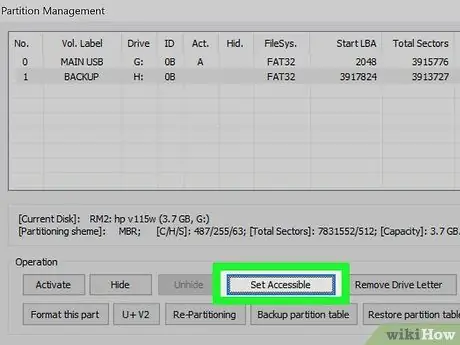
Step 15. Set the active partition using Bootice
Since, on USB devices, the Windows operating system is able to manage only one partition at a time, you can use Bootice to modify the one to be made visible and consequently accessible. This procedure has no effect on the data in the partitions, so it can be done as many times as you like.
- Select the partition you want to make active using the "Operation" section of the Bootice "Partition Management" window.
- At this point, press the "Activate" button. After a few moments the partition will be activated and Windows will make it visible and accessible.
Method 2 of 3: Mac
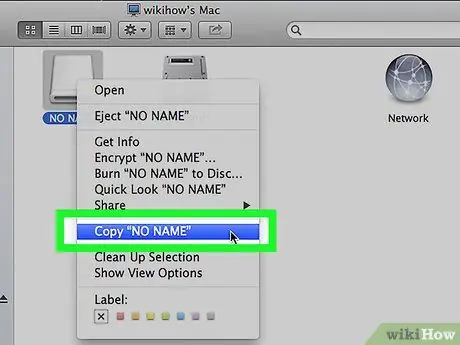
Step 1. Back up your most important data on the USB media
Partitioning a storage device erases all the information it contains, so make sure you've saved all relevant files before proceeding.
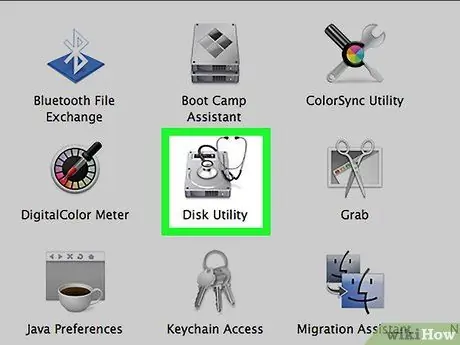
Step 2. Launch the "Disk Utility" program
You can do this by accessing the "Utilities" folder located in the "Applications" directory.
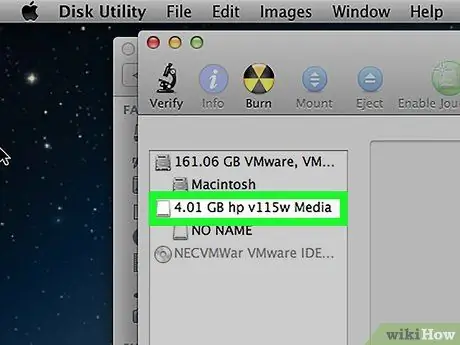
Step 3. Select the USB drive to partition
To do this, you can use the box on the left of the program interface.
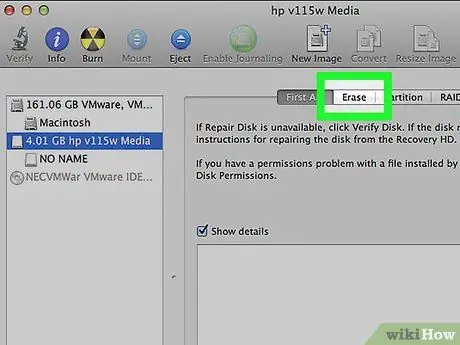
Step 4. Press the "Initialize" button
A new dialog will appear.
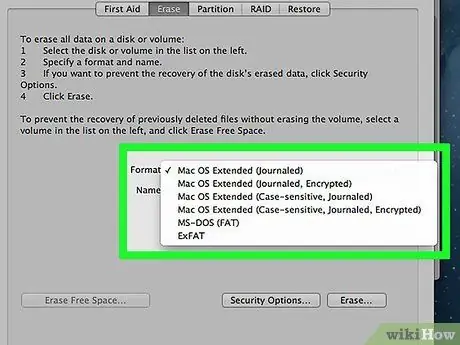
Step 5. From the "Map" drop-down menu choose the "Map GUID Partition" option
This step enables partitioning of the selected USB drive.
Make sure you choose the "OS X Extended (Journaled)" option from the "Format" menu. This will make any future resizing of a partition much easier. Remember, though, that this file system format makes the USB drive compatible with OS X systems only
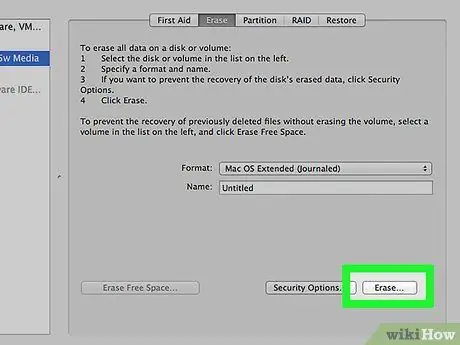
Step 6. To start formatting the media, press the "Initialize" button
The map to be adopted for the partitioning of the unit will be applied and the "Partition" button, located in the upper part of the window, will become active.
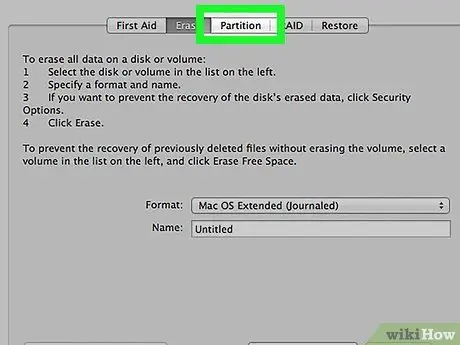
Step 7. Press the "Partition" button
The partitioning dialog will be displayed.
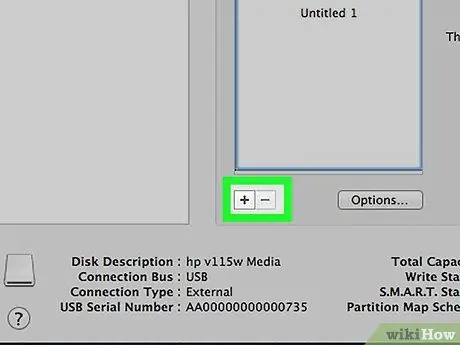
Step 8. To add a new partition, press the "+" button
You can add as many partitions as you want without any limit.
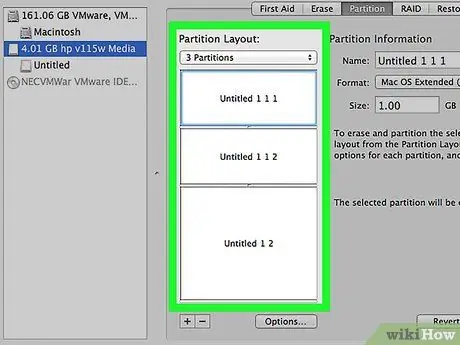
Step 9. To resize the new partition, drag the relevant sliders that appeared on the pie chart
The size of the new partition can be increased or decreased according to your needs. Obviously, the size of the existing and contiguous partitions to the newly created one will be resized accordingly.
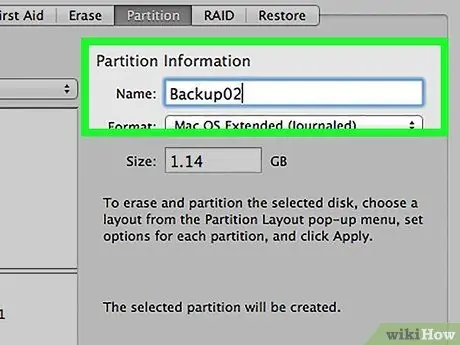
Step 10. Select the newly configured partition to label it
Each partition can be given a unique name, greatly simplifying identification.
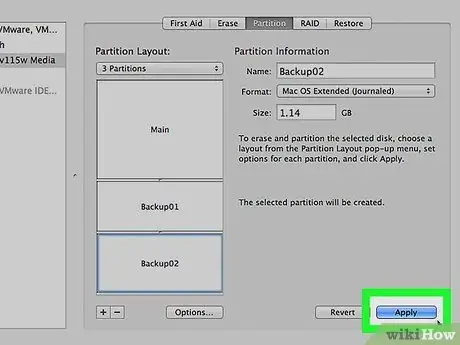
Step 11. To create the new partition, press the "Apply" button
The USB drive will be formatted; remember that this process may take a while to complete.
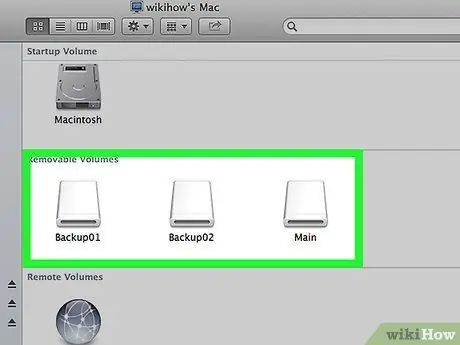
Step 12. Start using your new partitions
As long as the USB drive is connected to your Mac, all partitions inside it will be visible and accessible, just as if they were separate USB storage media.
Since the file system format used to format partitions is "OS X Extended (Journaled)", the USB drive is only compatible with OS X systems. support multiple partitioning of removable storage drives
Method 3 of 3: Linux
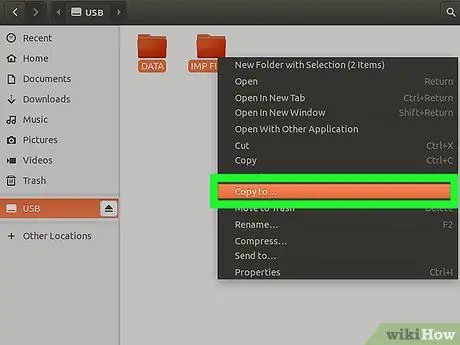
Step 1. Back up your most important data on the USB media
Partitioning a storage device erases all the information it contains, so make sure you've saved all relevant files before proceeding.
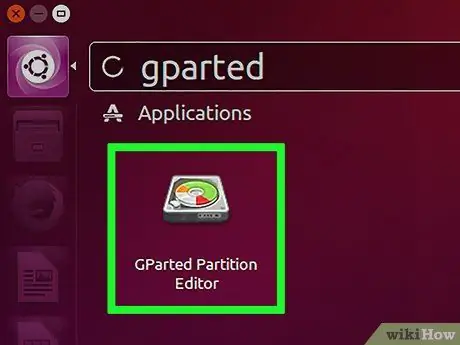
Step 2. Start the "GParted" program
This procedure is based on an Ubuntu system that already integrates the "GParted" tool into the operating system. If the Linux distribution you are using does not have "GParted" installed, you can download the installation file from the gparted.org/ website or use the package manager on your system.
On Ubuntu systems, log into the dashboard and type in the keyword "gparted". Alternatively, select the "System" menu, choose the "Administration" item, then select the "GParted Partition Editor" tool
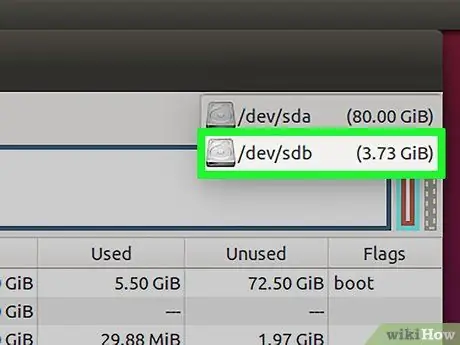
Step 3. Select the USB drive to partition using the drop-down menu located in the upper right corner of the window
You can identify the correct unit by referring to its size. If you have selected the system hard drive, make sure you do not proceed further, otherwise you will lose all the data on it.
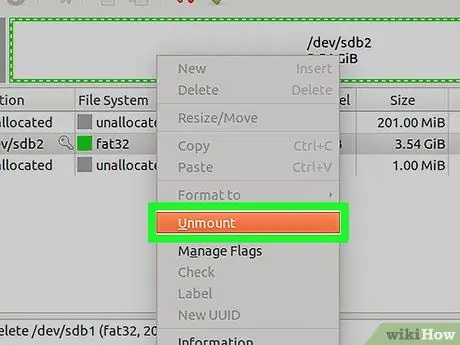
Step 4. Select the bar in the upper part of the window with the right mouse button, then choose "Unmount" from the context menu that appeared
This will disable the chosen USB drive and make it available for partitioning.
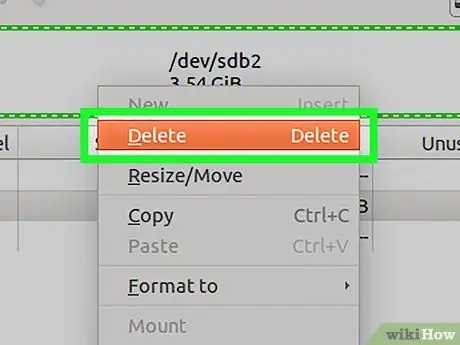
Step 5. Select the bar at the top of the window with the right mouse button, then choose "Delete" from the context menu that appeared
This step removes the current partition on the USB media.
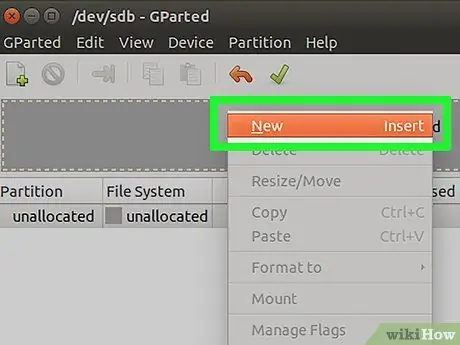
Step 6. Select again the bar in the upper part of the window with the right mouse button (it will be characterized by the word "Unallocated"), then choose the "New" option
The "Create New Partition" dialog box will appear.
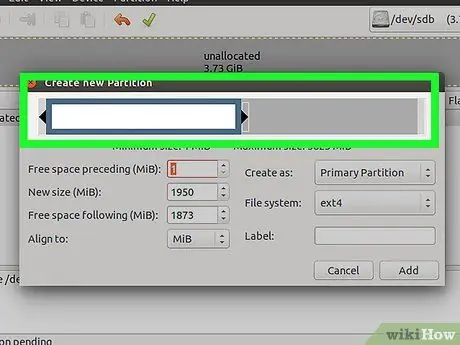
Step 7. Configure the size of the first partition
To do this, you can use the graphic cursor or the related text field. Make sure you leave enough free space for creating additional partitions.
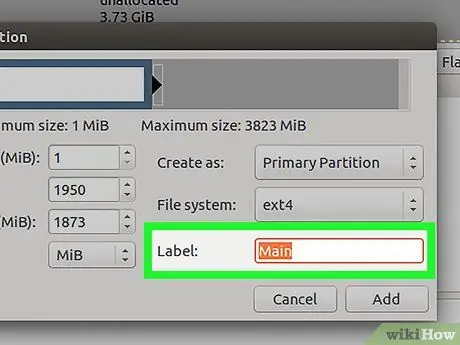
Step 8. Name the partition
Labeling partitions with a descriptive name is the simplest and quickest way to distinguish them.
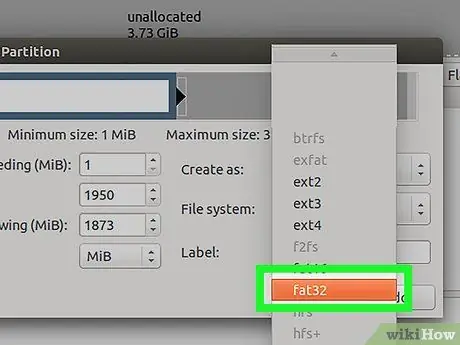
Step 9. Set the file system
If you intend to use the drive exclusively on Linux systems, choose the "ext2" format. If you plan to use the primary partition to boot a Windows operating system, choose the "ntfs" format (remember that in this case you will only have to use the primary partition of the drive). If you intend to use this partition as a simple storage medium for different systems, use a "fat32" or "exfat" file system.
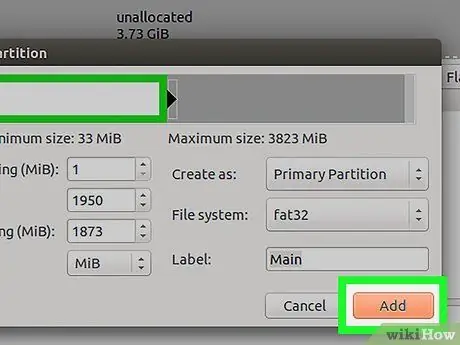
Step 10. When finished, hit the "Add" button
This will create a new partition from the unallocated space on the drive.
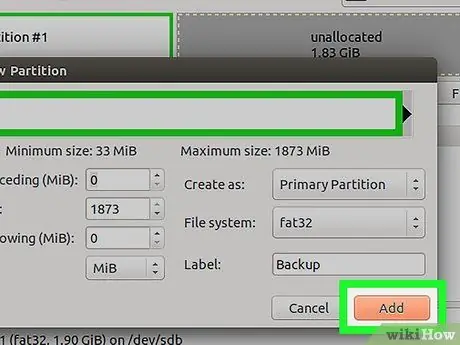
Step 11. Right-click the remaining unallocated space, then repeat the above steps to create the additional partitions
As long as there is enough unallocated space on the media, you will be able to create a new partition.
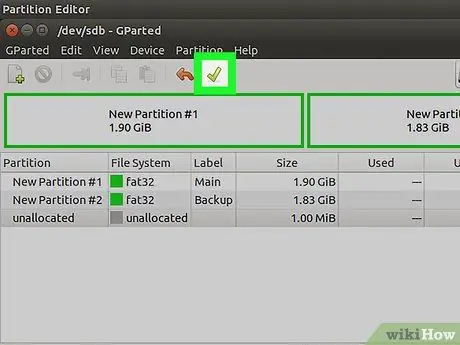
Step 12. Once you have finished configuring the partitions, press the green button in the form of a check mark at the top of the "Gparted" window
To confirm your choice, press the "Apply" button. All configured changes will be applied to the selected USB drive. This step may take some time to complete.
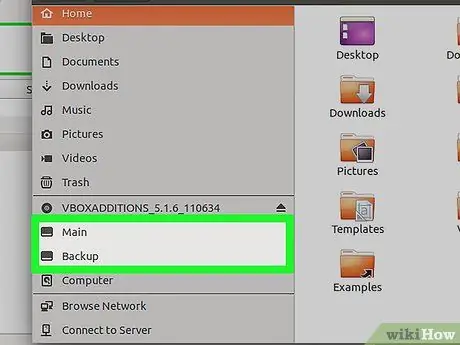
Step 13. Log in to your new partitions
Through your Linux system you will be able to access all partitions on the USB drive, as if they were separate storage media.


