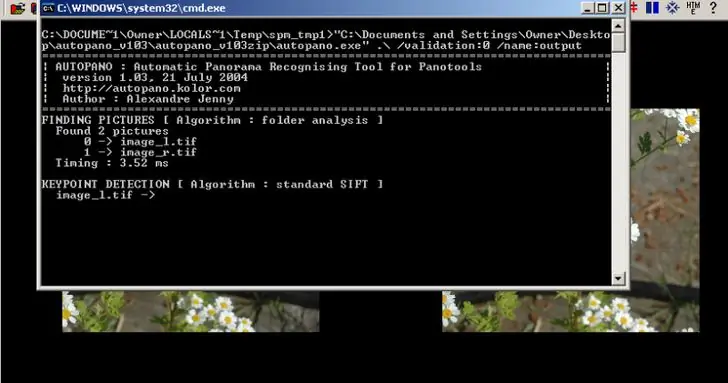
All you need to create 3D photos is a camera and photo editing software. This tutorial will walk you through the process of creating 3D images using freeware available for PC. StereoPhoto Maker (SPM) is a free program for Windows and Intel / PowerPC Macs that allows you to crop and align a pair of stereo images, making it suitable for comfortable three-dimensional viewing. Once the pair is aligned, it will allow you to save it in different display formats, including "anaglyph", which uses red and cyan 3D glasses. AutoPano works with StereoPhoto Maker and finds thousands of features of the left and right photographs that allow SPM to automatically align the two images for you.
Steps
Method 1 of 5: Photograph
Step 1. Find a subject with foreground and background elements to add depth to the photo
Unless you are using two digital cameras at the same time, you will be forced to take only still life shots. You can try asking a friend to stand still between shots, but it will be difficult to work with children or animals. If you intend to view 3D images with red-blue anaglyph glasses, it is best to avoid photographing red or cyan colored objects.
Step 2. Take a photo 3-5 meters away from the main subject
Then slide the camera about 5cm to the right for the right eye image.
- Try to be consistent. If you sometimes take the photo on the right first and other times on the left, it will be difficult for you to tell them apart. Make it a habit to always start on the left.
- It would be best to place the camera on a tripod, but if you prefer to hold it in your hand, keep it as still as possible as you move to take the second shot.
- Keep the same overall shot of the images as you move. To minimize vertical error, the bottom of the frame must be the same in both photos.
Step 3. Move the images to your computer
If you're using a digital camera, it's helpful to organize your images to make them easier to process later. Create a folder called "3D Photos". Inside "3D Photos", insert some subfolders. You could call them "Original Right" or "DO", "Original Left" or "SO". Create another folder called "Anaglyph" and maybe another "Side by Side". These are for storing your finished work.
- Move the images from the camera to the "3D Photos" folder, then drag the right shots into the "DO" folder and the left shots into the "SO" folder. There should be the same number of shots in each folder.
- Rename files. Let's say you started taking five pairs of images. You could give them similar names to FOTO1-S and Foto1-D, FOTO2-S and FOTO2-D, and so on. If you have created 10, 20, 50 or several hundred "stereo pairs", renaming them individually would take you a long time. There is a way to rename an entire folder full of files (Multi-Rename) thanks to SPM (StereoPhoto Maker) which is described later in this guide.
Method 2 of 5: Download the Software
StereoPhoto Maker
Step 1. Visit the SteroPhoto Maker website and at the top of the page you will see:
- StereoPhoto Maker Ver4.01 836KByte May 22, 2009
- StereoPhoto Maker Ver4.01 including help file 11087KByte 22 May 2009
Step 2. Click on one of these links to download StereoPhoto Maker
Surprisingly, the program is small, taking up only about 700 kilobytes. You can also download a guide (takes up about 5 megabytes) which provides comprehensive illustrated instructions and is strongly recommended as a tutorial.
Step 3. Save the file
A window should appear giving you the option to open or save a file named "stphmkr310.zip". Press the "Save" button. A "Save As" box will open and you will need to indicate where to save it. In the "Save in" section, select the desktop so you will be able to find it easily.
Step 4. Once the file is downloaded, open it
A folder containing the "stphmkre.exe" file should appear. Drag it to your desktop so you can easily find it later. At this point, you can close the StereoPhoto Maker website window.
Method 3 of 5: Create 3D Images

Step 1.
Choose "File", "Open Left / Right Images".
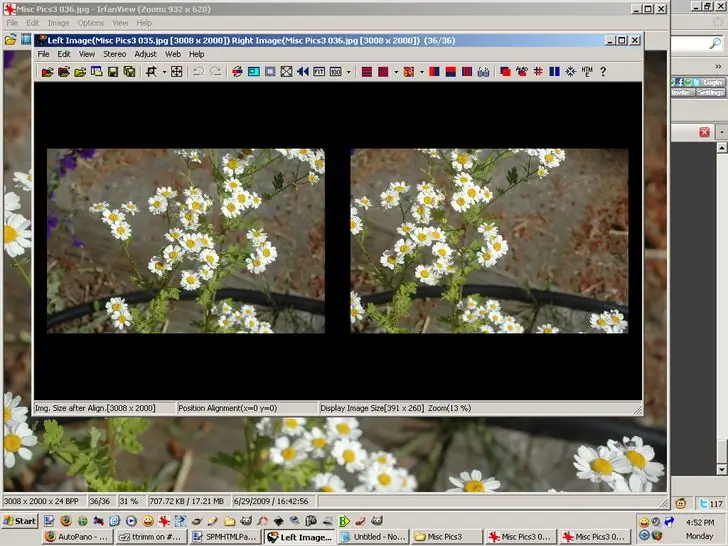
The program will guide you, asking where it can find the left image and then the right one. After selecting the images, they will appear side by side.

Step 2.
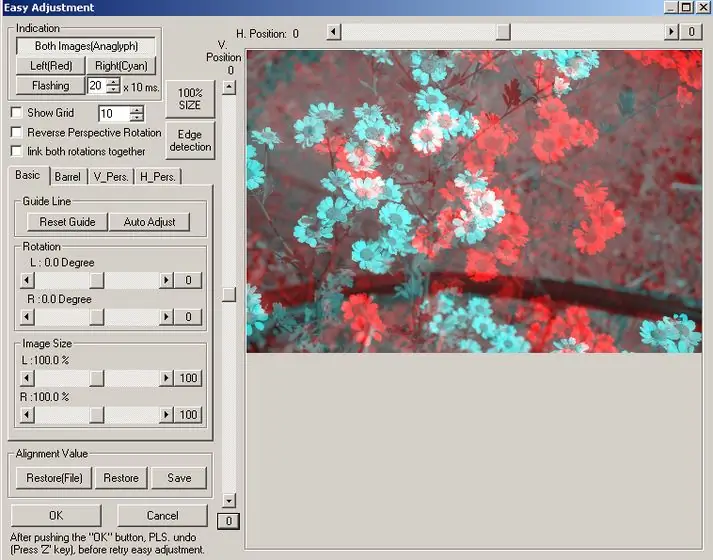
Click on the "Easy Adjust" icon (K)
a red square superimposed on another blue.
It will take you to a window that allows you to view both images transparently. You can then drag one until it lines up nicely with the other.
-

Image Images after alignment The ideal would be to make sure that the elements in the center of the two photos coincide perfectly vertically and horizontally. Align the two images as best you can and click OK.
Step 3. Get the preview of the anaglyph
The multicolored icon
to the left of the red-blue vertical icon
allows you to see images as an anaglyph. Now that you have them aligned, click the icon and put on the 3D glasses. To enlarge the 3D image, click on the icon that looks like a rectangle with an X in the middle.
This way you can view it in full screen. After taking a look, to return to the normal program screen, press the Esc key. Change the alignment of the images if necessary until you are satisfied with the result.
Step 4. Save the image
Choose "File", "Save Stereo Image" and put it in the "Anaglyph" folder. You need to change the name of the file so that it doesn't contain an S or D.

Step 5.
Experiment with automatic alignment.
Again, choose "File", "Open Left / Right Images" and tell the program which files to open. Then select "Adjust", "Auto Align".
When asked if you want to use the previous report file, always answer "No". The program will perform its magic by comparing the two images and aligning them as best they can. If you wish, you can also save this image, perhaps with another name. You will be able to look at the two images later and decide which is the best.
Method 4 of 5: Rename a Group of Photos with Multi-Rename
The "Multi-Rename" option can be found in the "File" drop-down menu (File> Multi-Rename). It will allow you to rename groups of images, replacing the cryptic numeric names assigned by the cameras (for example: DSC000561) with more useful names such as Name001_L and Name001_R. Even if there are holes in the original sequence, because you may have deleted files, the function will rename them consecutively from 1 up to the total number of files. This is a very useful option. It will make it much easier to identify the two images that make up the stereo pair and is essential if you use StereoPhoto Maker's "Multi-Conversion" feature which can automatically create countless stereo pairs.
Step 1. Select your files
Once you have clicked "File" and then "Multi-Rename", a box will appear. Use the "Look In" window to locate the folder where you stored the original files on the left. Select "Rename All".
Step 2. Provide file information
Let's say you took some pictures in the desert and would like to indicate when you took them. You have 25 stereo pairs, the left images are in a folder called OS (Left Originals) and the right images in a folder called OD (Right Originals).
- In the box that says "Stereo", you could replace "Stereo" with "Deserto2007Febebruary" or any other meaningful notation.
- In the numbering box that shows "0001", you could replace the number "0001" with "01", since you only need two digits to number 25 images.
- In the box that contains "_B.jpg", leave the underscore "_" and the extension ".jpg", but replace the "B" with "S" or "OS" when renaming the files on the left and with "D "or" OD "when it comes to the right files. Repeat this for both the left and right image folders - it will now be much easier to identify your files.
Method 5 of 5: Convert Multiple Images with Multi-Conversion
We mentioned Easy Alignment and Auto-Alignment, two very powerful tools of SPM. Now, to experience the real potential of the program, try Multi-Conversion.
Step 1. Double-check the images
If you have multi-renamed the left and right images in anticipation of a multi-conversion, be sure to look at how many files are in their respective folders. It is not uncommon to make a mistake and end up with a different number of files in the two folders. Multi-converting in such circumstances would be a mess. If there are a different number of files, you may need to check them to remove the unmatched single images and then do the multi-rename again.
Step 2. Select "File" and then "Multi-Conversion"
When multi-converting, you need to tell the program which files it should work on, how to save them and where. Let's say you have two independent image files. As you become more experienced with StereoPhoto Maker this may not happen, but for the purposes of this tutorial, let's assume it does.
Step 3. In the "Look In" box locate the folder containing the left image files you want to work on
You don't need to choose a file name or type.
Step 4. In the "Input File Type (Stereo)" box, choose "Independent (L / R)"
As soon as this item is selected, the "Right Image Folder" box will appear right below it. Check the box and the "Browse" window will appear. Click on "Browse" and choose the folder that contains the right image files. Leave boxes S and D alone as they are. You should use them if you want to rotate images or flip them.
Step 5. Choose "Output File Type"
For the purposes of this tutorial, choose "Color Anaglyph".
After performing this conversion sequence, you will need to repeat it and choose "Gray Anaglyph"
"Side by side"
or "Independent S / D", but for now choose "Color Anaglyph".
Step 6. In the "Adjustment" box, select "Auto-Align", then "Auto Crop" and "Auto Adjust and Color Adjustment"
There are tons of other options you can experiment with later.
Step 7. At the bottom, indicate the "Output Folder" where you want the created files to be placed
If you remember, at the beginning of this tutorial it was suggested that you create a folder called "Anaglyph". Hit the "Browse" button and choose that folder. Even if you haven't created that folder first, it's not too late. Go to Windows "Explorer", create that folder and open it.
Step 8. Click the "Convert All Files" button
When asked if you want to use the "legacy report files", click "No". At this point, nothing blatant will happen, but you will only see the computer crazily executing its steps, trying to make sense of the stereo pairs. Depending on the speed and configuration of your PC, this can take anywhere from 5 seconds to 3 minutes for each pair. The program will automatically adjust the images for a correct stereo window, correct vertical difference errors, size differences and image rotation. If you took the two images carefully, there should be no problem with most of the images it produces.
Step 9. If you wish, you can save your choices so that you don't have to do them again the next time you multi-convert
Just check the "Save" box at the bottom right of the window and give it a name. To use the same settings again, you can click on "Recover (File)" and choose the saved file.
Advice
-

Image Back side of 3D glasses. Red goes on the left Try creating your own glasses with thin cardboard and red and blue (cyan) acetate.
- If you have version 3.x, update it to 4.01. The current version includes the "AutoPano" option.


