Due to intense use and the presence of a large number of files on a hard drive, information will tend to fragment, i.e. to be stored in non-contiguous areas of the disk. This situation causes a natural slowdown of the computer in carrying out normal activities. The defragmentation procedure of a memory unit consists in recompacting all the data blocks belonging to the same file so that they are stored in areas that are as contiguous as possible on the disk. The operating system will be able to access the data on the disk quickly and efficiently. There are at least two different methods to open the Windows 10 "Optimize Drive" window: using the Cortana virtual assistant or using the "File Explorer" window. To defragment the hard drive of a computer with a Windows 10 operating system, you must be logged in with an administrator account.
Steps
Part 1 of 2: Enter the Optimize Drive Window
Use Cortana
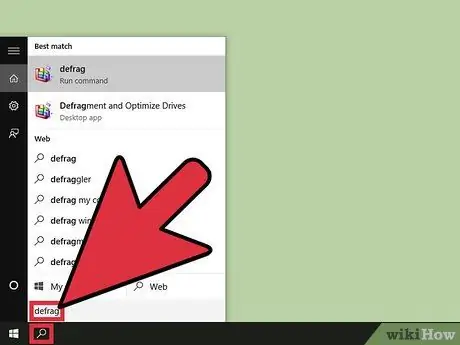
Step 1. Type the keyword "defragment" into Cortana's search field
The latter is located at the bottom left of the desktop next to the "Start" button. It features a magnifying glass icon. As you type the word to search for, you will see the list of results appear in the Cortana window. When you have finished composing the word "defragment", the entry "Defragment and optimize drives (App Desktop)" should appear at the top of the list of results.
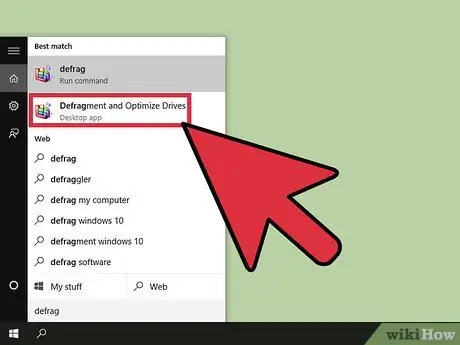
Step 2. Select the "Defragment and Optimize Drives (Desktop App)" icon
This will bring up the "Optimize Drive" system window. Remember that if you are not logged in to Windows with an administrator account, you will need to select the "Defragment and optimize drives (Desktop App)" icon with the right mouse button (or press and hold it with your finger if you are using a touch device screen) and choose the option "Run as administrator" from the context menu that appeared.
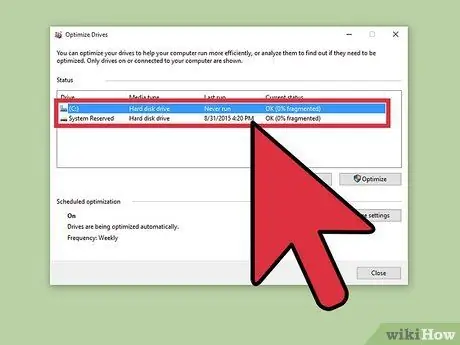
Step 3. Select the hard drive to defragment
Inside the "Optimize Drives" window there is a section called "Status" which shows a table listing all the memory drives installed in the system. This is made up of the following columns (moving from left to right): "Unit", "Media type", "Last run" and "Current status". Select the drive you want to optimize by clicking it with the mouse or tapping it with your finger.
The "Current status" column shows the status of all the memory units present in the system indicating the percentage of defragmentation and what to do (the "OK" status means that the drive is optimized, while the " Optimization needed "indicates that defragmentation is required)
Use the File Explorer Window
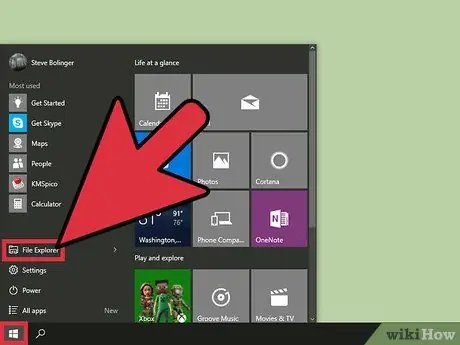
Step 1. Open the "File Explorer" window
Access the "Start" menu by pressing the relative button located in the lower left corner of the desktop. Alternatively, you can press the "Windows" key on your keyboard.
- Click the "File Explorer" icon located in the lower left part of the "Start" menu and characterized by a small folder.
- Inside the left sidebar of the "File Explorer" window is the tree menu that contains all the computer resources. The "This PC" node collects the folders and main drives of the computer, including the currently connected external devices.
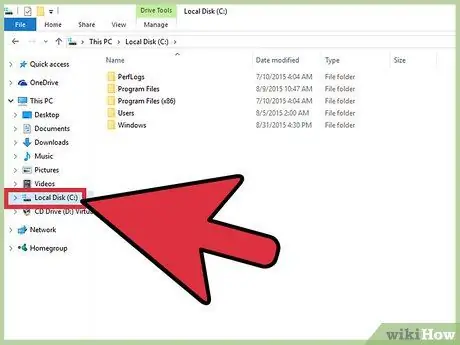
Step 2. Select the drive to defragment
If the main system disk is not partitioned and there are no other external or internal disks, only the "C:" drive will be displayed. Otherwise, all memory drives and optical readers present will be identified by their drive letter.
Select the disk to defragment. After doing so, the "Disk Tools / Manage" tab will appear in the ribbon of the "File Explorer" window. The latter is only shown when the chosen item offers certain specific options
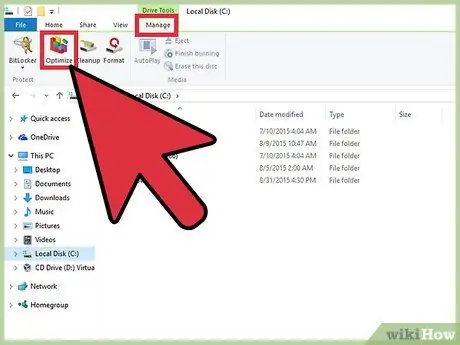
Step 3. Open the "Optimize Drive" window
Access the "Disk Tools / Manage" tab and press the "Optimize" button located within the "Manage" group. This will bring up the "Optimize Drive" system window.
Alternatively, you can select the icon of the unit to be optimized with the right mouse button (or hold it down with your finger in the case of a touch screen device) and choose the "Properties" option from the context menu that appears. The "Properties" window of the selected disk will appear which consists of several tabs, one of which is labeled "Tools". Access the latter and press the "Optimize" button
Part 2 of 2: Defragment a Hard Drive
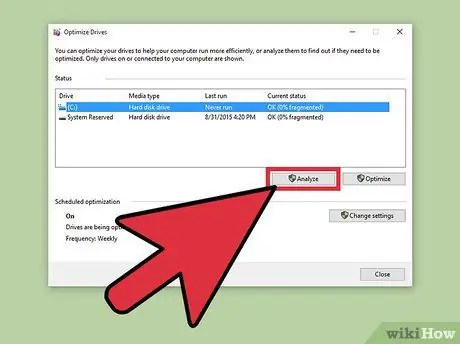
Step 1. Press the "Analyze" button of the "Optimize Drive" window
This will examine the extent of the fragmentation status of the files within the selected disk. After a few minutes the scan result will be displayed in the "Current Status" column for the unit being scanned. The state of file fragmentation is expressed as a percentage, and if the latter is greater than 10%, you will be advised to perform defragmentation.
If the disk fragmentation status is less than 10%, press the "Close" button located in the lower right corner of the "Optimize Drives" window. It is advisable to avoid defragmentation of drives that do not need to be optimized in order not to unnecessarily wear out the mechanical parts that make up the hard disk
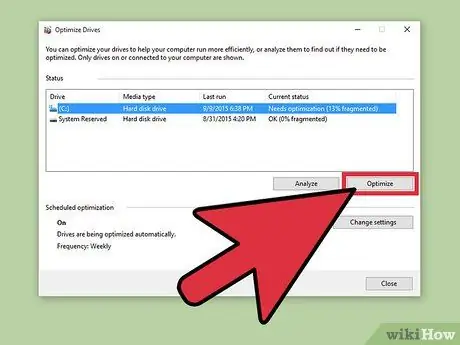
Step 2. Hit the "Optimize" button to start the defragmentation process
Disk optimization may take a few minutes or several hours to complete, depending on the size, number of files it contains, and their fragmentation status. The real-time progress of the optimization process will be shown in the "Current status" column.
- The defragmentation procedure is complete when "OK" is displayed in the "Current status" column. Next to the latter, the disk fragmentation percentage will also appear, which normally should be zero if the percentage of occupancy is not very high.
- If the hard drive is large, the number of files stored on it is very large, and the fragmentation rate is high, the optimization process may take hours to complete. In this case it is good to perform disk defragmentation at a time when you do not need to use the computer.
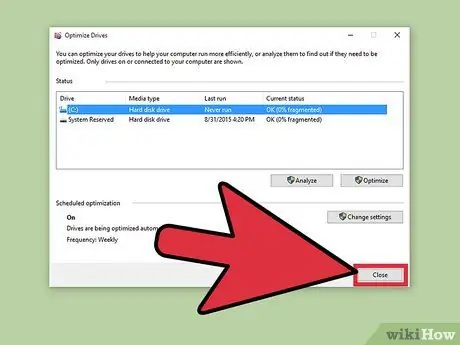
Step 3. Once the optimization is complete, close the "Optimize Drive" window by simply pressing the "Close" button in the lower right corner
Advice
- During the defragmentation procedure it is still possible to continue using the computer, however it will be slower than normal, so it is always better not to use it while carrying out this delicate activity.
- Windows 10 is designed to automatically optimize all drives in your system on a weekly basis.


