To remove the background from an image with Adobe Illustrator, use the Pen Tool or the Magic Wand to outline the perimeter of the foreground object. Then, right click on the figure and select "Create Clipping Mask". At that point it will be easy to "delete" the background and embed the image on a website or other creative projects. Learn how to use Illustrator tools to remove backgrounds from photographs and logos, make them transparent, and save the images you just created.
Steps
Method 1 of 2: Pen Tool
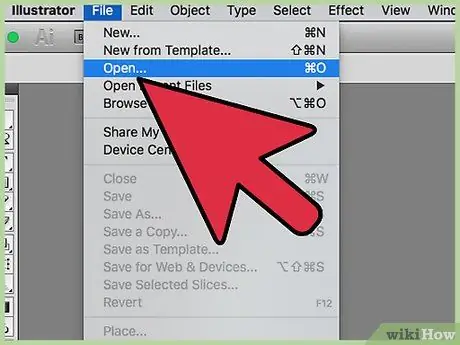
Step 1. Open the image with Adobe Illustrator
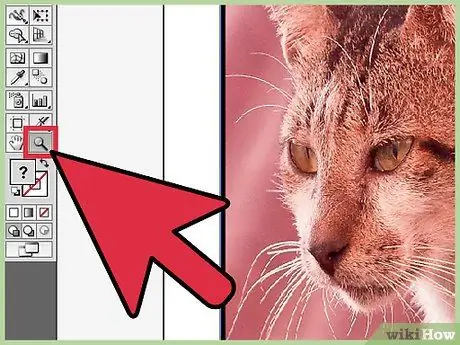
Step 2. Press Z to use Zoom
To remove the background of an image from a photograph, you need to create a precise outline of the section you want to keep. The best way to achieve this level of precision is to use the Zoom tool.
If the image you are working on is pretty simple, such as a single shape, use the Magic Wand tool instead
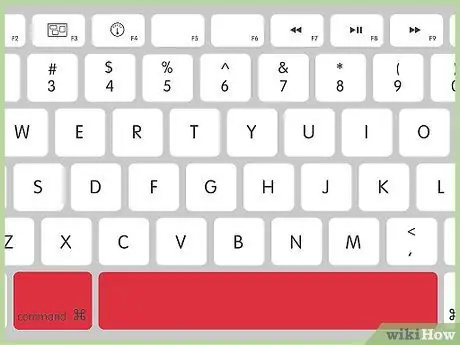
Step 3. Press ⌘ Cmd + Space (Mac) or Ctrl + Space (PC) to zoom in.
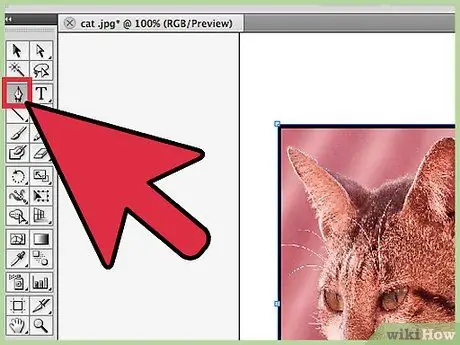
Step 4. Press P to select the Pen
This tool allows you to isolate an object by creating an outline with a series of clicks, each of which will form an "anchor point". As you add the points, a line will appear connecting them all.
You can also select the Pen by clicking its icon in the toolbar
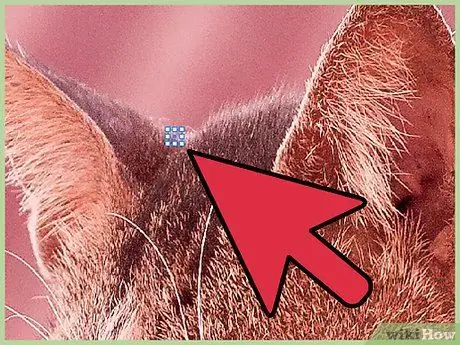
Step 5. Click once on the edge of the foreground object to place the first anchor point
Your goal is to trace the perimeter of the object (which you will remove from the background), thanks to these points.
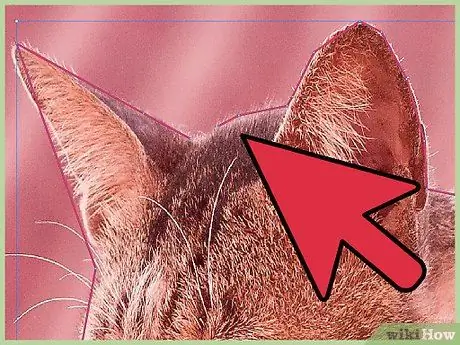
Step 6. Click along the perimeter of the object to create an outline, until you return to the first anchor point
Stay as close to the edge as possible - Illustrator will try to correct your clicks in favor of maximum precision.
You can press Space to move the image and make off-screen areas more visible. This is especially useful if you've zoomed in on the image to the point where you can't see it all. The cursor will turn into a hand; use it to drag the figure in the desired direction and view hidden parts without having to break the pen stroke
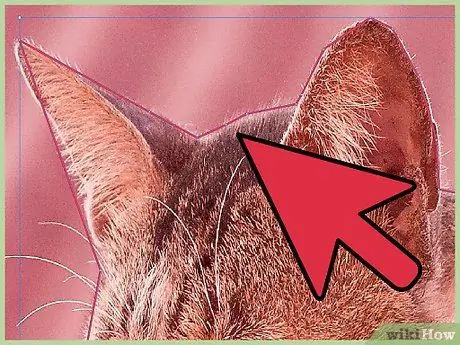
Step 7. Click on the first anchor point (a second time) to complete the outline
The object should be completely surrounded by a dotted line.
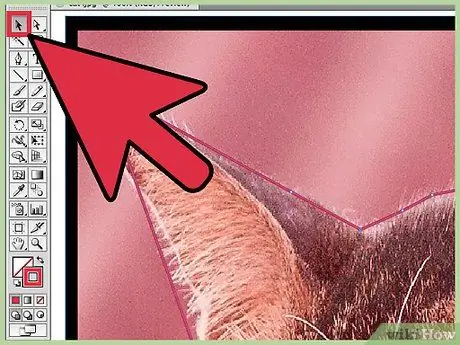
Step 8. Click on the Selection tool to view all objects
The part of the image you have outlined should be considered an object in itself. It, as well as the background, will be surrounded by a selection outline (usually a blue line).

Step 9. Click the foreground object, then hold down Shift while clicking the background
You will select both objects at the same time.
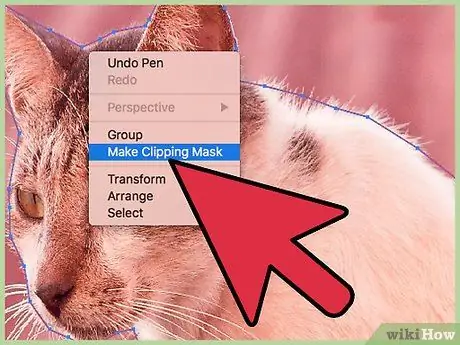
Step 10. Right click (or Ctrl + click) on the foreground object, then select "Create Clipping Mask"
The background will turn white. The foreground object should now be clearly visible.
When the background is completely white, it is easier to change its color
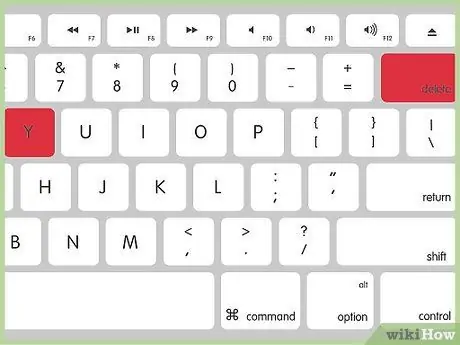
Step 11. Remove the white background to make it transparent
If you want to save only the foreground image, without any background, press Y to use the Magic Wand tool, then click on the white part. Now, hit Delete.
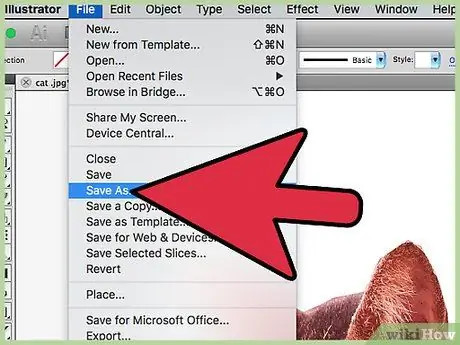
Step 12. Save your image in. EPS format for use in a page layout or with graphics software
This format is used in almost all graphics applications and word processing programs. Click on "File", then "Save As", then choose "Illustrator EPS (*. EPS)" from the File Format drop-down menu. Enter a name for the file, then click "Save".
If you made the background transparent, it will remain invisible in this format
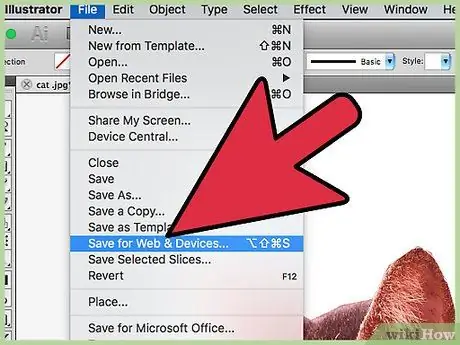
Step 13. Save the image in-p.webp" />
PNG files are high quality web images that support transparent backgrounds. This format is ideal for photographs as it can support up to 16 million colors.
- Click on "File", then on "Save for web". In the window that opens, select "PNG-24" from the drop-down menu, then put the check mark next to "Transparency" if you have made the background transparent. Click on "Save", choose the location you prefer, then click on "Save" a second time.
- If you are working with a small file with few colors, you can select "GIF" from the menu instead of "PNG-24". Images saved in that format will load faster on web pages, but they won't be as detailed.
Method 2 of 2: Magic Wand Tool
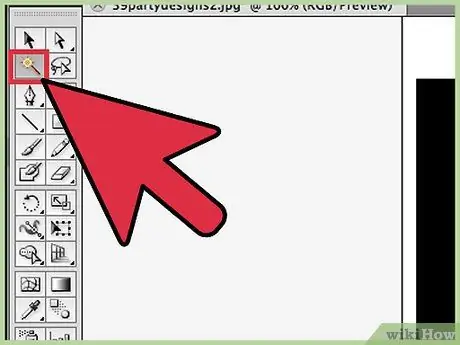
Step 1. Evaluate if the Magic Wand fits your image
Since this tool uses color and stroke size to "magically" locate the outline of a selection with a single click, it is best suited to photos where the foreground object is in sharp contrast to the background.
- For example, if your image is a completely black star on a checkerboard background, you can use the Magic Wand to isolate the foreground figure.
- If the image has many colors, such as a photograph, the Pen tool is better suited.
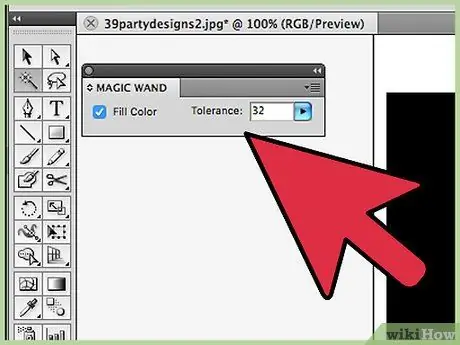
Step 2. Double click on the Magic Wand in the left bar to open the corresponding panel
The tool looks like a wand with a sparkle at the top. Within the panel you can decide which parts of the image will be selected after your click.
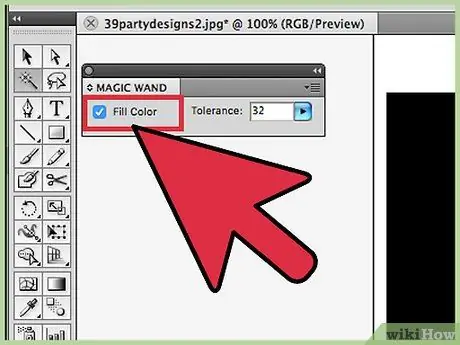
Step 3. Select "Fill Color" if the object you want to isolate is solid color
Thanks to this option, clicking on an object the Magic Wand will select all parts of the image of the same color as the point on which you clicked.
- For example, clicking with the Magic Wand on a pink triangle on a purple background will only select the triangle. If there are multiple pink triangles, they will all be selected.
- Also, if there are multiple objects of the same color as where you clicked, they will all be selected.
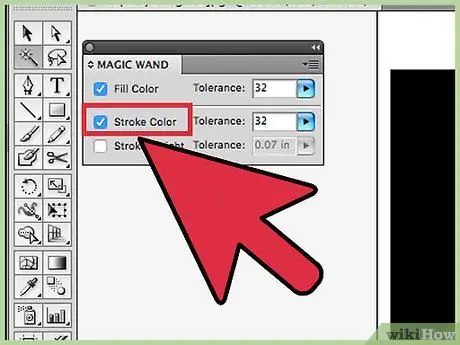
Step 4. Select "Stroke Color" if the object you want to isolate is surrounded by a line of a specific color
This tool refers to the outline color of an object, while "Fill Color" refers to the area inside the line. If you decide to use "Stroke color" as a parameter, to define the color you will have to click on the contour line of an object and not inside it.
- For example, to eliminate the background of a red circle with a blue outline, use "Stroke Color" so that the blue line is included in your selection.
- When you click with the Magic Wand on a line of a certain color after choosing "Stroke Color", all objects that have a line of that color as an outline will be selected.
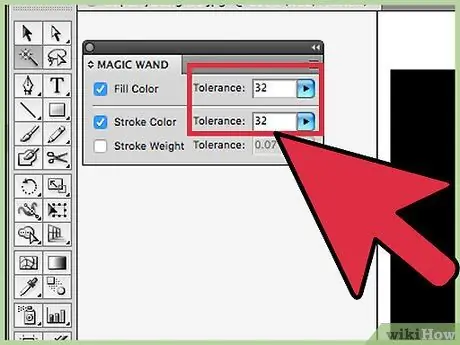
Step 5. Enter a pixel value (0-255 for RGB colors, 0-100 for CMYK colors) in the "Tolerance" field if you have chosen "Fill Color" or "Stroke Color" as a parameter
The tolerance value allows you to set the tool's flexibility in matching colors to where you clicked.
- The default is 32px, which means that all colors that are less than 32px away from the one you clicked will be selected.
- If the object has a color gradient, you can increase the tolerance to make sure the whole figure is selected.
- For most images, the default setting is ideal.
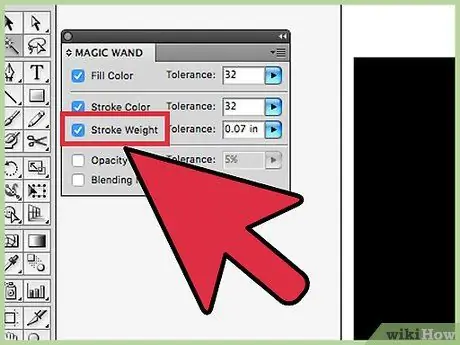
Step 6. Choose "Stroke Thickness" to select all lines that have the same thickness, regardless of color
This parameter selects all lines that have the same thickness as the one you clicked on.
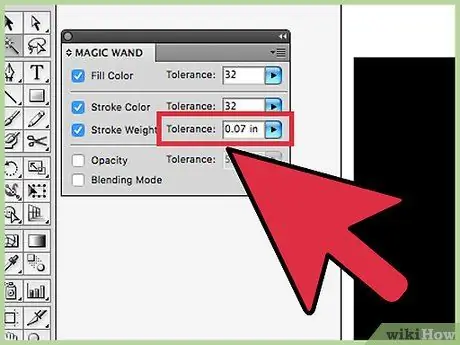
Step 7. Enter a value between 0 and 1000 (in pixels) in the "Tolerance" field if you have set "Stroke thickness" as a parameter
Lower numbers indicate more accurate matches. If you click on a 10px line after setting the tolerance to 0, the Magic Wand will only select lines exactly 10px thick.
The default is 5px and is often not enough for very thin lines. If you select more lines by default than you would like, replace the value with 0
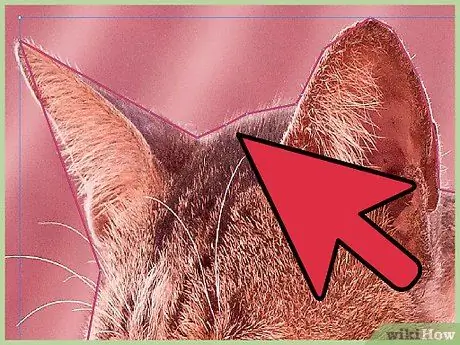
Step 8. Click on the image object you want to keep
You will select it, based on the criteria you have set for the Magic Wand. After clicking, a dashed line will appear around the selection.
If the selected area doesn't match what you want, press ⌘ Cmd + Shift + A (Mac) or Ctrl + Shift + A (Windows) to deselect it. Afterward, open the Magic Wand panel to adjust the parameters before trying again

Step 9. Press Shift and click on the background
With this action you will select the foreground object and the background at the same time.
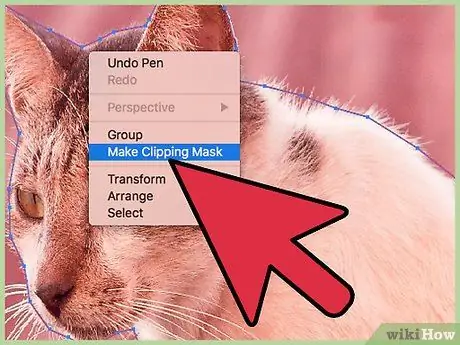
Step 10. Right click (or Ctrl + click) on the foreground image, then choose "Create Clipping Mask"
This action will immediately remove the background, turning it into an all-white selection around the foreground object.
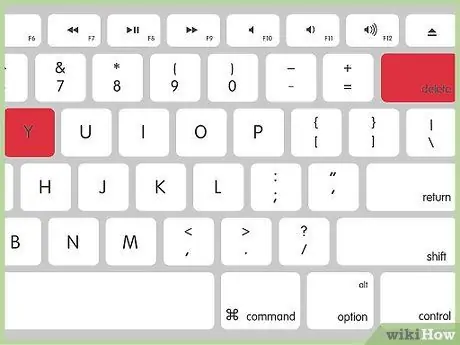
Step 11. Remove the white background by making it transparent
Press Y to select the Magic Wand (this time you don't need to open the panel), click on the white part of the image, then press Delete.
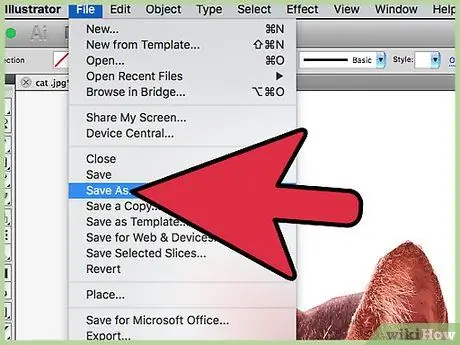
Step 12. Save your image in. EPS format for use in a page layout or with graphics software
This format is used in almost all graphics applications and word processing programs. Click on "File", then "Save As", then choose "Illustrator EPS (*. EPS)" from the File Format drop-down menu. Enter a name for the file, then click "Save".
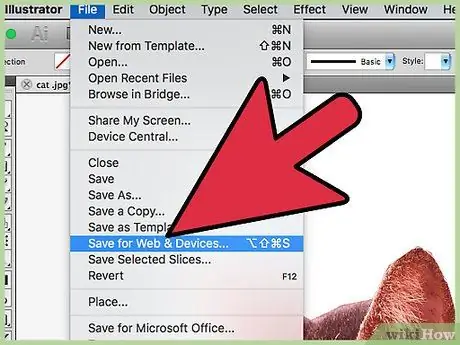
Step 13. Save the image in-g.webp" />
Files in this format load very fast and can support transparent backgrounds. If you are not working with a very brightly colored photo, saving it in-g.webp
- Click on "File", then on "Save for web". Choose "GIF" as the format and check the "Transparency" box if you have made the background transparent. Click on "Save", give the file a name and choose a path, then click on "Save" a second time.
- If your image contains more than the 256 colors allowed by the GIF format (for example, a photograph), select “PNG-24” instead of GIF. Your file will be saved in-p.webp" />


