If you are not comfortable using Windows Live Messenger and want to switch to another instant messaging software, this tutorial shows you the simple steps required to uninstall Windows Live Messenger.
Steps
Method 1 of 2: Windows XP
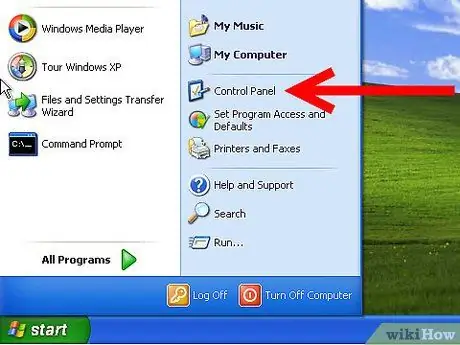
Step 1. Log in to the 'Control Panel'
Select the 'Start' button, then choose the 'Control Panel' item.
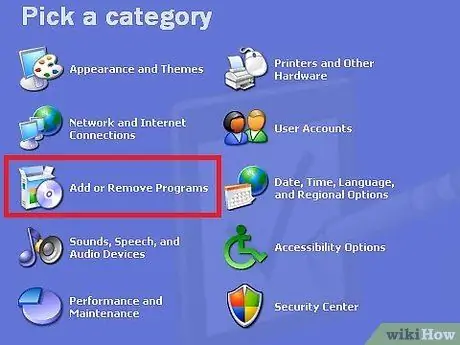
Step 2. Select the 'Add or Remove Programs' icon in the window that appears
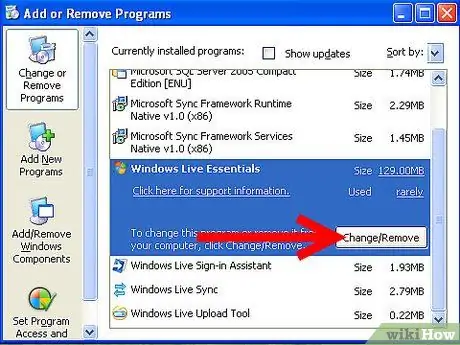
Step 3. Proceed to uninstall Windows Live Messenger
Scroll through the list that appeared looking for the entry 'Windows Live Essentials'. Select it and press the 'Remove' button. Press the 'Uninstall' button, then press the 'Next' button, select the 'Messenger' item and finally press the 'Continue' button.
Method 2 of 2: Windows Vista or Windows 7
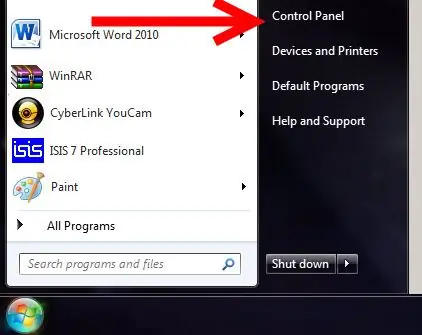
Step 1. Log in to the 'Control Panel'
Select the 'Start' button, then choose the 'Control Panel' item.
Step 2. Go to 'Programs and Features'
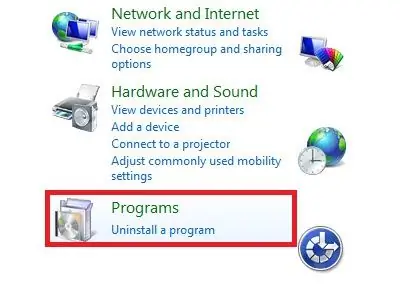
To do this, select the 'Uninstall a program' link in the 'Programs' category. Alternatively, if you are using the classic view, select the 'Programs and Features' icon.
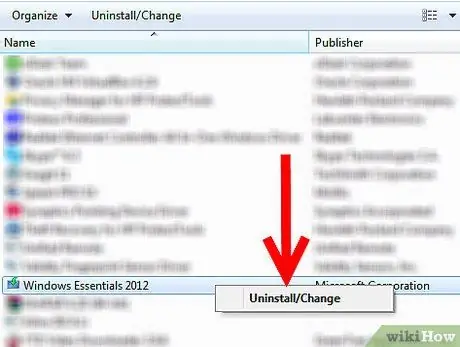
Step 3. Proceed to uninstall Windows Live Messenger
Scroll through the list that appeared looking for the entry 'Windows Live Essentials'. Select it and press the 'Uninstall' button, then press the 'Next' button, select the 'Messenger' item and finally press the 'Continue' button.
Advice
- Uninstalling Windows Live Messenger does not delete your Microsoft account.
- You may also need to uninstall other programs that are part of the Windows Live suite.


