Updating the firmware version of the network router can help improve the connectivity and security of the network infrastructure. Everyone recommends that you always install the most up-to-date version available to keep your network safe and efficient. Most routers have a built-in procedure in the operating system for checking for new updates, but it may not be able to complete the update automatically. If you are using an Apple AirPort router, you can use the AirPort Utility program to check for new firmware updates.
Steps
Part 1 of 4: Finding the IP Address of the Network Router (Windows Systems)

Step 1. Physically check the router for the IP address
In order to access the configuration page of the device that manages your home or office network, you need to know its IP address and enter it in the address bar of an internet browser. Most routers have the default IP address printed directly on an adhesive label located on the bottom of the external case. If not, or if you can't physically access the device, follow these instructions.
If you are using a Mac, skip to this section of the article directly
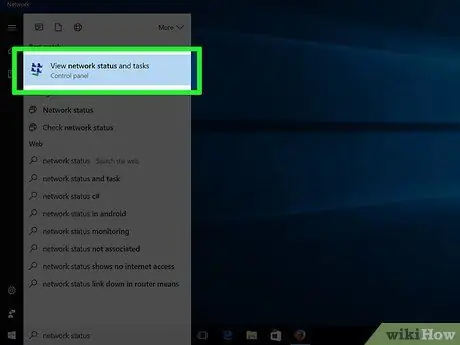
Step 2. Go to the "Start" menu or screen, type "View network activity and status", then press the "Enter" key
The "View network activity and status" system window will appear.
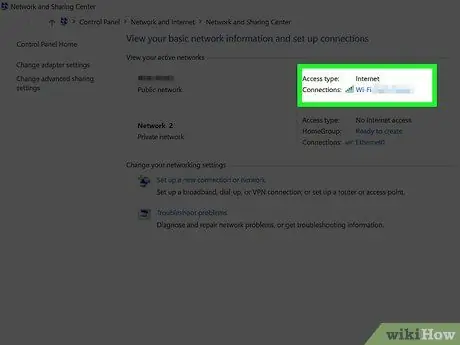
Step 3. Select the name of the current active network connection located in the upper right corner of the window
It is characterized by an icon that indicates the type of network connection in use (Wi-Fi, Ethernet, etc.).
Make sure you are connected to the network managed by the router you want to upgrade
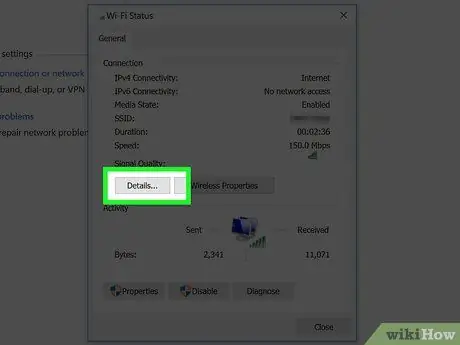
Step 4. Press the "Details" button
.. placed in the new window that appeared. A box containing various information will be displayed.
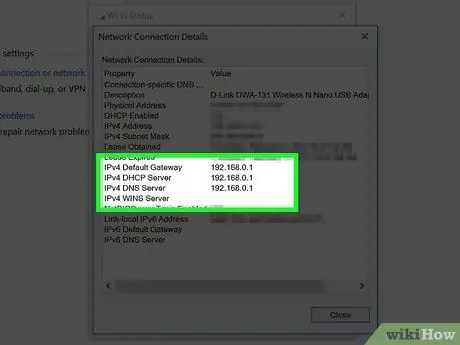
Step 5. Find the entry named IPv4 Default Gateway
The IP address in this item corresponds to the one adopted by the network router. Make a note of the address and go directly to this section of the article.
Part 2 of 4: Finding the IP Address of the Network Router (OS X Systems)
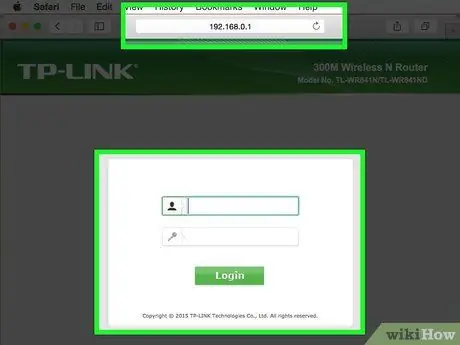
Step 1. Physically check the router for the IP address
In order to access the configuration page of the device that manages your home or office network, you need to know its IP address and enter it in the address bar of an internet browser. Most routers have the default IP address printed directly on an adhesive label located on the bottom of the external case. If not, or if you can't physically access the device, follow these instructions.
If you're using an Apple AirPort router, check out this section of the article
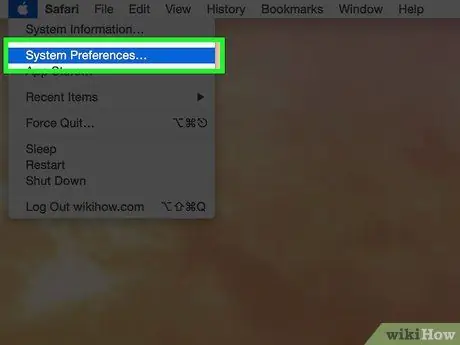
Step 2. Access the "Apple" menu, then select the "System Preferences" item
A new system configuration settings window will appear.
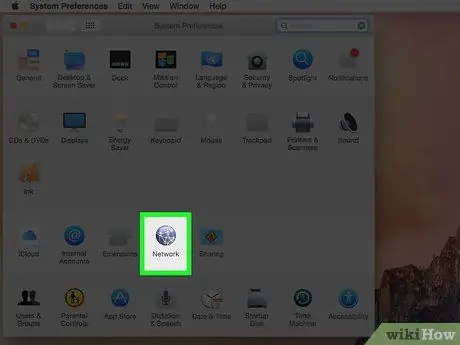
Step 3. Select the "Network" icon
A list of all network connections will be displayed.
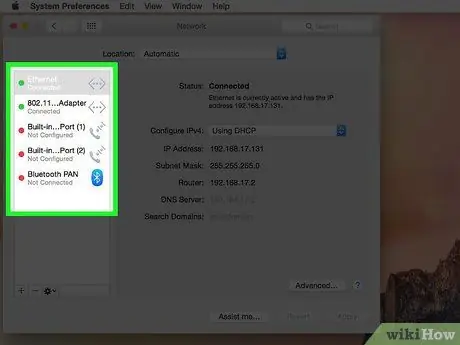
Step 4. Select the active network connection located in the left pane
It is characterized by a green indicator and the words "Connected".
Make sure you are connected to the network managed by the router you want to upgrade
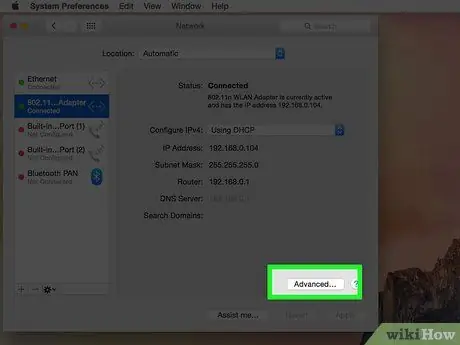
Step 5. Press the "Advanced" button
A new dialog will appear.
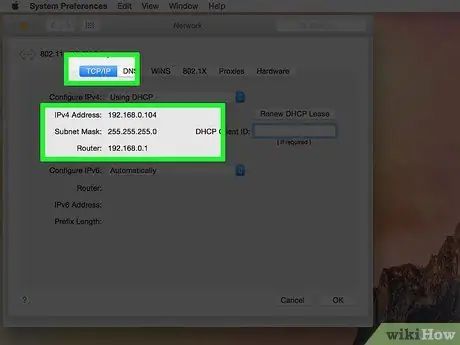
Step 6. Go to the "TCP / IP" tab to search for "Router"
This item reports the IP address of the network router.
Part 3 of 4: Install Router Updates

Step 1. Connect directly to the router via network cable
Some router models are configured not to allow access to the settings configuration page via Wi-Fi connection. Connecting to the router via an Ethernet cable ensures that you can properly access all the configuration tools you have at your disposal.

Step 2. Enter the IP address of the network router in the address bar of the internet browser
You can find this information using one of the methods described above.
Enter the IP address exactly as you would for any other web page address
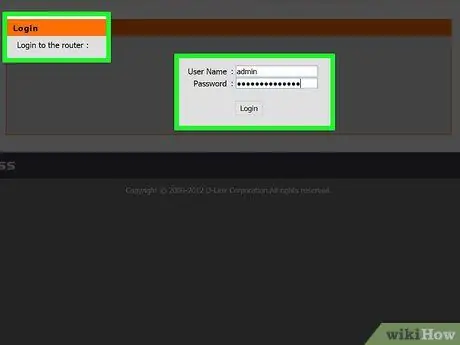
Step 3. Provide login credentials
When you try to access the configuration page of the network router, you are asked to provide your username and password in order to log in. If you don't have this information, you can try to use those commonly adopted by most manufacturers:
- Try leaving both text fields blank. Many routers do not require you to enter a username and password.
- Try using the username "admin" (without quotes) and leaving the password field blank. If that doesn't work either, try using the word "admin" (without quotes) for the password as well.
- Search the routerpasswords.com website using the manufacturer name and model of your network router. This way you should go back to the default login information.
- If the default login credentials are no longer correct and you do not know how to log in, you can restore the factory configuration settings by pressing the appropriate "Reset" button on the back of the network device. Note that this will erase all current settings, with the risk of compromising accessibility to the current Wi-Fi network generated by the device. At this point, you can access the router configuration page using the default login credentials.
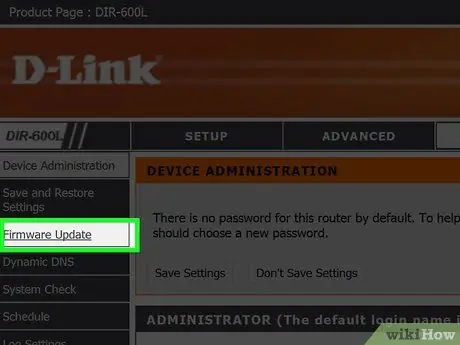
Step 4. Go to the "Firmware", "Router Upgrade" or "Update" section of the configuration page
The exact name of this section varies depending on the manufacturer and model of the network device. The location within the configuration page also varies, but is usually found in the "Administration", "Utility" or "Maintenance" menu.
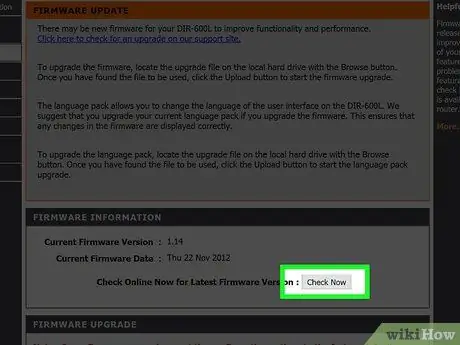
Step 5. To check for new updates, press the "Check" button
Many routers have a dedicated button to check if a new firmware version is available.
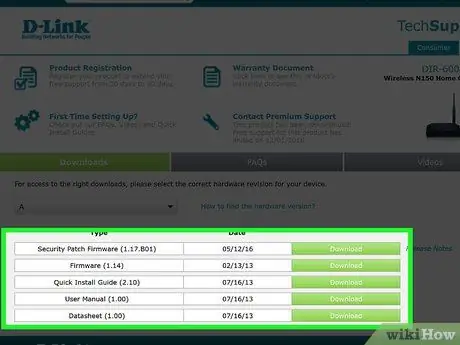
Step 6. Download the installation file of the latest firmware version using the appropriate link that appeared
Depending on the router model, you may be given the link to download the latest firmware version installation file or your device may be able to update automatically.
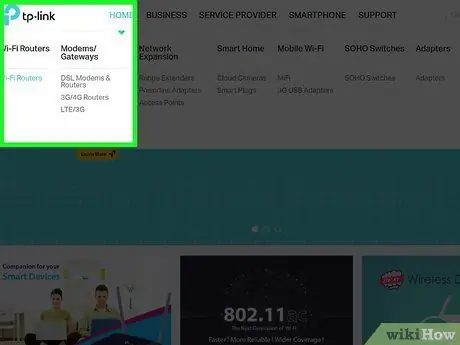
Step 7. If no link is provided to you, consult the router manufacturer's website
If a new firmware version is available, but no installation link is provided, it means that you will need to download the new firmware directly from the manufacturer's website. You can download the installation file from the "Support" or "Support" section of the site.
Do a simple web search to locate the router manufacturer's website. For example, if your network router is a Netgear, you will need to use the keywords "Netgear Support" which will result in the following netgear.com/support URL
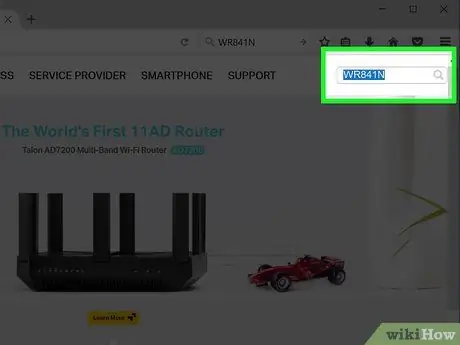
Step 8. Type your router model into the search field of the "Support" section of the manufacturer's website
The router model is listed at the top of the configuration page. Enter the information into the search field of the manufacturer's website.
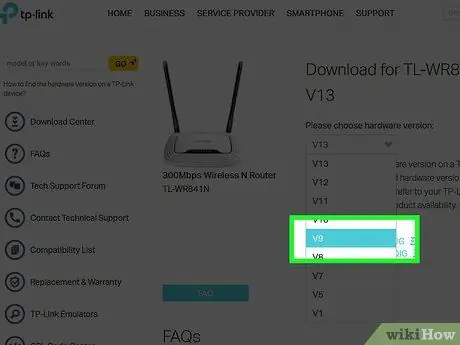
Step 9. Locate the latest firmware installation file
Depending on the router model, there may be only one installation file, multiple files for different versions, or nothing. Download the latest version of the firmware by evaluating the release date and the identification number. Normally, the installation file is distributed in ZIP format.
Make sure you are not downloading a firmware version that is older than the one already installed on your router. You can find this information by looking at the section of the router configuration page related to updating the firmware
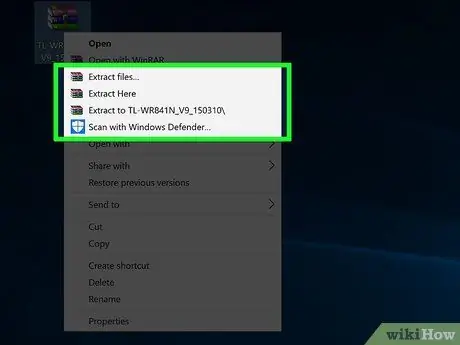
Step 10. Extract the ZIP file
After completing the download of the new firmware version, double-click the relative ZIP archive, then select the "Extract" item to decompress its contents. Normally, this is a single file with an unfamiliar extension.
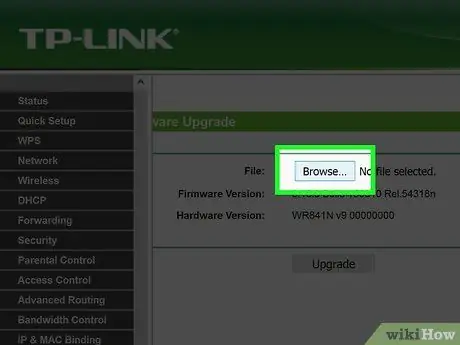
Step 11. Upload the file to the router
Return to the router configuration page, more precisely to the section on updating the firmware. Press the "Choose File" button, then go to the folder where you extracted the file you just downloaded. Select it and then press the "Upload" button.
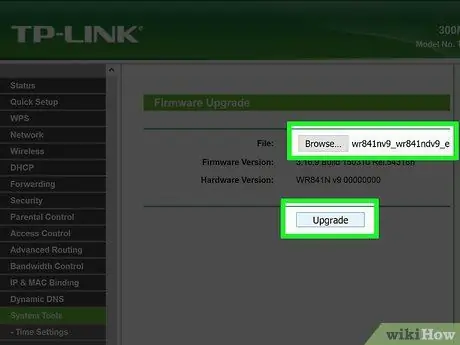
Step 12. Wait for the file to upload and apply
Once the file has been copied to the device, the firmware will be updated automatically. Normally, it is possible to check the progress of the process through the relative status bar; however, the update should take approximately 3-5 minutes to complete. It is very likely that the router will restart, so you will be disconnected from the network for a few seconds.
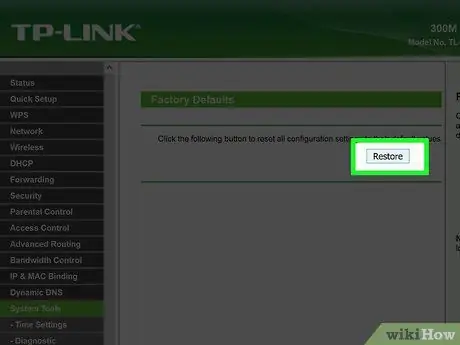
Step 13. If the update process fails, reset your device
If loading the new firmware didn't work and you are no longer able to connect to the router, manually reset the device and repeat the entire update procedure. Press and hold the "Reset" button on the router for 30 seconds to reset the factory settings. In this case the customized network settings (network name, IP address, DNS, etc.) will be deleted and replaced with the default ones, before you can access the network you will therefore have to reconfigure it.
Part 4 of 4: Upgrade an AirPort Router
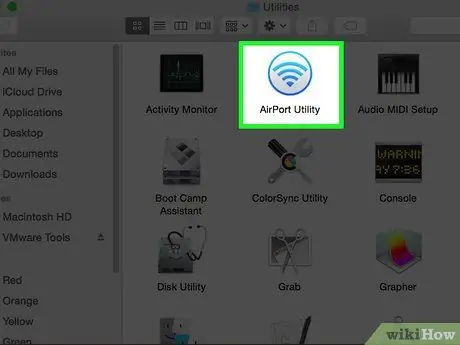
Step 1. Launch the AirPort Utility program located in the Mac's "Utilities" folder
This software allows you to change the settings of the AirPort router that manages the network. The "Utilities" folder is located inside the "Applications" directory.
- If you are using an iOS device, you can download the AirPort Utility program directly from the Apple App Store.
- The AirPort Utility software is only available for OS X systems and iOS devices.
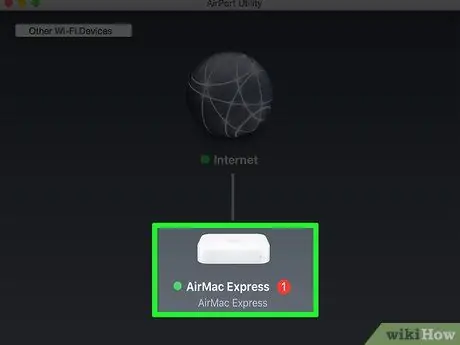
Step 2. Select your base station, then enter your username and password
The icon that characterizes the network device may have a red numbered badge indicating that a firmware update is available. However, this badge may not be visible until the authentication password is entered.
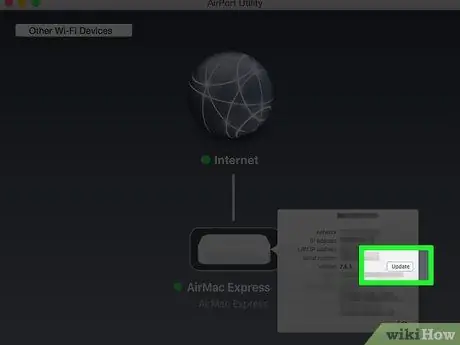
Step 3. Press the "Update" button to download and install the new firmware
The "Update" button appears only when an update is available to install. When prompted, press the "Continue" button to confirm your action.
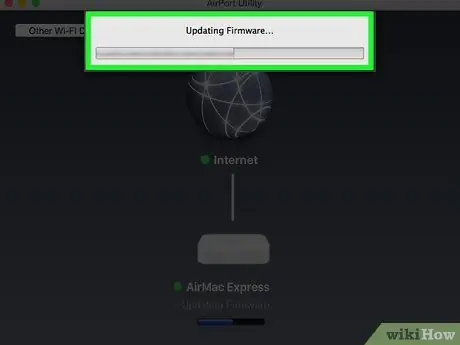
Step 4. Wait for the router to update
This step may take several minutes to complete. During the update process, you will be disconnected from the network for a short time.


