This article explains how to turn off the AutoCorrect feature on a smartphone, tablet, or computer. Autocorrect is a standard typing feature built into most operating systems and platforms. By disabling it, your computer or mobile device will not automatically replace misspelled words with the closest match.
Steps
Method 1 of 4: On an iPhone or iPad
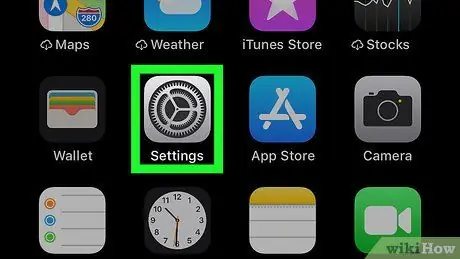
Step 1. Open the settings of your iPhone or iPad
Click on the "Settings" application icon, depicting gears in a gray box.
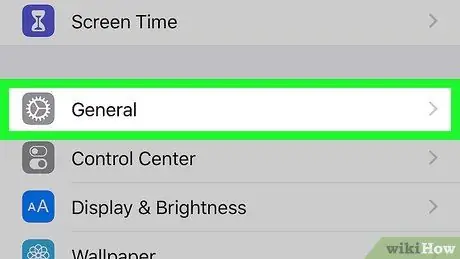
Step 2. Scroll down and select "General"
This option is located at the top of the "Settings" page.
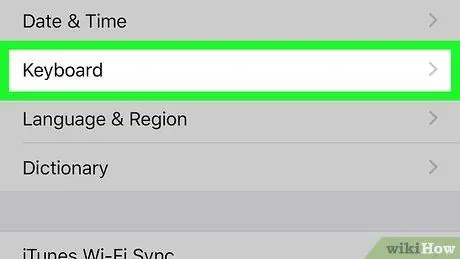
Step 3. Scroll down and tap on the Keyboard option
It is located more or less in the center of the page entitled "General".
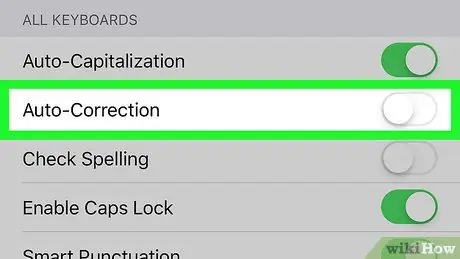
Step 4. Press on the green switch next to the "Auto Fix" option
Once it turned gray
the automatic correction feature will be disabled on your device.
- If the Autocorrect switch is already gray, then the feature has been disabled previously.
- You should also disable the "Check Spelling" feature by pressing the green switch next to this option.
Method 2 of 4: On Android
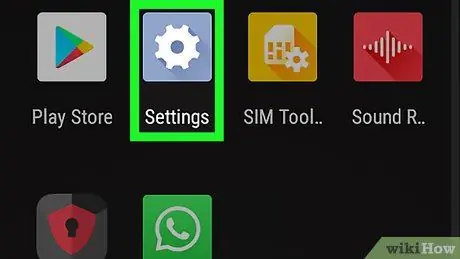
Step 1. Open the device settings
Swipe the screen from top to bottom to open the notification panel, then tap on the gear symbol
in the upper right corner of the menu.
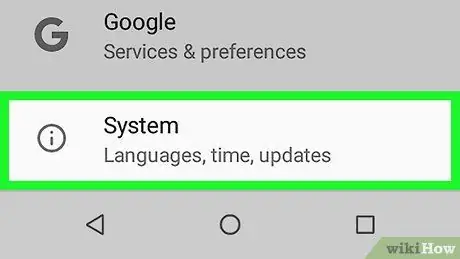
Step 2. Scroll down and select System
This option is found at the bottom of the settings menu.
If you're using a Samsung Galaxy, you'll need to scroll down until you find the option instead General management.
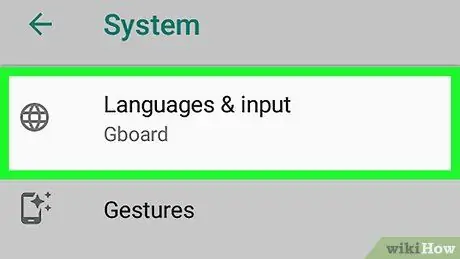
Step 3. Select Languages and input
This option is located at the top of the page.
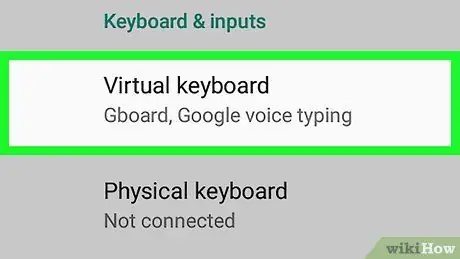
Step 4. Select Virtual Keyboard
This option is located in the center of the page.
If you have a Samsung Galaxy smartphone or tablet, you will need to select instead On-screen keyboard.
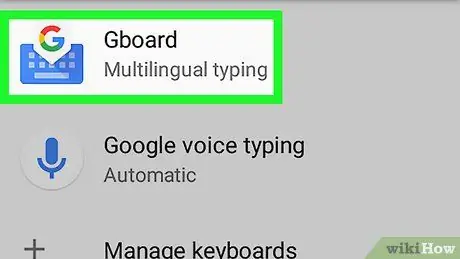
Step 5. Select your device keyboard
Press on your phone or tablet's built-in keyboard.
- For example, if you are using a Samsung Galaxy, you will have to press on the option Samsung keyboard.
- If you are using the Gboard, press on instead Gboard.
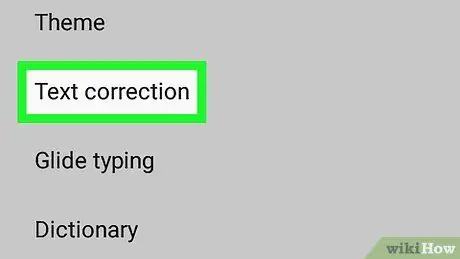
Step 6. Select Text Correction
This option is placed in the center of the screen.
If you are using a Samsung Galaxy, press on instead Smart typing in this section (unless you have selected the Gboard; in that case, you will have to press on Text correction).
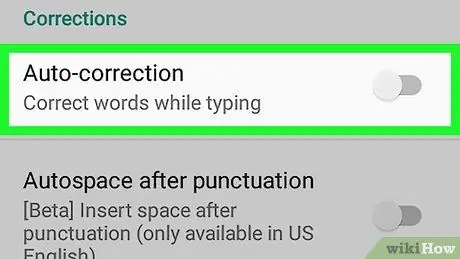
Step 7. Press the teal switch next to the "Auto Correct" option
Once it turned gray
the AutoCorrect feature will be disabled.
- If this button is grayed out, then automatic correction has already been disabled on your device. In this same menu, you should also turn off the feature called "Show Tips".
- If you are using the default keyboard of a Samsung Galaxy, in this section you will have to press on the blue switch next to the "Predictive text" option.
Method 3 of 4: On Windows

Step 1. Open the "Start" menu
Click on the Windows logo in the lower left corner of the screen.
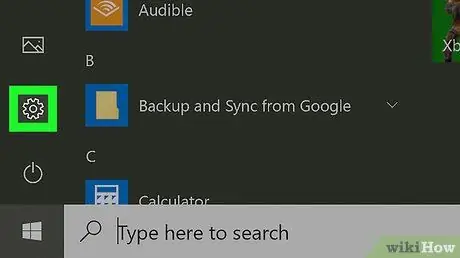
Step 2. Open the "Settings"
Click on the gear icon in the lower left corner of the "Start" menu. This will open a window called "Settings".
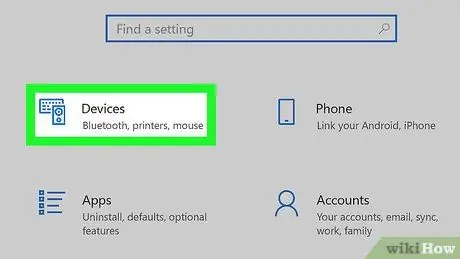
Step 3. Click on Devices
This option is located in the center of the settings window.
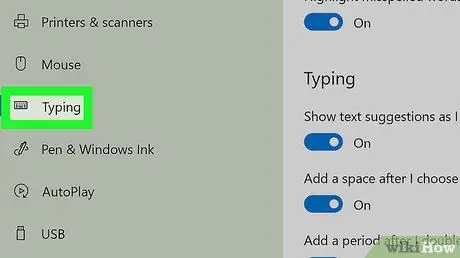
Step 4. Select the tab titled Typing
This option is located on the left side of the window titled "Devices".
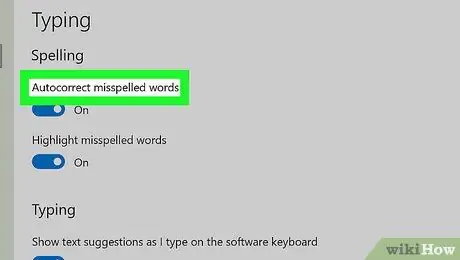
Step 5. Look for the section titled "Automatically Correct Spelling Mistakes"
You can usually find it at the top of the window.
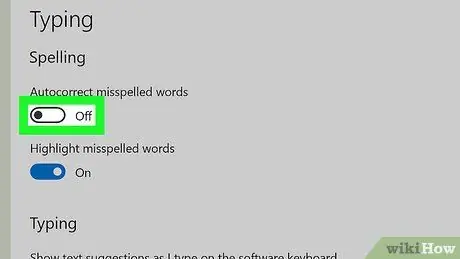
Step 6. Click on the toggle next to the "Enabled" option
It can be found in the section titled "Automatically Correct Spelling Mistakes". By doing so, the switch will be disabled
. This means that automatic correction will be disabled on your computer.
- If "Disabled" already appears next to this switch, then AutoCorrect was not enabled on your computer.
- In this same menu, you should also disable the "Highlight spelling errors" feature by clicking on the relevant switch, next to which you will see the word "Enabled".
Method 4 of 4: On a Mac

Step 1. Open the Apple menu
Click on the Apple logo in the upper left corner of the screen. A drop-down menu will appear.
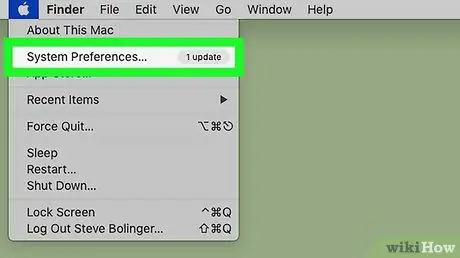
Step 2. Click on System Preferences…
This option is located on the drop-down menu. Clicking on it will open a window titled "System Preferences".
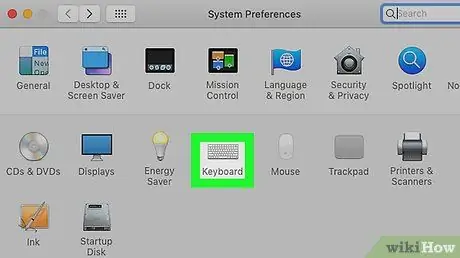
Step 3. Click on Keyboard
This option is located in the "System Preferences" window. A window dedicated to the keyboard will appear.
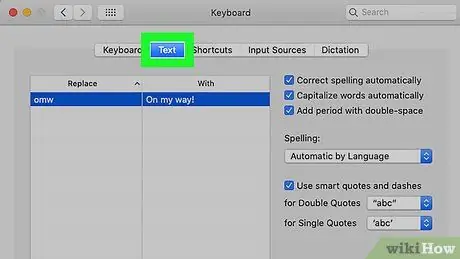
Step 4. Click on the Text tab
It is located at the top of the keyboard window.
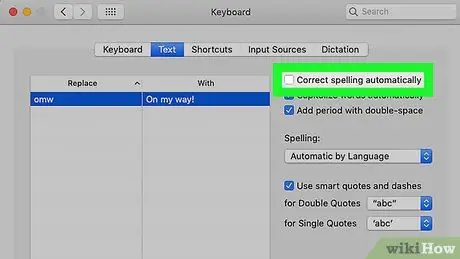
Step 5. Remove the check mark from the box next to the "Automatically Correct Spelling" option
It is located in the upper right corner of the window. This will disable automatic correction on the Mac.


