This article shows you how to safely remove an external hard drive or any USB memory drive from a computer running Windows 10.
Steps
Method 1 of 3: Using the Taskbar
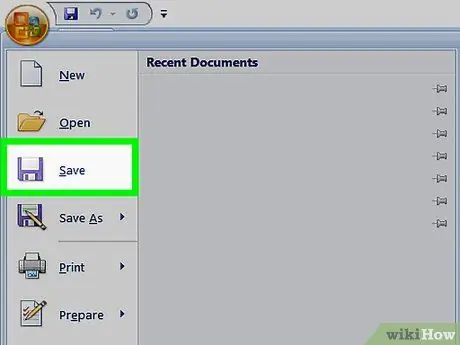
Step 1. Save any files in use that reside on the USB drive
The easiest way to do this is to activate the program window that is using the file and press the hotkey combination Ctrl + S.
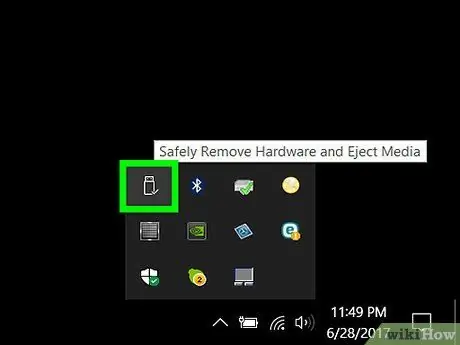
Step 2. Locate the "Safely Remove Hardware and Eject Media" icon
It has a rectangular shape and features a small USB stick with a small check mark next to it. It is located inside the Windows notification area that you find in the lower right corner of the desktop. If you don't see it, it most likely means it's hidden, so select the "Show hidden icons" icon that looks like an arrow pointing up.
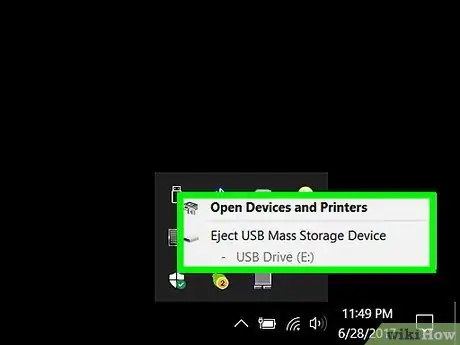
Step 3. Click the "Safely Remove Hardware and Eject Media" icon
This will bring up a small context menu.
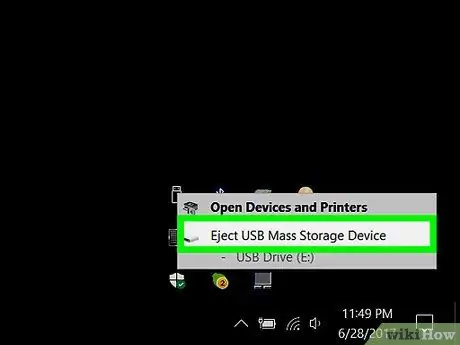
Step 4. Choose the Eject option
This item should appear at the bottom of the menu. The full wording is usually similar to the following Eject Mass Storage Device (E:) followed by the name assigned to the unit.
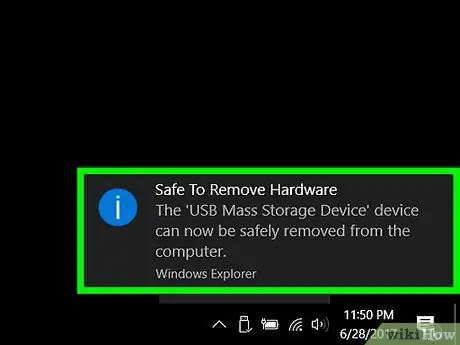
Step 5. Wait for the "You can remove the hardware" confirmation message
When you see this notification appear in the lower right corner of the screen, it means that the USB drive is ready to be removed from the system.
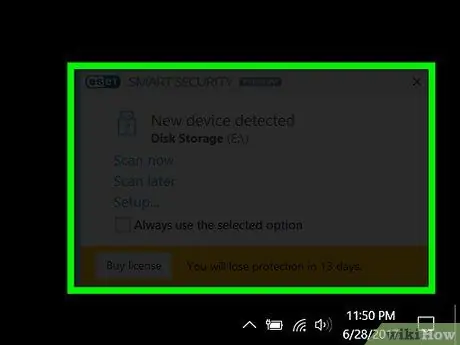
Step 6. Gently remove the USB stick from its port on your computer
The next time you connect it to the system, all the files inside will be intact and available for use.
Method 2 of 3: Using the "This PC" Window
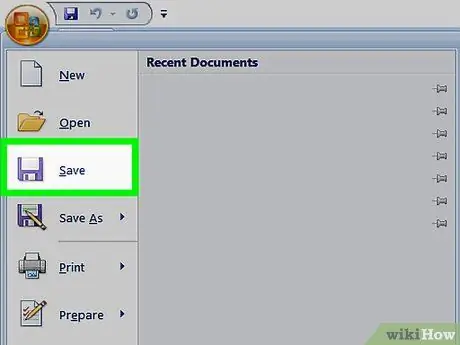
Step 1. Save any files in use that reside on the USB drive
The easiest way to do this is to activate the program window that is using the file and press the hotkey combination Ctrl + S.
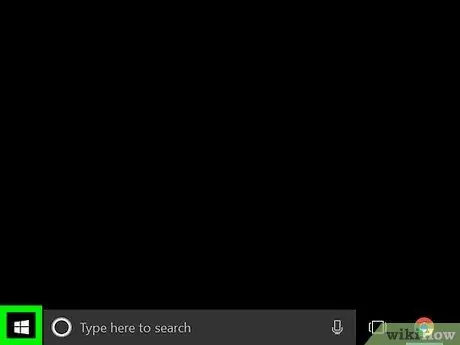
Step 2. Access the "Start" menu
To do this, you can click the Windows logo located in the lower left corner of the desktop or you can press the ⊞ Win key on the keyboard. When you open the "Start" menu the text cursor is automatically positioned inside the search bar.
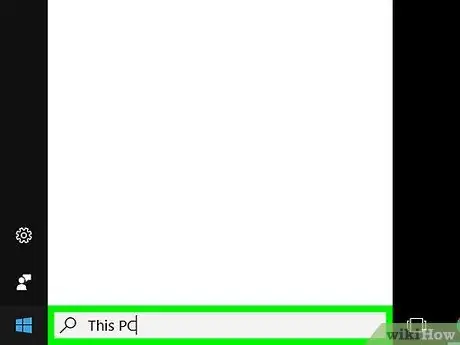
Step 3. Type keywords this pc
This will search the entire system for the "This PC" application.
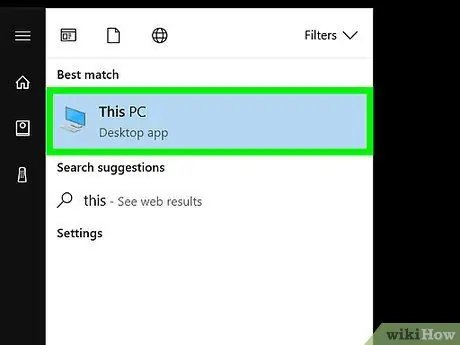
Step 4. Select the "This PC" icon
It features a small keyboard and small monitor and is positioned at the top of the search results list. This will bring up the "This PC" system window.
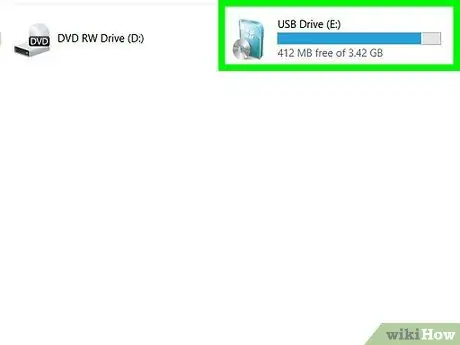
Step 5. Find the name of the USB drive you want to remove
All storage devices and devices connected to your computer are listed in the "Devices and drives" section located in the center of the right pane of the "This PC" window.
All storage devices are labeled with a drive letter (for example "E:" or "F:") placed at the end of its name
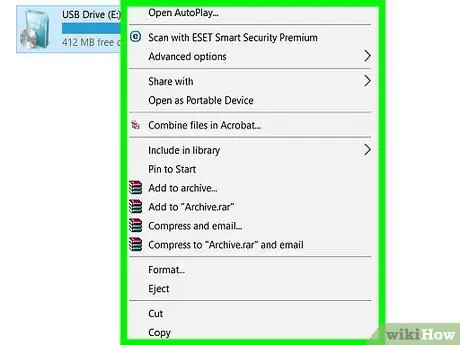
Step 6. Select the drive icon with the right mouse button
A context menu will be displayed.
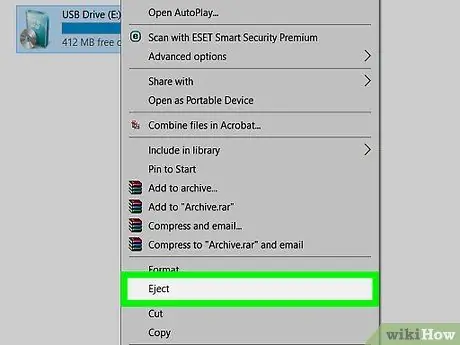
Step 7. Choose the Eject option
It is located in the middle of the context menu that appeared. After selecting this item, the USB drive icon will disappear from the "This PC" window.
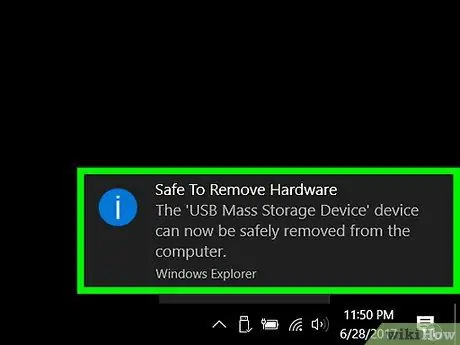
Step 8. Wait for the "You can remove the hardware" confirmation message
When you see this notification appear in the lower right corner of the screen, it means that the USB drive is ready to be removed from the system.
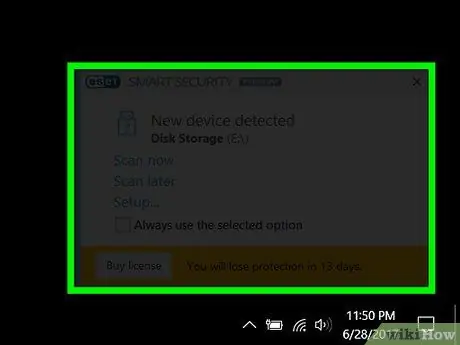
Step 9. Gently remove the USB stick from its port on your computer
The next time you connect it to the system, all the files inside will be intact and available for use.
Method 3 of 3: Enable the Quick Remove Feature
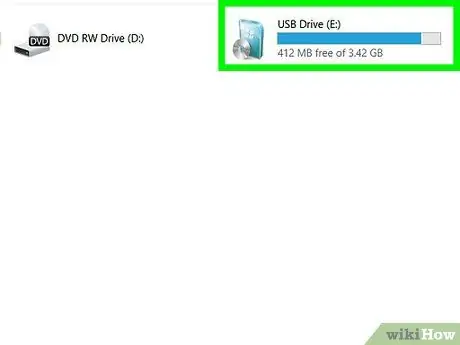
Step 1. Make sure the USB drive under test is connected to your computer
The purpose of the Windows "Quick Remove" feature is to configure the USB memory drive so that it can be removed from the system without the need to perform the "Safely Remove Hardware and Eject Media" procedure. Enabling the "Quick Removal" function is strictly linked to each individual memory unit, so in order to proceed, it must be connected to the computer.
Please note that "Quick Remove" cannot be activated for SD cards
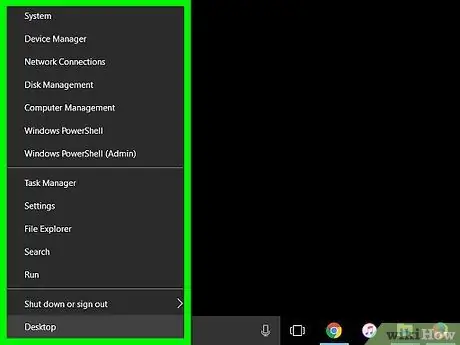
Step 2. Select the "Start" button with the right mouse button
It features the Windows logo and is located in the lower left corner of the desktop. This will display the relevant context menu.
Alternatively, you can press the hotkey combination ⊞ Win + X
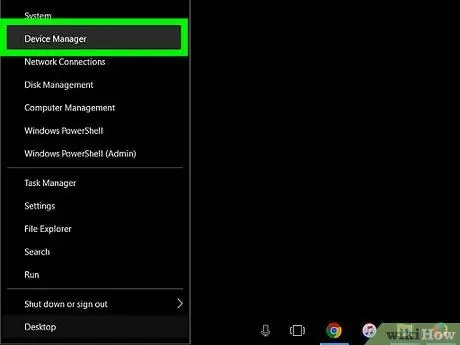
Step 3. Select the Device Manager option
It is located at the top of the menu.
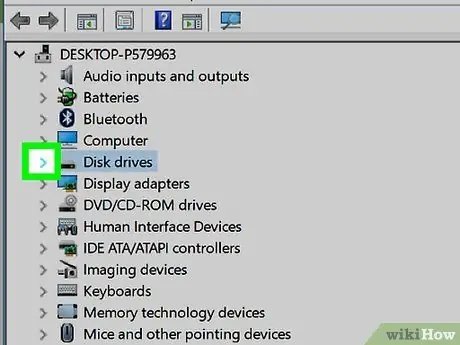
Step 4. Click the> symbol located to the left of the "Disk drives" item
This tree menu item is located at the bottom of the "Device Manager" window. Clicking the indicated symbol will display the list of all storage devices currently connected to the computer, including USB sticks and external hard drives.
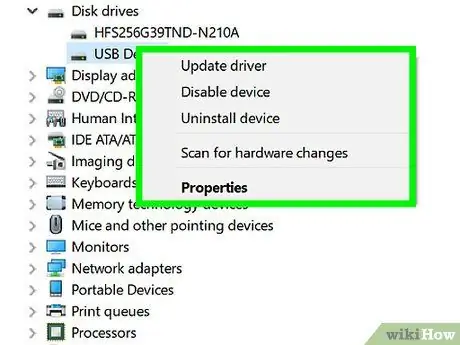
Step 5. Select the USB stick with the right mouse button
The name it is labeled with varies by manufacturer and model, but usually includes the word "USB" as well.
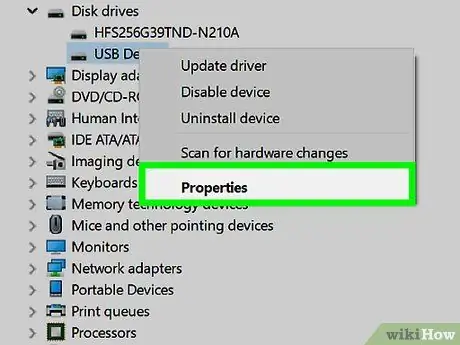
Step 6. Choose the Properties option
This is the last item in the context menu that appeared.
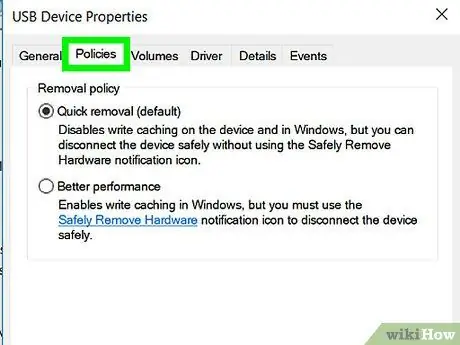
Step 7. Go to the Policies tab of the "Properties" window
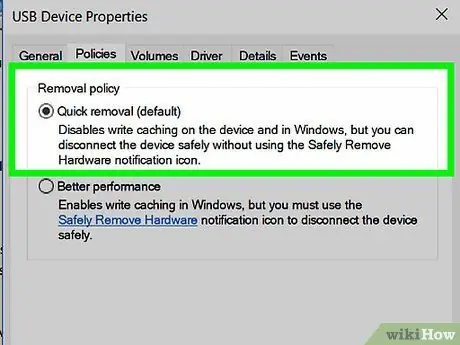
Step 8. Select the Quick Remove radio button
It is the first item on the list.
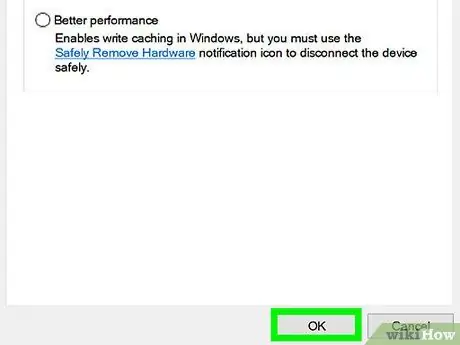
Step 9. Press the OK button
This will enable the "Quick Remove" function for the selected USB memory drive. From now on, when you have finished using the USB stick, you can remove it from your computer without having to perform the Windows eject procedure.
Advice
- The "Eject" option is also suitable for removing SD memory cards (such as those normally used in cameras and smartphones).
- Since the "Quick Remove" feature is specific to your device, it must first be enabled for each individual removable USB drive in order to be used.


