Are you looking for a fun afternoon project to make with the kids or a simple DIY gift you can create in an afternoon? If so, consider making a DIY stamp. Stamps can be used to decorate a multitude of things and can be great tools for making distinctive gifts, from a special card for a friend to a large decorated canvas bag. This article describes two ways to make it: a potato stencil, which is great for kids, and a linoleum stamp, which is ideal for adults interested in creating complex, reusable stamps.
Steps
Method 1 of 2: Making a Simple Stencil with Potatoes
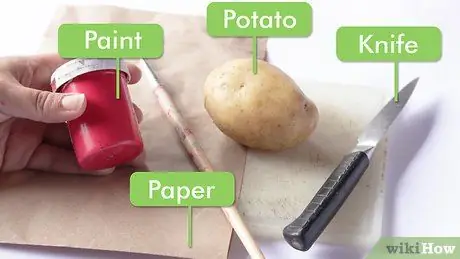
Step 1. Gather all the materials you will need
Start by choosing a large potato with a firm texture. You will also need to get a knife, paint or ink, and something like paper to stamp on.
While it can be fun to simply stamp on a sheet of paper, consider purchasing screen printing ink and a garment, large canvas bag, or tea towel to stamp on. This way you can make a creative gift or a fun new item for yourself
Step 2. To make a stencil, you can also use the cork from a wine bottle or a large eraser instead of the potato
With one of these items you will create a stencil that you can use on more than one occasion, while one made with potato won't last long. However, these items will not allow you to have a large surface area like that of the potato to create your stencil.
Step 3. Wash the potato and cut it in half
Make sure you make a straight cut in the center. It is important that the cut is uniform and clean so that the stamp rests flat on the surface to be stamped during application.
Step 4. Engrave a design on the side of the potato you cut
Start with a simple design, like a star or a heart, that doesn't have many cuts on the inside. It is easier to trim the outside edge of the potato.
- It is not necessary to cut the potato very deeply; it is enough to create a kind of difference in height.
- The design that will actually appear when you use the stencil corresponds to the part you did not cut out; keep this in mind when cutting.
- A good way to successfully crop the design is to reproduce it on the surface and then cut out any parts that have not been drawn.
Step 5. Spread the paint or ink evenly on a flat, non-porous surface
If you already have a rubber roller to apply ink, use it to spread the paint or ink evenly. If you don't have such a tool, simply use a knife to spread the paint or ink as evenly as possible. The result does not need to be perfect, but the layer should be quite thin over the entire surface.
Step 6. Press the design you made onto the paint
Place the design directly on the paint. Apply light pressure to the potato, but don't force yourself. The goal is to cover the entire surface of the stencil without causing too much paint or ink to deposit in the cuts made, to prevent it from accumulating on the surface and transferring when stamping.
If you think you've applied too much paint or ink and the cuts are solid, take the time to get most of them out with a knife. If all your attempts fail, you can rinse the potato under tap water, wipe off excess water with a towel, and start over by applying the ink or varnish
Step 7. Press the paint coated design onto the surface you want to stamp
Make sure you place the stencil directly on the surface to be stamped. Try to keep the tone level as you put it down. Press lightly on the potato mold, but don't press too hard.
- If you are stamping on a relatively non-porous surface, such as a piece of paper, you will need to apply very little pressure. If you press too hard, you may cause the design to smudge. If you are stamping on a porous surface, such as a piece of cloth, you can press with a little more force.
- Remove the stamp the same way you applied it, lifting it up to avoid smudging the design.
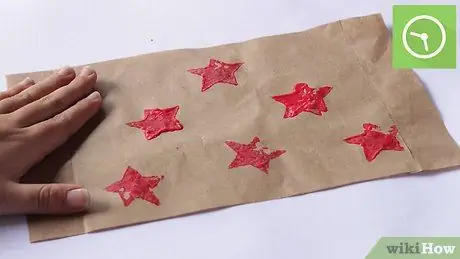
Step 8. Create a pattern with the stencils
While it's perfectly acceptable to put only one stamp, try to create a repeating pattern or design.
Step 9. Let the paint dry
It is important to let the paint dry before it interferes with the image you stamped. If you are impatient, try using a hair dryer to make the paint or ink dry faster.
Method 2 of 2: Make a Rubber or Linoleum Stamp
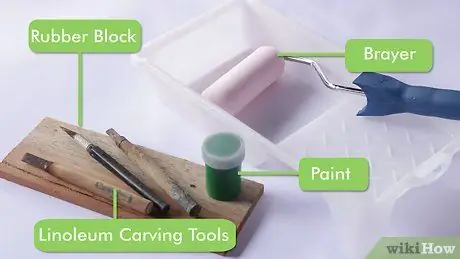
Step 1. Get the material
You will need to purchase a block of rubber or linoleum, some paint or ink, a rubber roller, tools with different shapes for carving linoleum, a non-porous surface on which to spread the ink, and an object to put the stamp on..
Most of these items can be easily found and purchased at any craft store
Step 2. Draw a design on the rubber or linoleum block
If this is your first project, try to draw lines that are at least 6 millimeters thick. It will therefore be easier to carve the design with thicker rather than very thin lines.
The lines drawn correspond to what will actually appear when you use the stencil. It means that you will remove all the surface on which nothing is drawn; keep this in mind as you draw
Step 3. Cut out the design using the carving tools
Remember that you are removing the negative space, which is all the surface area on which nothing has been drawn. This step may take some time, depending on the design, but it is important that all negative space is below the surface of the block.
- Cut deep enough that when you stamp the ink that has concentrated in the negative space is not accidentally transferred to the surface you are stamping on.
- Use the different shapes of the carving tools you have available. Small straight-blade cutters are good for working on details, while tools with large, rounded tips are suitable for quickly removing larger portions of the surface.
Step 4. Spread the ink or paint on the non-porous surface and use a rubber roller to make it even
It shouldn't be necessary to apply a lot of paint to the surface. Simply apply enough paint or ink so that you can spread a thin layer of paint over a space a little larger than the surface of the stencil.
To obtain a multicolored design, apply specks or strips of different colors of paint or ink on the non-porous surface and smooth everything with the rubber roller, so that the various colors come into contact with each other and create a thin and homogeneous layer
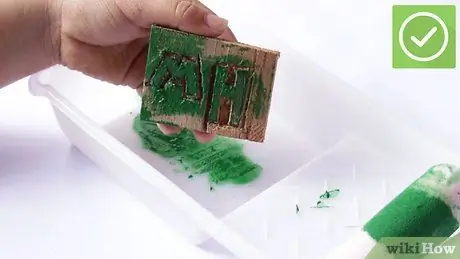
Step 5. Gently press the surface of the design onto the paint
You must completely cover the design with paint or ink, but avoid getting a lot of paint in the negative space.
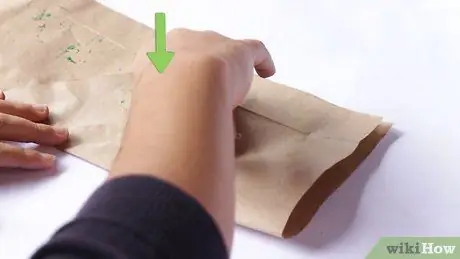
Step 6. Lift the stamp and make sure the surface is covered with paint or ink
If there are gaps where the ink or paint should be but there isn't, simply dab some ink on the affected area with kitchen paper or your fingers.
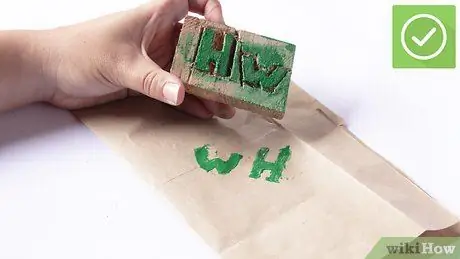
Step 7. Press the stencil onto the surface to be stamped
Remember to place the stencil directly on the surface, keeping it horizontal and stationary. This will decrease the risk of smudging the design.
- Keep in mind that if you put the stencil on the fabric, the paint or ink could get through the fabric. Protect the underlying surface with a piece of cardboard or several sheets of newspaper.
- Lift the stamp up and away from the surface, then let the design you embossed dry completely. If you are impatient, you can use a hair dryer to quickly dry the ink or paint.


