You can use the PCSX2 emulator to play PlayStation 2 games on your computer. To configure the input device after installation, you can choose between the LilyPad and Pokopom plugins, which allow you to customize the control scheme. LilyPad supports mouse and keyboard inputs, as opposed to Pokopom, which only supports controllers (but offers advanced features like pressure sensitivity). After completing the configuration, you can always change the active plugin or reset the key assignment from the "Configuration" menu.
Steps
Method 1 of 2: Using LilyPad
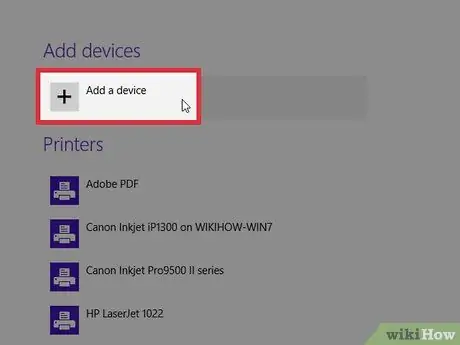
Step 1. Connect the device you want to use to play the game to your computer
LilyPad supports keyboard, mouse, Xbox 360 and third party controllers.
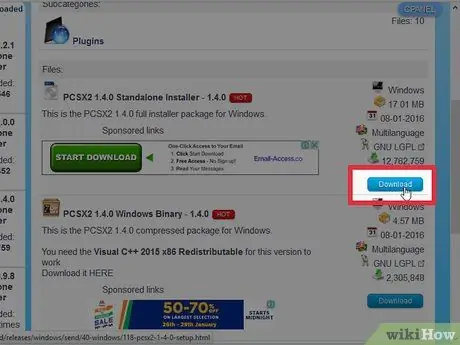
Step 2. Download and open PCSX2
Go to https://pcsx2.net/download.html and select the installer suitable for the platform you are using. Once the program is open, you will see the setup wizard window.
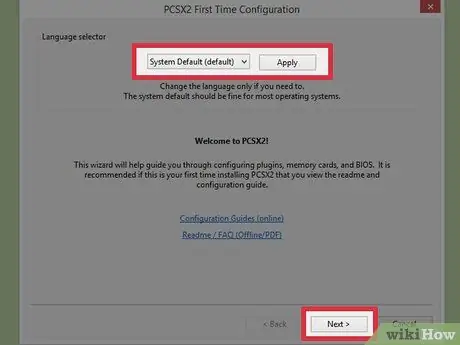
Step 3. Select your language
By default, the system language is chosen. Press "Next" to proceed with the plugin configuration.
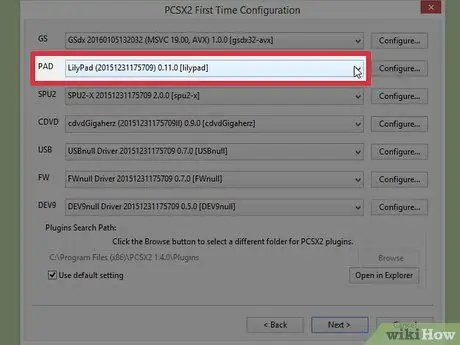
Step 4. Select "LilyPad" from the "PAD" drop-down menu
This is the second menu in the plugin list.
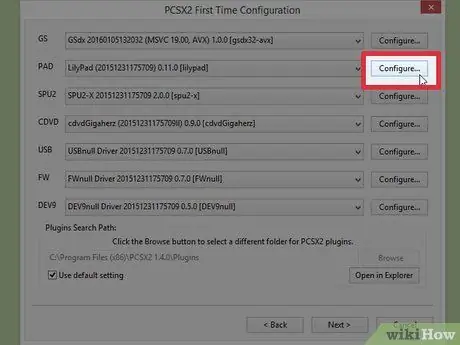
Step 5. Click on "Configure
.. . You will see the button to the right of the PAD menu; the LilyPad plugin configuration list will open.
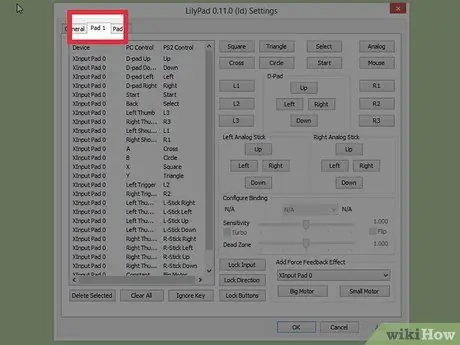
Step 6. Select "Pad 1"
You will see the tab in the upper left part of the window; click on it and the button configuration page for the connected device will open. On the right, you will see a series of buttons that you can click to reconfigure the PS2 controller buttons as you like.
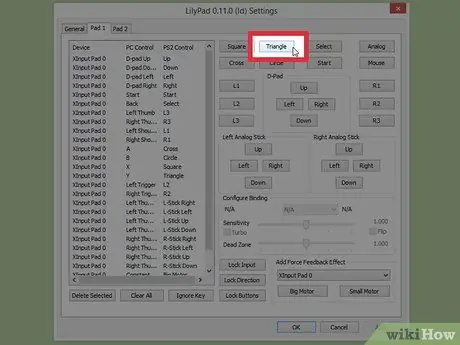
Step 7. Select a button to enter edit mode
For example, to change the button that corresponds to the "Triangle" on the PS2 controller, click on "Triangle".
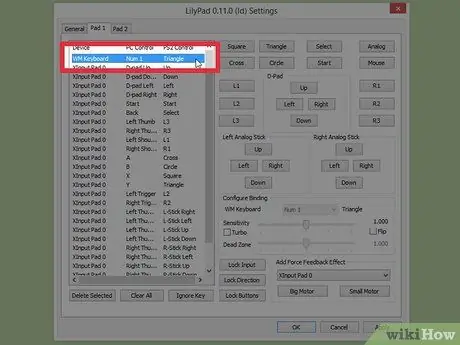
Step 8. Press the key you want to assign to that button
The input will appear in the list of saved assignments on the left.
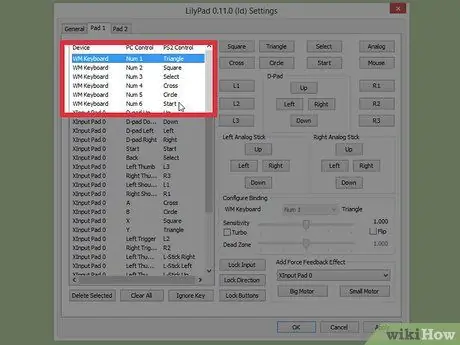
Step 9. Repeat for all buttons on the controller
Any keys you don't assign will not work.
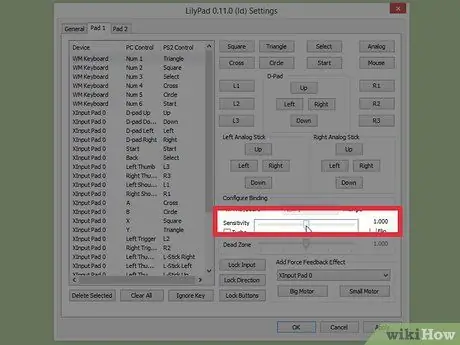
Step 10. Adjust the "Sensibility" item (optional)
You will find the sensitivity selector in the "Configure binding" section of the window. Moving the switch to the left will reduce the sensitivity, while to the right you will increase it.
- You can change the sensitivity of all buttons, but it is usually useful to do this especially for the triggers and analog sticks, which also register partial presses.
- Similarly, you can use the "Dead zone" selector to find the range within which partial key presses will not be detected.
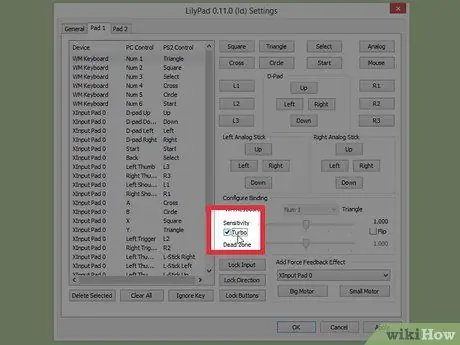
Step 11. Enable and configure the "Turbo" option (optional)
Check the "Turbo" box in the "Configure binding" section to enable this feature.
The turbo mode allows you to hold down a key to send rapid repeated presses to the emulator. This is a useful feature in games where buttons have to be pressed repeatedly, but it can create problems in cases where you need to hold down a key for a long time
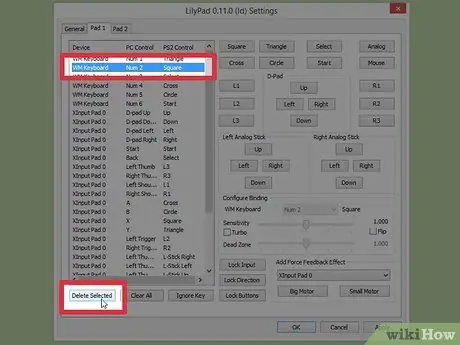
Step 12. Click on "Delete Selected"
Choose an assignment from the list on the left and click the button to remove it.
You can also click "Clear all" to remove all assignments. Note that this option clears ALL the assignments configured for that device, it does not reset them to their default values
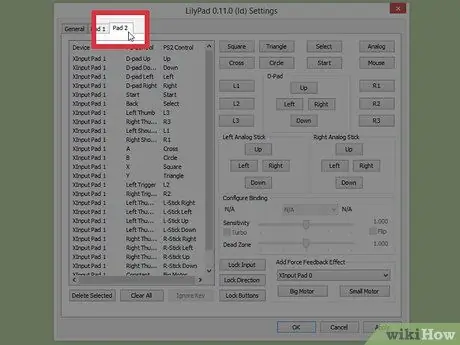
Step 13. Configure a second input device (optional)
Select "Pad 2" and repeat the previous steps to play in multiplayer mode.
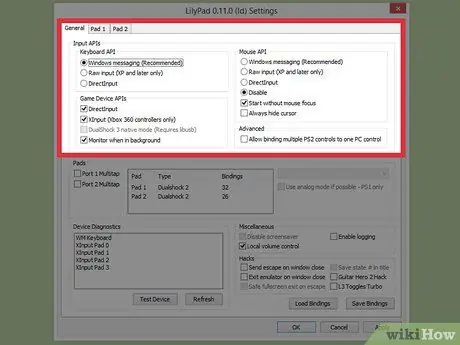
Step 14. Change the Input API to troubleshoot
If you run into problems, click on the "General" tab on the "Configure …" page and try different APIs for the type of input you are using. Alternate inputs may work better with some devices.
The APIs are broken down by input type: keyboard, mouse, and controller
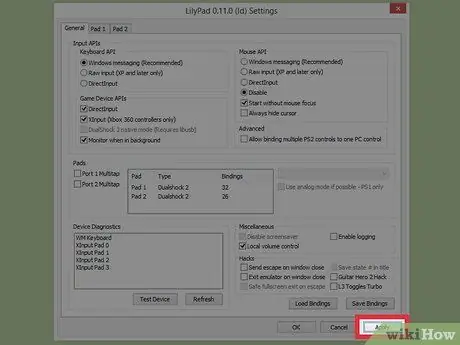
Step 15. Click on "Apply" or "OK"
Both of these buttons allow you to save your settings. Clicking on "OK" will also close the window.
Method 2 of 2: Using Pokopom
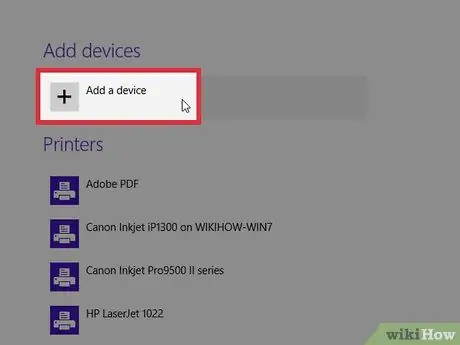
Step 1. Connect the device you want to use to play the game to your computer
Pokopom only supports controllers and can take advantage of features like vibration and pressure sensitive inputs. The program also supports guitar-style controllers, such as those used for the Guitar Hero series games.
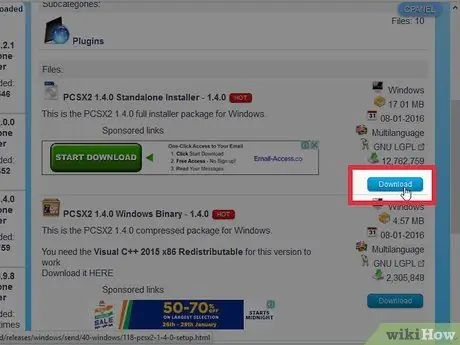
Step 2. Download and open PCSX2
Go to https://pcsx2.net/download.html and select the installer suitable for the platform you are using. Once the program is open, you will see the setup wizard window.
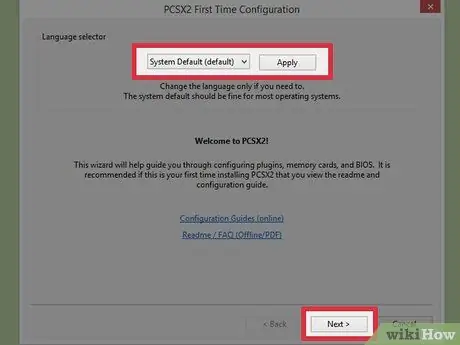
Step 3. Select your language
By default, the system language is chosen. Press "Next" to continue configuring the plugin.
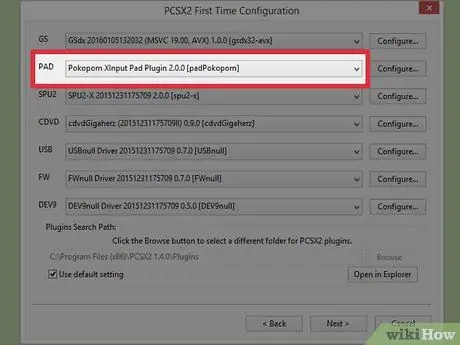
Step 4. Select "Pokopom" from the "PAD" drop-down menu
This is the second menu in the plugin list.
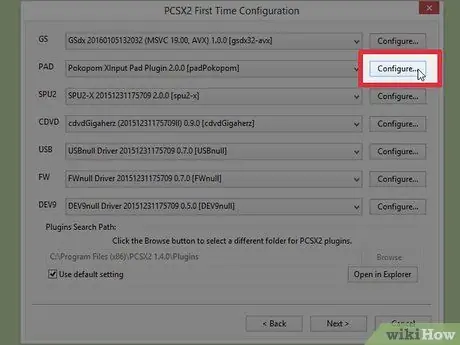
Step 5. Click on "Configure
.. . You will see the button to the right of the PAD menu; the list of configurations of the Pokopom plugin will open.
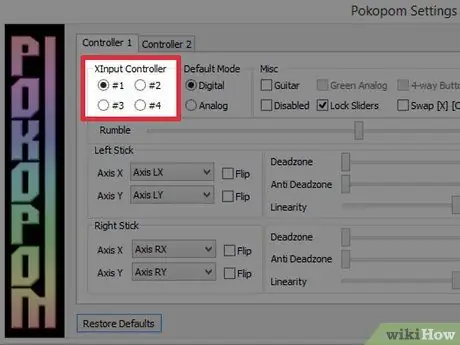
Step 6. Select "Xinput Controller"
In the "Xinput Controller" section at the top left, press one of the radio buttons. You only need to change the value if you have connected multiple controllers to your computer.
- Xinput allows automatic PS2 controller emulation using an Xbox360 pad. The buttons will automatically be assigned to the corresponding buttons on the PS2 controller.
- Xinput is a plugin built into Pokopom and you don't have to download it separately.
- If you just want to swap the circle and X keys, click on the "Swap [X] [O] buttons" item in the "Misc" section.
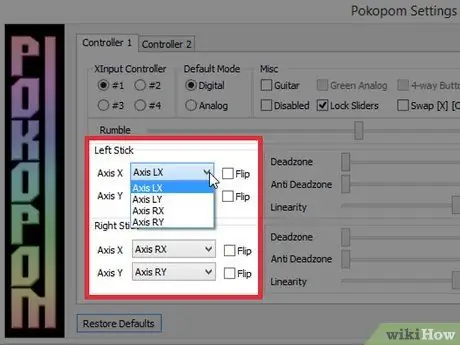
Step 7. Adjust the axes of the analog sticks
In the "Left stick" and "Right stick" sections at the bottom right, you can change the right / left and x / y axes associated with the directions of the sticks.
Axis settings can usually be changed within the game, so change the configuration within the program only if you want them to always be customized across all games and menus
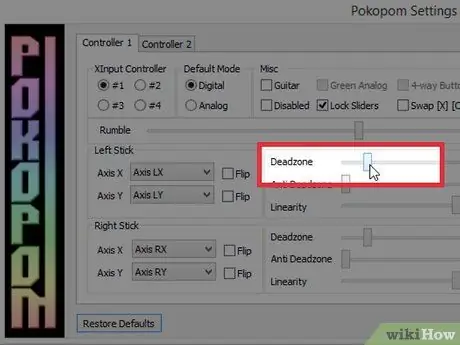
Step 8. Adjust the "Dead Zone"
Move the "Deadzone" switch to the right to increase the range of motion that input is ignored when you move the analog stick. Moving it to the left reduces the range.
- You can also use the "Anti deadzone" switch to allow the emulator to ignore dead zones already used in the game.
- The two analog sticks use separate switches for the Dead Zone.
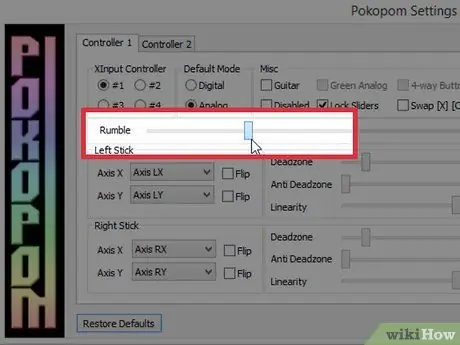
Step 9. Adjust the vibration settings
Move the slider at the top of the window to the left to reduce the intensity of the vibration and to the right to increase it.
- You must use a controller that supports vibration to use this feature.
- This feature does not force vibration in games that do not have it.
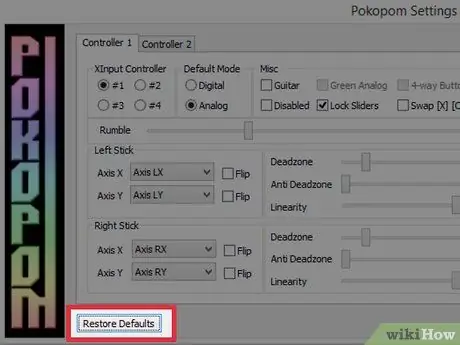
Step 10. Click "Restore Defaults" (optional)
This button allows you to cancel all changes to the original configuration. Since some assignments cannot be changed, you won't have to change them again.
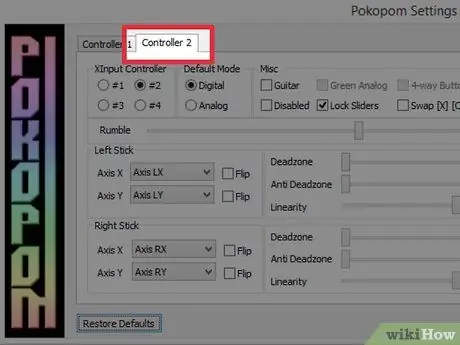
Step 11. Configure a second input device (optional)
Select "Pad 2" and repeat the previous steps to play in multiplayer mode.
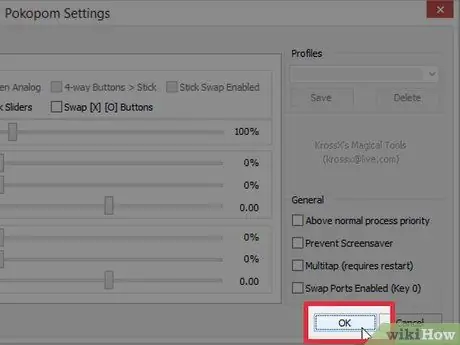
Step 12. Click on "OK"
The controller configurations will be saved and the window will close.
Advice
- Be careful when assigning keys with LilyPad. You can assign multiple inputs to a single key and vice versa. If you don't do this on purpose, this can cause confusion when playing.
- Xbox controllers are supported by Windows. By using one to play emulated video games, you eliminate one of the possible compatibility problems.
- If you're having trouble, make sure your computer meets the emulator's system requirements.


