If you want to customize your PowerPoint presentation with a fixed header, you need to manually place a text field or image at the top of the Slide Master. The program has a built-in header tool, but this will not display in the on-screen version of the presentation; it will only be visible on printouts. Learn how to create the header manually on the "Slide Master" to give exactly the look you want to the slides you see on your computer screen.
Steps
Method 1 of 3: Use an Image or Text Field as the Slide Header
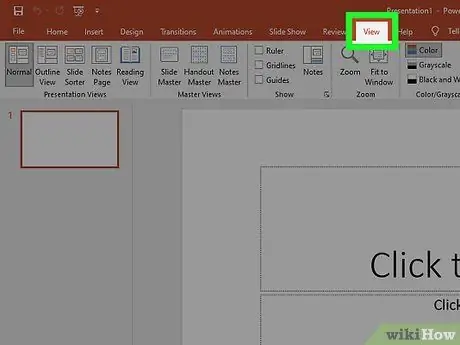
Step 1. Click "View", then "Slide Master"
You can add an image or text on top of all slides by inserting them into the Slide Master. This slide contains all the information that is repeated during the presentation, such as the background and the default positioning of the elements; you can change it at any time while creating your presentation.
On Mac, click "View", "Master", then "Slide Master"
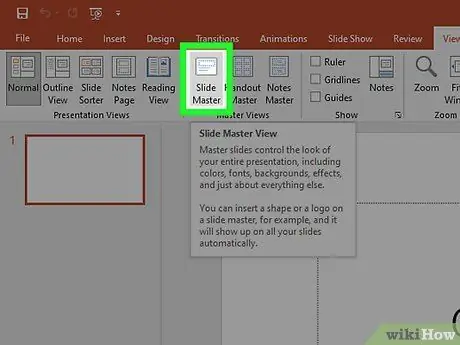
Step 2. Click the first slide in Master Slide mode
To make sure the text or image you choose appears at the top of all slides, you need to edit the first slide in your presentation.
Any changes made to this slide will be repeated on the others
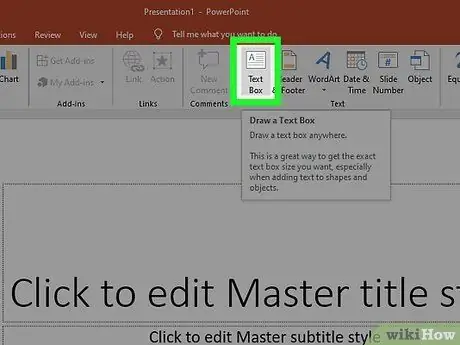
Step 3. Insert a text field
To include a sentence at the top of all slides, click "Insert", then "Text field"; the cursor will turn into an arrow. Click and hold the mouse button while you drag the pointer to the left to create a box for you to write in. Once you have reached the desired size, release the button, then enter the header text.
- To align the text, select one of the alignment options (left, center or right) from the "Paragraph" section.
- To change the color or font, select the text you typed and choose different options from the text formatting section in the toolbar above the slide.
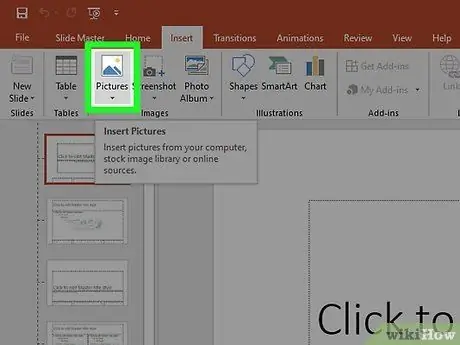
Step 4. Insert an image or logo
If you want to use a figure as a header, click "Insert", then "Image". Select the image from the dialog box, then click "Open" to add it to the slideshow.
- To resize the image without changing its aspect ratio, drag one of the corners.
- To move the whole image, click inside and drag it.
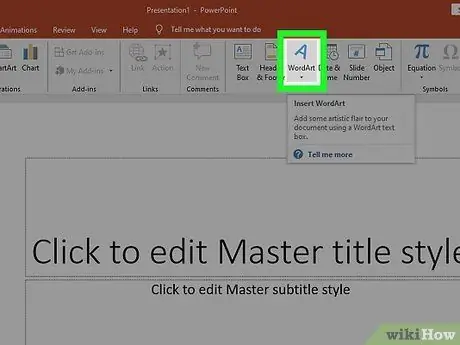
Step 5. Insert Word Art
If you want to customize the text with special effects, click "Insert", then "WordArt". Select one of the available styles, then start writing.
- In some versions of PowerPoint for Mac, to insert a Word Art style you have to click "Insert", "Text", then "WordArt".
- To give the text the exact look you want, select the one you typed and use "Text Fill" to change the color, "Text Outline" to change the outline and "Text Effects" to add effects such as shadows and bevels.
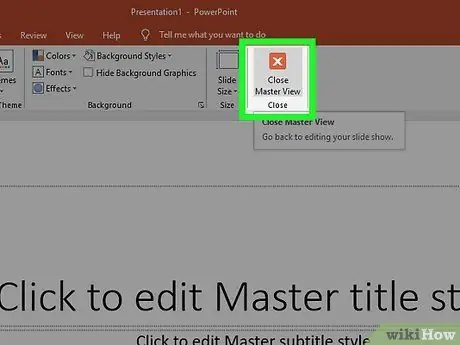
Step 6. Click "Close Master View" to exit the Slide Master mode
You will return to the normal PowerPoint presentation editing mode.
Method 2 of 3: Add Headers to the Printouts
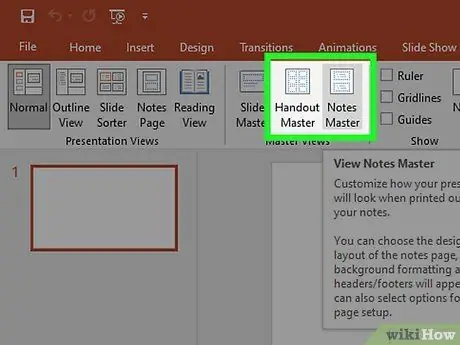
Step 1. Click "View", then "Notes template" or "Printed template"
Headings appear only in the printed or annotated versions of your presentation, not on the slides you see on the screen. The Notes and Printed headings can only contain text.
- Select "Notes Master" if you want to view and print your presentation with one slide per page, above a section delimited by a line meant for taking notes.
- Select "Printed Layout" if you want to print the presentation as a series of slides (without a note section) on a single page.
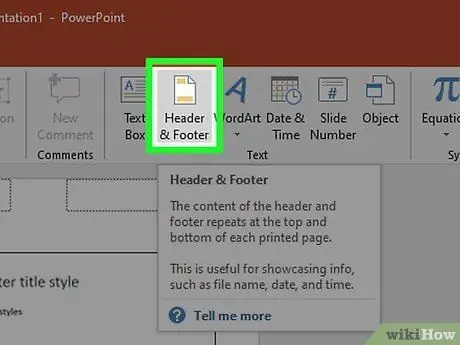
Step 2. Click "Insert", then "Header and Footer"
The "Notes and Handouts" tab of the "Header and Footer" screen will automatically open.
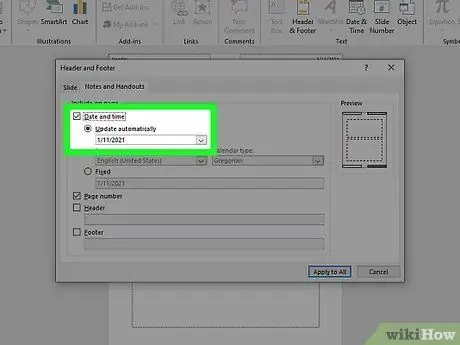
Step 3. Check "Date and time", then select a time
Choose between "Update automatically" and "Fixed" as the display type. If you choose "Fixed", write the date in the empty field.
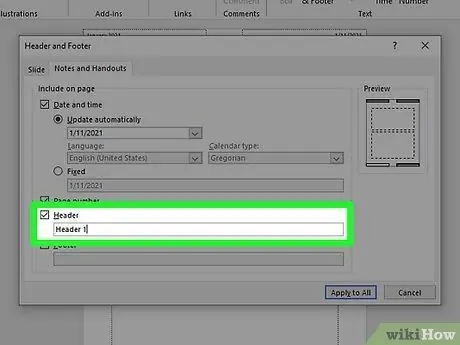
Step 4. Check "Header", then type the text you want to insert in the relevant field
In this section you can also add a footnote (which appears at the bottom of the footnotes or printout), by ticking "Footer" and entering the information you prefer.
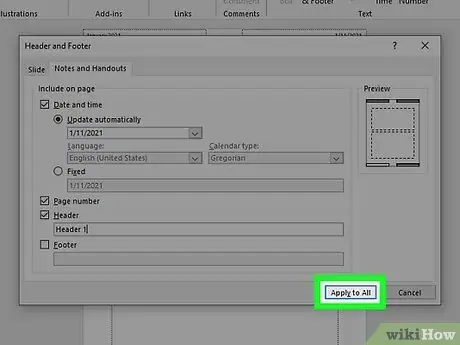
Step 5. Click "Apply to all" to save the changes
This will add your header (and footnote) to all printed pages. You can change these options at any time.
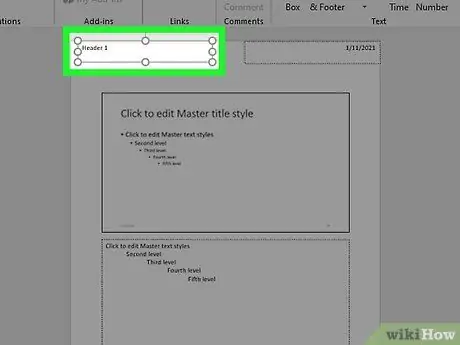
Step 6. Change the position of the header
If you want to move it to another place on the page, hold the mouse pointer over one of the lines surrounding it until a four-arrow cursor appears. At that point, hold down the mouse button and drag the header to another place.
- Moving the header to another point in the Notes Master does not move it to that for the printouts as well; you will need to switch to the Handout Master on the View tab if you want to reposition the header of that print style.
- Footnotes can also be moved this way.
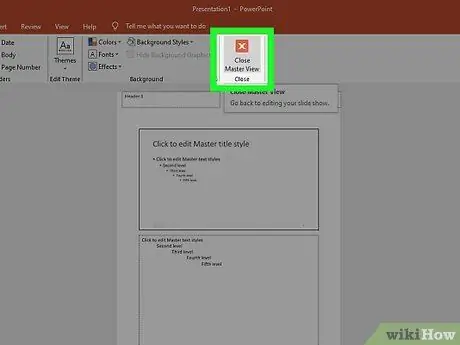
Step 7. Click "Close Schematic View"
This will take you back to the PowerPoint slides.
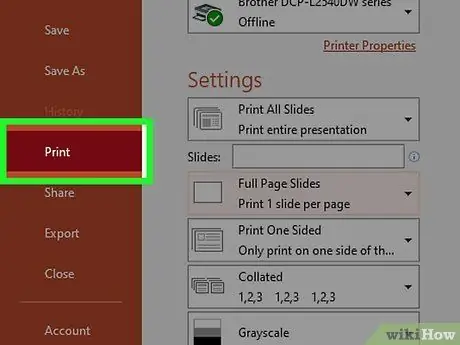
Step 8. Print a handout or note pages
Once you hit "Print" in your PowerPoint presentation window, find the print layout field in the dialog. The default is "Full Page Slides", but you can change it to "Handouts" or "Notes Pages".
- If you select "Printed", you will see the option to change the amount of slides per page. The default is 6, but if you want people to be able to read your slide contents better, you can go down to 2 or 3.
- For "Notes Pages", all slides will be printed on a different page, with a space at the bottom reserved for notes.
Method 3 of 3: Using the Footer
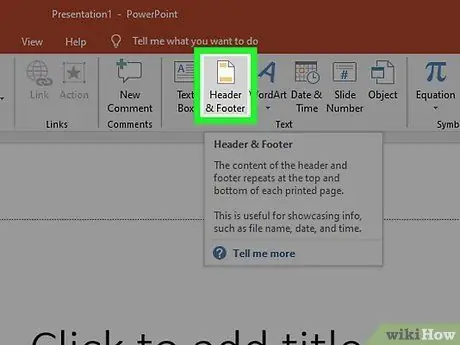
Step 1. Click "Insert", then "Header and Footnotes"
If you don't mind the position of the text you want to insert, another way to add a sentence to all slides is to use a footnote. The text will appear at the bottom of each slide, rather than at the top.
- On PowerPoint 2003 and earlier, click "View", then "Header and Footer".
- If, on the other hand, you really need a header centered at the top of all pages, try using an image or a text field.
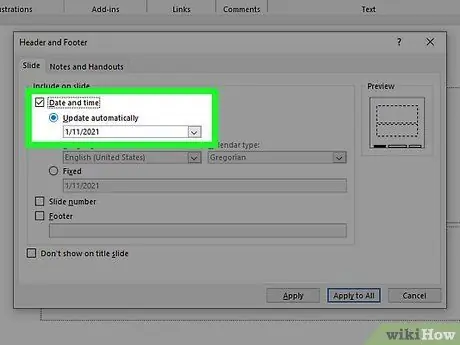
Step 2. Check the box next to "Date and time"
If you want the current date and time to appear on each slide, select this option.
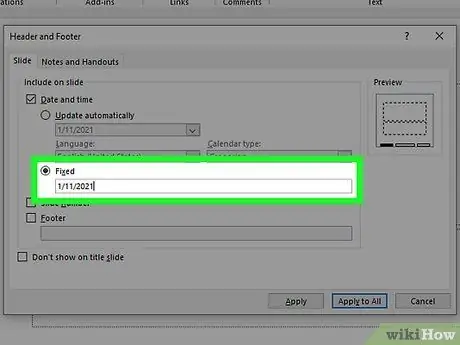
Step 3. Create a single date to be displayed on all slides
If you prefer the date on the slides to remain the same regardless of the day you show the presentation, write the day in the "Fixed" field.
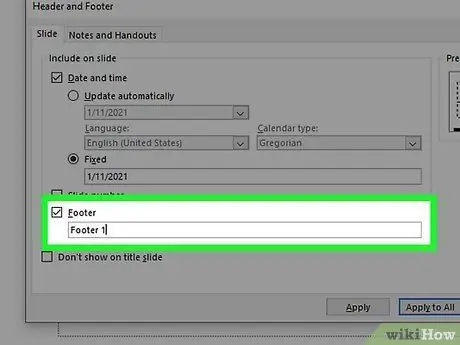
Step 4. Check "Footer" to add text
If you want to insert text common to all slides, write it in the relevant field.
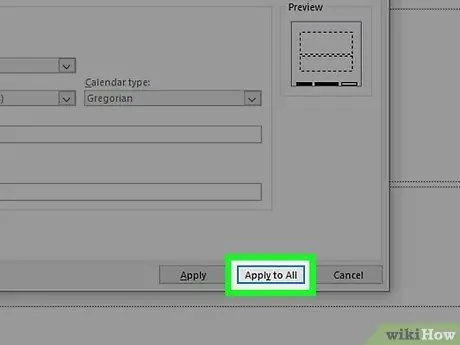
Step 5. Click "Apply to all" to apply the changes
This way you will insert the same footnotes on all slides.
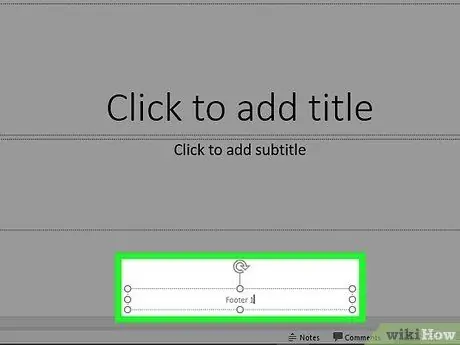
Step 6. Drag the footnotes to the top of the slide
If you prefer the content you just added to appear at the top (as a header), click the footnote text until it is surrounded by a bulleted box, then drag it up.
This change will not apply to the other slides in the presentation. You will need to move the footnotes on each slide
Advice
- When showing a PowerPoint presentation as part of a course or classroom activity, consider printing the slides in Notes format. The additional space at the bottom should encourage students to take notes.
- You can edit PowerPoint presentations wherever you are using Google Slides.


