This article shows you how to open a specific port on a router so that a certain application or program can access the web from your LAN and vice versa. This operation allows video games, servers and programs (for example clients that use the BitTorrent protocol) to communicate correctly, overcoming the protections normally offered by a router, whose purpose is also to block all incoming and outgoing connections from the network. LANs that are not authorized. For this reason, opening the wrong ports or opening an excessive number of them could expose the computers and data present to attacks by malicious people.
Steps
Part 1 of 3: Accessing the Network Router Using a Windows Computer
Step 1. Make sure your computer is connected to the LAN managed by the router you want to access
Before you can view the administration page of the network router you must be connected to the LAN it manages in order to be able to trace its IP address.
Step 2. Access the "Start" menu by clicking the icon
It features the Windows logo and is located in the lower left corner of the desktop.
Step 3. Launch the Settings app by clicking the icon
It features a gear and is located at the bottom left of the "Start" menu. The system window of the same name will be displayed.
Step 4. Select the item "Network and Internet" characterized by the following icon
It represents a globe and is located in the central part of the "Settings" window.
Step 5. Click the View Network Properties link
It is visible at the bottom of the page.
In order to locate and select it, you may need to scroll down the list of options that appeared
Step 6. Scroll to the "Wi-Fi" section of the new screen that appears
It is located to the right of the "Name:" entry and should appear at the bottom of the page.
Step 7. Find the "Default Gateway" field
It is located at the bottom of the "Wi-Fi" section.
Step 8. Make a note of the IP address displayed in the "Default Gateway" field
The number that appears to the right of the indicated item represents the network address of the router.
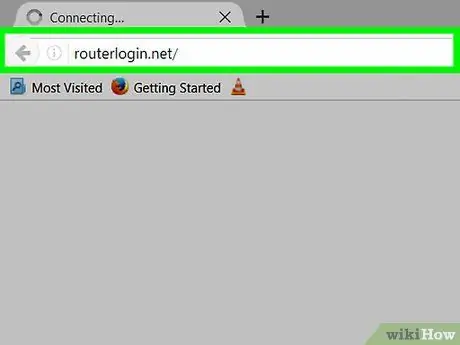
Step 9. Log in to the administration page of the network router
Start the internet browser of your choice and type the IP address of the router in the address bar, then press the Enter key.
For example, if the IP address of the router that manages your local network is "192.168.1.1", you will have to type the string 192.168.1.1 into the address bar of the browser
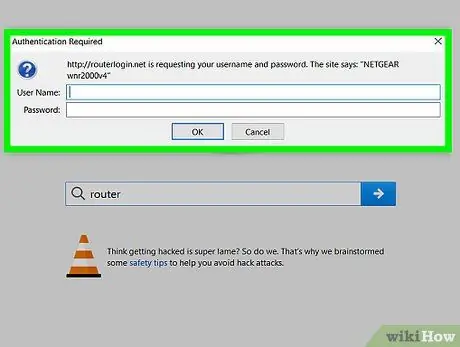
Step 10. Provide login credentials (username and password)
If authenticated access is not required, you can skip this step. If you did the initial setup of the network device and set up custom login credentials, then you will need to provide the username and security password of the account you created at this point. In case you kept the default settings, here are the credentials to use based on the router model in use:
- Linksys router - enter the admin keyword for both username and password;
- Netgear router - type admin as username and password as security password;
- Consult the device manual to verify the correctness of the username and password to be used;
- If you have set custom login credentials but have forgotten them, you can reset the router to restore the default ones;
- The username and password to log in to the router's administration page should also be indicated on an adhesive label located on the underside of the device.
Step 11. Wait for the router configuration page to appear
After gaining access to the network device, you can proceed to configure the communication ports.
Part 2 of 3: Accessing the Network Router Using a Mac
Step 1. Make sure your computer is connected to the LAN managed by the router you want to access
Before you can view the administration page of the network router you must be connected to the LAN it manages, in order to be able to trace its IP address.
Step 2. Enter the "Apple" menu by clicking the icon
It features the Apple logo and is located in the upper left corner of the screen. A drop-down menu will appear.
Step 3. Choose the System Preferences… item
It is one of the options present in the drop-down menu that appeared. The "System Preferences" dialog box will appear.
Step 4. Click the Network icon
It is characterized by a globe and is located inside the "System Preferences" window. The "Network" dialog will be displayed.
Step 5. Press the Advanced… button
It is located in the lower right part of the "Network" window. A new system window will appear.
Step 6. Access the TCP / IP tab
It is visible at the top of the appeared window.
Step 7. Note the numbers in the "Router" text field
This is the IP address of the router that manages your local LAN.
Step 8. Log in to the router administration page
Start the internet browser of your choice and type the IP address of the router in the address bar, then press the Enter key.
For example, if the IP address of the router that manages your local network is "192.168.1.1", you will have to type the string 192.168.1.1 into the address bar of the browser
Step 9. Provide login credentials (username and password)
If authenticated access is not required, you can skip this step. If you did the initial setup of the network device and set up custom login credentials, then you will need to provide the username and security password of the account you created at this point. In case you kept the default settings, here are the credentials to use based on the router model in use:
- Linksys router - enter the admin keyword for both username and password;
- Netgear router - type admin as username and password as security password;
- Consult the device manual to verify the correctness of the username and password to be used;
- If you have set custom login credentials but have forgotten them, you can reset the router to restore the default ones;
- The username and password to log in to the router's administration page should also be indicated on an adhesive label located on the underside of the device.
Step 10. Wait for the router configuration page to appear
After gaining access to the network device, you can proceed to configure the communication ports.
Part 3 of 3: Enable and Configure Port Forwarding
Step 1. Review and understand how the router configuration and management interface works
It is a part of the device that is created and customized by the manufacturer specifically for each device, for this reason it is very difficult for two routers to have the same configuration page. At this point, study the user interface of your router, in particular to locate the section relating to port forwarding. In most cases, the easiest way to access it is to consult your device manual or online documentation.
- For example, if your LAN is managed by a Linksys router, you will need to search online using the linksys port forwarding keywords and then refer to the device model to locate the correct documentation.
- Since the user interface of a router allows you to change advanced and very technical settings in most cases it is intended for advanced users, so you will have to be ready to think outside the usual schemes to be able to identify the elements you are looking for. For example, if there is no "Advanced" or "Advanced" section on your network router's configuration page, don't give up and keep looking.
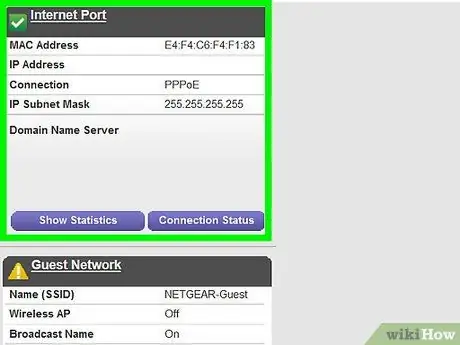
Step 2. Locate the section on port forwarding
Although each router has its own configuration interface, menus are usually labeled similarly. In this case focus your attention on the following names: "Port Forwarding", "Applications", "Gaming", "Virtual Servers", "Firewall" and "Protected Setup".
- Remember that any section of the interface that includes the word "Port" in its name deserves a closer look;
- If you haven't found one of the listed names or something similar, try looking for the "Advanced Settings" or "Advanced Settings" section and see if it contains the subsection related to port forwarding.
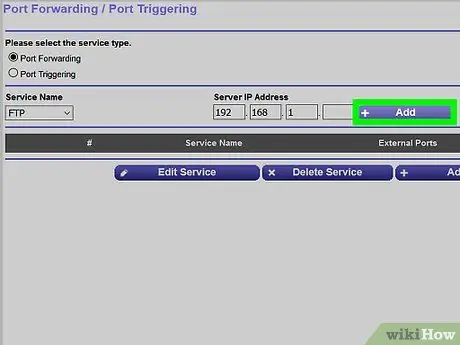
Step 3. Find the preconfigured port forwarding rules
Many user interfaces have a pre-configured drop-down menu for opening the communication ports of the most commonly used applications and programs. If you need to configure the port forwarding of one of these applications, select its name from the drop-down menu "Service Name" or "Application" (or similar), then save the changes by pressing the button Save or Save (or similar).
For example, the Minecraft video game is one of the programs for which users must enable port forwarding to play multiplayer, so it is very likely that you will find the entry Minecraft in the pre-installed configuration rules of your router.
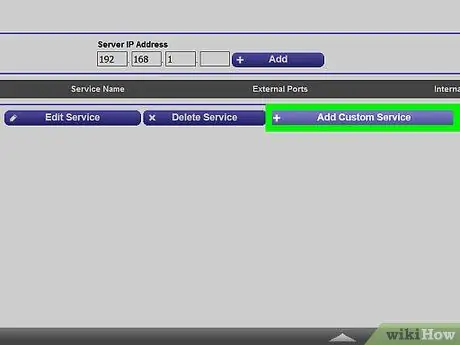
Step 4. Create a custom rule
If your program is not listed, you will need to create a port forwarding rule manually. Again, each router model adopts a slightly different procedure to open a communication port. However, the information to be used is always the same, regardless of the make and model of the network device:
- Name or Description - this is the name to be assigned to the service you are configuring (for example "Minecraft"). Normally it is not mandatory information, but you will need it to keep track of the active ports on the router and of all the port forwarding rules present;
- Type or Service Type - refers to the network protocol to be used and can assume the values "TCP", "UDP" or both. If you're not sure which one to use, select the option Both or TCP / UDP;
- Inbound or Start - this is the number of the first door to open. You should search online to find the port you need to use in your case and to make sure it is not already in use by another program or service;
- Private or End - represents the number of the last port to configure. If you need to open only one door, in this field you will have to enter the same number entered in the previous one. On the contrary, if you need to open a range of consecutive ports, you will have to report the number of the last port of the group (for example enter the number "23" as the initial value and "33" as the final value, if you need to open the communication ports ranging from 23 to 33).
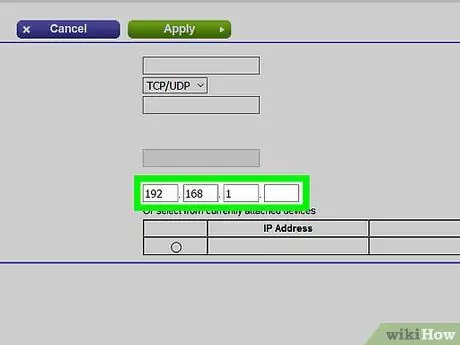
Step 5. Enter the local IP address of the computer on which the program will run
In this case you will need to use the "Private IP" or "Device IP" text field. To locate the IP address of a Windows system, refer to this article, while if you are using a Mac read this guide.
Depending on the network router in use, the indicated field may already be filled in with the computer's IP address. In this case you can skip this step
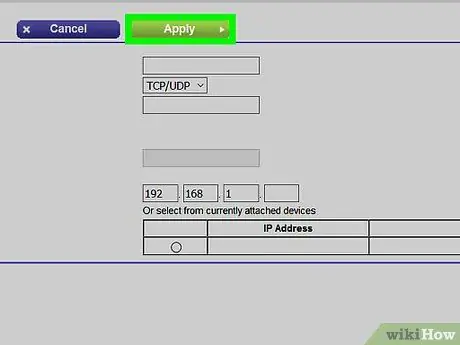
Step 6. Save the new settings
Push the button Save or Apply. When prompted you will need to reboot the router so that the new settings can be applied and taken into effect.
In some cases you will also need to select the "Enabled" or "On" check button for the newly created port forwarding rule to make it active
Advice
- Make sure you enter all the information correctly. By opening the wrong door, the program in question will not be able to work correctly, so it is always a good idea to carry out a thorough and careful check.
- Some router models (such as those produced by D-Link) are equipped with a feature called "trigger port", which allows some video games to work correctly even without changing the IP address. This router feature monitors outbound communications generated by the program by automatically opening all necessary ports and rerouting traffic to the correct IP address. Normally the "trigger port" function must be activated manually by accessing the configuration page of the router.
- If you are having trouble configuring the ports of the service you want to use, disable the system firewall. The firewall built into the Norton Internet Security product suite and similar software can be very problematic. If that's the case, just use the firewall built into Windows or your Mac.
Warnings
- Do not open all the communication ports on the router, otherwise any hacker could have easy access to the computers connected to the network. Always limit yourself to simply configuring the ports of the web services you need to use.
- If you have discovered that your router login password is the factory default one, be sure to set a new one. Keeping the default password is a security risk for your personal data.
- When you change the settings of the network router make sure that an antivirus, antispyware, antiadware program and a Firewall are active, in order to be protected from threats on the web.


