Do you need to draw a lion for a school project, design a card for someone or just feel bored and want to get creative? Follow this simple article with step-by-step instructions that will teach you how to make a cartoon in the shape of a lion.
Steps
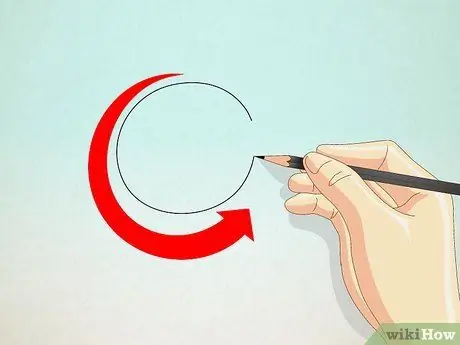
Step 1. Draw a large circle , which will make up the head of your lion.
Use a light pen or pencil, as you will later outline the final shape with a darker color
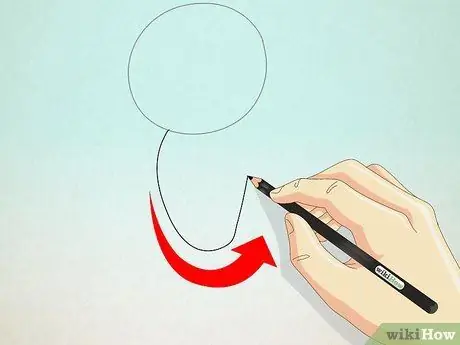
Step 2. Draw a big, wide chest below the head
As shown in the figure, the shape of the chest resembles a sort of reverse letter "D", leaning slightly to the left. The chest should be about the same width as the head and about one and a half times the length of the head.
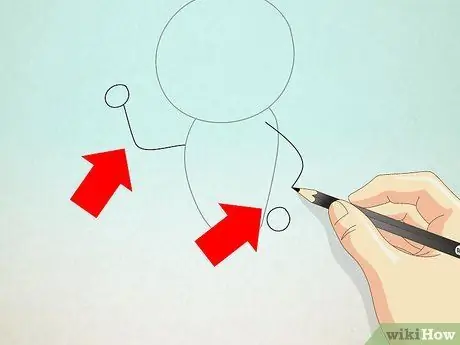
Step 3. Draw the front legs of the lion
For this step it is sufficient to draw lines to outline the position of the arms, then draw circles at the ends to represent the hands. In the example, the right arm is drawn as a "C" with the top touching the joint of the head or neck. The left arm should look more like a "V" and also be joined to the neck on the other side.
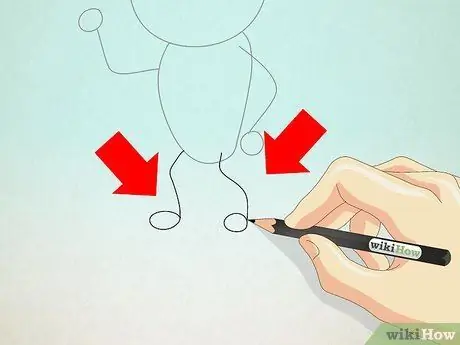
Step 4. Draw the lion's hind legs
Also for this step use lines for the leg and circles to represent the foot. In the example, the right leg is slightly curved while the left is slightly angled down to the left. This position will give more perspective and it will appear that the lion is leaning more towards the viewer.
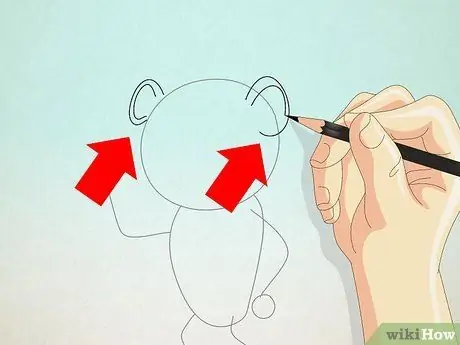
Step 5. Draw the lion's ears
As shown in the picture, the ears are shaped like an upside down "V", but the sides are slightly curved. To make the ear seem softer and more realistic, another curved line is drawn inside, almost like a bridge.
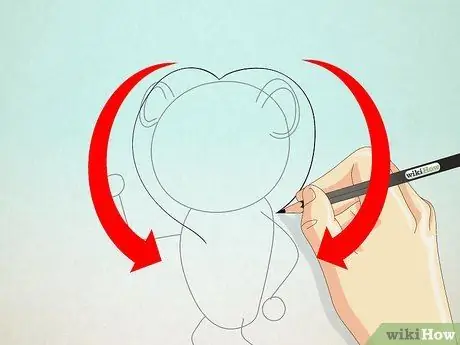
Step 6. Draw the lion's mane
- Starting halfway up the top of the right ear draw a curve, similar to the top of the head, up halfway up the top of the left ear.
- From the lower half of the right ear, draw a line, always following the curve of the head, until it reaches the arm.
- Do the same on the other side.
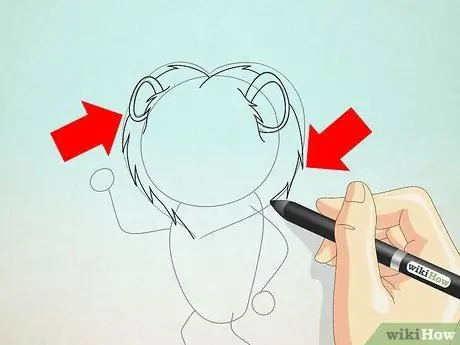
Step 7. Outline the lion's ears and mane with a dark colored marker or pen
This time though, draw the mane in an irregular way to better represent the lion's hair.
- Also add a jagged "fringe".
- Draw a "W" shape under the lion's chin to create a sort of "beard".
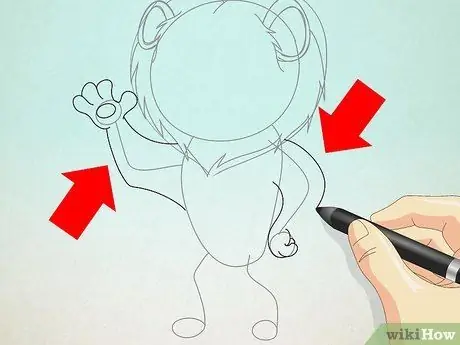
Step 8. Outline the lion's arms and paws with a dark colored marker or pen
This time draw them thicker, not just with light lines. Watch the video to see how to draw a bent arm. The paw should be drawn with a closed fist, which means small strokes for each finger, (only 3 fingers and a thumb are needed).
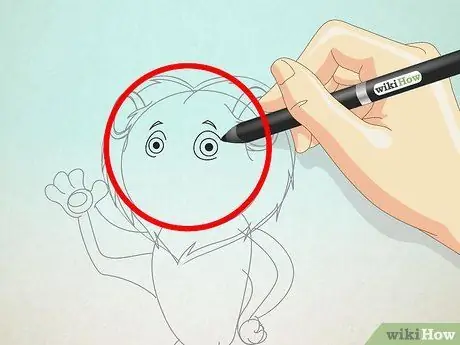
Step 9. Draw the eyebrows and eyes of the lion
The eyebrow, or unibrow !, is a curved line like a bowl with a downward horizontal dash at each end. For the eyes, draw two dots and draw the line underneath.
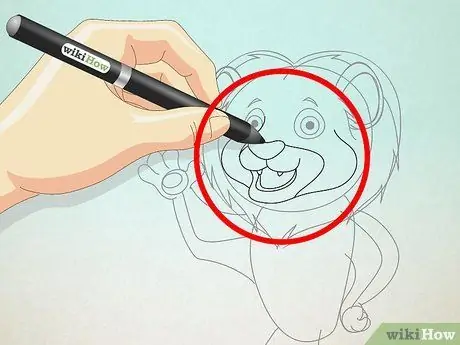
Step 10. Draw the lion's nose and mouth
The nose is a large curved bridge-shaped line about halfway down the face with a small, (though still larger than the eyes) circle below, but touching the nose in the center. The mouth is a simple smile, a curved line like a kind of bowl.
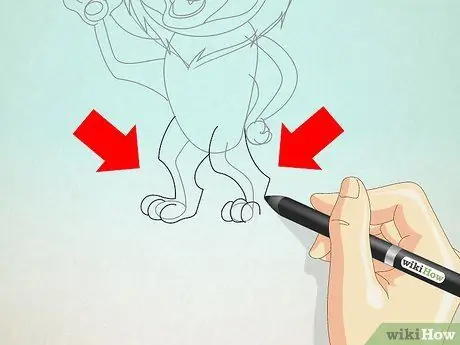
Step 11. Outline the lion's feet and paws with a dark colored marker or pen
They should be approximately as thick as the arms, albeit slightly thicker at the top than at the bottom. The legs should be curved at the top, but rather flat at the bottom. Define the legs by drawing a kind of claws, ("toes"), with 3 curved lines.
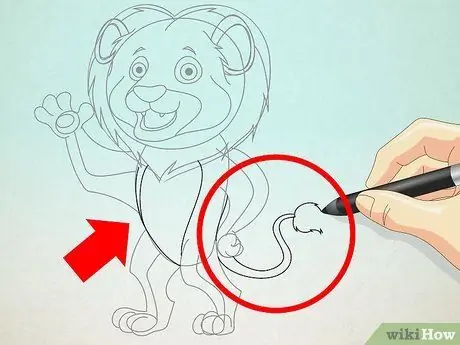
Step 12. Add a tail to the lion, thinner than the arms and legs and curved like an "S"
Make sure your lion design has all lines joined, even the back and trunk lines.
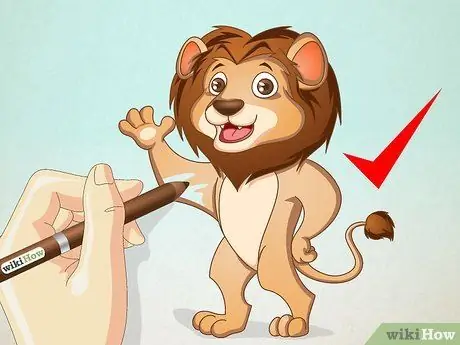
Step 13. Finish the drawing by coloring it if you prefer
Step 14. Finished
Advice
- Using a pencil at first will make it much easier to correct any mistakes and start over.
- Watch the various videos in the steps as a guide, even if you don't have to follow them to the letter; you can draw your lion in various poses.


