A virtual machine is nothing more than a program that simulates the behavior of a physical computer. The advantage of virtual machines is that they can run an operating system within a completely isolated environment, which allows you to test any type of software or program on different types of computers without having to purchase and configure a physical machine.
Steps
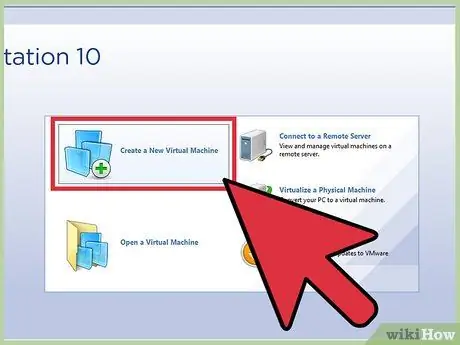
Step 1. Create a virtual machine
After starting the VMware Workstation program, click on "Create a new virtual machine".
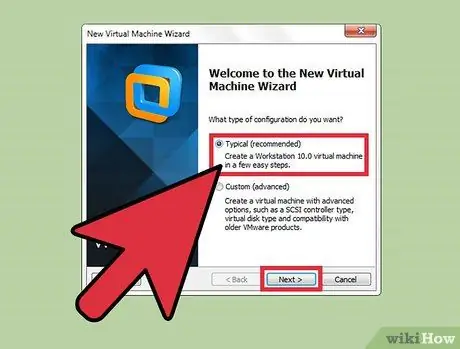
Step 2. Select the type of configuration to adopt
The wizard screen for creating a new virtual machine will appear. You will have two options: "Typical" or "Custom". Choose the default option and click the "Next" button.
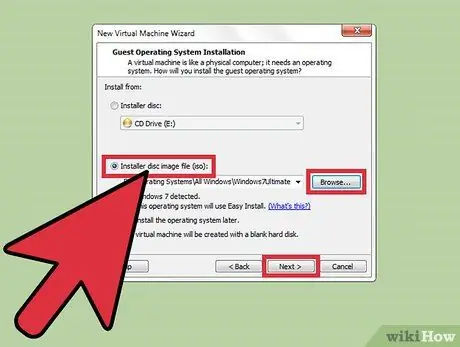
Step 3. Choose the "Installation file image" option
This way you can use the ISO file you downloaded for the operating system to install on the virtual machine. Click on the "Browse" button to locate the Windows 7 ISO file. Now click on the "Next" button.
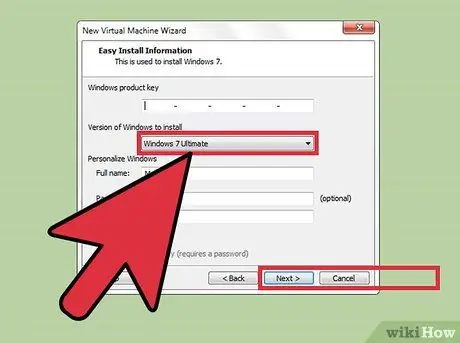
Step 4. Select the version of Windows to install
This choice varies based on the version of the operating system referenced by the ISO file you downloaded. You can provide the product key and customize your Windows settings later. Click on the "Next" button to continue.
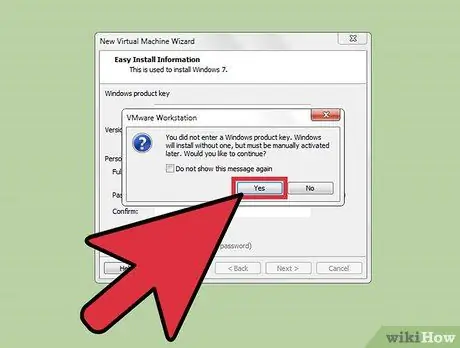
Step 5. Wait for a new dialog box to appear
If you have not provided the product key for the version of Windows you want to install, click the "Yes" button to continue.
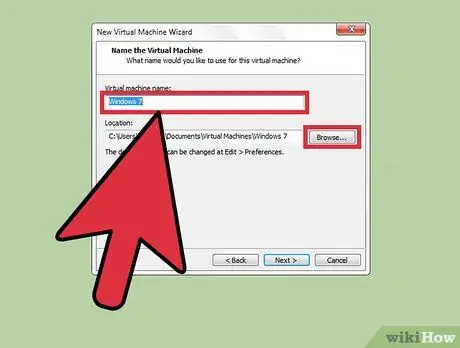
Step 6. Name the new virtual machine
You can change the name of the virtual machine and the folder where it is stored according to your needs. Click the "Browse" button to change the folder where the virtual machine file will be stored. At this point click on the "Next" button.
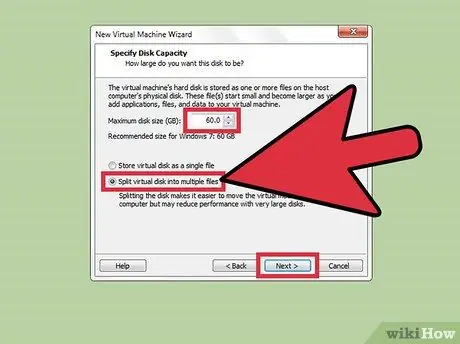
Step 7. Specify the hard disk size you want to assign to the virtual machine
Click the arrow button to change the hard disk file size of the virtual machine you are creating. You can also choose whether to store it on your computer as a single file or as multiple files. At the end of the selection, click on the "Next" button.
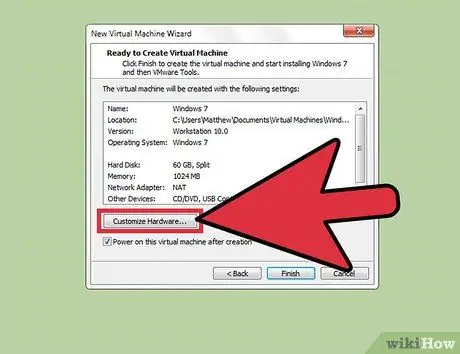
Step 8. Confirm the configuration you have chosen for your virtual machine
All the settings you have selected will be displayed. Click the "Customize Hardware" button to change any virtual machine hardware configuration settings.
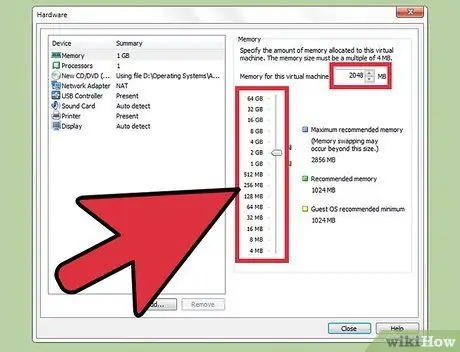
Step 9. Change the amount of RAM allocated to the virtual machine
If you need to change this parameter, use the slider or the two arrow buttons displayed on the right side of the dialog. Click on the "Close" button to close the virtual machine creation wizard window.
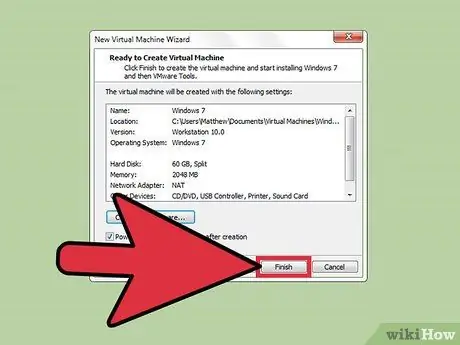
Step 10. Proceed to create the virtual machine
After checking and confirming the accuracy of all configuration settings, click on the "Finish" button to start the virtual machine creation process.


