This article shows you how to open and edit a Windows DLL (from the English "Dynamic-Link Library") file using a third-party program or a free web service. It should be noted that DLL files are fundamental components of the operating system, so their modification could compromise the correct functioning of the computer.
Steps
Part 1 of 2: Prepare the DLL File for Editing
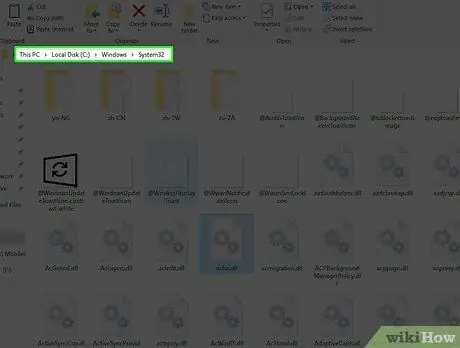
Step 1. Understand where the DLL files are stored
These are binary files that are used by the Windows operating system to perform its basic functions and are normally stored within system folders. Precisely for this reason it would be better to avoid moving or modifying this type of file. However, if you are an advanced user or feel capable of performing this procedure, you will first need to enable the display of hidden Windows files and folders in order to locate the DLL to modify.
-
Normally most of the system DLL files are stored within the following path
C: / Windows / System32
- . To access it, open a "File Explorer" window, double-click the computer's main hard disk icon (the one where the operating system installation resides), double-click the "Windows" folder icon, then access the "System32" subfolder.
- If you need to modify a DLL linked to a specific program (usually it is a third-party program that you installed directly), you will need to access its installation folder.
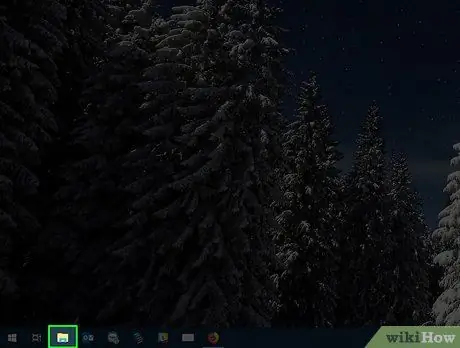
Step 2. Open a new "File Explorer" window by clicking the icon
It features a small yellow and blue folder and is located directly on the Windows taskbar.
Alternatively, press the hotkey combination ⊞ Win + E
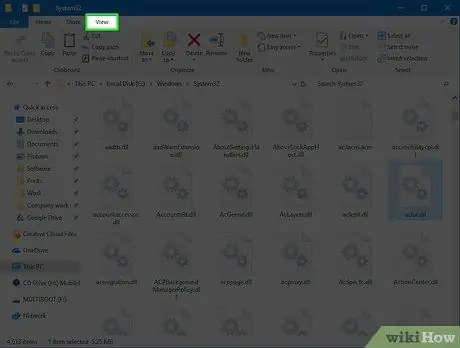
Step 3. Go to the View tab
It is located at the top of the "File Explorer" window. You will see a toolbar appear at the top of the window.
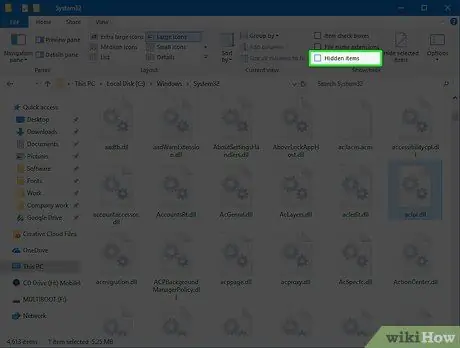
Step 4. Select the "Hidden items" checkbox
It is located within the "Show / Hide" group of the "File Explorer" window ribbon. This way sensitive files and folders that are normally hidden will become visible.
At this point you can close the "File Explorer" window
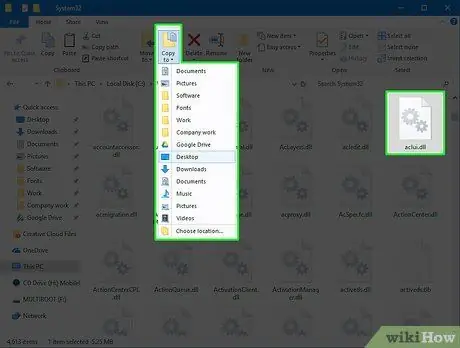
Step 5. Consider making a backup copy of the DLL file under consideration before modifying it
It is advisable to perform this step due to the nature of DLL files which are often essential components for the correct functioning of the operating system and programs.
- Locate the DLL you want to modify and select it with the mouse;
- Press the key combination Ctrl + C to copy the selected file;
- Access a folder or a place that is easy to reach for example your computer desktop;
- Press the key combination Ctrl + V to paste the DLL file you just copied into the folder of your choice.
Part 2 of 2: Editing a DLL File with Hex Editor
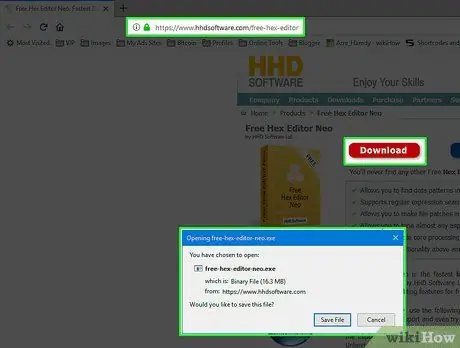
Step 1. Download the Hex Editor installation file
Copy the URL https://www.hhdsoftware.com/free-hex-editor into the address bar of your computer's internet browser, then press the button Download placed at the top of the page.
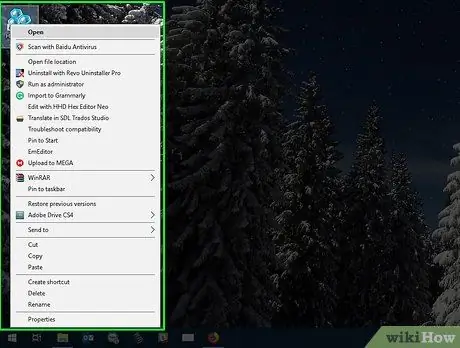
Step 2. Install Hex Editor
Double-click the "free-hex-editor-neo" installation file icon you just downloaded, then follow the instructions that appear on the screen. At the end of the installation the Hex Editor program should start automatically.
If the Hex Editor does not open automatically, double-click the blue "Hex Editor Neo" shortcut icon on your desktop before continuing
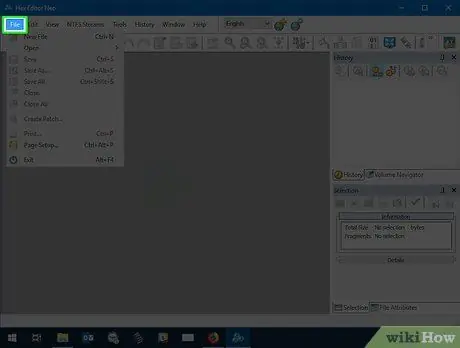
Step 3. Access the File menu
It is located in the upper left corner of the Hex Editor program window. A list of options will be displayed.
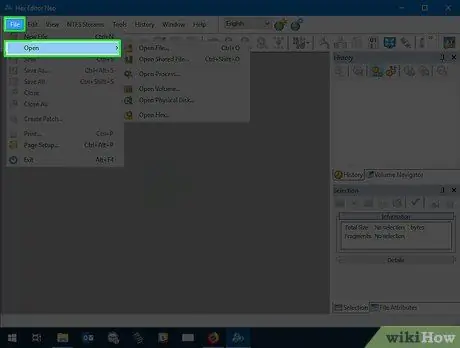
Step 4. Choose the Open item
It is listed within the menu File. A submenu will appear next to the first one.
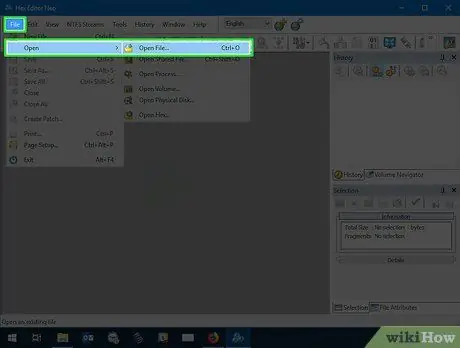
Step 5. Select the Open File… option
It is visible within the submenu Open appeared on the right of the menu File. The "File Explorer" dialog will be displayed.
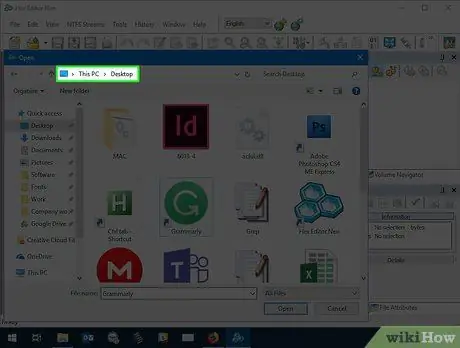
Step 6. Locate the DLL file to modify
Use the "File Explorer" window to access the folder where the DLL to be modified is stored.
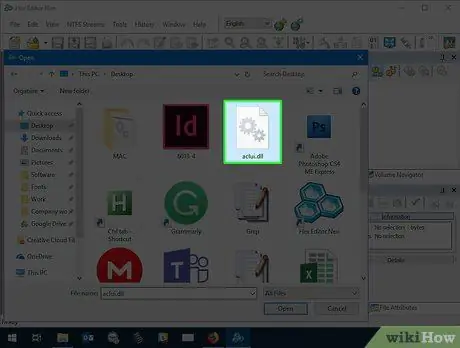
Step 7. Select the DLL file icon with a single click of the left mouse button
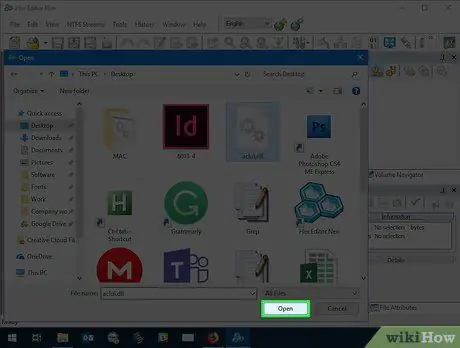
Step 8. Press the Open button
It is located in the lower right corner of the "File Explorer" window. The contents of the selected DLL file will be displayed inside the Hex Editor program window.
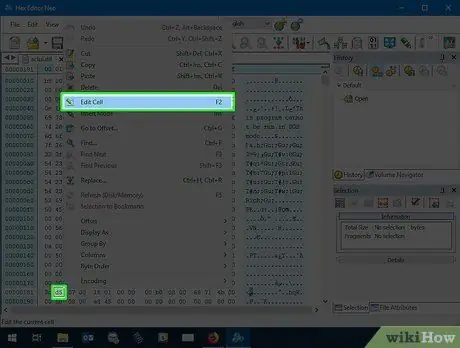
Step 9. Edit the data contained in the DLL file under consideration
To change a binary value, select it with the right mouse button, choose the option Edit from the context menu that will appear, then type the value you want.
You can also delete one of the values in the file. In this case, press the Delete key after selecting the data to be deleted
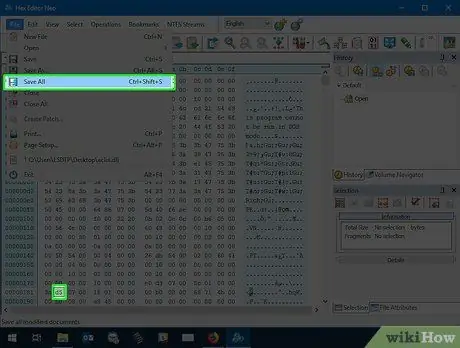
Step 10. Save your changes
Access the menu File and choose the voice Save All present in the list of options that appeared. Any changes made to the DLL file under consideration will be stored.
Alternatively, you can press the key combination Ctrl + ⇧ Shift + S
Advice
- Due to the extremely important structure and content of a DLL file it is not possible to use a normal text editor (such as Windows "Notepad") to edit it.
- Technically it is also possible to open a DLL file using the Notepad ++ program, however most of the data contained in the library will not be readable.


