This article shows how to transfer files and data from an iOS or Android device to a Windows computer or a Mac. The type of data that can be transferred from a smartphone to a computer can include images, audio, video, text documents, contacts, etc. Transfer is possible using a USB data cable on both iPhone and Android. Alternatively, you can use a Bluetooth connection to transfer files stored on an iPhone to a Mac or to copy the data on an Android device to a Windows system.
Steps
Method 1 of 7: Use a USB cable for iPhone
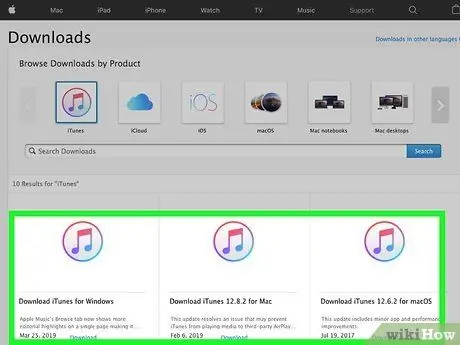
Step 1. Make sure iTunes is installed on your computer
With this program you can backup all personal data stored on an iPhone quickly and easily.
If you don't have iTunes installed on your computer, check out this article before proceeding to find out how to download and install it
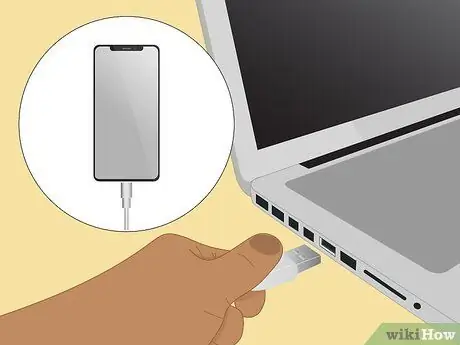
Step 2. Connect the iPhone to the computer
Insert the USB connector of the cable you use to charge the device's battery into a free USB port on your computer, then insert the smaller connector of the same cable into the communication port on the iPhone.
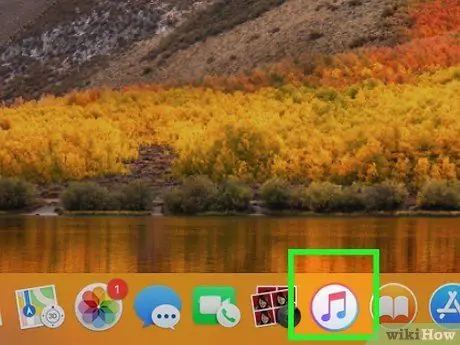
Step 3. Launch iTunes
It features a multicolored music note icon on a white background.
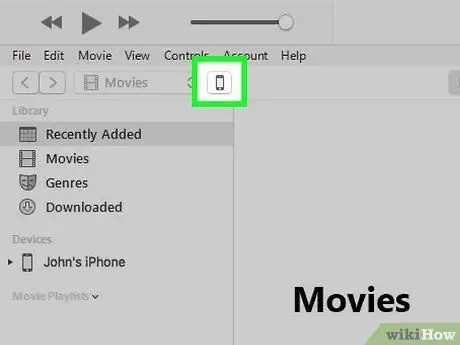
Step 4. Select the iPhone icon
It features a small stylized iPhone and is located on the upper left side of the window.
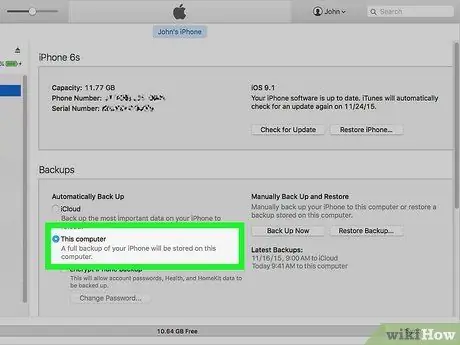
Step 5. Select the "This Computer" option
It is located within the "Backups" pane of the "Summary" tab of the device. In this way all the data on the iPhone will be copied to the computer and not to iCloud.
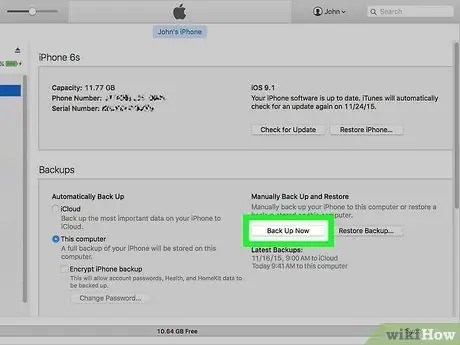
Step 6. Press the Back Up Now button
It is gray in color and located to the right of the "Backup" section. The contents of the iPhone will be immediately copied to the computer.
You can monitor the progress of the backup process by looking at the progress bar displayed at the top of the iTunes window
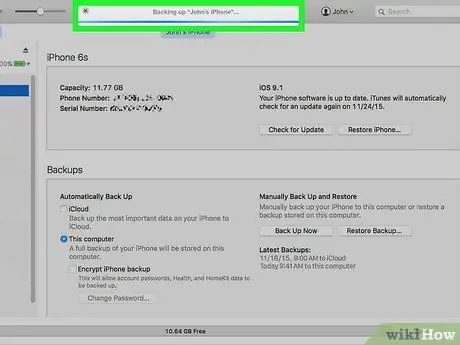
Step 7. Wait for the backup process to finish
When the data backup is complete you will hear a beep, after which you can disconnect the iPhone from the computer.
Method 2 of 7: Transfer Data from Android Device to Windows Via USB Cable
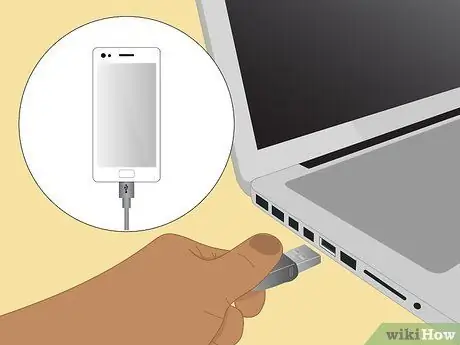
Step 1. Connect the Android device to the computer
Insert the USB connector of the cable you use to recharge the device's battery into a free USB port on your computer, then connect the smaller connector of the same cable to the communication port of your smartphone (or tablet).
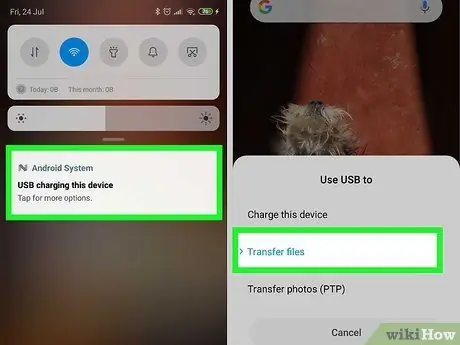
Step 2. Tap the notification received on the Android device regarding the USB connection
When prompted, confirm that you want to use the USB connection to transfer files and data from your device to your computer by selecting the correct option. At this point you can move on to using the computer.
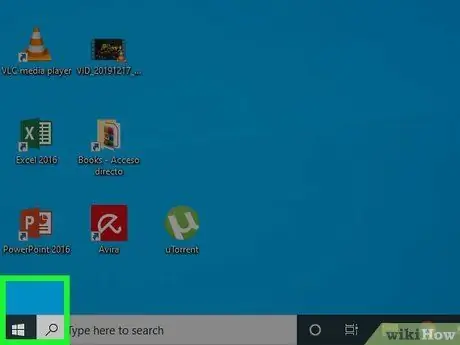
Step 3. Access the "Start" menu by clicking the icon
It features the Windows logo and is located in the lower left corner of the desktop.
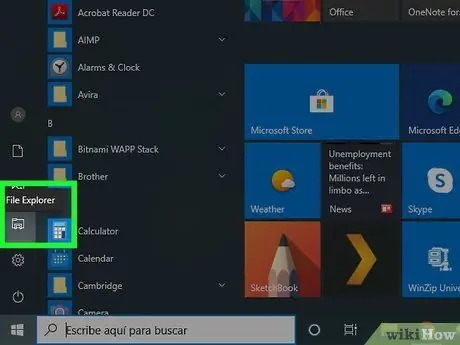
Step 4. Choose the "File Explorer" item by clicking the icon
It is characterized by a folder and is located in the lower left part of the "Start" menu.
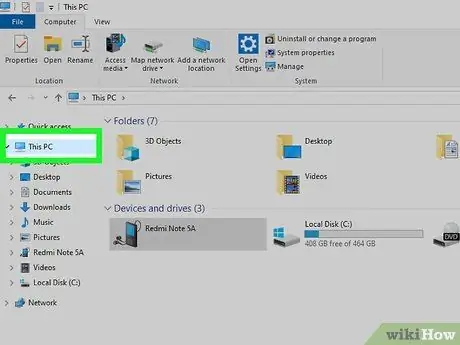
Step 5. Select the This PC option
It is visible in the left bar of the "File Explorer" window. You may need to scroll down or up in the list of items to be able to select the indicated setting.
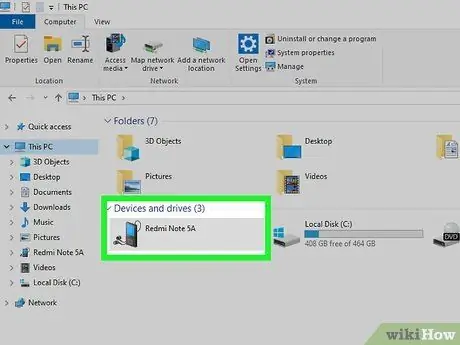
Step 6. Double click on the Android device icon
It is located in the "Devices and Drives" section of the "This PC" tab and is characterized by the device name. The file system of the smartphone (or tablet) will be displayed.
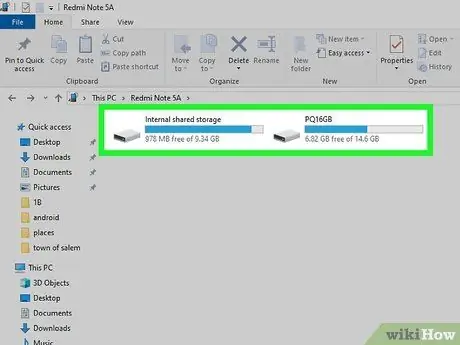
Step 7. Locate the file you want to transfer
Most Android devices allow you to access the internal memory and all the data it contains by selecting the relative icon (normally called "Internal" or "Phone"). In some cases, you may need to access multiple nested folders before you can reach the information you are looking for.
In the case of an Android device with an SD memory card, some of your personal files may be stored in the folder named "SD" or "Removable" instead of the internal memory folder
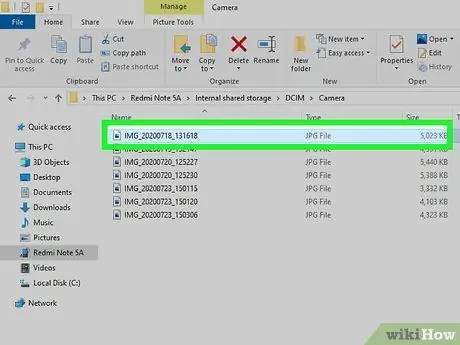
Step 8. Select the file or folder to copy
Click the icon of the file or folder you want to transfer to your computer. If you need to copy multiple items, hold down the Ctrl key while selecting them one at a time with the mouse.
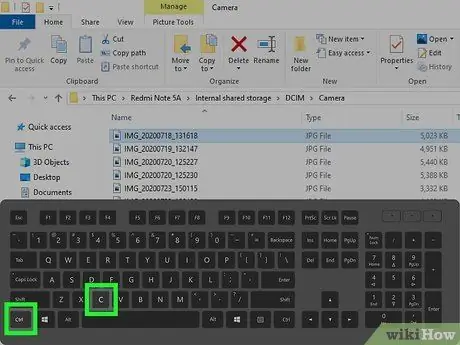
Step 9. Copy the chosen elements
Press the key combination Ctrl + C to copy the data you have selected.
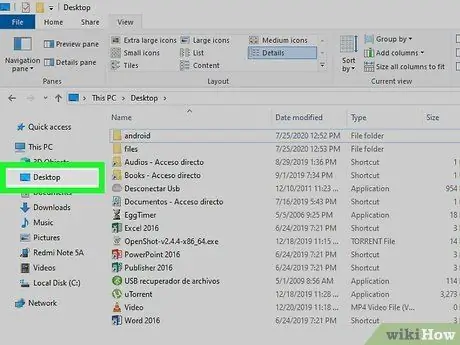
Step 10. Navigate to the folder where you want to keep the copied data
Use the left sidebar of the "File Explorer" window to select the folder or drive on your computer (for example "Documents") to save the copied items to.
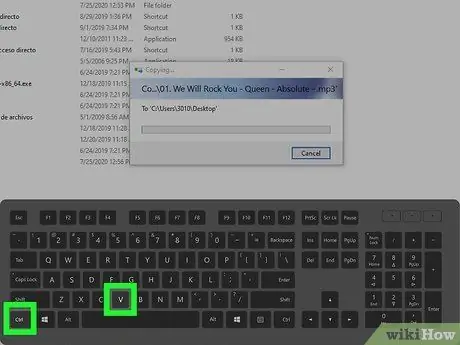
Step 11. Paste the data
Press the key combination Ctrl + V. All the items you copied in the previous steps will be pasted inside the current folder. The data transfer process may take some time to complete, depending on the amount of information to be copied.
You can also do the reverse process, i.e. copy files stored on your computer to transfer them to a folder on your Android device
Method 3 of 7: Transfer Data from an Android Device to a Mac Via USB Cable
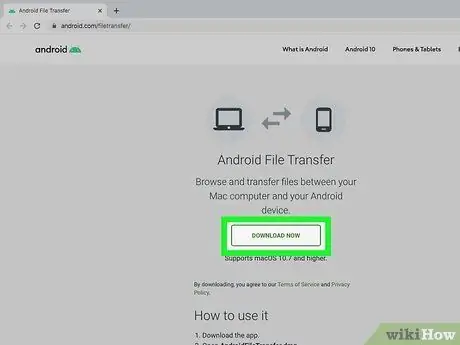
Step 1. Download and install the Android File Transfer program
It is a software that the Mac uses to have direct access to the internal memory of an Android device. To install the program follow these instructions:
- Access the URL
- Push the button Download Now;
- Double-click the Android File Transfer DMG file;
- If prompted, authorize the installation of non-certified software on the Mac;
- Drag and drop the Android File Transfer program icon into the "Applications" folder.
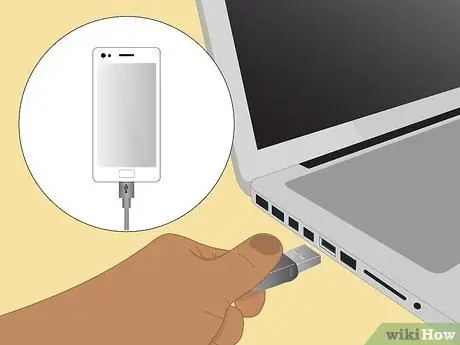
Step 2. Connect the Android device to the computer
Insert the USB connector of the cable you use to recharge the device's battery into a free USB port on your computer, then connect the smaller connector of the same cable to the communication port of your smartphone (or tablet).
If your Mac doesn't have a USB 3.0 port, but only USB-C ports, you'll need to purchase a USB 3.0 to USB-C adapter so you can connect with your Android device
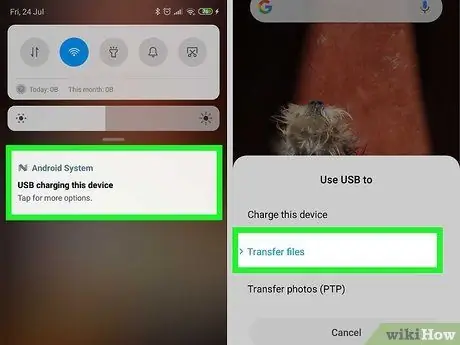
Step 3. Tap the notification received on the Android device regarding the USB connection
When prompted, confirm that you want to use the USB connection to transfer files and data from your device to your computer by selecting the correct option. At this point you can move on to using the computer.
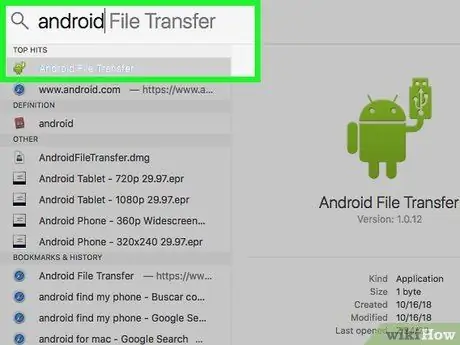
Step 4. Launch the Android File Transfer program
If the latter does not start automatically, select the field Spotlight clicking the icon
located in the upper right corner of the screen, type the keywords android file transfer into the search bar that appears and double-click the Android File Transfer icon from the list of results that appears.
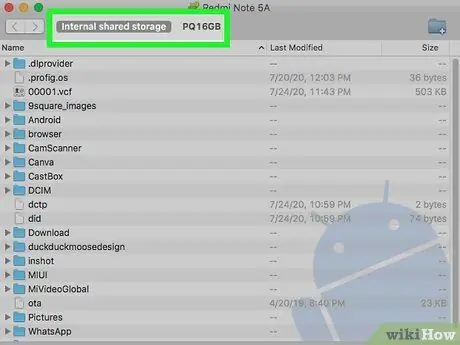
Step 5. Locate the file you want to transfer
Most Android devices allow you to access the internal memory and all the data it contains by selecting the relative icon (normally called "Internal" or "Phone"). In some cases, you may need to access multiple nested folders before you can reach the information you are looking for.
In the case of an Android device with an SD memory card, some of your personal files may be stored in the folder named "SD" or "Removable" instead of the internal memory folder
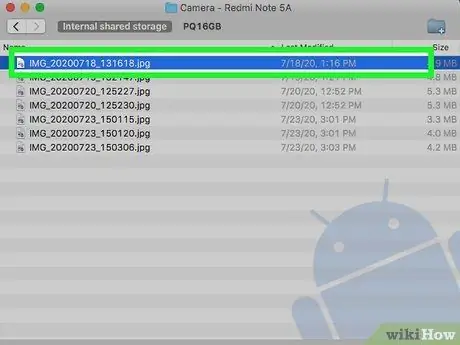
Step 6. Select the file or folder to copy
Click the icon of the file or folder you want to transfer to your computer. If you need to copy multiple items, hold down the ⌘ Command key while selecting them one at a time with the mouse.
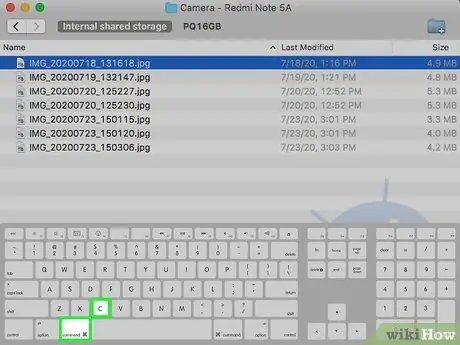
Step 7. Copy the chosen items
Press the key combination ⌘ Command + C to copy the data you have selected.
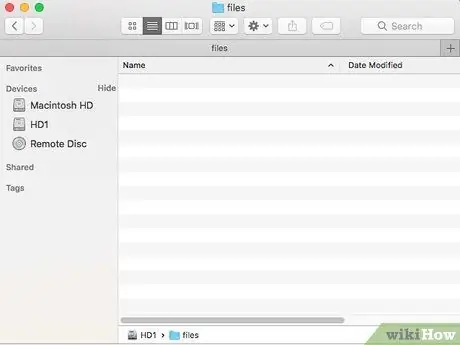
Step 8. Navigate to the folder where you want to keep the copied data
Use the left sidebar of the "Finder" window to select the folder or drive on your computer (for example "Desktop") to save the copied items to.
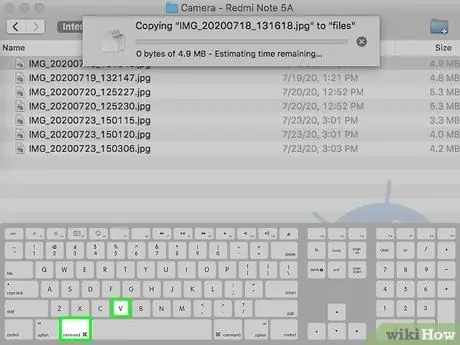
Step 9. Paste the data
Press the key combination ⌘ Command + V. All the items you copied in the previous steps will be pasted inside the current folder. The data transfer process may take some time to complete, depending on the amount of information to be copied.
You can also do the reverse process, i.e. copy files stored on your computer to transfer them to a folder on your Android device
Method 4 of 7: Transfer Data from iPhone to Mac Via Bluetooth
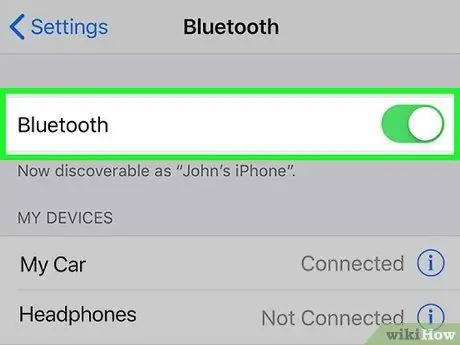
Step 1. Enable the iPhone Bluetooth connection
Launch the app Settings clicking the icon
choose the item Bluetooth, then turn on the "Bluetooth" slider
moving it to the right. It will take on a green color
If the slider already appears green, it means that Bluetooth connectivity is already active
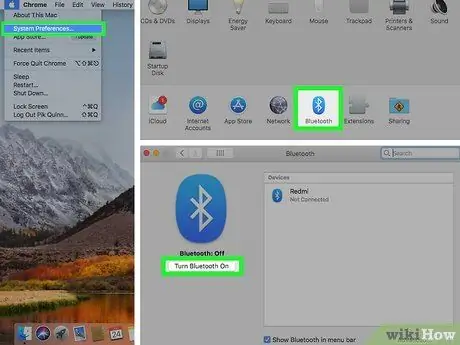
Step 2. Activate your Mac's Bluetooth connectivity
Access the menu Apple clicking the icon

choose the option System Preferences …, click the icon Bluetooth, then press the button Turn on Bluetooth positioned on the left side of the appeared window.
If the Bluetooth connection is already active, the indicated button will be characterized by the wording Turn off Bluetooth. In this case it should not be pressed.
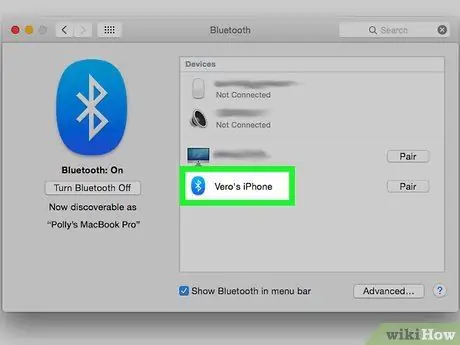
Step 3. Find the name of the iPhone
It should appear inside the "Devices" pane of the "Bluetooth" window as soon as the device is detected by the Mac.
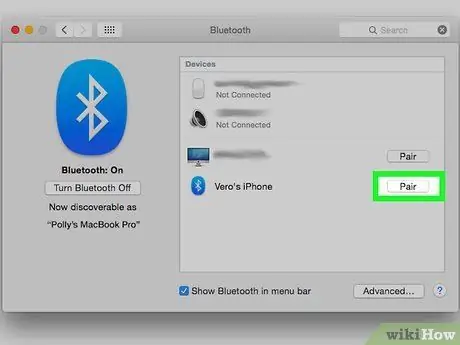
Step 4. Press the Pair button
It is visible to the right of the iPhone name. This way your Mac and iOS device will establish a connection using Bluetooth connectivity.
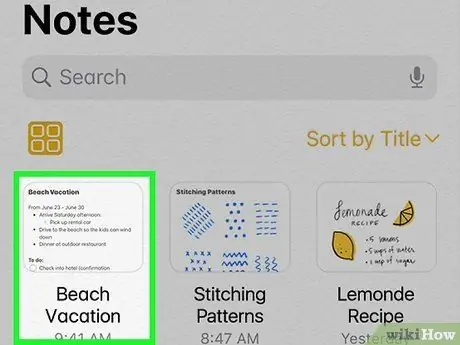
Step 5. Open the file you want to share
Using your iPhone, access the image, video or document you want to transfer to your Mac.
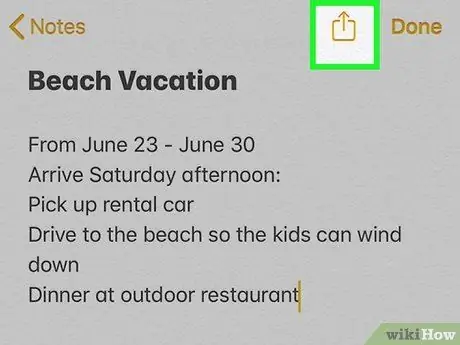
Step 6. Tap the share icon
It is normally placed in one of the corners of the screen. A context menu will be displayed.
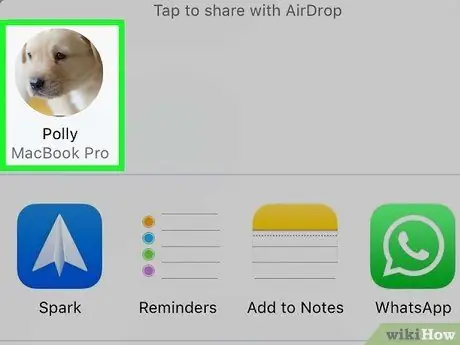
Step 7. Select the name of the Mac your device is connected to
It should be visible at the top of the appeared menu. In this way the chosen file will be copied into the Mac's "AirDrop" folder. You will be able to access it through the menu visible in the left sidebar of the Finder window.
- You may have to wait a few moments before your Mac name appears in the sharing options menu.
- It is possible to perform the reverse transfer, that is to copy data from the Mac to the iPhone by accessing the "AirDrop" folder, waiting for the name of the iOS device to appear among the available resources, then selecting and dragging the files you want to copy to the icon of the iPhone.
Method 5 of 7: Transfer Data from Android Device to Windows Via Bluetooth
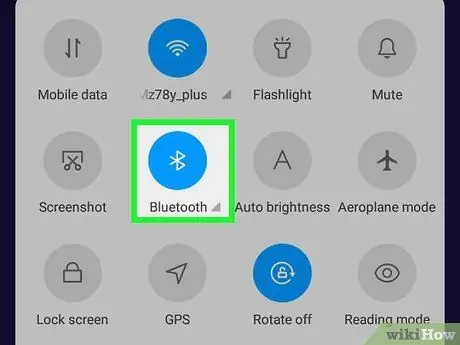
Step 1. Activate the Bluetooth connectivity of the Android device
Swipe your finger on the screen from top to bottom to access the control panel, keep your finger pressed on the icon Bluetooth
to access the "Settings" menu section relating to the Bluetooth connection, then activate the slider
located on the right of the "Bluetooth" page by moving it to the right. In this way it will take on a blue color
to indicate that Bluetooth connectivity has been successfully activated.
- If the indicated cursor is already blue or green, it means that the Bluetooth connectivity of the Android device is already active;
- If you are using a Samsung Galaxy device, the slider to activate the Bluetooth connection is located to the right of the "Disabled" item. After being activated it will take on a blue or green color.
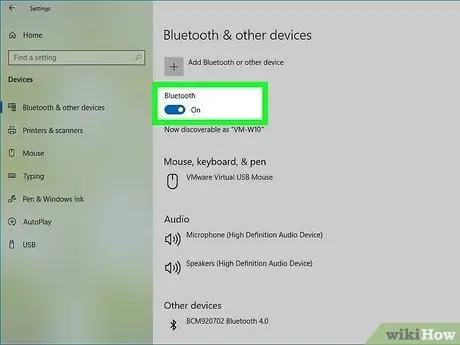
Step 2. Turn on your computer's Bluetooth connection
Access the "Start" menu by clicking the icon
choose the item Settings characterized by the icon

select the option Devices, access the tab Bluetooth and other devices visible on the left side of the window, then activate the white "Off" slider
located inside the "Bluetooth" section by moving it to the right.
If "Active" appears next to the indicated cursor, it means that the computer's Bluetooth connection is already active
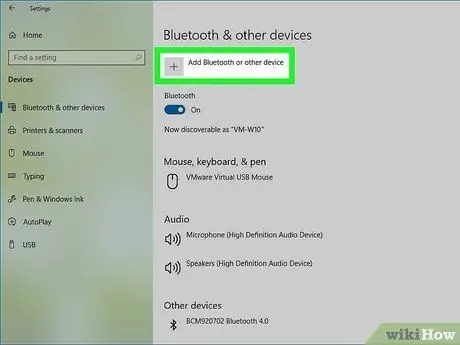
Step 3. Press the + Add Bluetooth or other device button
It is located at the top of the page. A new menu will appear.
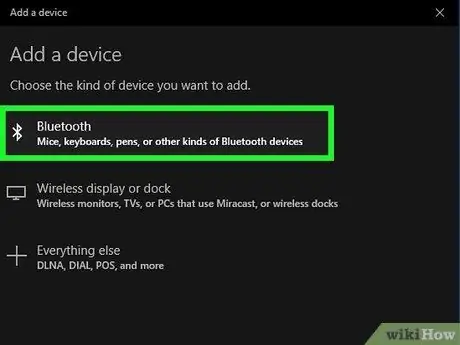
Step 4. Choose the Bluetooth option
It is one of the items in the menu that appeared. The computer will automatically start searching for all active Bluetooth devices in the area.
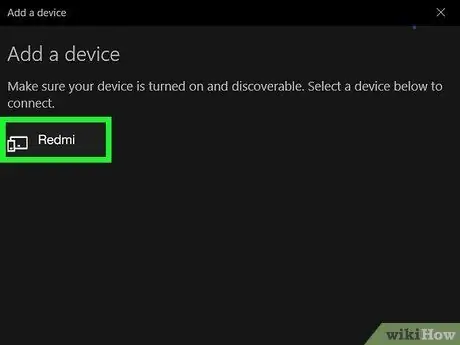
Step 5. Click the name of your Android device
It should appear within the menu displayed on the screen.
If the name of your Android smartphone or tablet does not appear on the screen, find the name of the Windows computer you are using in the Bluetooth menu of the device, then select it if there is one. After performing this procedure the name of the Android system you are using should appear in the Windows Bluetooth menu
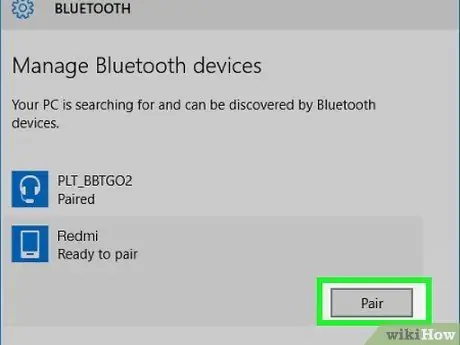
Step 6. Press the Connect button
It is visible under the name of the Android device visible in the menu.
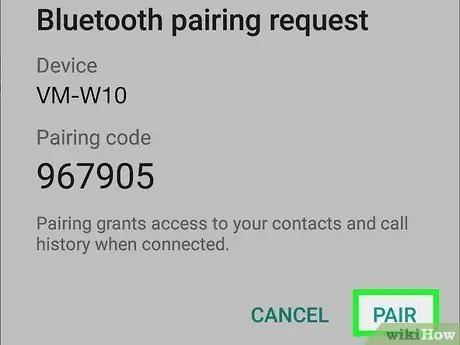
Step 7. Press the Yes button when prompted
If the security code displayed on the computer screen matches the one displayed on the device screen, press the button Yup to confirm your action. If not, press the button No, then repeat the connection procedure.
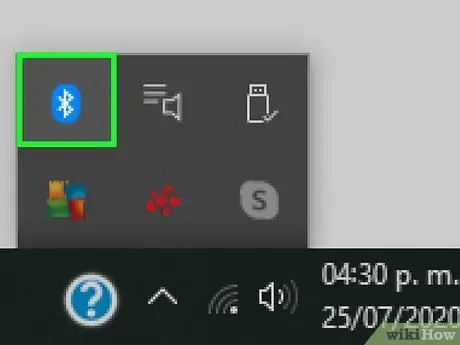
Step 8. Click the "Bluetooth" icon
It is blue in color and should have appeared in the Windows notification area located in the lower right corner of the desktop. In some cases, to be able to select it, you must first click the "Show hidden icons" icon characterized by the following symbol ^.
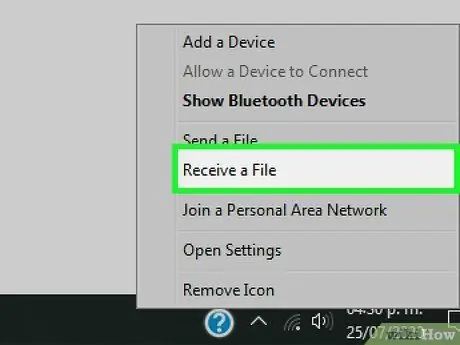
Step 9. Choose the Get a File option
It is one of the items in the context menu that appeared. A new dialog will appear.
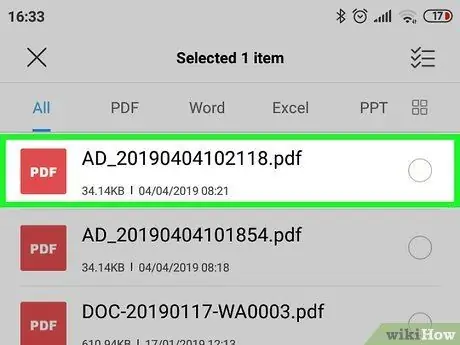
Step 10. Locate the file you want to transfer to or from the Android device
For example, it could be an image or a video.
If you have installed an app for managing the file system of the Android device (for example ES File Explorer), you will be able to consult all the contents of the internal memory of the smartphone or tablet and locate the desired content
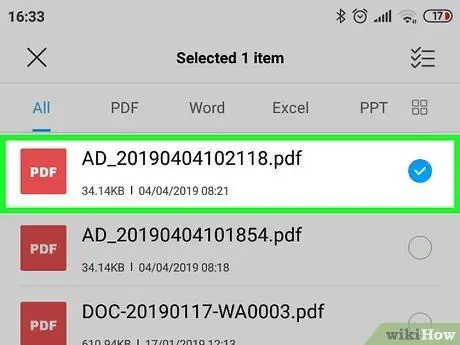
Step 11. Select the file
To perform this step, hold it down with your finger. If it's a photo or video, you simply need to tap it to view it in full screen.
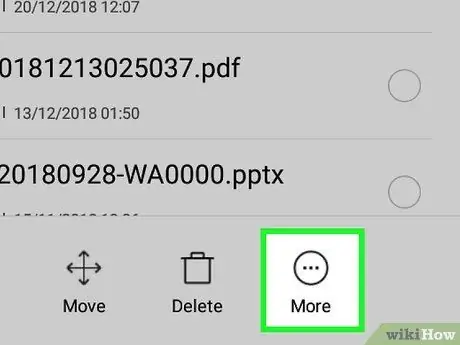
Step 12. Press the button to access the options menu
In most cases it is indicated by the icon ⋮
or ⋯, although on some Samsung Galaxy smartphones it is characterized by the wording Other. A drop-down menu will appear.
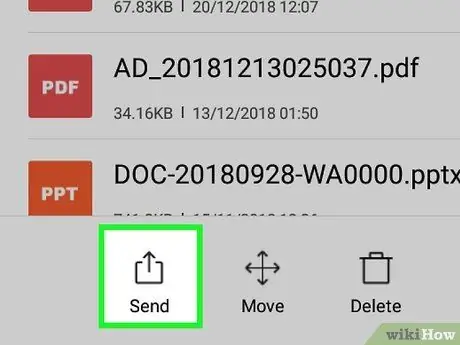
Step 13. Choose the sharing option
The appearance and precise name of this item varies depending on the Android device you are using.
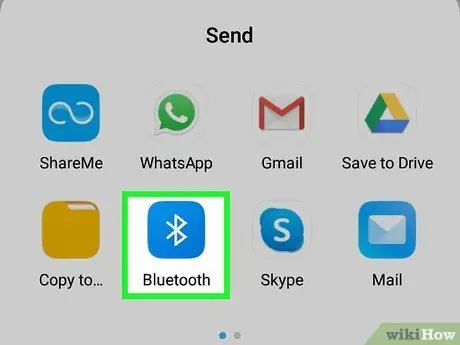
Step 14. Select the item related to sharing via Bluetooth connection
Again, the appearance and name of this option vary from device to device.
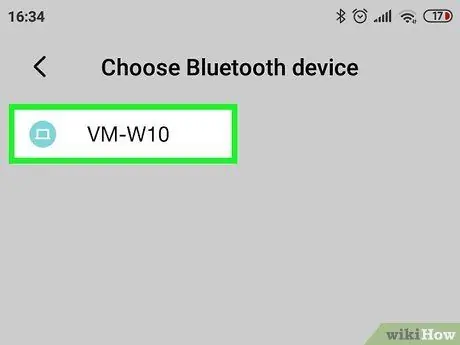
Step 15. Choose the name of the Windows computer to share data with
Simply tap on the computer name displayed within the appeared menu.
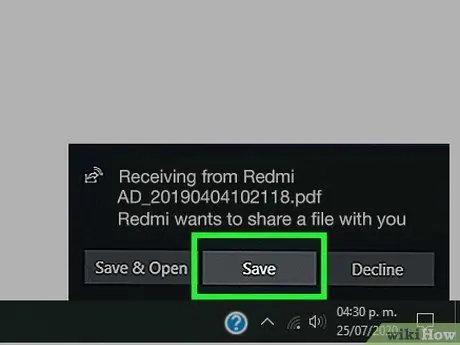
Step 16. Review the notification message that appeared on your computer screen
If Windows asks you to accept or decline the data transfer request from the Android device, press the button Yup.
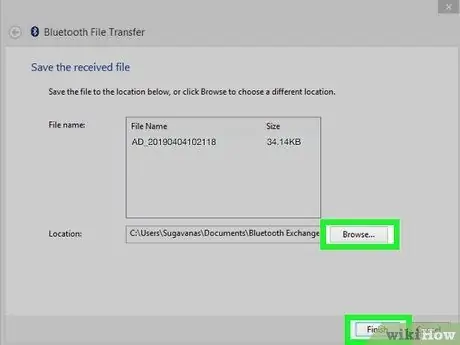
Step 17. Follow the instructions that will appear on the screen
After accepting the request for data transfer to your computer and choosing the destination folder, the process of copying the selected file should begin.
You can also send a file to your Android device by choosing the option Send a File from the context menu of the Bluetooth icon, by selecting the file and dragging it into the dialog box that appears, following the instructions that will appear on the screen and pressing the confirm button I accept, when prompted, which will appear on the screen of the Android device.
Method 6 of 7: Copy Contacts from an iPhone
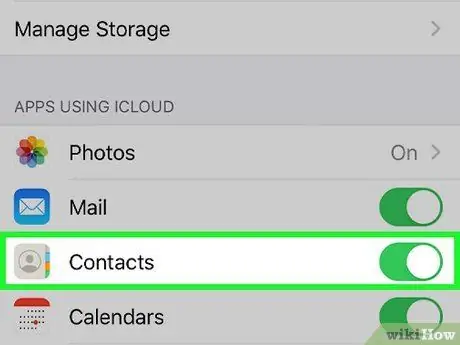
Step 1. Start by synchronizing the data in the iPhone address book with iCloud
Follow these instructions:
- Launch the app Settings;
- Tap the name of your Apple ID displayed at the top of the appeared menu;
- Choose the option iCloud;
- Activate the white cursor next to "Contacts" by moving it to the right. If the indicated cursor appears colored green, you can skip this step.
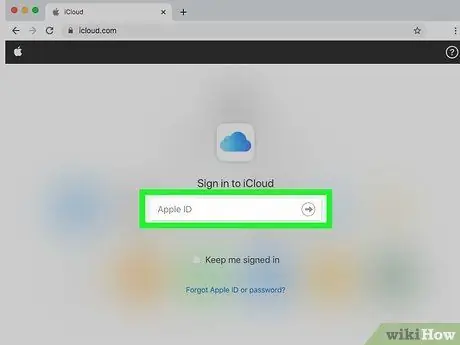
Step 2. Log in to the iCloud website
Use the internet browser of your choice and the URL https://www.icloud.com/. This will give you access to the iCloud dashboard, but only if you are already signed in with your Apple ID.
Otherwise, log in using the email address associated with your Apple ID and its security password
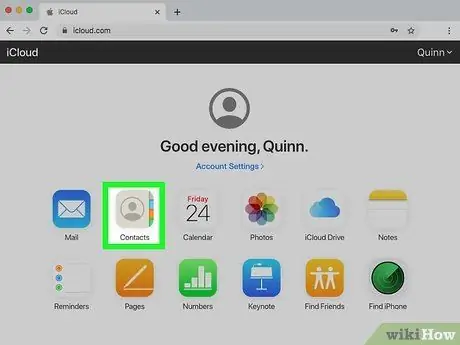
Step 3. Click the Contacts icon
It features a stylized human silhouette. The complete list of all your contacts will be displayed.
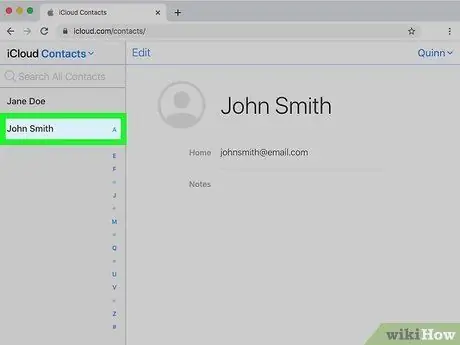
Step 4. Select a contact
Choose any of the contacts visible in the central column of the table that appears on the screen.
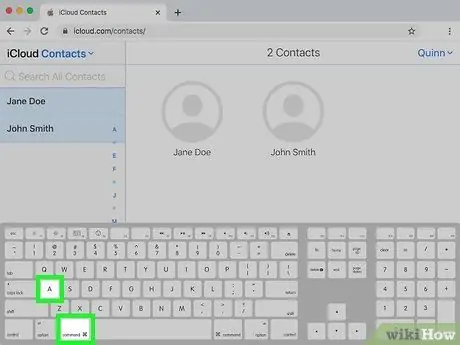
Step 5. Now select all the contacts in the address book
Press the key combination Ctrl + A (on Windows systems) or ⌘ Command + A (on Mac).
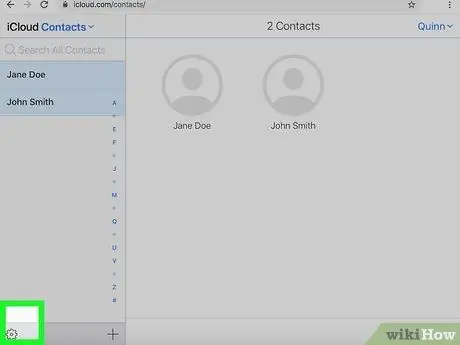
Step 6. Press the ⚙️ button
It is located at the bottom left of the page. A drop-down menu will appear.
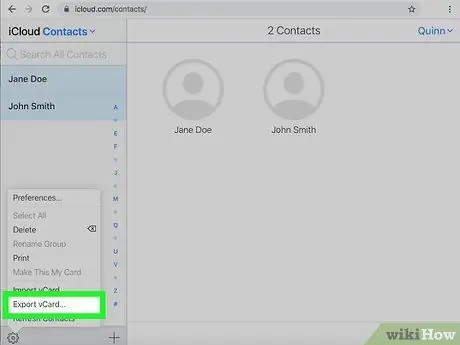
Step 7. Choose the Export vCard… option
It is one of the items in the menu that appeared. All selected contacts will be downloaded to your computer as a file.
Method 7 of 7: Use Google Drive to Download Android Device Backup to Computer
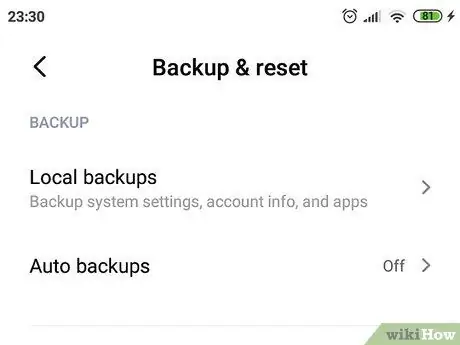
Step 1. Back up the data on your Android device
Before you can download the information in your Android address book to your computer, you'll need to back up your device using Google Drive.
Make sure you do this using a Wi-Fi internet connection instead of a cellular data connection
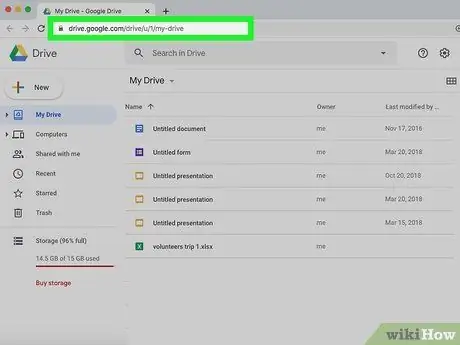
Step 2. Log in to the Google Drive website
Use the internet browser of your choice and the URL https://drive.google.com/. If you are already signed in with your Google account, your personal Google Drive page will be displayed.
- If you have not yet logged into your Google Drive account, do so now using the email address associated with the profile and the corresponding login password.
- Remember that you will need to use the same Google account that your Android device is synced with. If the account in use is not the correct one, select the initials of the name visible in the upper right corner of the Google Drive page, choose the item Go out from the menu that appeared, then log in with the correct account.
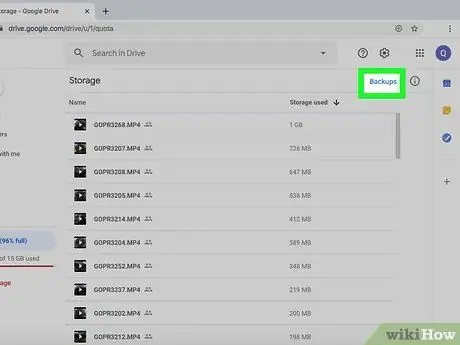
Step 3. Go to the Backup Copies tab
It is located at the bottom left of the page.
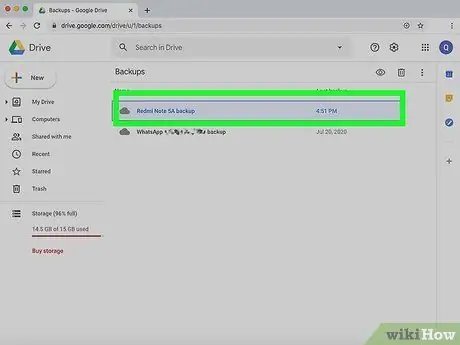
Step 4. Choose the backup file of your interest
You will need to select the archive you want to download to your computer.
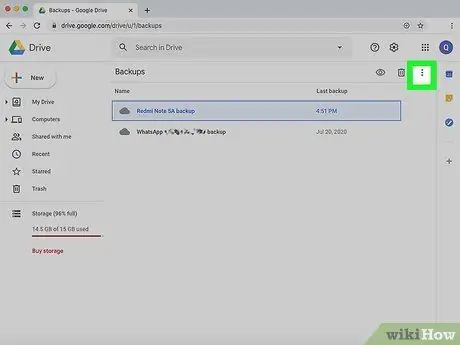
Step 5. Press the ⋮ button
It is located at the top right of the page. A drop-down menu will appear.
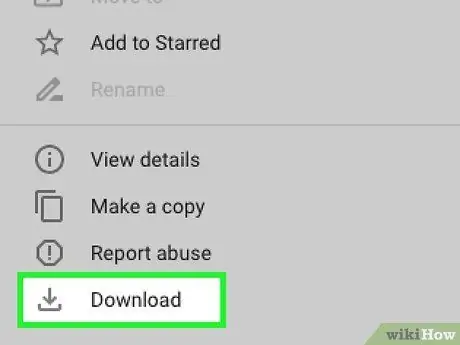
Step 6. Choose the Download option
It is one of the items in the menu that appeared. This way the backup file of the Android device will be transferred to the computer.
Advice
- If your mobile device is having trouble connecting to your computer, try using a different USB port.
- Another way to transfer data from a smartphone to a computer is to use a clouding service (for example iCloud or Google Drive). Using your phone, you can copy data to the cloud and then access it directly from your computer and download the necessary files.
- The contacts in the address book of an Android device are automatically saved on the Google account with which it is synchronized. This feature allows the user to manage their contacts directly online.
Warnings
- Some types of data are not compatible with certain hardware platforms (for example some file formats used by Apple devices are not viewable on Android systems).
- Data on an iPhone cannot be transferred to a Windows 10 system via a Bluetooth connection.


