The Mac Dock was created to house the icons of any application, file or folder, so you can access them quickly and easily. One of its additional functions is to notify the user of all currently open programs and, if one of them has a problem closing, its icon would remain "stuck" on the Dock. Fortunately, there are a number of steps that can fix this and other small issues that may be preventing the Dock from working properly.
Steps
Part 1 of 3: Adding a Program Icon to the Dock
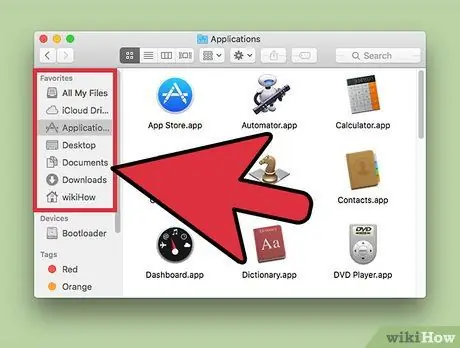
Step 1. Navigate to the folder where the program you want to add to the Dock resides
Remember that a document or folder icon can also be docked on the OS X Dock.
If you are not sure where it is stored, you can search using "Spotlight" (the magnifying glass icon in the upper right corner of the screen). Alternatively, you can use the search field located in the upper right corner of any Finder window
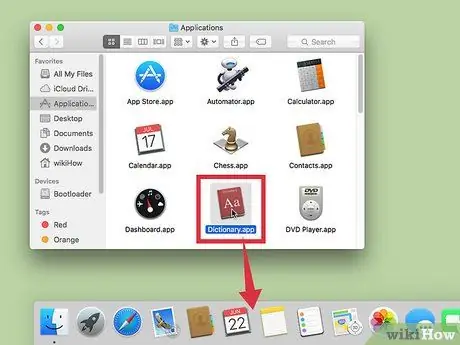
Step 2. Drag the program icon to the left side of the Dock
There is a small dividing line on the Dock bar. Program icons can be docked only on the left side of this line, while those for folders and documents can be docked only on the right side.
If your Mac Dock is positioned vertically, the program icons will be positioned at the top of the dividing line, while the folders and documents at the bottom
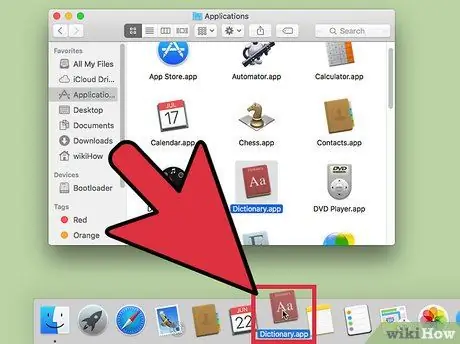
Step 3. Drop the icon on the desired location in the Dock
Move the icon in question to the point in the Dock where you want to insert it, until the two neighboring icons move creating the necessary space. At this point, release the mouse button to permanently dock the icon on the Dock.
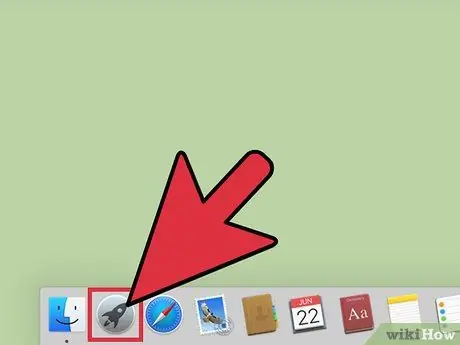
Step 4. Add an icon using Launchpad
To view all available applications at the same time, start the Launchpad program located in the "Applications" folder. You will see a grid appear containing all the icons of the applications installed on the Mac, which you can then easily drag to the desired point in the Dock.
Part 2 of 3: Remove a Program Icon from the Dock
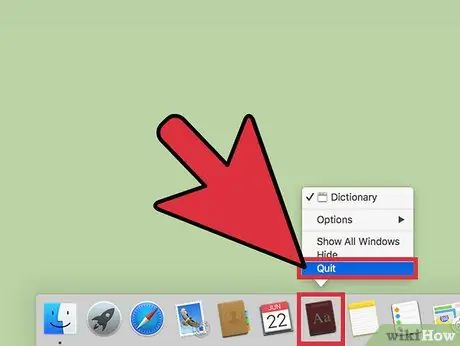
Step 1. Close the program
All icons on the Dock that refer to programs are highlighted when they are running. First, close all running applications; this way you will have immediate feedback when you successfully remove the relevant icon from the Dock.
A program is running when there is a small dot under its docked icon. This happens even if the program window is not currently open. To close a running program, select its icon with the right mouse button (or hold down the Ctrl key while pressing the only button on the pointing device in use), then select "Quit" or "Force Quit"
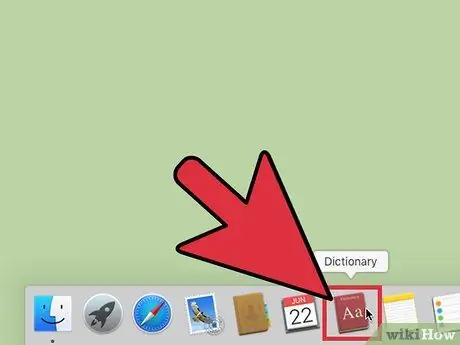
Step 2. Drag the desired icon from the Dock to anywhere on the screen
To do this, select it with the mouse without releasing the button. At this point, drag it away from the Dock anywhere on the screen (you need to move it to a distance that is at least one third of the size of the desktop).
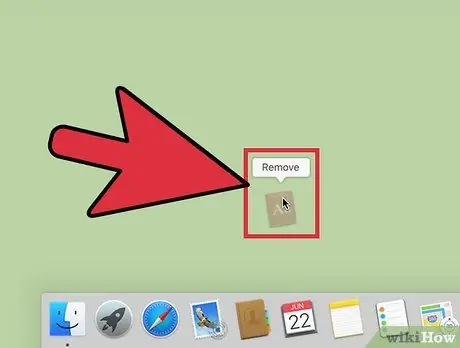
Step 3. Wait a couple of seconds
Do not release the mouse, otherwise the selected program icon will return to its previous position in the Dock. Wait until the icon becomes transparent (in some versions of OS X you may receive other notification patterns, such as the appearance of the word "Remove" or a small cloud above the icon itself).
If the appearance of the selected icon doesn't change, try moving it farther away from the Dock
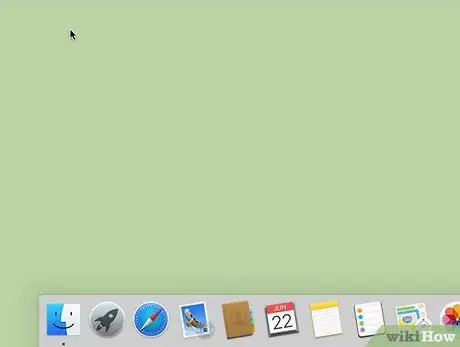
Step 4. Release the mouse button
If the selected icon disappears with a small puff of smoke, the removal from the Dock was successful.
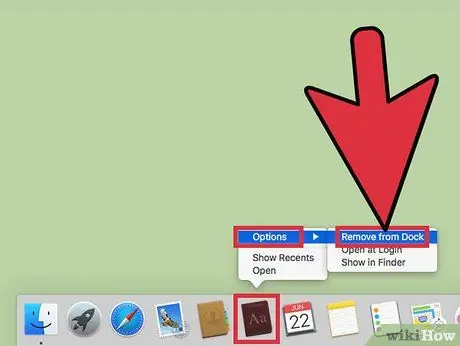
Step 5. Use the context menu
You can also use its context menu to remove an icon from the Dock:
- Select the icon in question with the right mouse button (or hold down the Ctrl key while pressing the only button on the pointing device in use).
- Move the mouse pointer over the "Options" item.
- Select the "Remove from Dock" item.
- If the "Options" menu says "Keep in Dock", it means that the program for the chosen icon is still running. Select the "Keep in Dock" option to clear the check mark and make the program disappear from the Dock after the next close.
Part 3 of 3: Troubleshooting
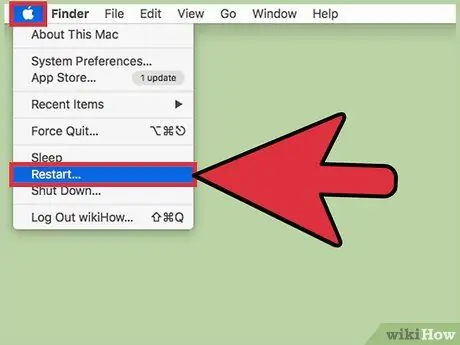
Step 1. Restart your computer
This trick could solve the problem that is afflicting the application in question by preventing it from closing in the appropriate way. There are many problems that this method cannot solve, but it is so simple to implement that it is worth trying it first.
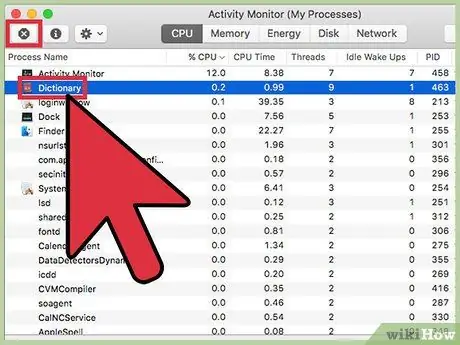
Step 2. Search for the program in the "Activity Monitor" window
If you have completed most of the work, adding and removing all the desired icons from the Dock, but one in particular does not want to be removed, it means that most likely the related program is still running even if there is no graphical notification that it confirmation. If restarting your system did not correct the problem, try following these steps:
- Go to the "Applications" folder, select the "Utilities" icon, then start the "Activity Monitor" program.
- Search for the name of the process related to the running program in the list that appears. To do this, use the name of the application you are trying to remove from the Dock.
- Select its name, then press the "X" button at the top of the window. This way, the related process should close.
- Repeat the above steps to close all processes that have a similar name.
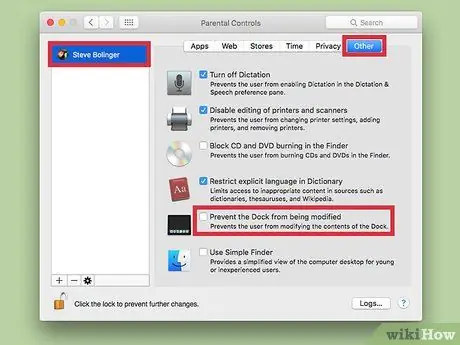
Step 3. Check the configuration of the "Parental Controls" tool
If you are using an account that is restricted by the "Parental Controls" application, you may not be able to change the Dock. If you have the password for a computer administrator account, you can enable Dock changes:
- Access "System Preferences" from the "Applications" folder.
- Select your account.
- If the available options are not editable, click the padlock icon in the lower left corner of the window, then enter the username and password of a system administrator account.
- Go to the "Other" tab.
- Uncheck the "Prevent Dock from Modification" checkbox or select "Allow User to Modify Dock".
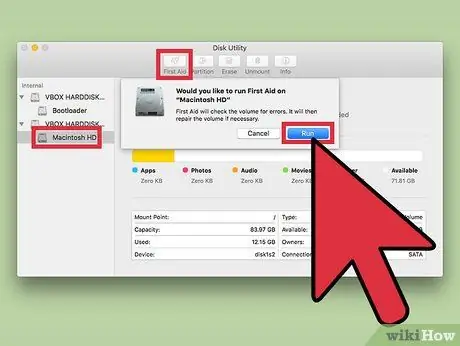
Step 4. Repair disk permissions
Problems related to accessing or editing files can occur when the files where user permissions are stored are corrupted. Try running the automatic repair process to see if the problem is resolved:
- If you are using the OS X 10.11 El Capitan operating system, your computer should automatically protect disk access permissions. This manual procedure is available (and required) only on computers running OS X 10.10 Yosemite or earlier.
- Go to the "Applications" folder, select the "Utilities" item, then choose the "Disk Utility" icon.
- Select the main hard drive of the system using the left pane of the GUI.
- Access the "S. O. S." tab.
- Press the "Repair disk permissions" button, then wait for the automatic procedure to complete its work. It may take some time, especially if the drive is very large or slow. Throughout the repair process, your computer may be slow or not respond at all to commands.
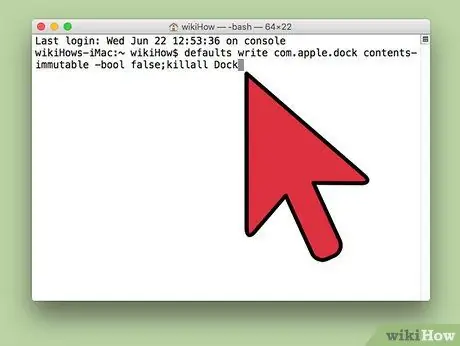
Step 5. Restart the Dock from a "Terminal" window
You can use the "Terminal" window and a single command to enable Dock changes and restart its application to fix the operating problems that afflict it. Follow this procedure:
- Go to the "Applications" folder, select the "Utilities" item, then choose the "Terminal" icon.
- Copy and paste the following command into the "Terminal" window: defaults write com.apple.dock contents-immutable -bool false; killall Dock.
- Press the Enter key. Wait a few seconds while the application controlling the Dock restarts.
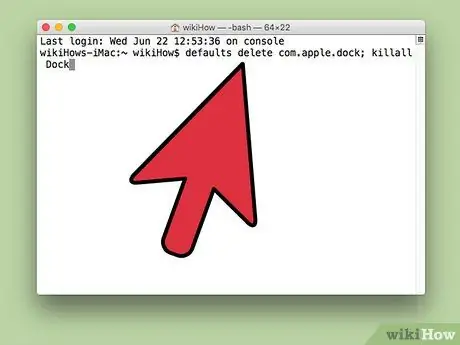
Step 6. Reset the Dock completely
If none of the previous methods solved the problem, you can restore the Dock's default configuration settings. This will remove any custom icons you've added. Follow this procedure:
- Go to the "Applications" folder, select the "Utilities" item, then choose the "Terminal" icon.
- Copy and paste the following command into the "Terminal" window: defaults delete com.apple.dock; killall Dock
- Press the Enter key. Wait a few seconds while the application controlling the Dock is reset and restarted.

Step 7. Eliminate any malware
If the icon you can't remove from the Dock refers to an advertisement or a program you didn't install, get antivirus software. Run a full scan of your hard drive for viruses and malware, then delete any items found that may be causing the problem.
Advice
- To move a program icon to a different location in the Dock, simply select and drag it to the new location. At this point, just release the mouse button to save the new changes.
- You can add multiple icons to the Dock simultaneously by simply selecting them all at once, dragging them to the bar, and finally releasing the mouse button.
- To avoid crowding your Mac's Dock, group programs into a single folder, based on your needs, then transfer it to the Dock as if it were a normal icon.
- To save a link in the internet browser on the Dock, select the small icon on the left of the browser address bar, then drag and drop it to the desired location in the Dock.


