This article explains how you can automatically start a PC or Mac at a specific time. If you are using a computer with a Windows or Linux operating system, you can use the BIOS to configure automatic startup. If you are using a Mac, you can solve the problem using the "System Preferences" dialog.
Steps
Method 1 of 2: Windows or Linux computer
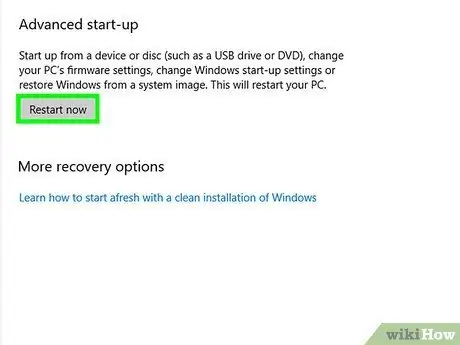
Step 1. Reboot the system to be able to access the BIOS
To be able to automatically start your computer at a specific time, you can use the BIOS which you can access by pressing a special key during the first few seconds of the computer startup procedure. Normally the key you will need to use is one of the following: Del, F8, F12 or F10. If you are using a computer with Windows 10, try following these instructions to enter the BIOS:
- Select the "Start" button with the right mouse button and select the item Settings;
- Click on the icon Update and Security;
- Click on the tab Restoration;
- Click on the button Restart now located in the "Advanced Startup" section;
- When the computer has restarted, click on the icon Troubleshooting from the menu that will appear;
- Click on the item Advanced options;
- Click on the option UEFI Firmware Settings, then click the icon Restart.
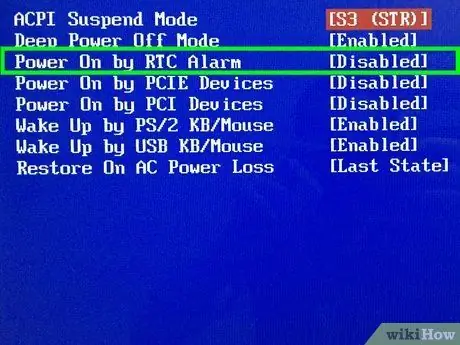
Step 2. Access the Power on Alarm section or RTC Alarm of the BIOS.
The name of the item in question varies by BIOS manufacturer and may be listed in the menu Advanced.
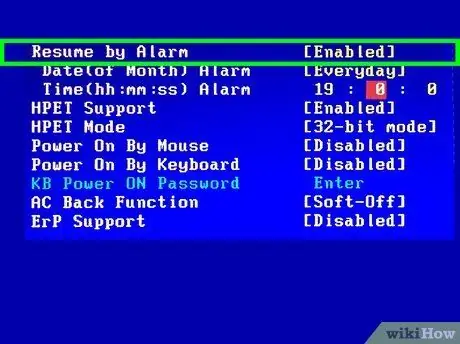
Step 3. Select how often to automatically start your computer
The steps to follow vary from computer to computer, but normally you will need to use the directional arrows on your keyboard to highlight the day of the week for which you want to schedule the automatic start of the system. At this point, press the indicated key to select the option Enable or Disable for the day of the week you have chosen.
Depending on your computer's BIOS you may have specific options available, for example Every Day, to schedule the computer to start automatically on any day of the week.
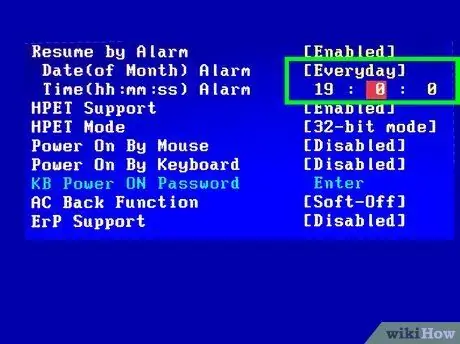
Step 4. Specify the time when the computer should start automatically
Normally you can use the directional arrows on your keyboard to select the named option Time, but in some cases you will have the option to specify the hour, minute and second separately.
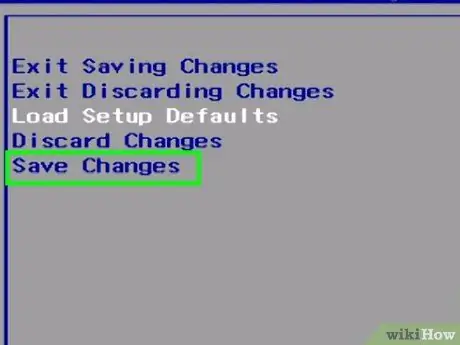
Step 5. Save the changes you have made to the computer's BIOS
If your BIOS has a menu bar, you will normally be able to save the new settings and close the interface by accessing the menu File and choosing the option Save Changes and Exit. Otherwise the option Save or Save and Exit it will be accessible by pressing an appropriate key on the keyboard which should be clearly indicated on the screen. After closing the BIOS interface, the computer will restart normally and the new settings will be saved.
Method 2 of 2: Mac
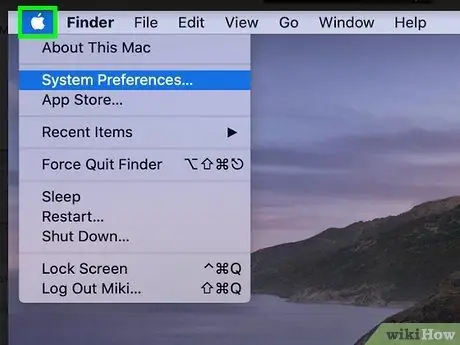
Step 1. Access the Apple menu by clicking on the icon
It is located in the upper left corner of the screen.
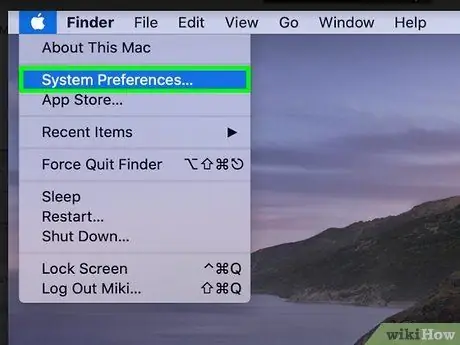
Step 2. Click on the System Preferences option
It is listed in the center of the menu that appeared.
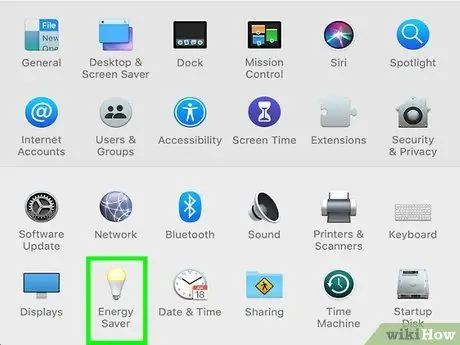
Step 3. Click the Energy Saver icon
It is characterized by a light bulb.
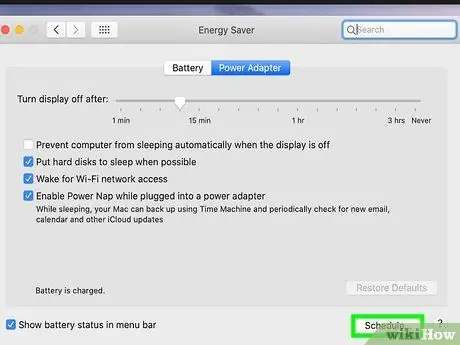
Step 4. Click the Schedule button
It is located in the lower right corner of the window.
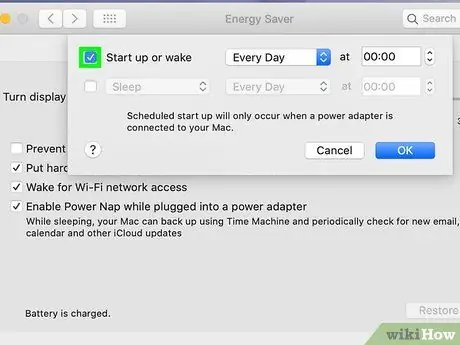
Step 5. Select the "Start or reactivate" checkbox
It is visible at the top of the pop-up window that appeared.
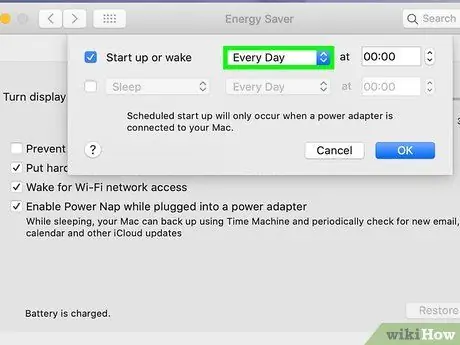
Step 6. Select how often the Mac should start automatically
Click on the drop-down menu to the right of "Start or reactivate", then choose one of the listed options (for example Everyday, Weekend, etc).
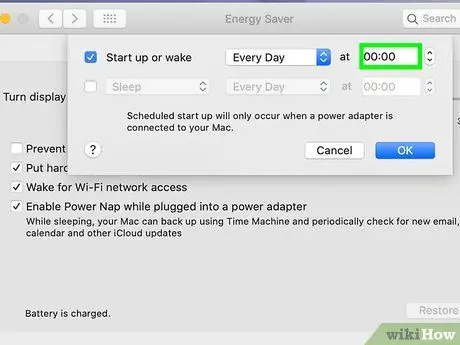
Step 7. Set the start time
Change the time displayed in the text field on the right of the drop-down menu of the pop-up window that appeared.
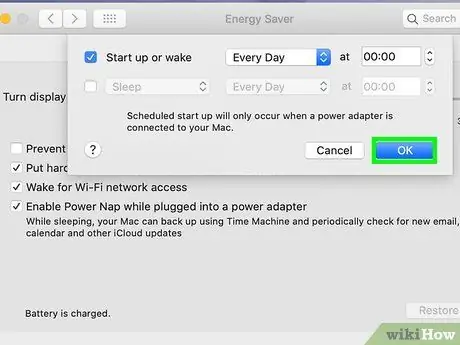
Step 8. Click the OK button
It is located in the lower right part of the window. At this point the Mac will automatically start at the specified time.


