If you need to be away from your office for a while, or if you are planning a vacation, you may want to let the people writing you know that you are not there. If you have an Exchange account, Outlook offers this functionality. If you don't have it, you can still automatically reply to emails by creating some rules. Follow this guide to set up automatic replies, whether you have an Exchange account or not.
Steps
Method 1 of 4: Outlook 2010/2013
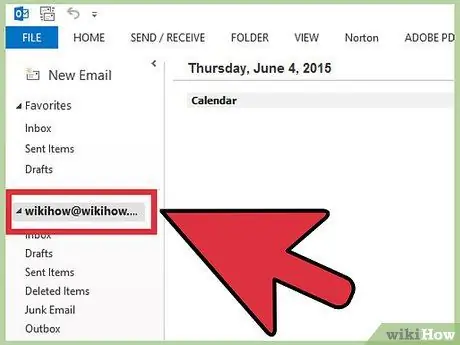
Step 1. Turn on automatic replies
Select an Exchange folder. Select the folder of your messages. You will need to select one to see the Automatic Replies option. Open the Auto Replies (Out of Office) menu. You can find it by clicking on the File tab and then selecting the Info tab.
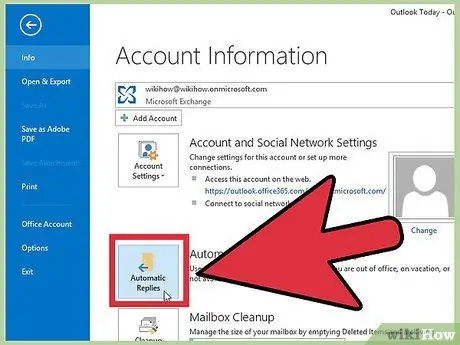
Step 2. Configure your responses
In the Automatic Replies menu, check the Send Automatic Replies box. You can adjust the time the assistant will be active by checking the box and setting the date and time range.
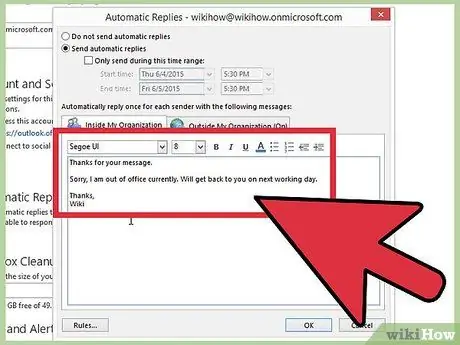
Step 3. Write your answers
For emails sent from your Exchange server, use the Inside My Organization tab. For replies received from anyone else, use the Out of My Organization tab. When you are satisfied with your answers, press OK.
Step 4. Turn off Automatic Replies
If you have chosen an interval for your auto replies, the assistant will automatically turn off at the end of the interval. If you have not set an interval, it will continue until you open the Automatic Replies menu and select "Do not send automatic replies".
Method 2 of 4: Outlook 2007
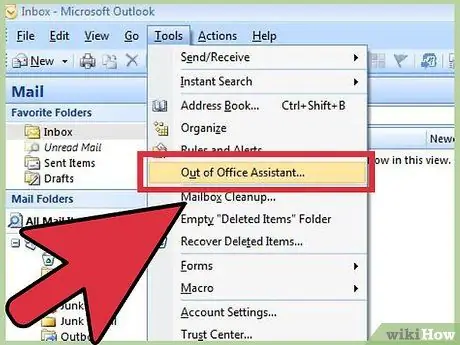
Step 1. Activate the Office Assistant
Click on the Tools tab. In the tools menu, select Out of Office Assistant. Check the box "Send automatic replies out of the office". You can set the assistant activity time by checking the box and choosing the date and time range.
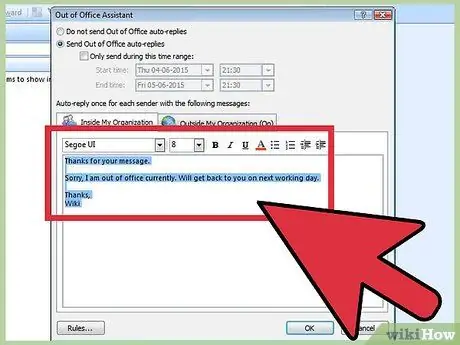
Step 2. Write your answers
For emails sent from your Exchange server, use the Inside My Organization tab. For replies received from anyone else, use the Out of My Organization tab. When you are satisfied with your answers, press OK.
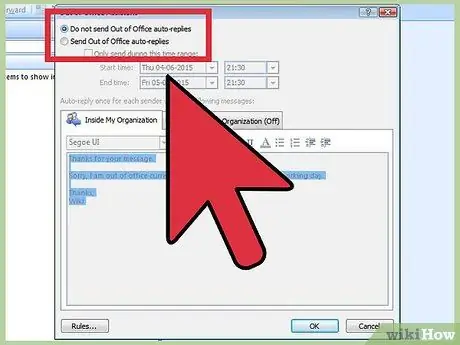
Step 3. Disable the Out of Office Assistant
If you have chosen an interval for your auto replies, the assistant will automatically turn off at the end of the interval. If you have not set an interval, it will continue until you open the Automatic Replies menu and select "Do not send automatic replies".
Method 3 of 4: Outlook 2003
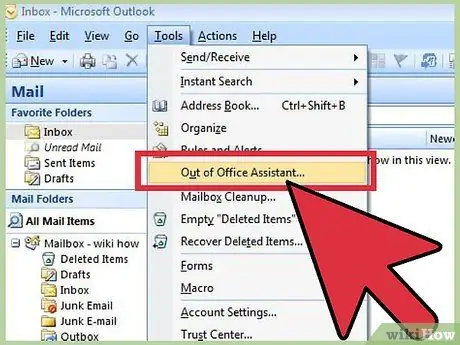
Step 1. Activate the Office Assistant
In the Tools menu, select Out of Office Assistant. Check the box "I am currently out of the office".
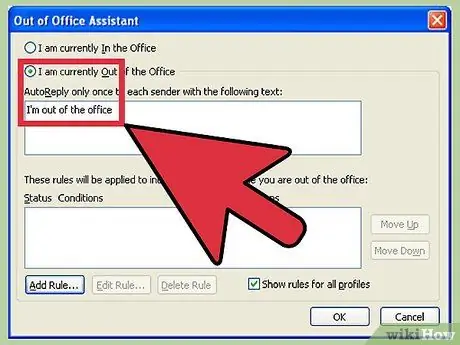
Step 2. Write your answers
In the "Automatically reply only once to each message with the following text:" field, enter the reply you want to send.
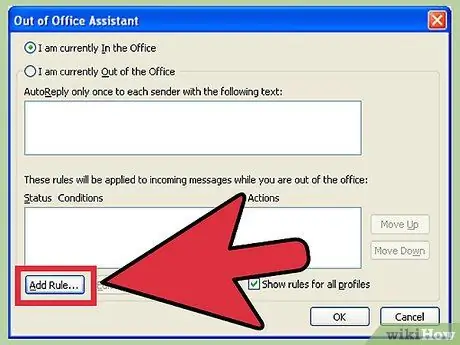
Step 3. Add rules
You can add rules to your Assistant, such as forwarding messages from some users to other recipients. Click Add Rule… to configure a custom rule. For example, you could create a rule that forwards the emails of a specific customer to one of your members, so that the most important emails are not ignored when you are away.
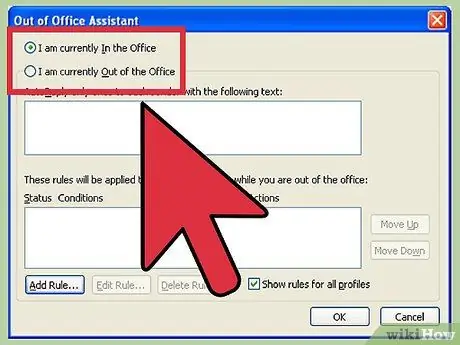
Step 4. Disable the Out of Office Assistant
The Out of Office Assistant will continue to work until you open the Auto Replies menu and select "Do not send automatic Out of Office replies".
Method 4 of 4: Send an Auto Reply without an Exchange Account
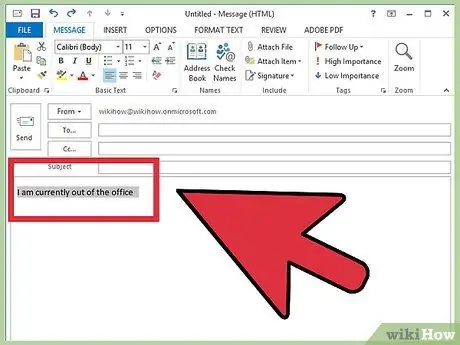
Step 1. Create your model
Without an Exchange account, the Auto Reply options are not available. However, you can set up an automatic reply using a template and some rules. Start by creating a new email. This will be the template for your autoresponder.
- Choose an Object that briefly explains the situation. For example "Away from the office until". You could also write the words "Auto Reply" in the Subject line to let the recipient know immediately that the reply is sent from a computer.
- Write a short message. In the body of the email, write a generic message that can be addressed to anyone who receives it. Let the recipient know how to contact you, or who else to contact.
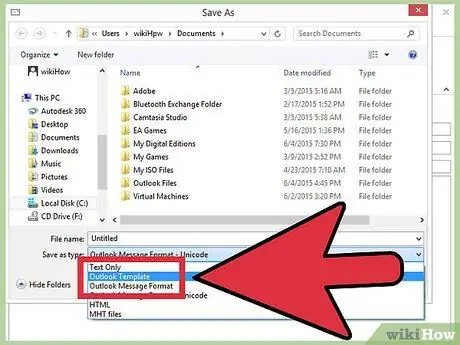
Step 2. Save your template
When you are satisfied, click on Save as. In the "Save as type" drop-down menu, choose Outlook Template. This will create a template that can be loaded into Outlook.
Step 3. Create the rules
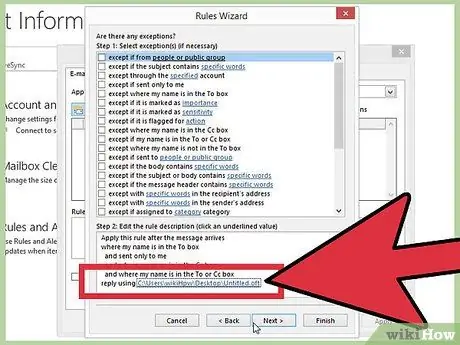
In order for the autoresponder to work properly, you will need to define some rules to make the process automatic. On Office 2003/2007, click on the Tools menu and select Rules and Alerts. On Office 2010/2013, click on the File tab, select Information, and then Rules and Alerts. This will open the E-Mail Rules menu.
- Click the New Rule button. You will be prompted to select a model. From the "Start with an empty rule" section, select "Check messages when they arrive". Click on Next.
- Determine which messages will be answered. If you want to reply to all the messengers that will arrive, check the box "when my name is in the recipients field". You can narrow it down by designating specific senders, or emails with words defined in the subject or body. Click Next after making your choices.
- Upload your model. Check the "reply using a specific template" box in the following window to load the message you created earlier. Click the link in the field description for a "specific template". A dialog will open asking you where to look for templates. Select "User Templates". Open the message you created earlier.
- Set your exceptions. Once the template is uploaded, you can define situations in which you do not want a reply to be sent, for example in the case of a specific sender, or specific types of messages. Click Next after making your choices.
- Name your rule. Before you finish, you will need to choose a name for your rule. Use something that is easy to remember, so you can quickly disable the rule in the future. Check the "Enable this rule" box to enable it, then click Finish.
Step 4. Disable the rule
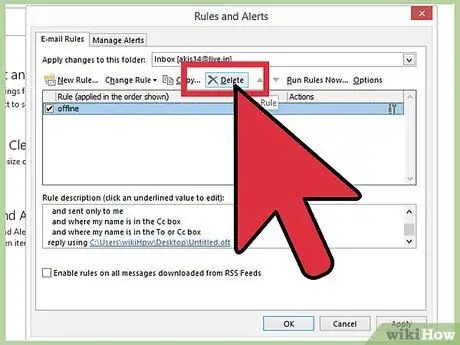
When you are back at the office, you can deactivate the rule by opening the Rules and Alerts menu again. Select the Out of Office rule you created from the list of active rules, and then click the Delete button.
Advice
- Organization is often referred to as your company and includes people who have an Exchange Server account on your email system.
- You will find the Tools menu in the main Outlook window. The main window is the one that appears when the program starts and includes the File, Edit, View, Go, Tools, Actions and Help menus. You will not find the Tools menu in the windows for creating or viewing emails, contacts or activities.
- When you check the Automatically reply to people outside my organization box, the Outside my organization tab shows (Enabled) next to the tab name.
- The contact must exist in your Exchange Server Contacts folder. If the contact exists only in a folder that is part of a Personal Folder (.pst) file, the automatic reply message will not be sent.


