The Windows taskbar can be maximized and minimized without the need for great technical knowledge. You may need to increase or decrease its size, dock it to the desktop or hide it when you are not using it, and even change its position, for example by placing it along the sides of the screen or at the top. This article explains how you can make all these changes.
Steps
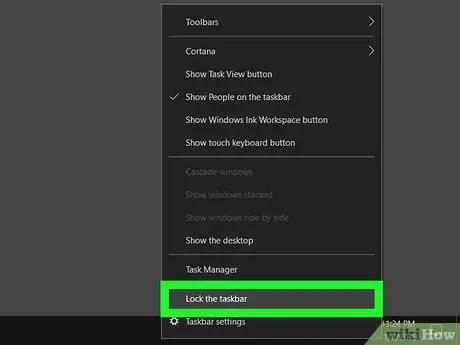
Step 1. Unlock the taskbar
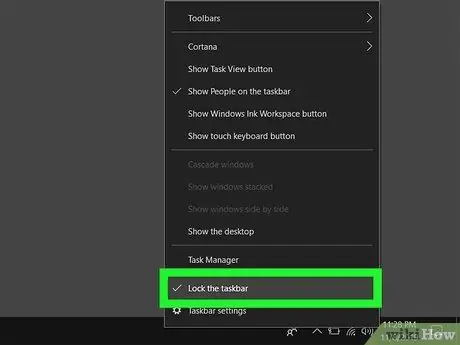
In order to change the appearance and position of the Windows taskbar you will first need to unlock it. To check if the taskbar is locked or not, right-click anywhere on the bar, then make sure there is no check mark next to "Lock the taskbar". If not, click on the indicated option to unlock the Windows taskbar.
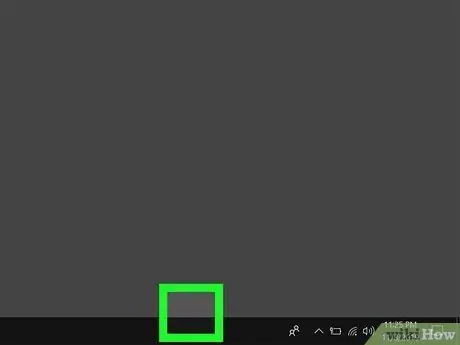
Step 2. Place the mouse pointer on the top side of the taskbar
The mouse cursor will change to a double-headed arrow.
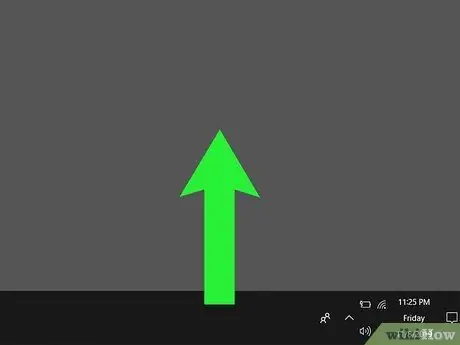
Step 3. Drag the top side of the bar up
This will increase the size of the taskbar. Conversely, drag the mouse cursor down to decrease the height of the bar.
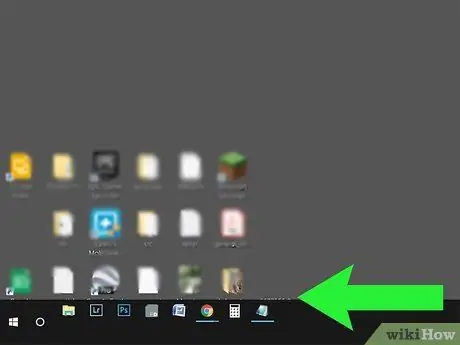
Step 4. Place the bar elsewhere on the desktop
You can dock the Windows taskbar on the top, left or right side of the desktop. To do this, click on the bar and drag it to the new location (the top, right or left side of the screen).
Making this change can be very useful when the taskbar blocks the view of information displayed at the bottom of the screen. This way, you can temporarily move it to another place on the desktop
Step 5. Disable the "Auto Hide" feature
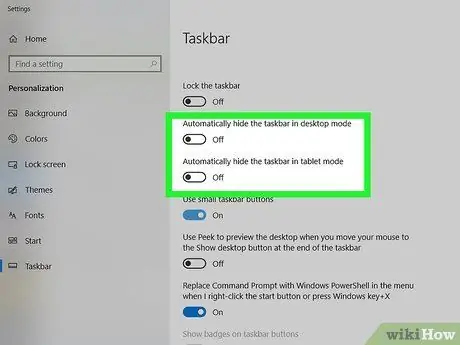
You can configure your computer to hide the taskbar automatically under certain conditions. If this feature is not useful for your needs, you can disable it by following these instructions:
- Select an empty spot on the taskbar with the right mouse button;
- Click on the item Taskbar settings (or Property in Windows 7 and Windows 8). It is located at the bottom of the context menu that will appear;
- Click on the slider next to the option "Automatically hide the taskbar in desktop mode";
- Click on the slider next to the option "Automatically hide the taskbar in tablet mode".
Step 6. Display the small icons on the taskbar
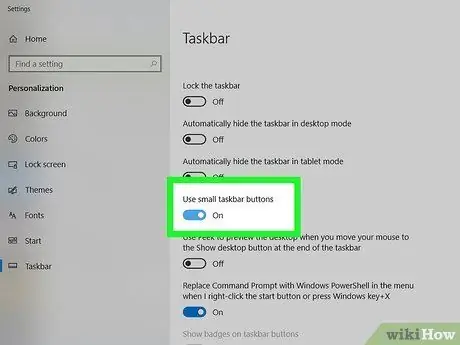
If you need to make the icons that appear on the taskbar smaller, follow these instructions:
- Click on an empty spot on the taskbar with the right mouse button;
- Click on the item Taskbar settings (or Property in Windows 7 and Windows 8). It is located at the bottom of the context menu that will appear;
- Click on the slider next to the "Use small taskbar buttons" option.
Step 7. Click on the icon
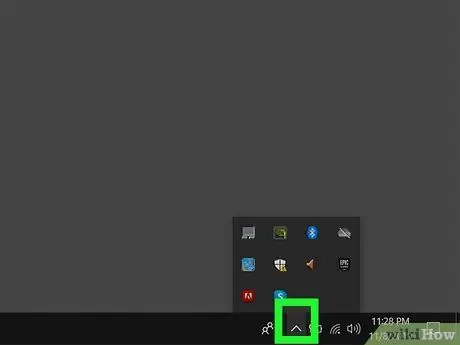
located on the right side of the taskbar (only for Windows 8 and Windows 10).
It is similar to an upward facing open angle bracket. A small pane will appear listing all hidden system tray icons. This way, you can choose which icons to leave hidden and which ones to dock on the bar so that they are always visible. In this second case, simply drag the icons you want to the bar or vice versa. In this way you have the possibility to hide some of the icons on the bar to have more free space.
Step 8. Lock the taskbar again
When you're done making the changes you want, you can lock the Windows bar again. Select an empty spot on the bar with the right mouse button, then click on the item "Lock the taskbar" so that it is marked with a check mark.


