This tutorial shows you how to find the color matching an object in an image and apply it to an object in a second image, using Photoshop's 'Color Match' feature.
Steps

Step 1. Open the two images using Photoshop
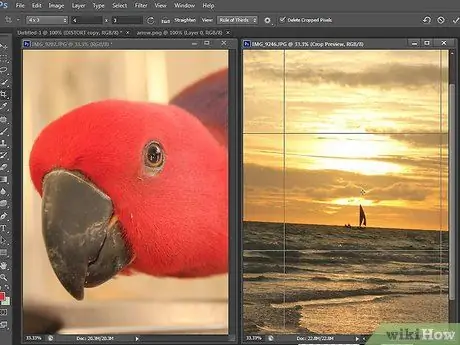
In our example we want to find the color used in the left image to apply it to the right image.

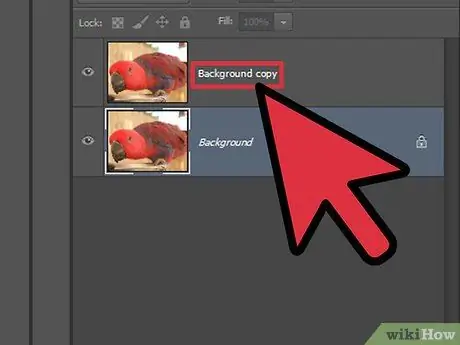
Step 2. Create a duplicate of the background layer
It is better to choose not to work directly on the original image, this way in case of errors you will be able to fix it easily. At this point choose the appropriate selection tool (in this example 'Polygonal Lasso') and select the object whose color you want to change.

Step 3. Move to the sample image
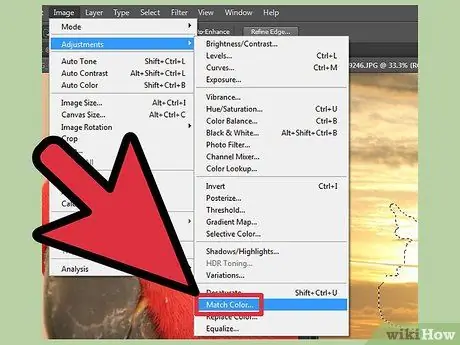
Use the selection tool you want (in this example we used the 'Magic Wand') and select a large area within the object that contains the color you want to use. Move back to the image to edit and access the 'Image' menu. Select the item 'Adjustments' and finally 'Color match…'.

Step 4. Change the color of the image
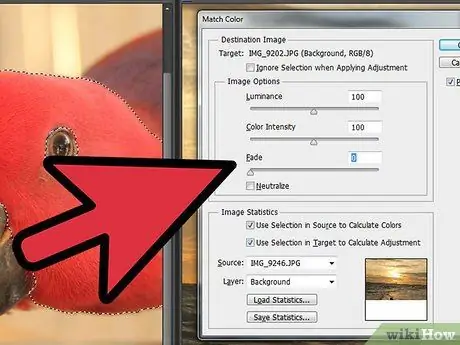
The 'Color Matching' dialog consists of two main sections: 'Target Image', located at the top, and 'Image Statistics', located at the bottom. The 'Target Image' section refers to the image whose coloring you want to change. Within the 'Image Statistics' section, you will find an option called 'Source'. In this field you will have to select the second image in the list to set it as the source image. After making the changes to the settings press the 'OK' button.


