This article explains how to disable BIOS options related to controlling and managing the RAM memory of a Windows computer, such as the ability to exclude a specific bank of RAM or disable the BIOS cache. It should be noted that the graphical interface and the BIOS menus vary according to the manufacturer and version, this means that the options indicated in the article may not be present in your computer or may have a different name. In some cases it will not be possible to change these BIOS settings.
Steps
Part 1 of 2: Enter the BIOS
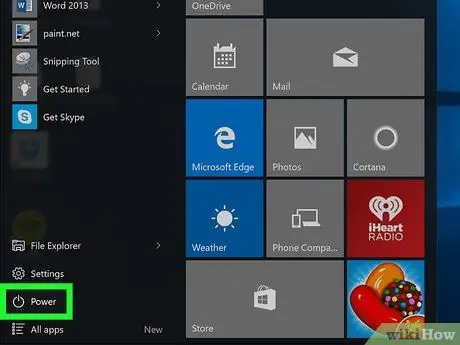
Step 1. Restart your computer
Access the "Start" menu by clicking on the icon
click on the "Stop" icon
then click the option Reboot the system.
- If the computer is locked, click anywhere on the screen shown on the screen, then click on the "Shutdown" icon located in the lower right corner of the screen and select the item Reboot the system.
- If your computer is already off, press the power button to start it.
Step 2. Wait for the computer startup screen to appear, then repeatedly press the key to enter the BIOS
If the words "Press [key] to enter setup" or similar appear for a short time at the bottom of the screen and then disappear, you will need to restart your computer and try again

Step 3. Press and hold the Delete key or F2 to access the BIOS.
The key you will need to press to access the BIOS may be different. In this case, simply press the indicated key.
- Normally you need to use a function key with the letter "F" and a number to access the BIOS. These keys are listed at the top of the keyboard.
- Depending on your computer model, you may need to hold down the Fn key in order to use the keyboard function keys.
- To be sure which key to press to enter the BIOS, refer to your computer manual or search the web.

Step 4. Wait for the BIOS user interface to load
After you have successfully pressed the correct key, the BIOS will load automatically. At this point you will be able to find the option you wish to disable.
Part 2 of 2: Disabling the RAM Memory Options
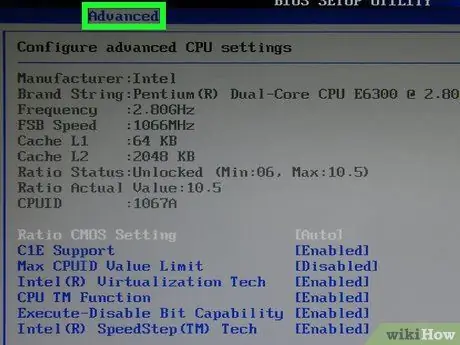
Step 1. Enter the "Advanced" tab of the BIOS
Select the menu Advanced located at the top of the screen. Use the directional arrows on your keyboard to move around the BIOS, then press the Enter key to select the option you want. This will take you to the advanced BIOS settings section.
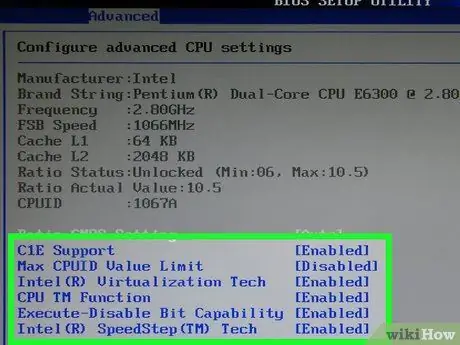
Step 2. Look for the RAM control and management options you want to disable
Some of these features include:
- Caching or Shadowing - if in general you are having problems with the RAM memory or the classic blue Windows error screens appear on the screen, disabling the BIOS cache could solve these problems.
- RAM - if you have installed a new RAM memory bank that has malfunctions, you may be able to exclude its use directly from the BIOS without having to physically remove it from the computer.
- The RAM management options you have available vary from BIOS to BIOS. In your case you may have additional options available that other computer models do not have and vice versa.
- If you can't find the option you are looking for, try looking at other sections of the BIOS (e.g. the card General).
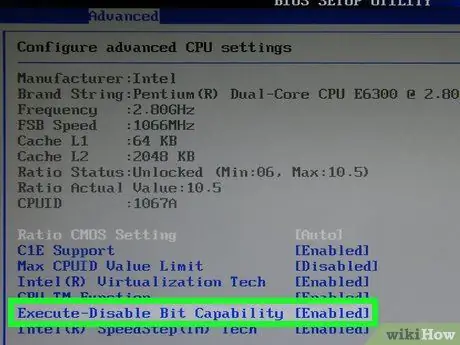
Step 3. Select the option you want to disable
Use the directional arrows on your keyboard to move the text cursor within the BIOS menus. In this case, select the "Enabled" or similar item relating to the RAM option in question. This way it will be selected.

Step 4. Press the "Change" button
Doing so will disable the option you selected. The "Change" key varies from computer to computer, but is specified in the BIOS legend located at the bottom right or left of the BIOS user interface. Inside the legend are specified all the keys that you will have to press to perform the related actions.
For example, you may need to press the Enter key to change the value of the selected option from "Enabled" to "Disabled"

Step 5. Press the Esc key
This will express a willingness to close the BIOS.

Step 6. Press the Enter key when prompted
Any changes you have made to the BIOS will be saved and applied and the program interface will close. Your computer will restart automatically.


