Lightning McQueen is the star of Disney Pixar's Cars and Cars 2. Its shape is reminiscent of a NASCAR car - but what really matters to an artist is that it's a really nice subject to draw. Follow this tutorial to learn how to draw Lightning McQueen!
Steps
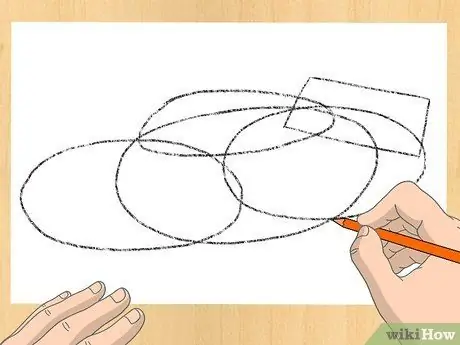
Step 1. Start with the basic body shapes
Draw two ovals for the front of the car, and two more larger ovals to shape the body. Draw a curved trapezoid for the head and a rectangle to make the back of the car.
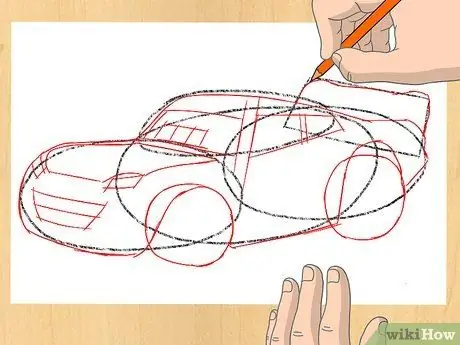
Step 2. Draw guidelines inside to give Lightning its characteristics
Make pencil lines for eyes, mouth, tires, windows, etc…, as shown in the picture.
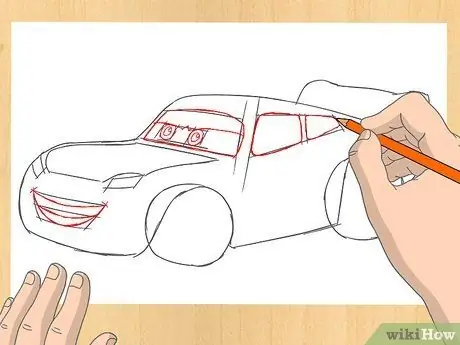
Step 3. Draw the outlines
Add two circles to the windshield area for the eyes. Draw smaller circles inside them to make the pupils. Add the eyelids to give the character more life. Don't forget her dazzling smile, which includes her teeth and tongue.
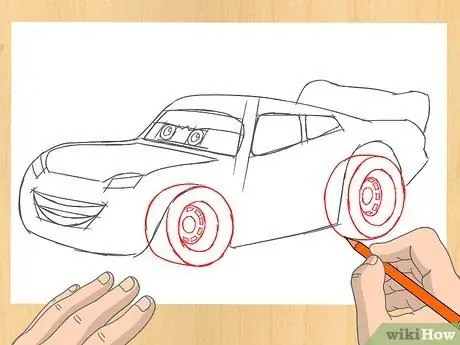
Step 4. Draw circles inside the Lightning bolt wheels
At this point, you need to work with perspective to make sense of dimension and depth. Add details to the wheels by drawing smaller circles to make the rims, with smaller circles in the center and squares around the rim.
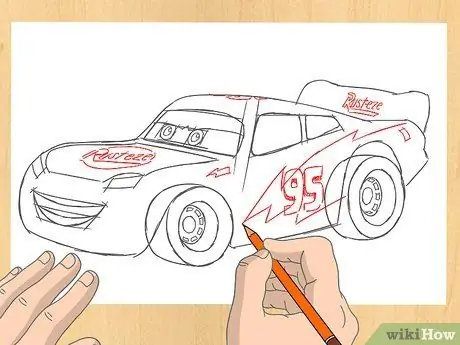
Step 5. Complete by drawing all the details
Add the Lightning Bolt stickers, the Rusteez logo, and a couple of lightning bolts. Draw the number 95 on the side. Make a shaded outline of the number to give depth.
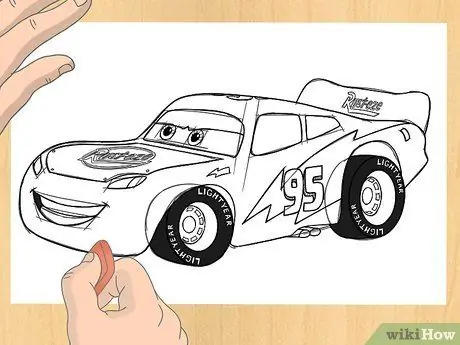
Step 6. Trace the outline of the design to outline it
Paint the black areas, such as the tires, pupils and part of the mouth as in the picture. Erase the guidelines.
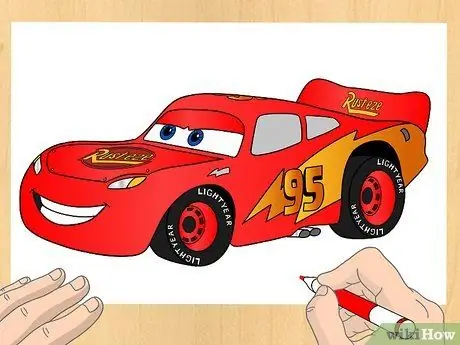
Step 7. Color the other parts of Lightning McQueen
Use the colors as in the picture, you will mainly need red and yellow / orange. As you paint, add shadows and highlights. All done!
Advice
- Don't apply too much pressure with the pencil, but use a light stroke that can be erased better if you make a mistake.
- If you want to use markers or watercolors to color the drawing, use relatively sturdy paper and make thicker pencil strokes before coloring.


