When numerous messages, web browsing history, playlists and personal user data take up a lot of the console's memory, the PlayStation 3 (PS3) can be slower in carrying out its normal activities. You can restore the normal performance level of a PS3 by rebuilding the database, changing the network settings and performing a normal maintenance routine of the entire hardware system.
Steps
Method 1 of 3: Rebuild the Database

Step 1. Turn off the console completely

Step 2. Press and hold the PS3's power button until it boots, then turn it off again

Step 3. Now press and hold the power button on the console and release it only when you hear a sequence of 4 beeps:
the first 2 slow, the other 2 issued more quickly. At this point the console will start in "Recovery" mode and the relative menu will be displayed on the screen.
Should the PS3 shut down, repeat this step a second time. If this happens, it simply means that you released the power button too late
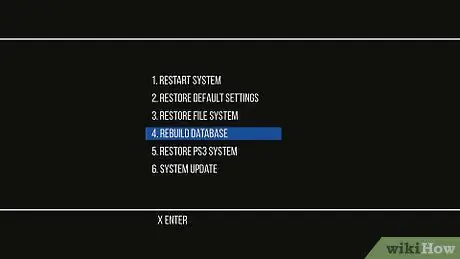
Step 4. Scroll down the menu to select "Rebuild database"
Be careful because the database rebuild procedure deletes some personal data of the user (messages, playlists, browsing history, list of viewed videos and console configuration settings). This step allows you to increase the performance of your PS3 without having to delete installed games, videos, music, trophies and other files stored on your hard drive.
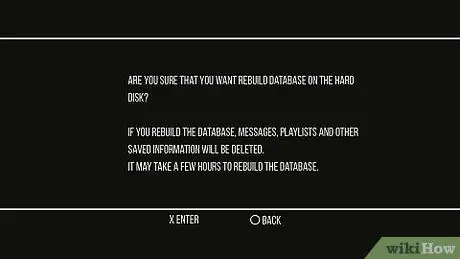
Step 5. Select the "Yes" option to confirm your willingness to proceed
At this point the console will start the database rebuild procedure, after which it will automatically restart in normal mode.
Method 2 of 3: Change the Network Configuration

Step 1. If possible, switch from a wireless network connection to a wired one using an ethernet cable
The latter type of connection is much more powerful and stable than a Wi-Fi connection.
Step 2. Turn on the computer you normally use and connect it to the same LAN that the PS3 is connected to
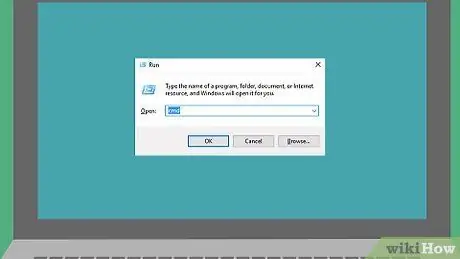
Step 3. Start the command console of the computer's operating system
For example, if you are using a Windows system, press the key combination "Windows + R" to open the "Run" window, then type the command "cmd" (without quotes) and press the "Enter" key.
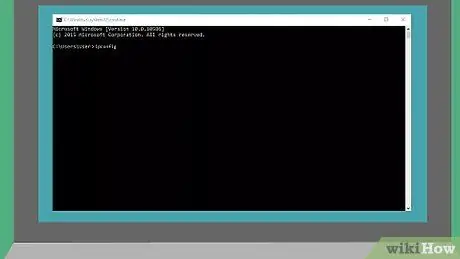
Step 4. Type the command "ipconfig" into the "Command Prompt" window that appears, then press the "Enter" key
This will show information on the computer's network configuration on the screen.
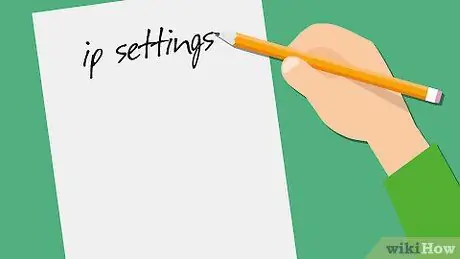
Step 5. Make a note of your LAN configuration
You will need this data later to change the PS3 configuration. The information you need includes the IP address, subnet mask, and default gateway.

Step 6. Turn on your PS3, then select the "Settings" menu item
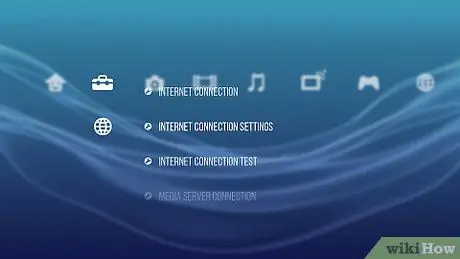
Step 7. Choose the "Network Settings" option, then select the "Internet Connection Settings" item
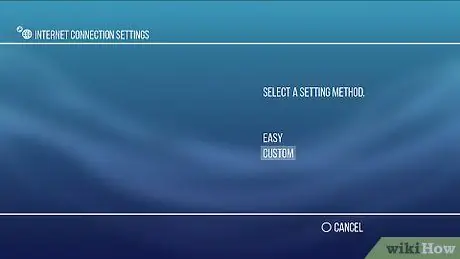
Step 8. Choose the "Custom" option, then choose the type of network connection you are using
If you are using a wireless connection you will need to provide the name of the network you want to connect to (SSID) and its login password.
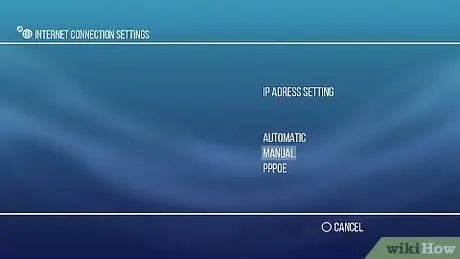
Step 9. Scroll through the menu that appeared to locate and select the "IP Address" item
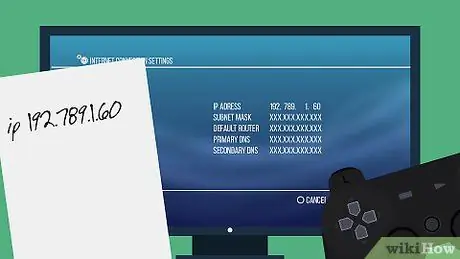
Step 10. Enter the IP address you wish to assign to the PS3 by changing the last 3 digits of the one used by your computer
You can use any value between 0 and 255 (as long as it is not already in use by another device connected to the network). For example, if the IP address you found in the previous steps is 192.168.1.53, try assigning 192.168.1.60 to the PS3. This will reduce the chances of creating an address conflict caused by having multiple network devices sharing the same IP.
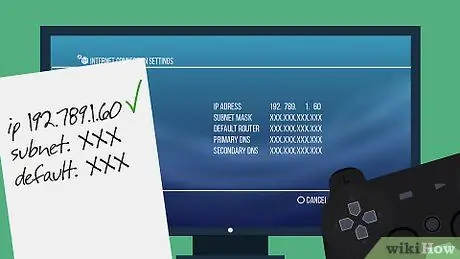
Step 11. Enter the subnet mask and default gateway address of your LAN network
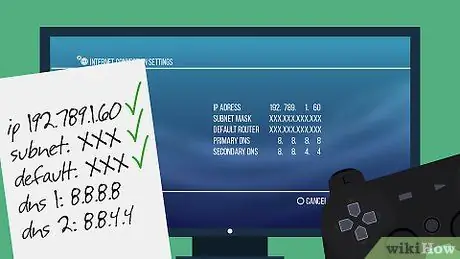
Step 12. You can now complete the network configuration by setting the primary and secondary DNS
If the operator of the internet connection with which you have subscribed has not provided you with this data, you can use the following values:
- Primary DNS 8.8.8.8
- Secondary DNS 8.8.4.4
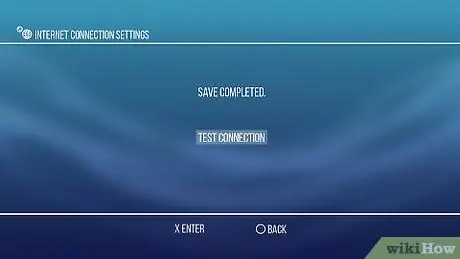
Step 13. Select the "Test Connection" option
This will confirm that the console is correctly connected to the network using the new IP address and that it is able to access the web. Setting a static IP address allows the PS3 to access the network and transfer data faster and more efficiently.
Method 3 of 3: Perform Normal Hardware Maintenance

Step 1. To keep your console in tip-top shape, dust and clean it thoroughly on a regular basis
Accumulated dust or other debris can cause the entire system to slow down.

Step 2. Clear the console's "Predictive Text Dictionary" data
This is the information that the PS3 stores when you search the web.
Select the "Settings" menu item, choose the "System Settings" option, then select the "Delete the predictive text dictionary" feature

Step 3. Clear your cookies and clear your internet browser cache
This step is to free up some memory space on the console hard drive.
- Choose the "Network" item from the PS3 main menu, then select the "Internet Browser" option. At this point, press the controller button characterized by the triangle.
- Select the "Options" item, choose the "Tools" item, then select the "Delete Cookies" or "Delete Cache" option.
- Choose the "Yes" option to confirm that you want to delete the cookies and clear the cache.

Step 4. Disable the "View What's New" feature
In this way the console will not download this information from the web automatically at every start.
Access the PS3 "Settings", choose the "System Settings" item, then disable the "View What's New" item

Step 5. Reset the console
This procedure formats the PS3 hard drive by restoring the system's factory settings.
- Manually turn off the console using the switch on the back.
- Press and hold the power button on the front of the PS3, then release it after hearing 3 short beeps.
- At this point, simply follow the instructions that will appear on the screen the next time the console is started to perform the initial configuration, exactly as if it had just been purchased.


