This article shows you how to remove write protection from files and removable storage drives (such as SD cards) so that you can modify their contents. In order to perform this procedure, you must use a system administrator account. Remember that some removable storage media, such as CD-Rs, are naturally equipped with a write protection system that cannot be removed (CD-Rs can only be burned once).
Steps
Method 1 of 5: Quick Fixes
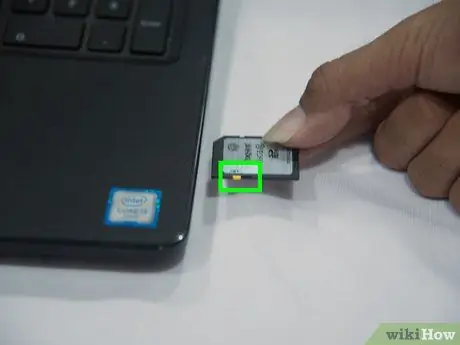
Step 1. Physically examine the storage media for the switch that disables write mode
Most SD memory cards and some USB flash drives have a physical switch that controls when the device is in "read only" use mode or not. Therefore in these cases it is necessary to physically check the presence of this control element and modify its position manually, if necessary
- Especially in the case of SD cards, a physical switch is an insurmountable form of protection until it's turned off.
- If the mechanism that controls how data is accessed is broken, don't despair. There may still be an option to fix it manually.
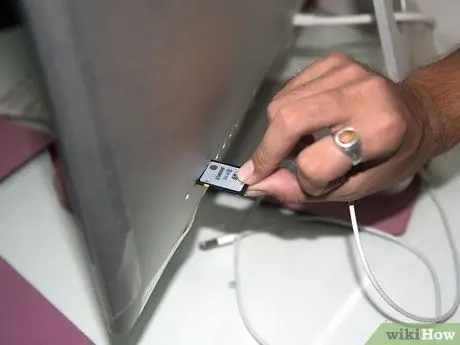
Step 2. Make sure that your operating system is compatible with the file system of the memory unit
It is good to keep in mind that Windows and Mac computers have a different default file system format (Windows systems use the NTFS file system which is not compatible with Macs) and that many USB memory drives, SD cards and external hard drives they are pre-formatted for use on Windows systems. For this reason if you are having difficulty using the drive or storage media on a Mac, after it has been previously used on a Windows system, you can solve the problem by formatting it by following these instructions:
- Back up the entire contents of the drive to a Windows computer (the formatting process deletes all data on the media permanently);
- Connect the drive to the Mac;
- Format the storage medium by changing the file system format and choosing the "Mac OS Extended (Journaled)" format.
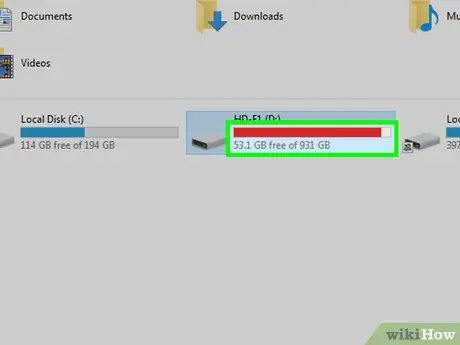
Step 3. Check that the drive still has free space available
The error related to the process of writing data to the media may have been generated simply because the drive is full, which means that it has no more free space to store information. To perform this check, select the drive icon to scan using the "This PC" window (on Windows systems) or Finder (on Mac) and check the amount of space still available in relation to the total amount.
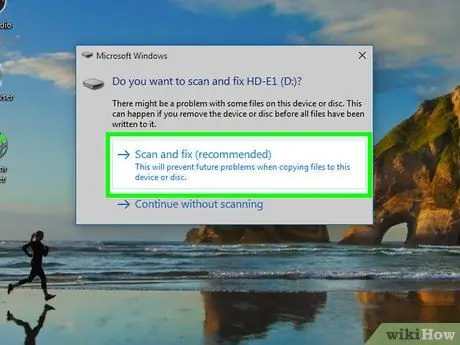
Step 4. Scan your computer for viruses
Viruses and malware are capable of changing the way the system handles removable storage media and, in severe cases, are able to activate "read-only" mode on all USB devices connected to the computer. To fix this, run a full system scan with any updated anti-virus software.
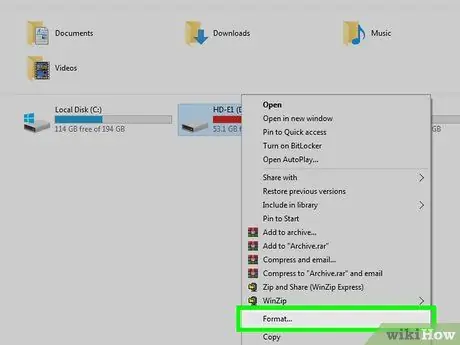
Step 5. Format your USB drive or CD
It should be remembered that the formatting procedure deletes all data on the storage medium and changes its file system format according to the selected settings. As this step is extremely invasive it should only be considered as a last resort.
Method 2 of 5: Remove Write Protection from a File (Windows Systems)
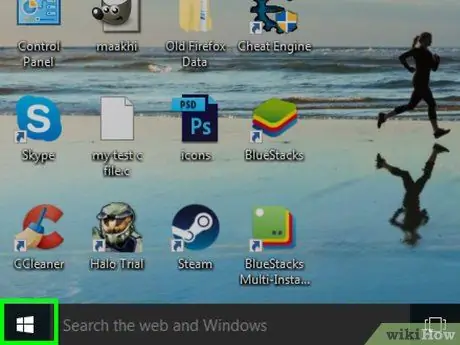
Step 1. Access the "Start" menu by clicking the icon
It features the Windows logo and is located at the bottom left of the desktop.
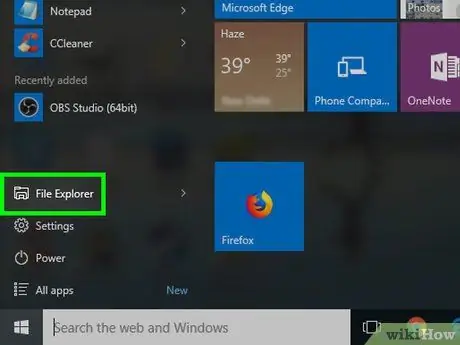
Step 2. Choose the "File Explorer" option characterized by the icon
It is located at the bottom left of the "Start" menu.
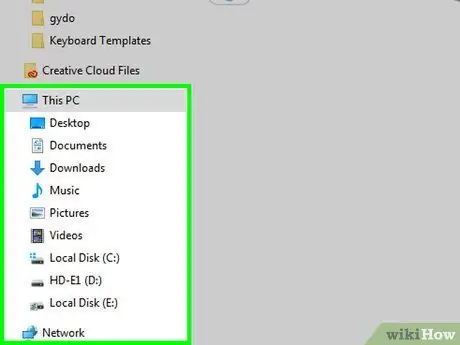
Step 3. Navigate to the folder where the file is stored
Select the icon of the directory where the file is located using the tree menu located in the left sidebar of the "File Explorer" window.
You may need to access a series of nested folders to reach the file to be processed
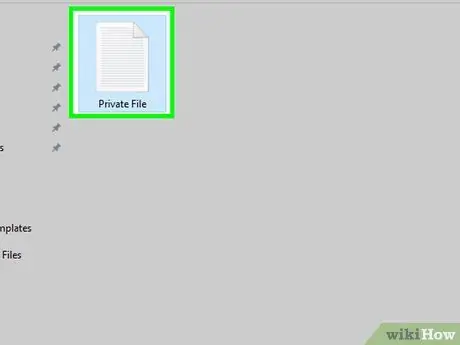
Step 4. Select the file to edit
Click the icon of the file you want to remove write protection from.
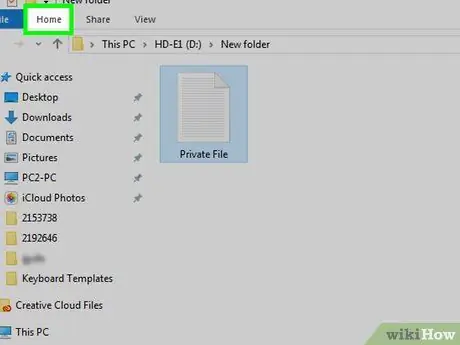
Step 5. Go to the Home tab of the window ribbon
It is located in the upper left part of the latter. A toolbar will appear at the top of the window.
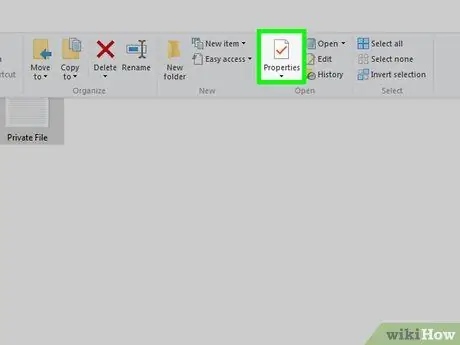
Step 6. Select the "Properties" option
It features a white page icon with a red check mark inside. It is located within the "Open" group of the "Home" tab. This will bring up the "Properties" window of the selected item.
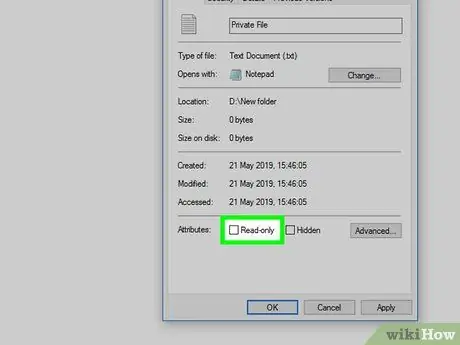
Step 7. Uncheck the "Read only" checkbox
It is located at the bottom of the "Properties" window.
If you can't find this option, make sure the tab is selected General of the "Properties" window.
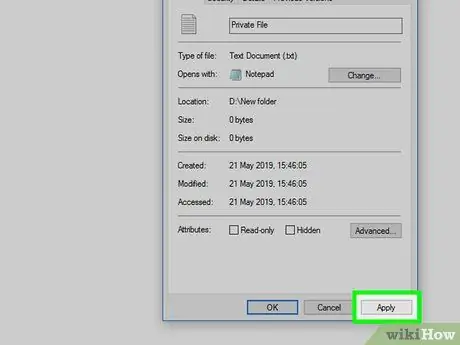
Step 8. Press the Apply buttons successively And OK.
Both are located in the lower right part of the "Properties" window. This way the changes to the file attributes will be saved and applied. At this point you should be able to access the file under consideration and modify its contents.
Method 3 of 5: Remove Write Protection from a File (Mac)
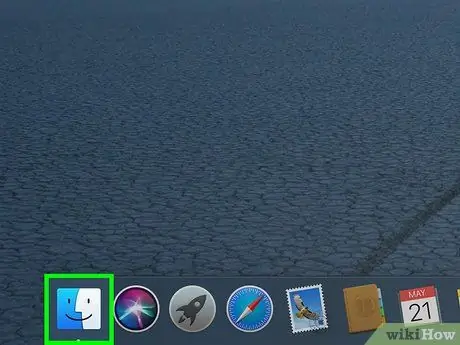
Step 1. Open a Finder window
Click the blue stylized face icon that you find on the System Dock. A new window will appear.
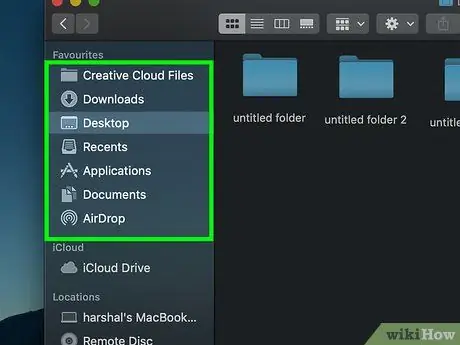
Step 2. Navigate to the directory that contains the file to edit
Select the folder name using the menu located inside the left sidebar of the Finder window.
You may need to access a series of nested folders to reach the file to be processed
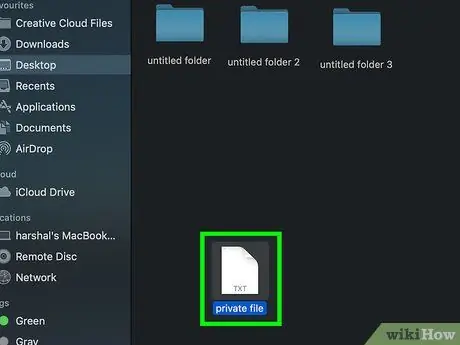
Step 3. Select the file in question by clicking on its icon
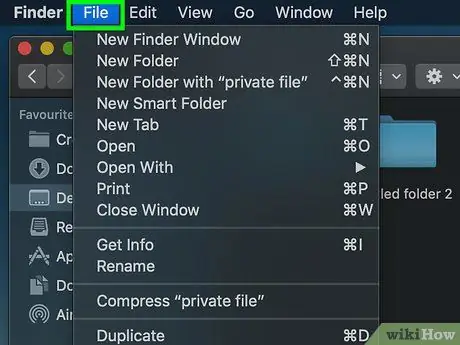
Step 4. Access the File menu
It is located in the upper left of the screen. A small drop-down menu will appear.
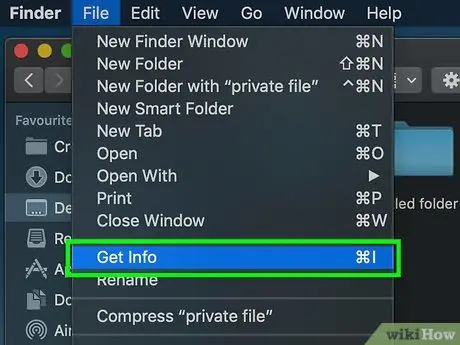
Step 5. Choose the Get Info option
It is located within the menu File appeared. This will display the "Info" window for the selected file.
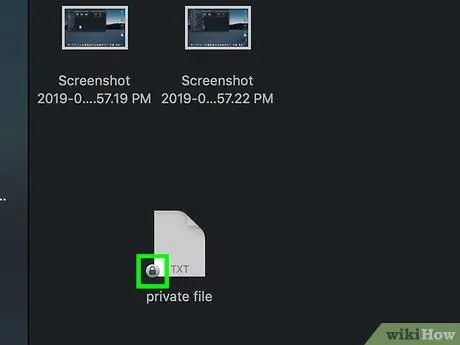
Step 6. Enable changes to the contents of the "Info" window
If there is a closed padlock icon in the lower right corner of the window, click it and type the login password of the computer's administrator account.
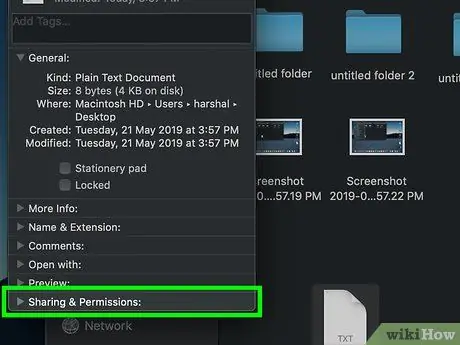
Step 7. Expand the Sharing and Permissions section of the "Info" window
It is located in the lower part of the latter. This will display all the configuration options relating to the sharing and access permissions of the chosen file.
If within the section Sharing and permissions there is a series of usernames with the "Read Only" access privilege, skip this step.
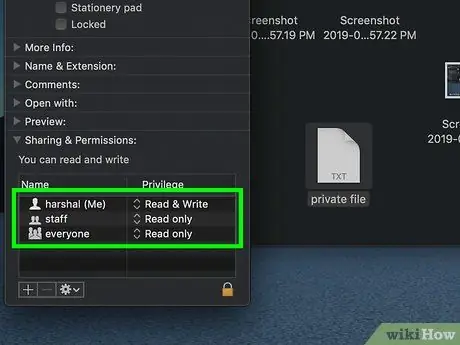
Step 8. Find your user account name
Inside the section Sharing and permissions there should be the name of the account you use to log on to your computer.
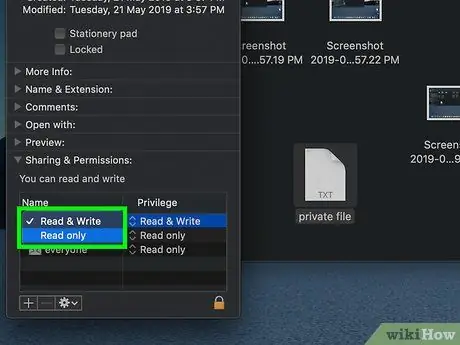
Step 9. Change the file access rights
Select the "Read Only" option to the right of the chosen username until "Read and Write" appears. At this point you can close the "Info" window. You should now be able to access the file under consideration and edit its contents.
Method 4 of 5: Remove Write Protection from a Removable Drive (Windows Systems)
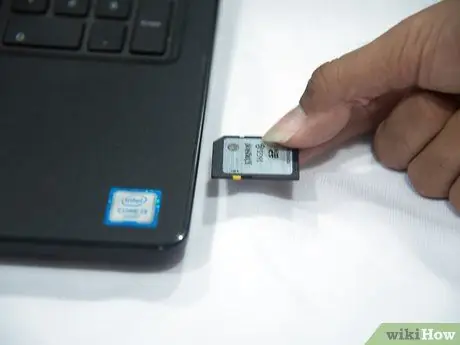
Step 1. Make sure the external storage media is connected to the computer
The USB memory drive, SD card or external hard drive must be connected before you can proceed.
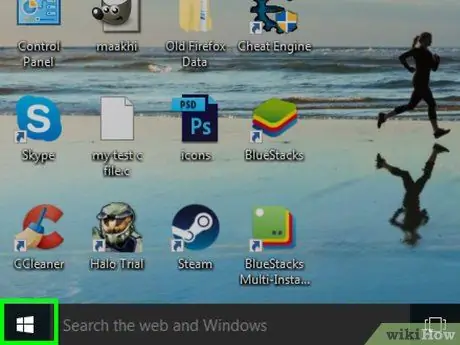
Step 2. Access the "Start" menu by clicking the icon
It features the Windows logo and is located at the bottom left of the desktop.

Step 3. Type the regedit command in the "Start" menu
The entire system will be searched using the specified criteria. In this case the Windows Registry Editor will be searched.
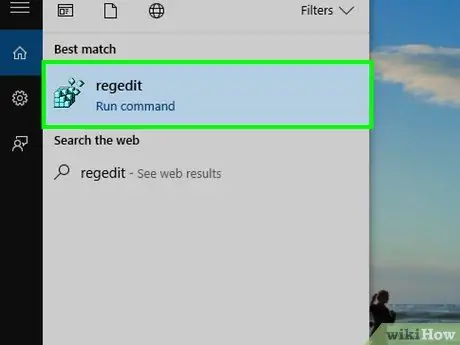
Step 4. Click the regedit icon that appeared in the results list
It features a grid formed by a series of small blue squares. The Registry Editor window will appear.
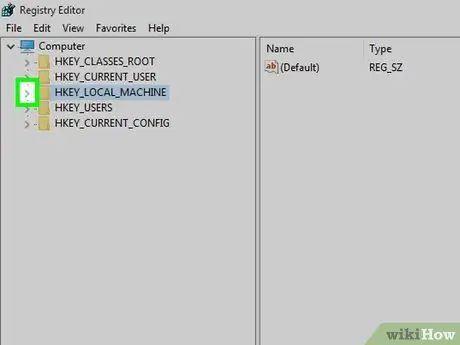
Step 5. Expand the "HKEY_LOCAL_MACHINE" node of the editor main menu
Click the small down arrow icon located to the left of the "HKEY_LOCAL_MACHINE" item located in the upper left of the window.
If you have used the Windows Registry Editor in the past, you may need to scroll up the tree menu in order to select the indicated key
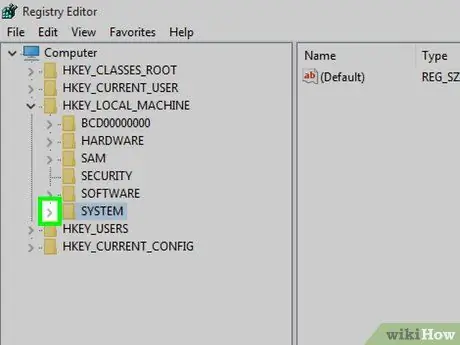
Step 6. Go to the "SYSTEM" folder
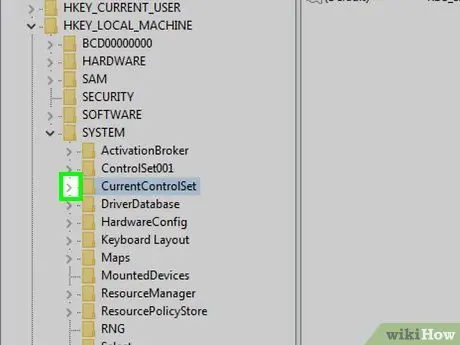
Step 7. Now expand the "CurrentControlSet" node
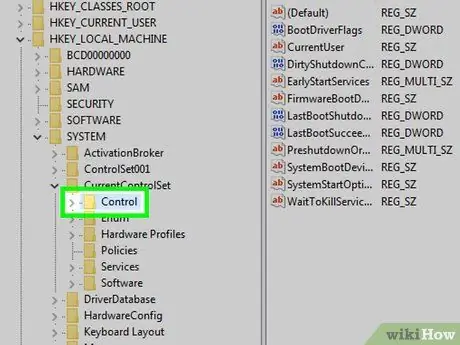
Step 8. Select the "Control" folder
Simply click on the relevant icon.
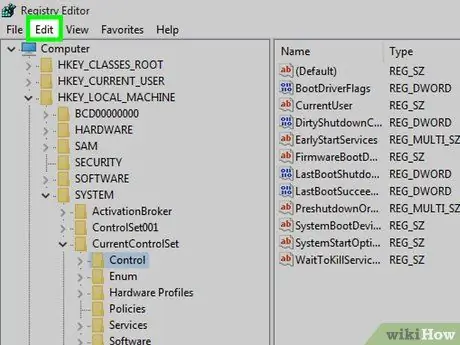
Step 9. Access the Edit menu
It is placed at the top of the window. This will bring up a new drop-down menu.
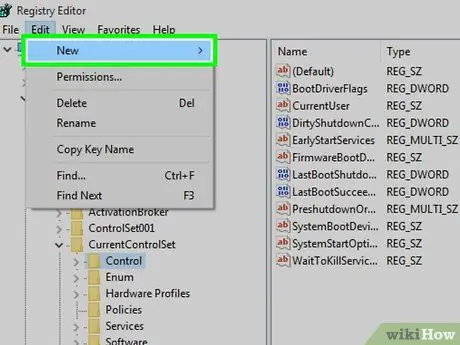
Step 10. Choose the New option
It should be the first item on the menu Edit starting from the top.
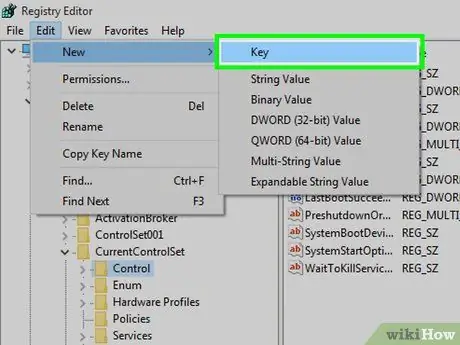
Step 11. Select the Key option
It is at the first item of the secondary menu New one. A new directory will be created within the current "Control" folder (in the Windows registry these folders are also called "Registry Keys" or simply "Keys").
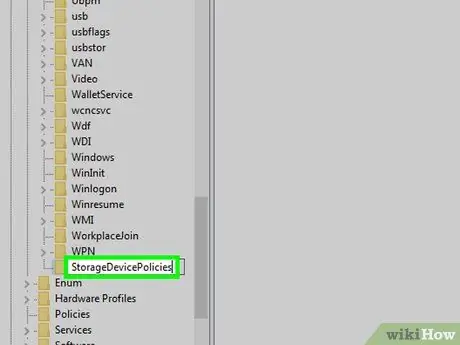
Step 12. Edit the name of the new key you just created
Type the following StorageDevicePolicies character string and press the Enter key.
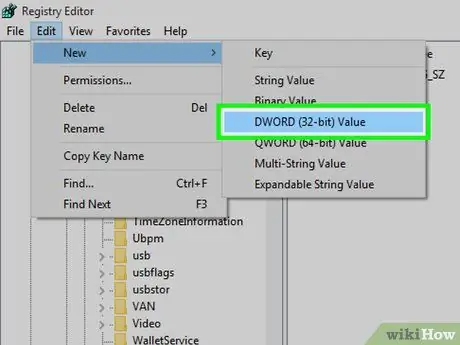
Step 13. Create a new element of type "DWORD" inside the newly generated key
Follow these instructions:
- Select the newly created "StorageDevicePolicies" key;
- Access the menu Edit;
- Select the item New one;
- Choose the option DWORD value (32-bit);
- Type the name WriteProtect and press the Enter key.
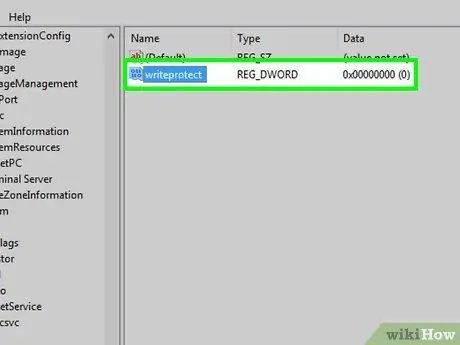
Step 14. Open the window showing the value of the newly created "DWORD" element
Select it with a double click of the mouse. A small pop-up window will appear.
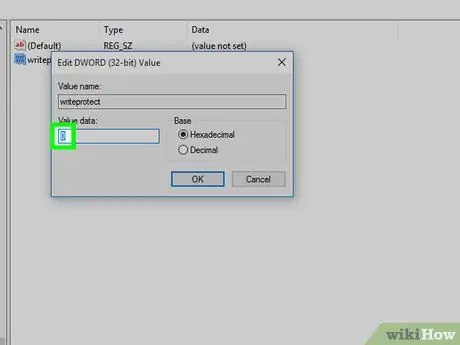
Step 15. Edit the value of the "DWORD" element
Select the content displayed in the "Value Data" field, then type the number 0 to change it.
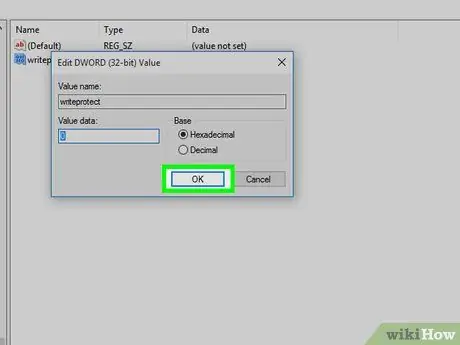
Step 16. Press the OK button
This way the error generated by the "read only" access mode to the removable drive should be resolved.
If the USB drive or optical media under consideration is still detected in "read-only" mode, you will need to rely on a professional experienced in this type of problem (for example a digital data recovery service)
Method 5 of 5: Remove Write Protection from a Removable Drive (Mac)
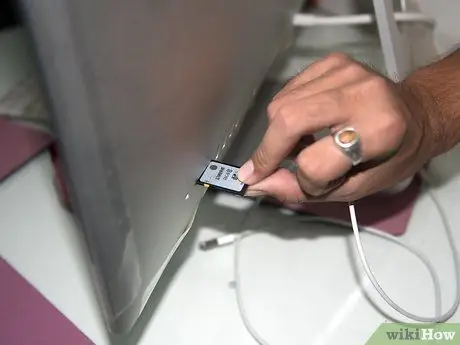
Step 1. Make sure the external storage media is connected to the computer
The USB memory drive, SD card, or external hard drive must be connected to your Mac before you can proceed.
If you are using a recent Mac model, you may need to purchase a USB to USB-C adapter in order to connect the drive to your computer
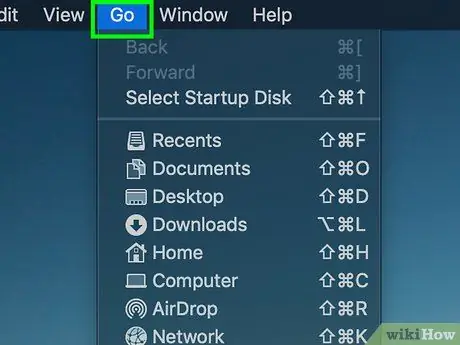
Step 2. Enter the Go menu
It is located at the top of the screen. A small drop-down menu will appear.
If the menu Go is not visible at the top of the screen, click anywhere on the desktop or the blue Finder icon in the shape of a stylized face on the system dock. This should show the menu bar.
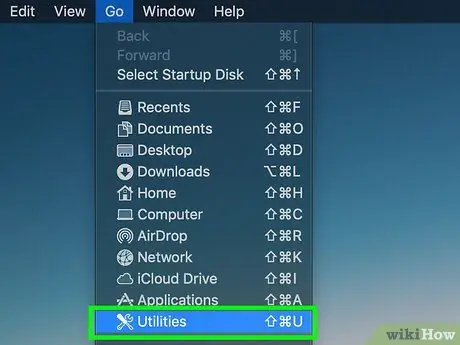
Step 3. Choose the Utility option
It should be located at the bottom of the menu Go.
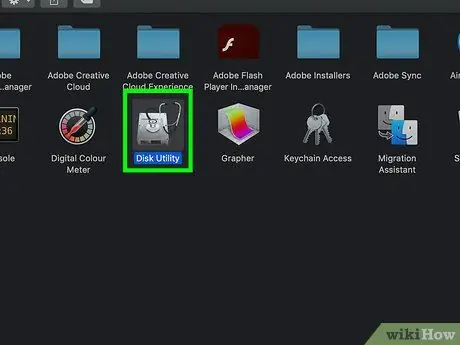
Step 4. Launch the "Disk Utility" application
It has a hard drive icon called "Disk Utility". A new window will appear.
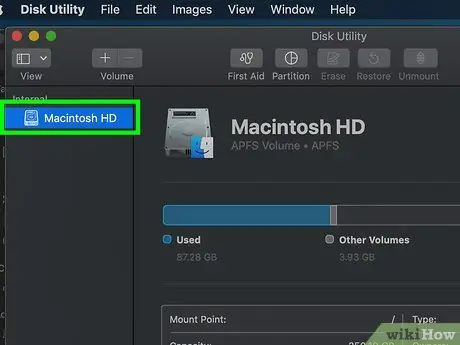
Step 5. Select the drive icon to be processed
It is located inside the left sidebar of the "Disk Utility" window.
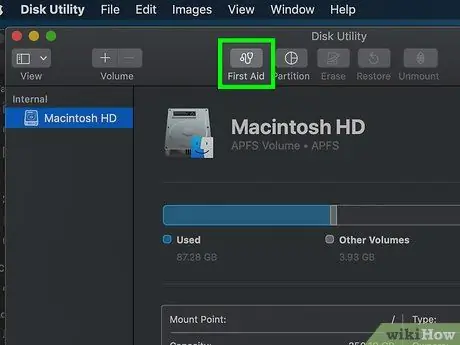
Step 6. Access the S. O. S
It has a stethoscope icon and is located at the top of the "Disk Utility" window.

Step 7. Wait for the Mac operating system to finish scanning your computer
If the write protection is activated due to an error on the storage media, the media will be corrected automatically and you can then resume using the drive as usual.


