By starting disk defragmentation in Windows 7, you will allow the operating system to reorganize the physical disk storage of all data files, increasing the speed of loading and retrieving information. You can use this system utility manually whenever you want, or you can schedule it to run automatically at a specific time. Let's see together what are the steps to follow.
Steps
Method 1 of 3: Access the Windows 7 Disk Defragmenter Utility
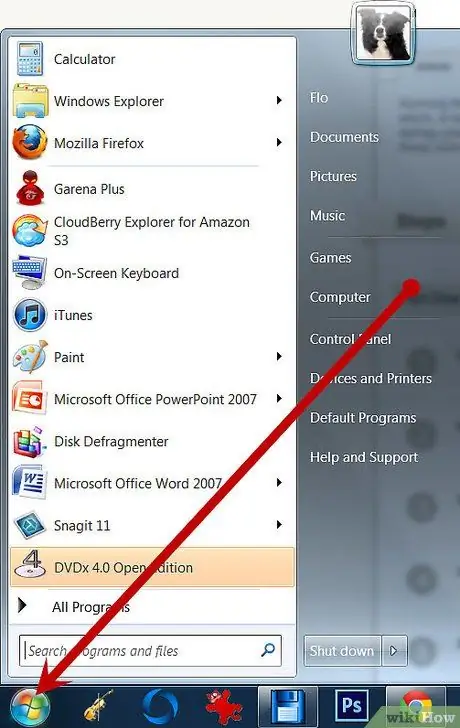
Step 1. Select the Windows 7 'Start' button

Step 2. Select the 'All Programs' menu item
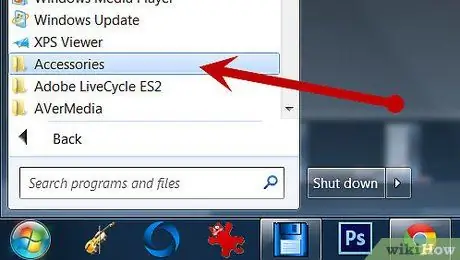
Step 3. Select the 'Accessories' folder
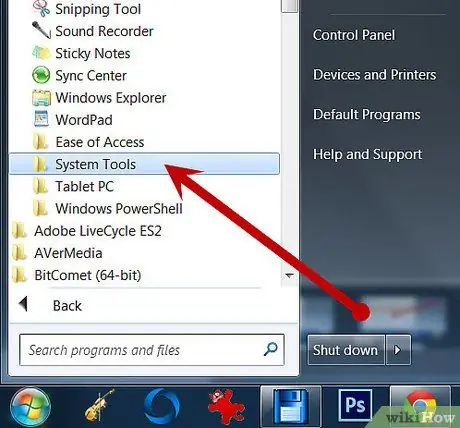
Step 4. Select the 'System Utilities' item
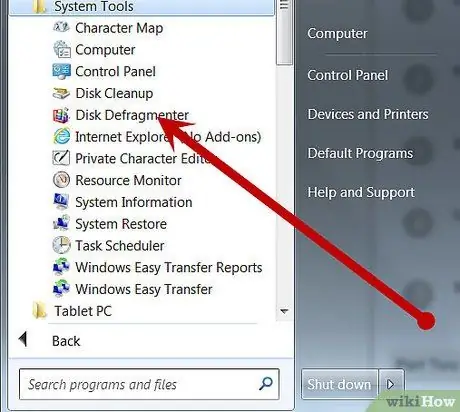
Step 5. From the menu that appears, select the 'Disk Defragmenter' item
Method 2 of 3: Manually Start Disk Defragmentation
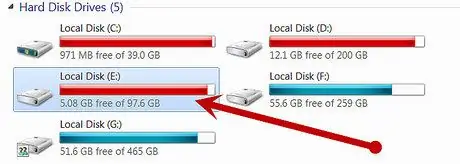
Step 1. Select the hard drive you want to defragment
For example, if you want to defrag your primary hard drive you will need to select the one labeled with the drive letter 'C:'.
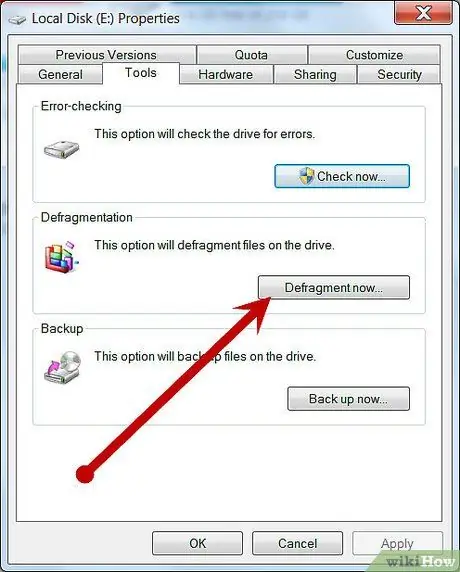
Step 2. Select the 'Defragment Disk' button to start the defragmentation process
The computer may take several minutes, or several hours, to defragment the disk, depending on the size of the drive and the level of data fragmentation.
Method 3 of 3: Schedule an Automatic Defragmentation

Step 1. Select the 'Activate Schedule' or 'Configure Schedule' button

Step 2. Select the 'Run on a schedule' checkbox
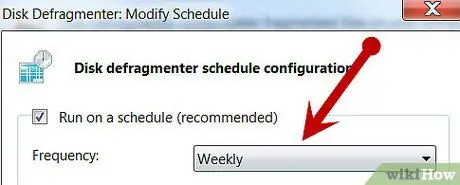
Step 3. Set how often disk defragmentation should be performed
You can choose between daily, weekly or monthly.
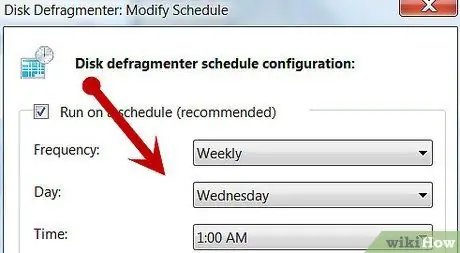
Step 4. Choose the day of the week to start the defragmentation process
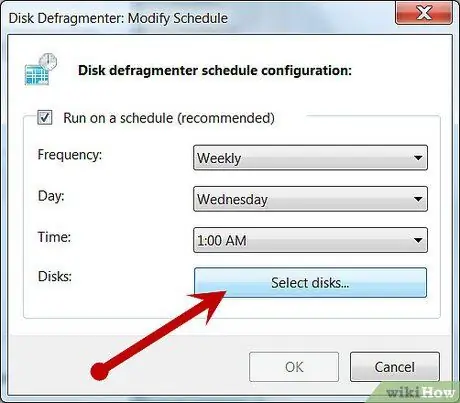
Step 5. Choose the drive to defrag by selecting the 'Select Disks' button
You can choose to defragment all disks on your computer or a single drive.
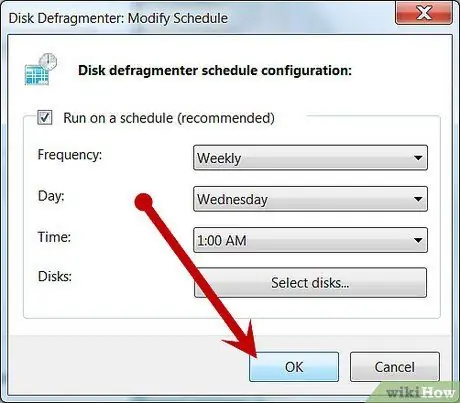
Step 6. Select the 'OK' button and then 'Close' for your changes to take effect
Your computer will now perform disk defragmentation regularly, based on your chosen settings.
Advice
- Be aware that if you are using an office or public place computer, you will need the 'Administrator' user password to perform the hard drive defragmentation.
- Schedule the defragmentation process to automatically start at a time when your computer is running but not in use, such as during your lunch break or at the end of your workday. This will prevent defragmentation from slowing down your computer's performance or from taking up too many system resources.
- Before starting a manual defragmentation, check in the Disk Defragmenter window when the last run occurred. In the 'Last execution' column you can read the date and time of the last activity.
- In the 'Disk Defragmenter' window, select the 'Analyze' button, after selecting the drive to be analyzed and before starting the actual defragmentation. In this way, the program will notify you if the drive in question needs to be defragmented or not.


